Deploying Aviatrix UserVPN with AWS TGW
This document describes how to deploy the Aviatrix UserVPN solution with an AWS TGW (Transit Gateway). See Overview of AWS Transit Gateway Orchestrator Features for more information about AWS TGW.
Use AWS Transit Gateway to Access Multiple VPCs in One Region
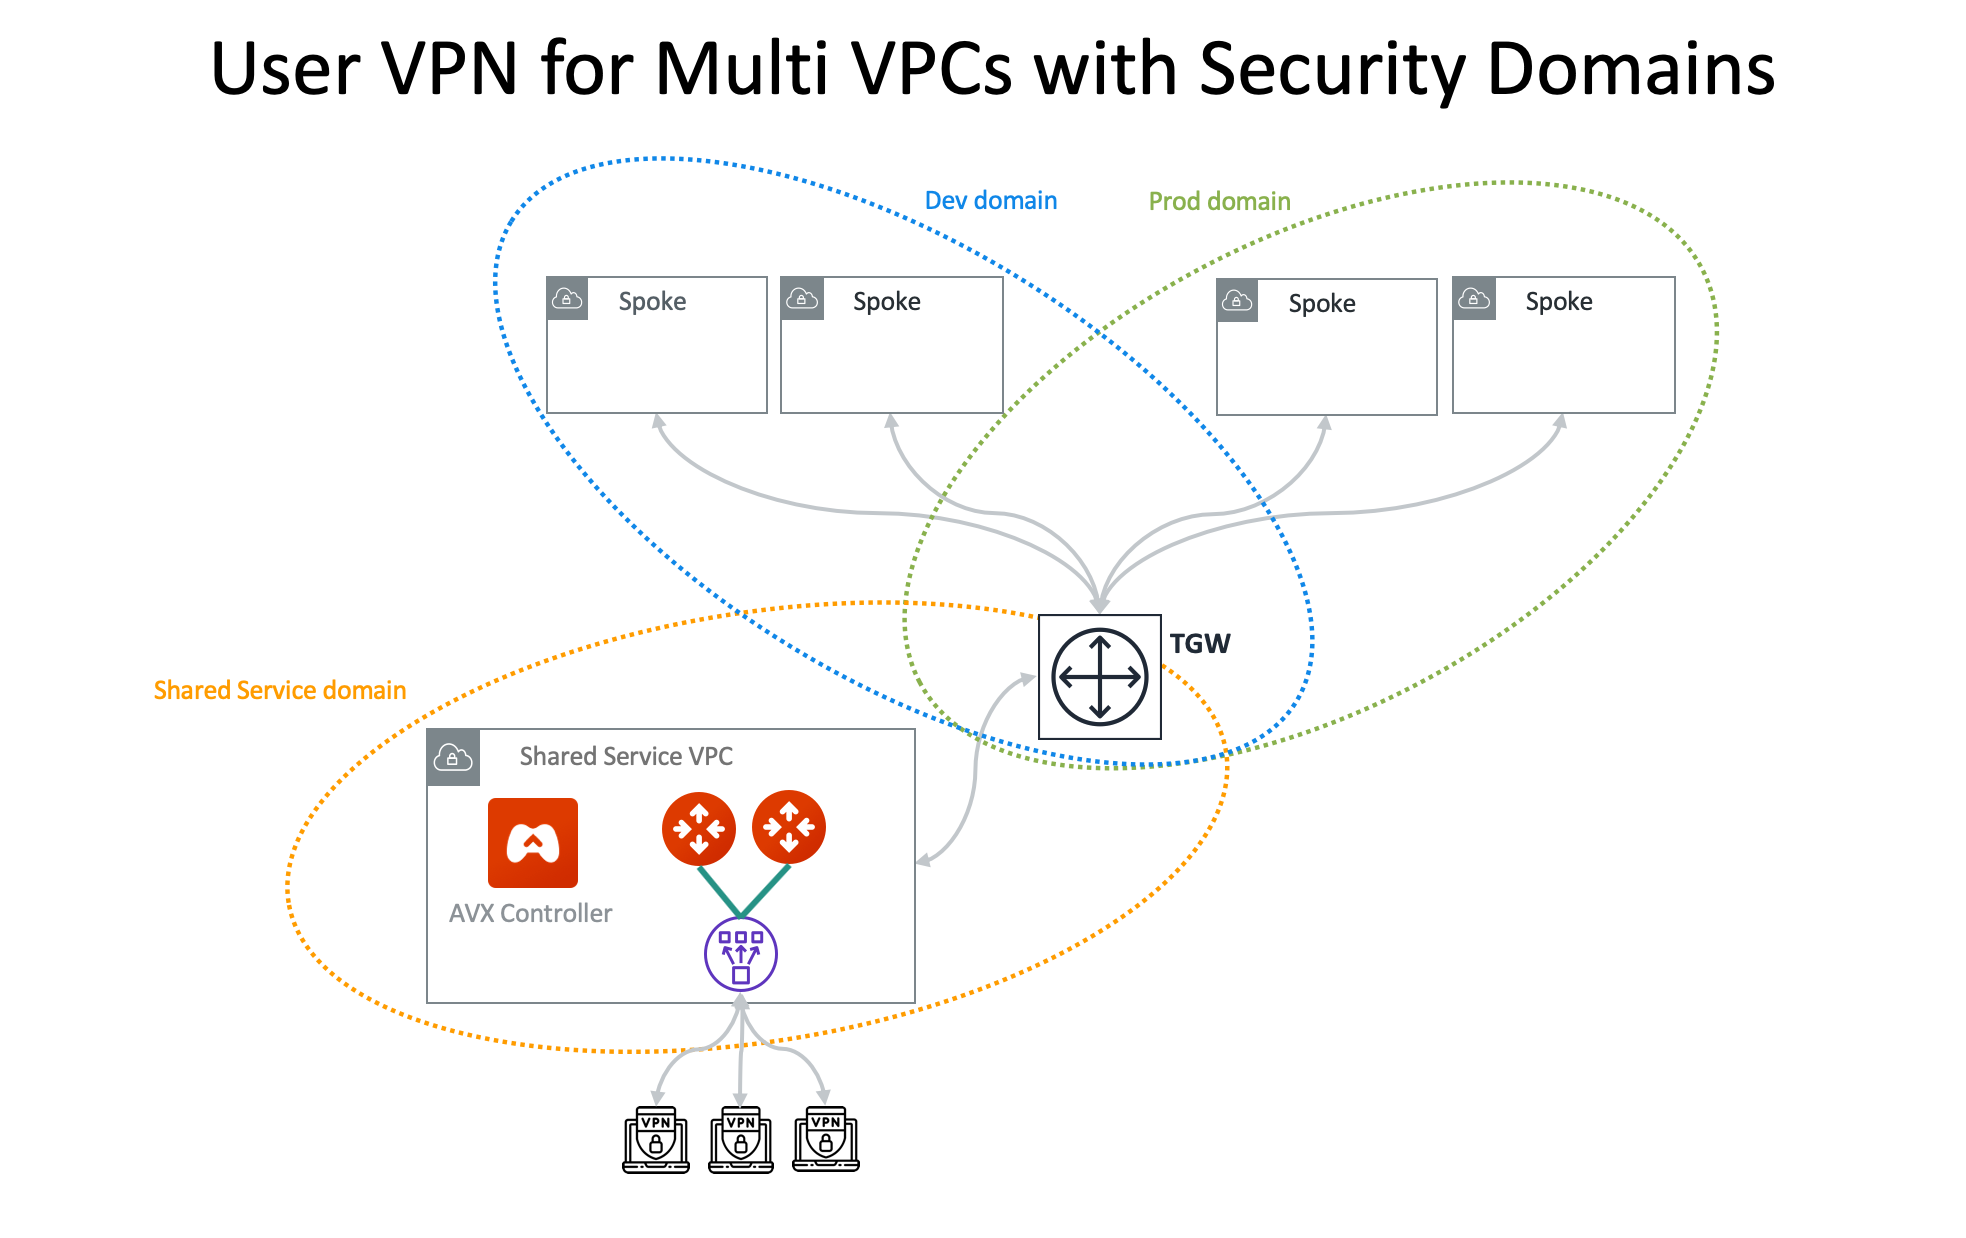
This reference guide will show how you can use an AWS Transit Gateway (TGW) to allow remote users to connect to multiple VPCs in the same region. Please see the overview images below for reference. In this walkthrough, it is assumed you have created VPCs in your environment. If not, you can create and deploy VPCs directly from Aviatrix CoPilot. See Create a VPC.
Creating a TGW
The first step is to create a TGW from Aviatrix CoPilot.
Enable Split Tunnel mode for this gateway.
To learn more about Transit Gateway deployment, see Aviatrix AWS Transit Gateway Orchestrator FAQ.
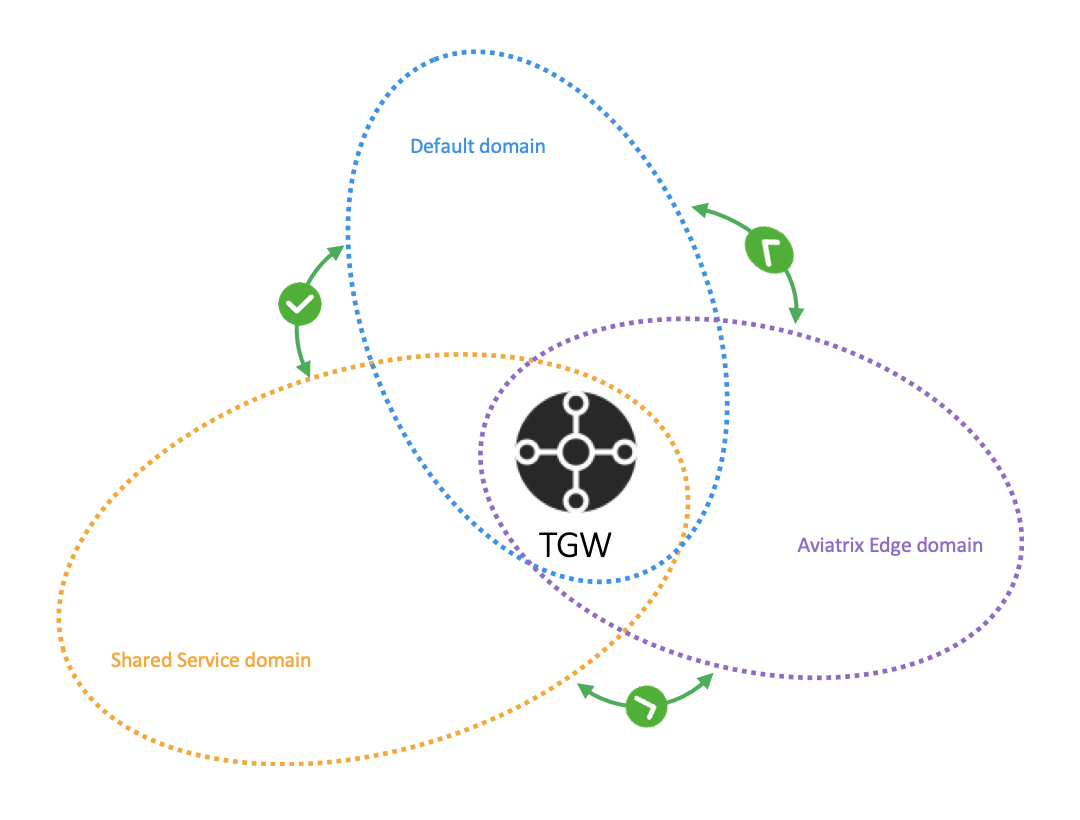
Creating a Security Domain
Now, create three security domains:
-
Shared Service Domain
-
Dev Domain
-
Prod Domain
Building Connection Policies
You have now created Network Domains. The next step is to use connection policies to connect:
-
The Shared Service Domain to the Dev Domain.
-
The Shared Service Domain to the Prod Domain.
|
You can call these domains any name and use as many domains as needed. As seen in the images below, Dev and Prod are simply called Domain 1 and Domain 2. |
Attaching VPCs to TGW
The next step is to attach your existing VPCs to the Transit Gateway (TGW) created above. Use the Shared Service Domain for this attachment.
Launching a VPN Gateway
After attaching VPCs to the TGW, create a VPN Gateway so users can access the instances in the VPCs. Use the VPC, Shared Service Domain, and region used above.
A new VPN Gateway will be created in the Shared Service VPC.
Adding Dev and Prod Domains to Split Tunnel Mode
-
Return to the TGW you created and edit it.
-
In the Split Tunnel section that appeared when you enabled Split Tunnel mode, In the Additional CIDRs field of the Split Tunnel section, add the IPv4 CIDR ranges for the Dev and Prod VPCs.
-
Click Save.
Configuring Aviatrix VPN Client
-
Add a new VPN User. For the VPC ID, use the Shared Service VPC ID.
-
Download your UserVPN configuration file.
-
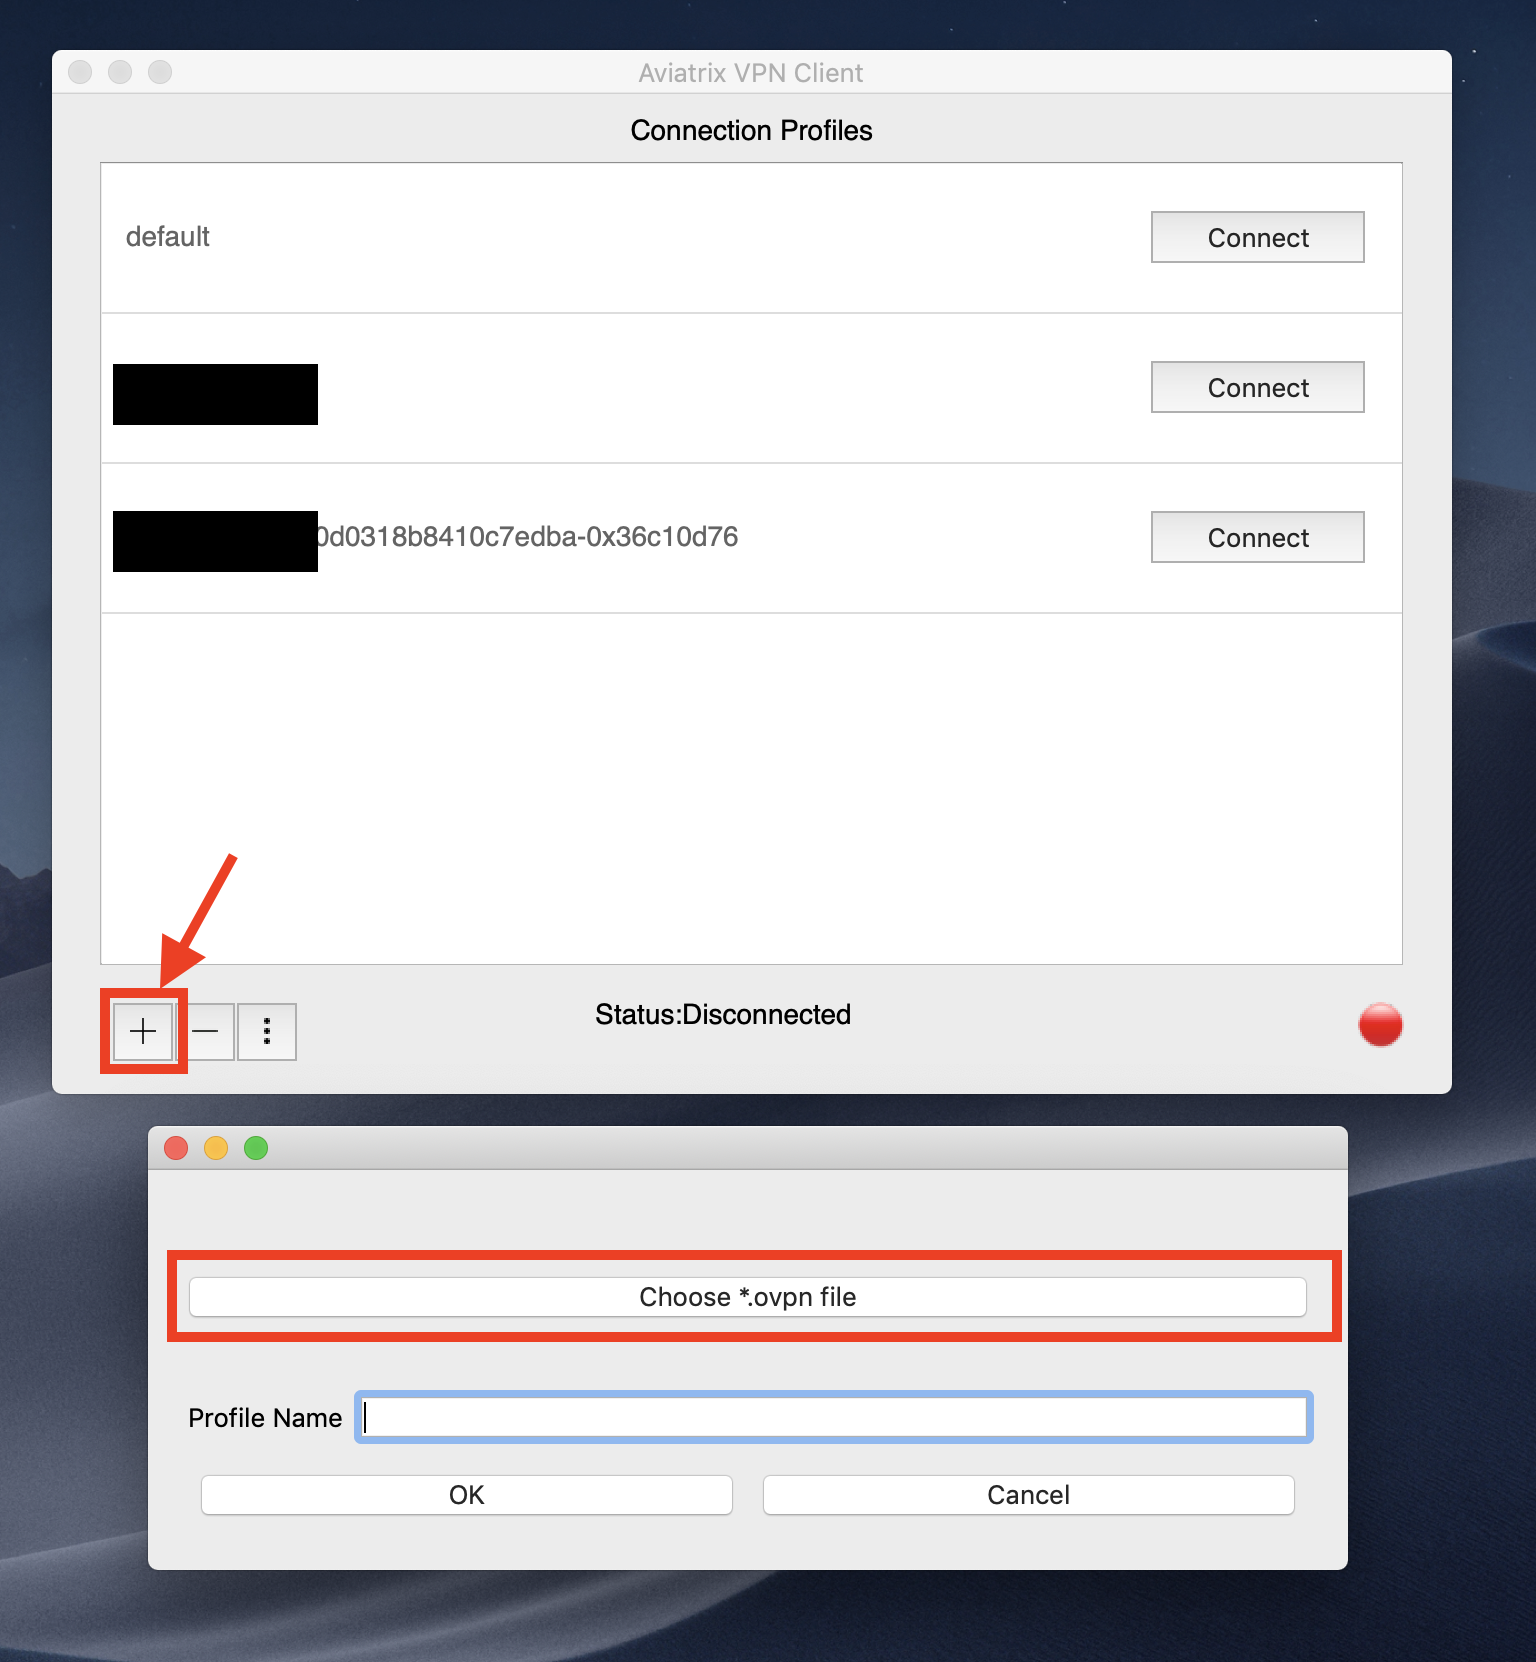
Download the latest Aviatrix VPN Client from the Docs page.
-
After installing the client, import your UserVPN configuration file to the Aviatrix VPN Client. Once the client is open, click + and choose your .ovpn file.
-
After the configuration file is imported, click Connect.
You are now connected via the Aviatrix VPN Client. Test that everything has been correctly configured.
-
Find and save the Private IP address of the EC2 instance running in either Dev or Prod VPCs. These IPs can be found in the AWS Console page under the EC2 banner.
-
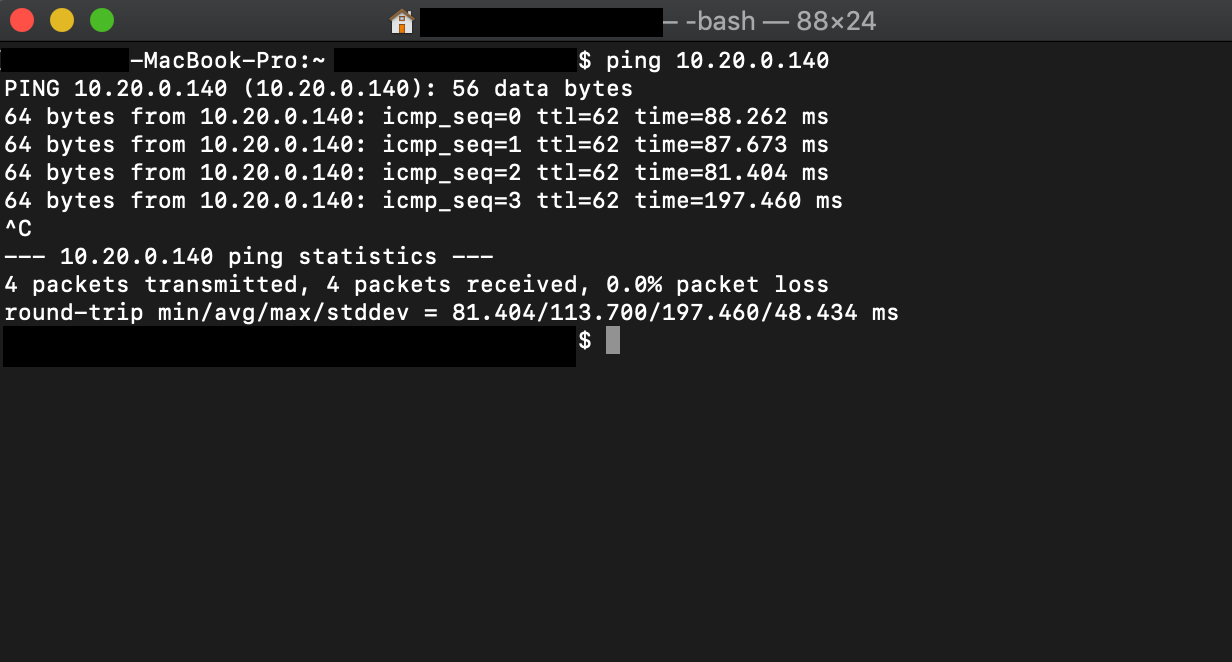
Open a terminal on your computer and see if you can ping the EC2 instance using its private IP address. If you are connected to the Aviatrix VPN Client, you should see a response.
-
To check, disconnect from the Aviatrix VPN Client. You should not see a response.
See below for an example of a proper ping response.
Last Steps
One last option for testing connection policies:
-
As a test, remove either the Dev or Prod Domain from the Connected list.
-
Remove Dev from the "Connected" list for the Shared Service Policy and run a Ping test. You should receive no response from the EC2 instance in the Development VPC.