Site2Cloud to a Public IP Address
This document addresses the scenario where a customer on-prem firewall device needs to route encrypted traffic to a partner network in the cloud (AWS/Azure/GCP). However due to concerns for overlapping CIDR blocks to the customer network, the customer side enforces a policy that the destination IP address must be a public IP address regardless of if the partner network is in the RFC 1918 range.
For example, the VPC instance IP address that the on-prem machine should send data to is 172.32.0.243, but the on-prem machine must instead send data to a public IP address 53.34.19.23 (or even 100.100.100.100). The scenario is shown in the diagram below.
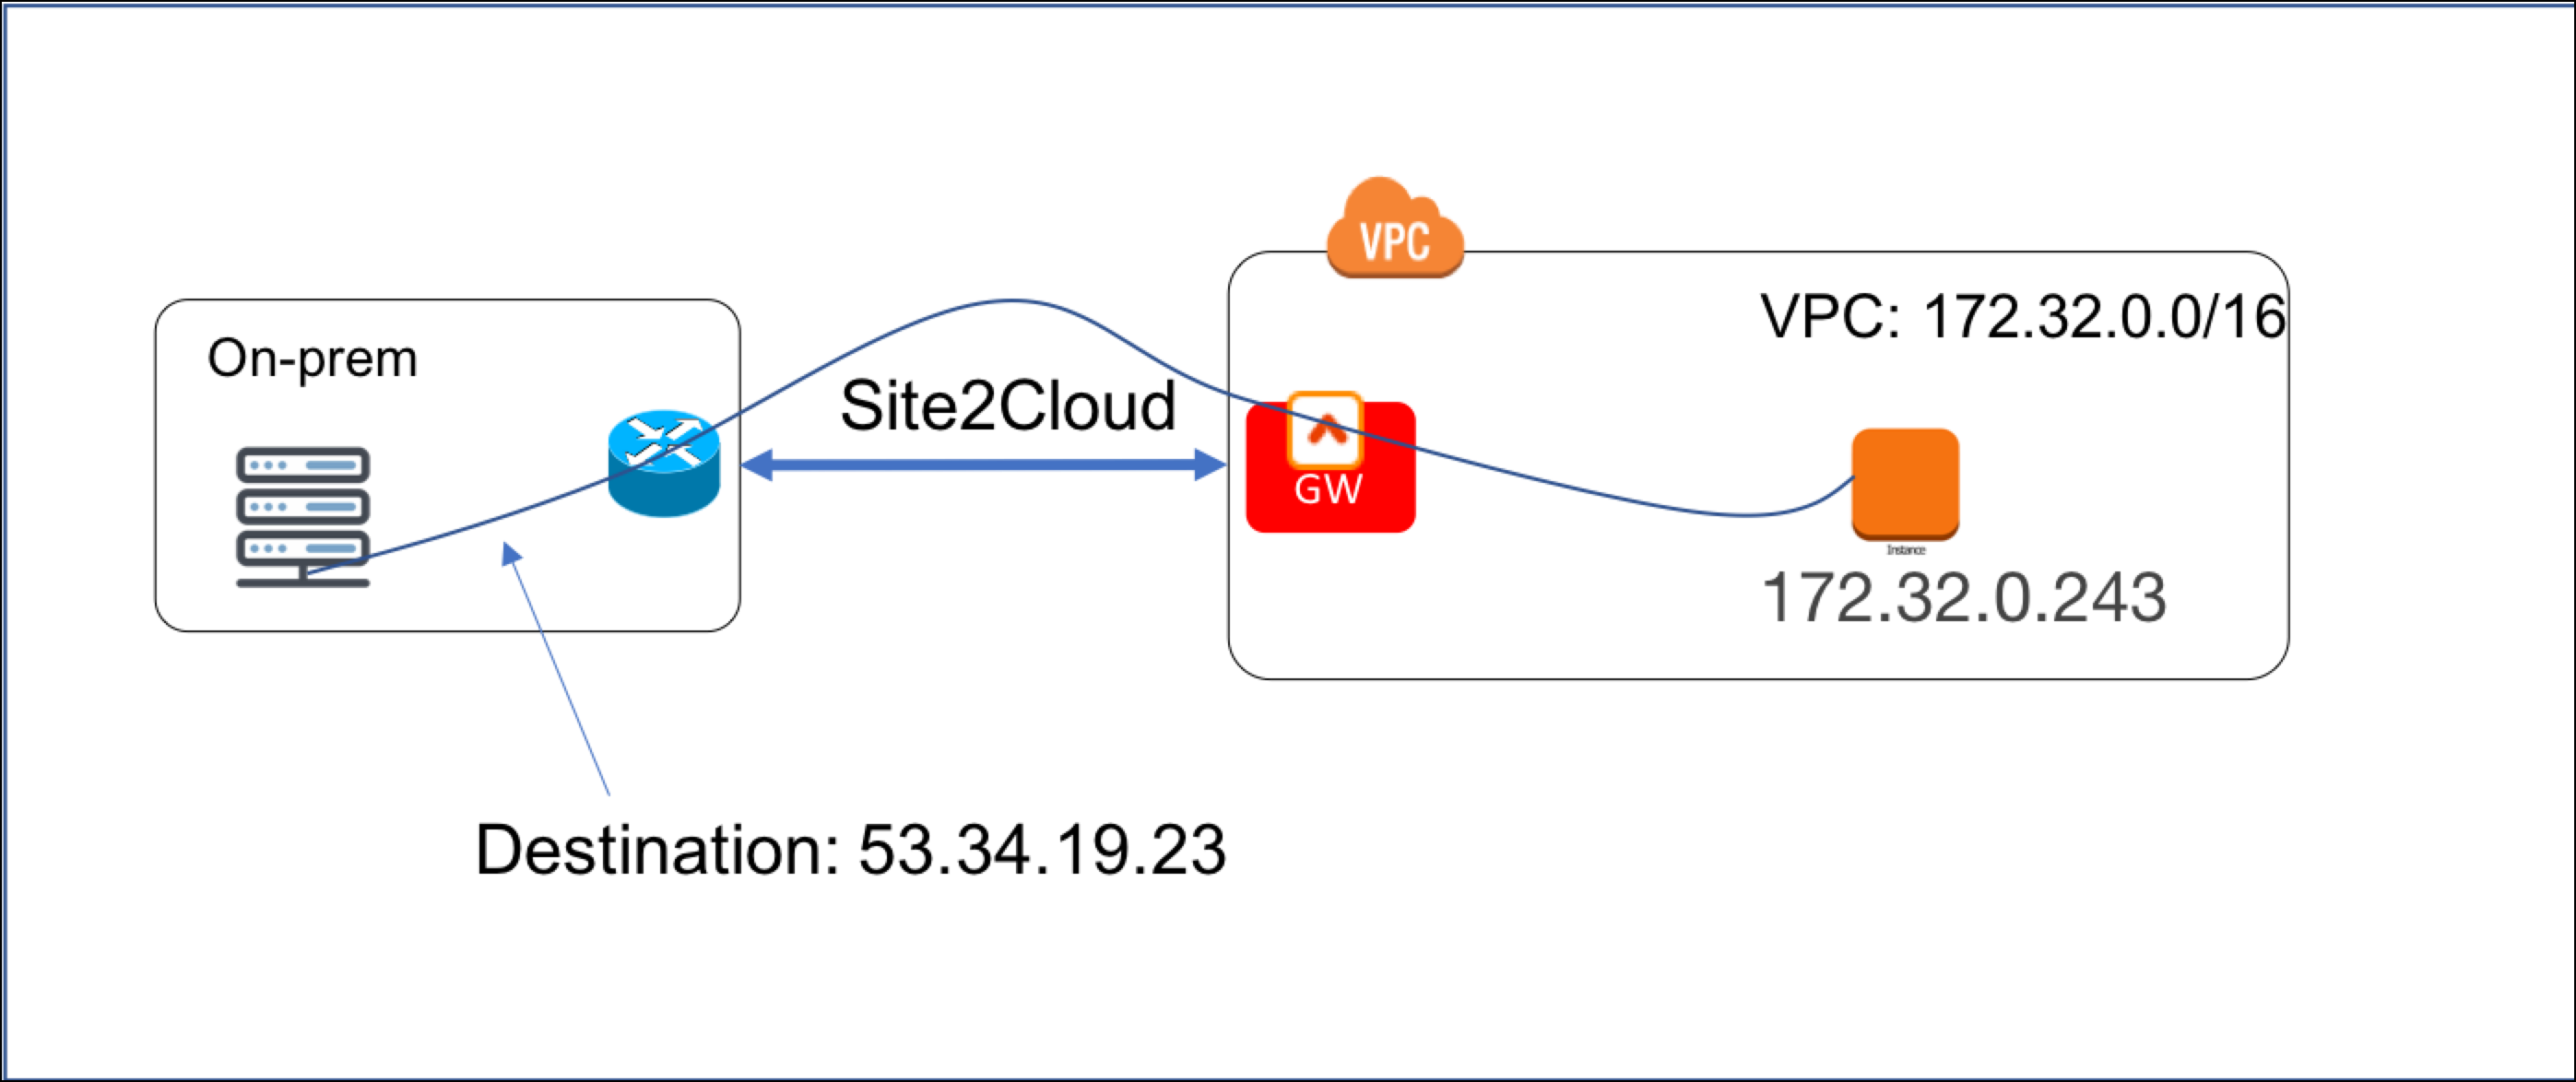
This problem can be solved by combining the Site2Cloud feature and the DNAT feature.
Determine the Public IP Address
As this public IP address is what the on-prem host sees, it should not change. You can do one of the following:
-
Allocate an EIP in the VPC for this public IP address. Make sure you do not associate this EIP to any instance.
-
Alternatively, if the EC2 instance that on-prem hosts need to send data to has an EIP, you can use that EIP.
You can also try a reserved public IP address range (for example, 100.100.x.x range).
Launch a Spoke Gateway
Launch a Spoke gateway in VPC 172.32.0.0/16. In this example the gateway name is Spoke1.
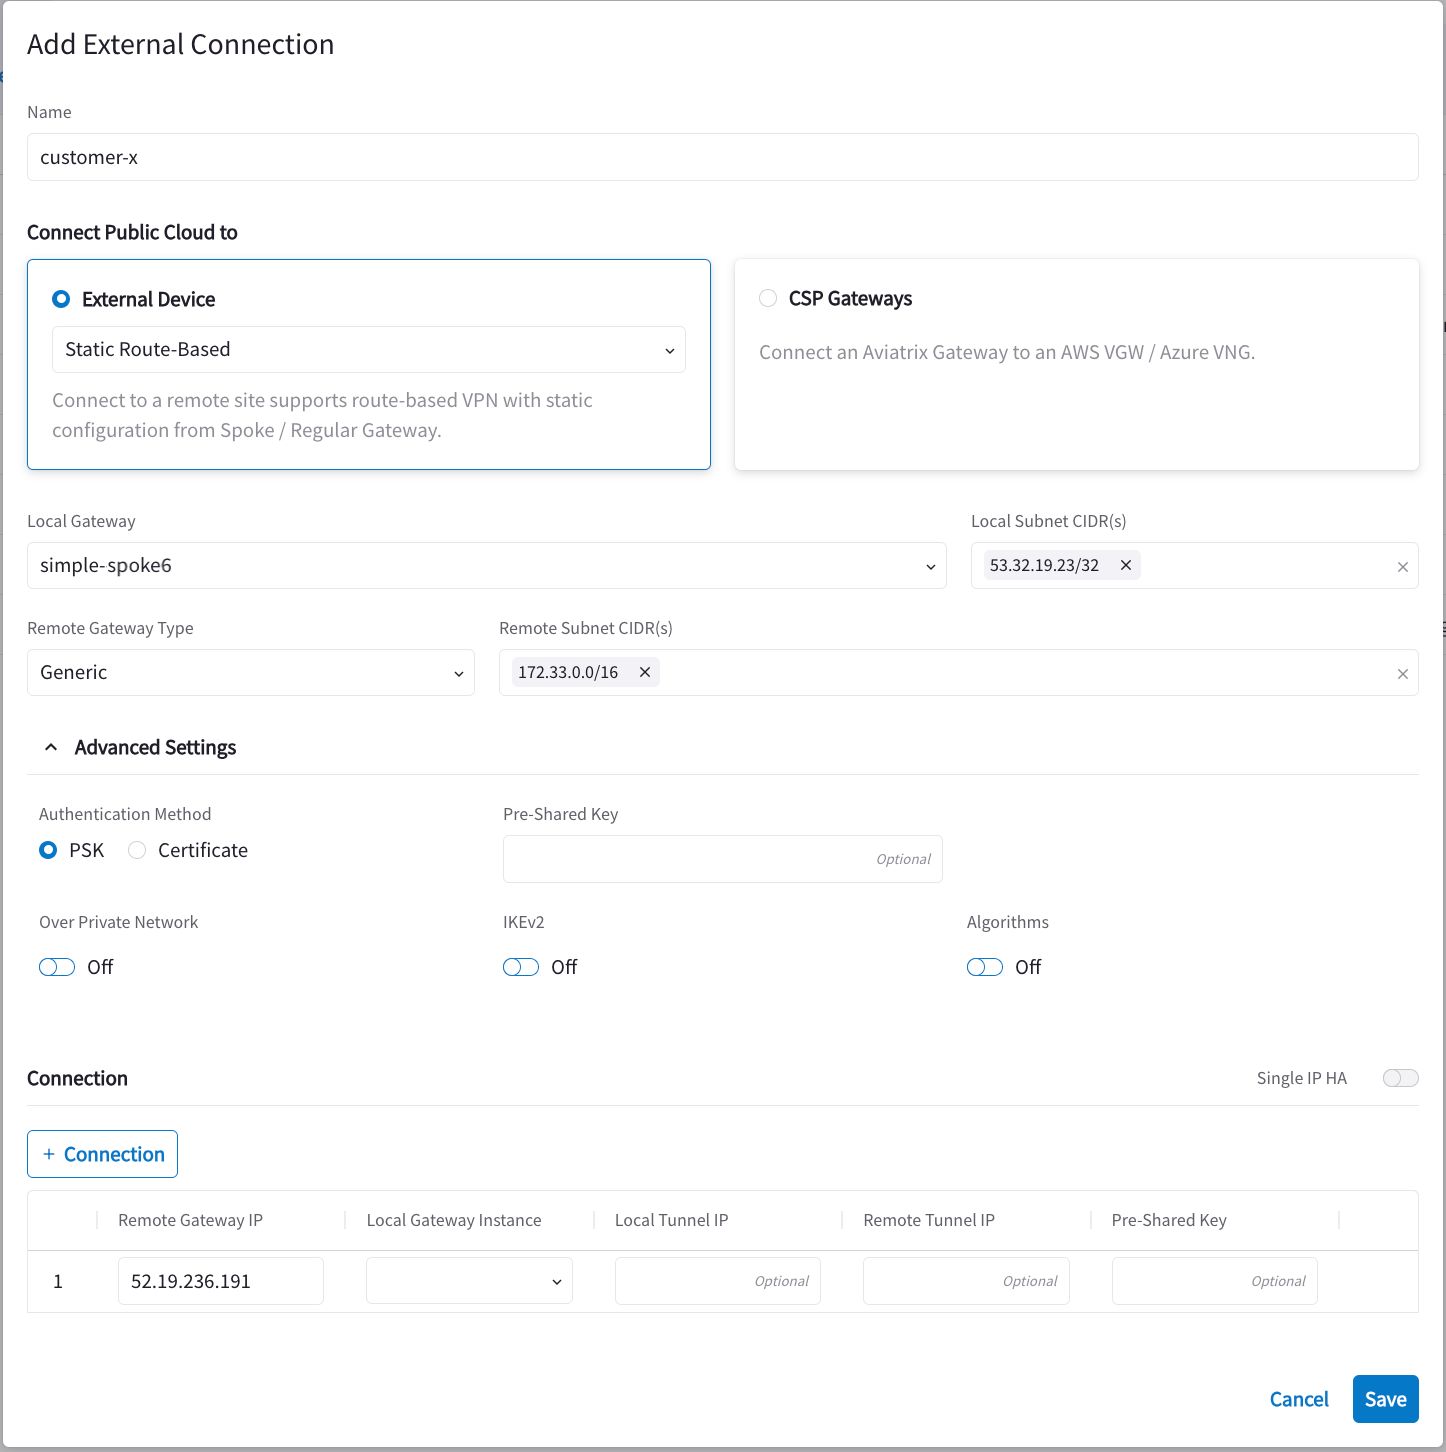
Create an External Connection
-
Navigate to Networking > Connectivity > External Connections (S2C) and click Add New to create a Site2Cloud connection using the values for one of the below options (for either you can select either PSK or certificate-based authentication).
-
The Local Subnet CIDR(s) field is the real or virtual public IP address that the on-prem host sends to. If there are multiple instances in VPC that needs to be addressed, enter multiple IP addresses separated by commas.
-
The Remote Device IP is the on-prem firewall public IP.
-
The Remote Subnet CIDR(s) is the on-prem network range.
Download the Configuration Template
Click the vertical ellipsis ![]() and select Download Configuration to download the template and send to the customer. Select the Generic Vendor Type.
and select Download Configuration to download the template and send to the customer. Select the Generic Vendor Type.
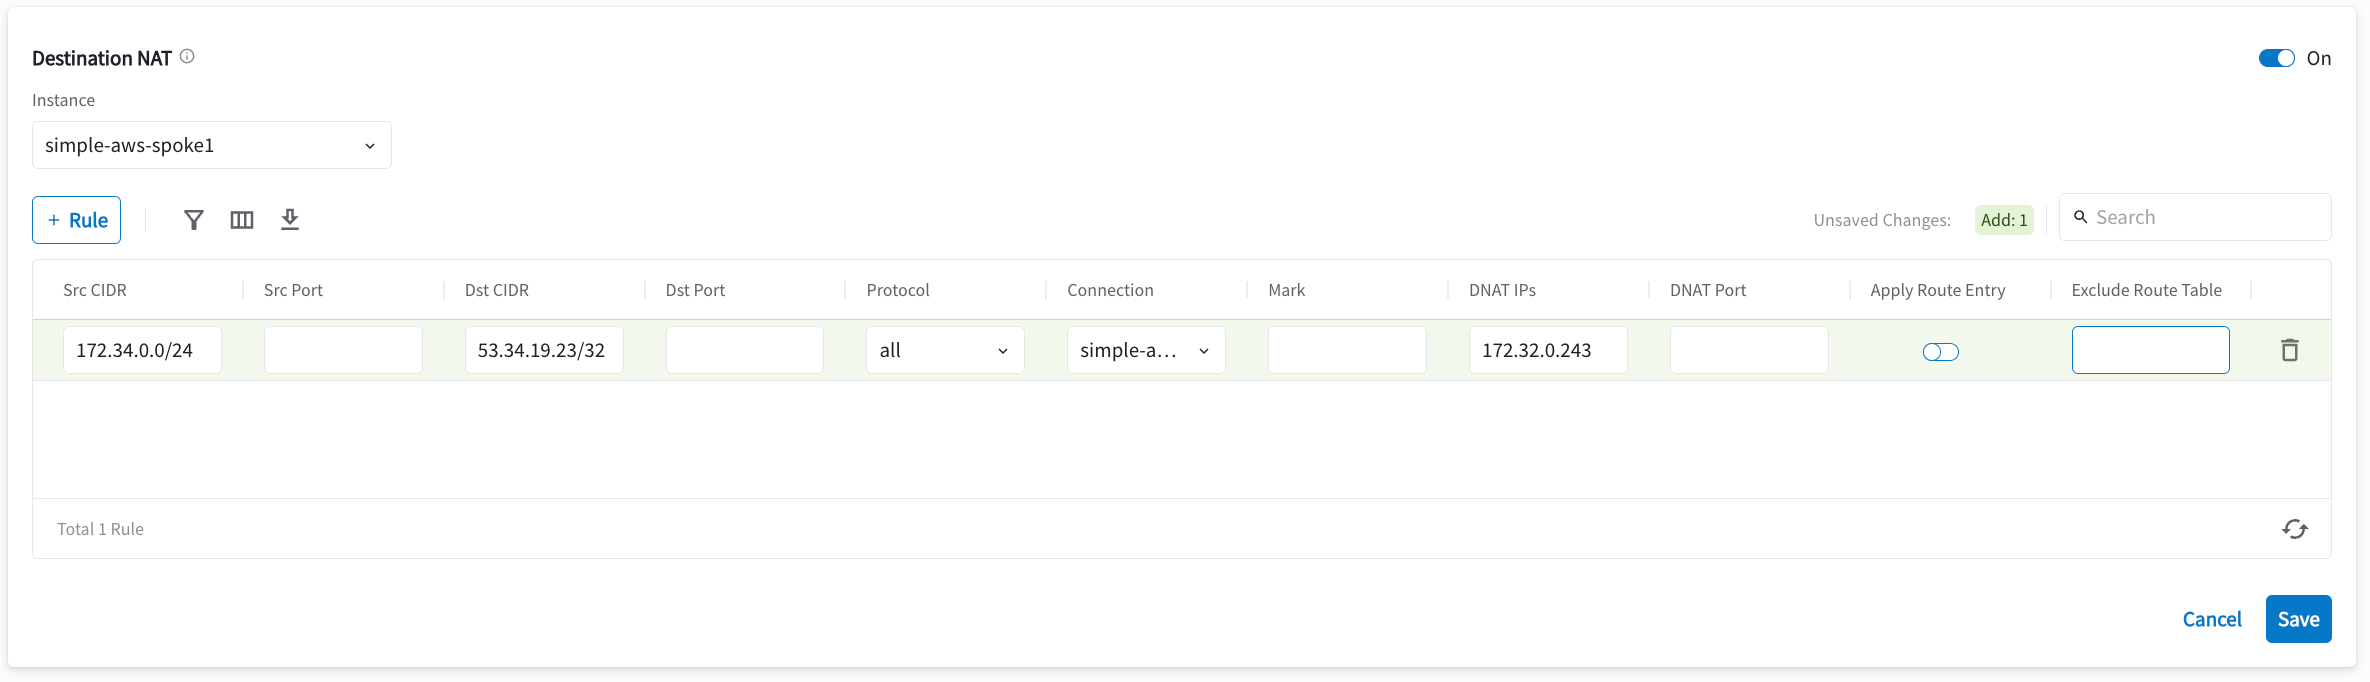
Configure DNAT
This step is to configure the gateway to translate the destination IP address 53.34.19.23 to the real private IP address 172.32.0.242.
-
Navigate to Cloud Fabric > Gateways > Spoke Gateways and select the Spoke Gateway created earlier in this document.
-
Click the Settings tab and expand the Network Address Translation (NAT) area.
-
Turn On Destination NAT.
-
Add a rule using the following information from this example:
-
Source CIDR: 172.34.0.0/24
-
Destination CIDR: 53.34.19.23/32
-
Protocol: all
-
Connection: The Site2Cloud connection you configured earlier in this document
-
DNAT IPs: 172.32.0.243
-
Test the Site2Cloud Connection and DNAT
Go to the Diagnostics > Cloud Routes > External Connections tab in Aviatrix CoPilot and verify that the external connection status is "Up".
Use ping to test connectivity from the on-prem host to the EC2 instance. For example, ping 53.34.19.23 from an on-prem host machine. The ping should reach 172.32.0.243.