IP-based Whitelisting of Aviatrix Controller in AWS and Azure
This document describes how to configure IAM policies (AWS) and Conditional Access (Azure) to prevent a malfunctioning Controller mistakenly restored from a backup assuming control of onboarded CSP accounts.
Whitelisting in AWS
In your AWS Console, do the following to whitelist the Controller Elastic IP:
-
Navigate to Access Management > Policies under Identity and Access Management (IAM).

-
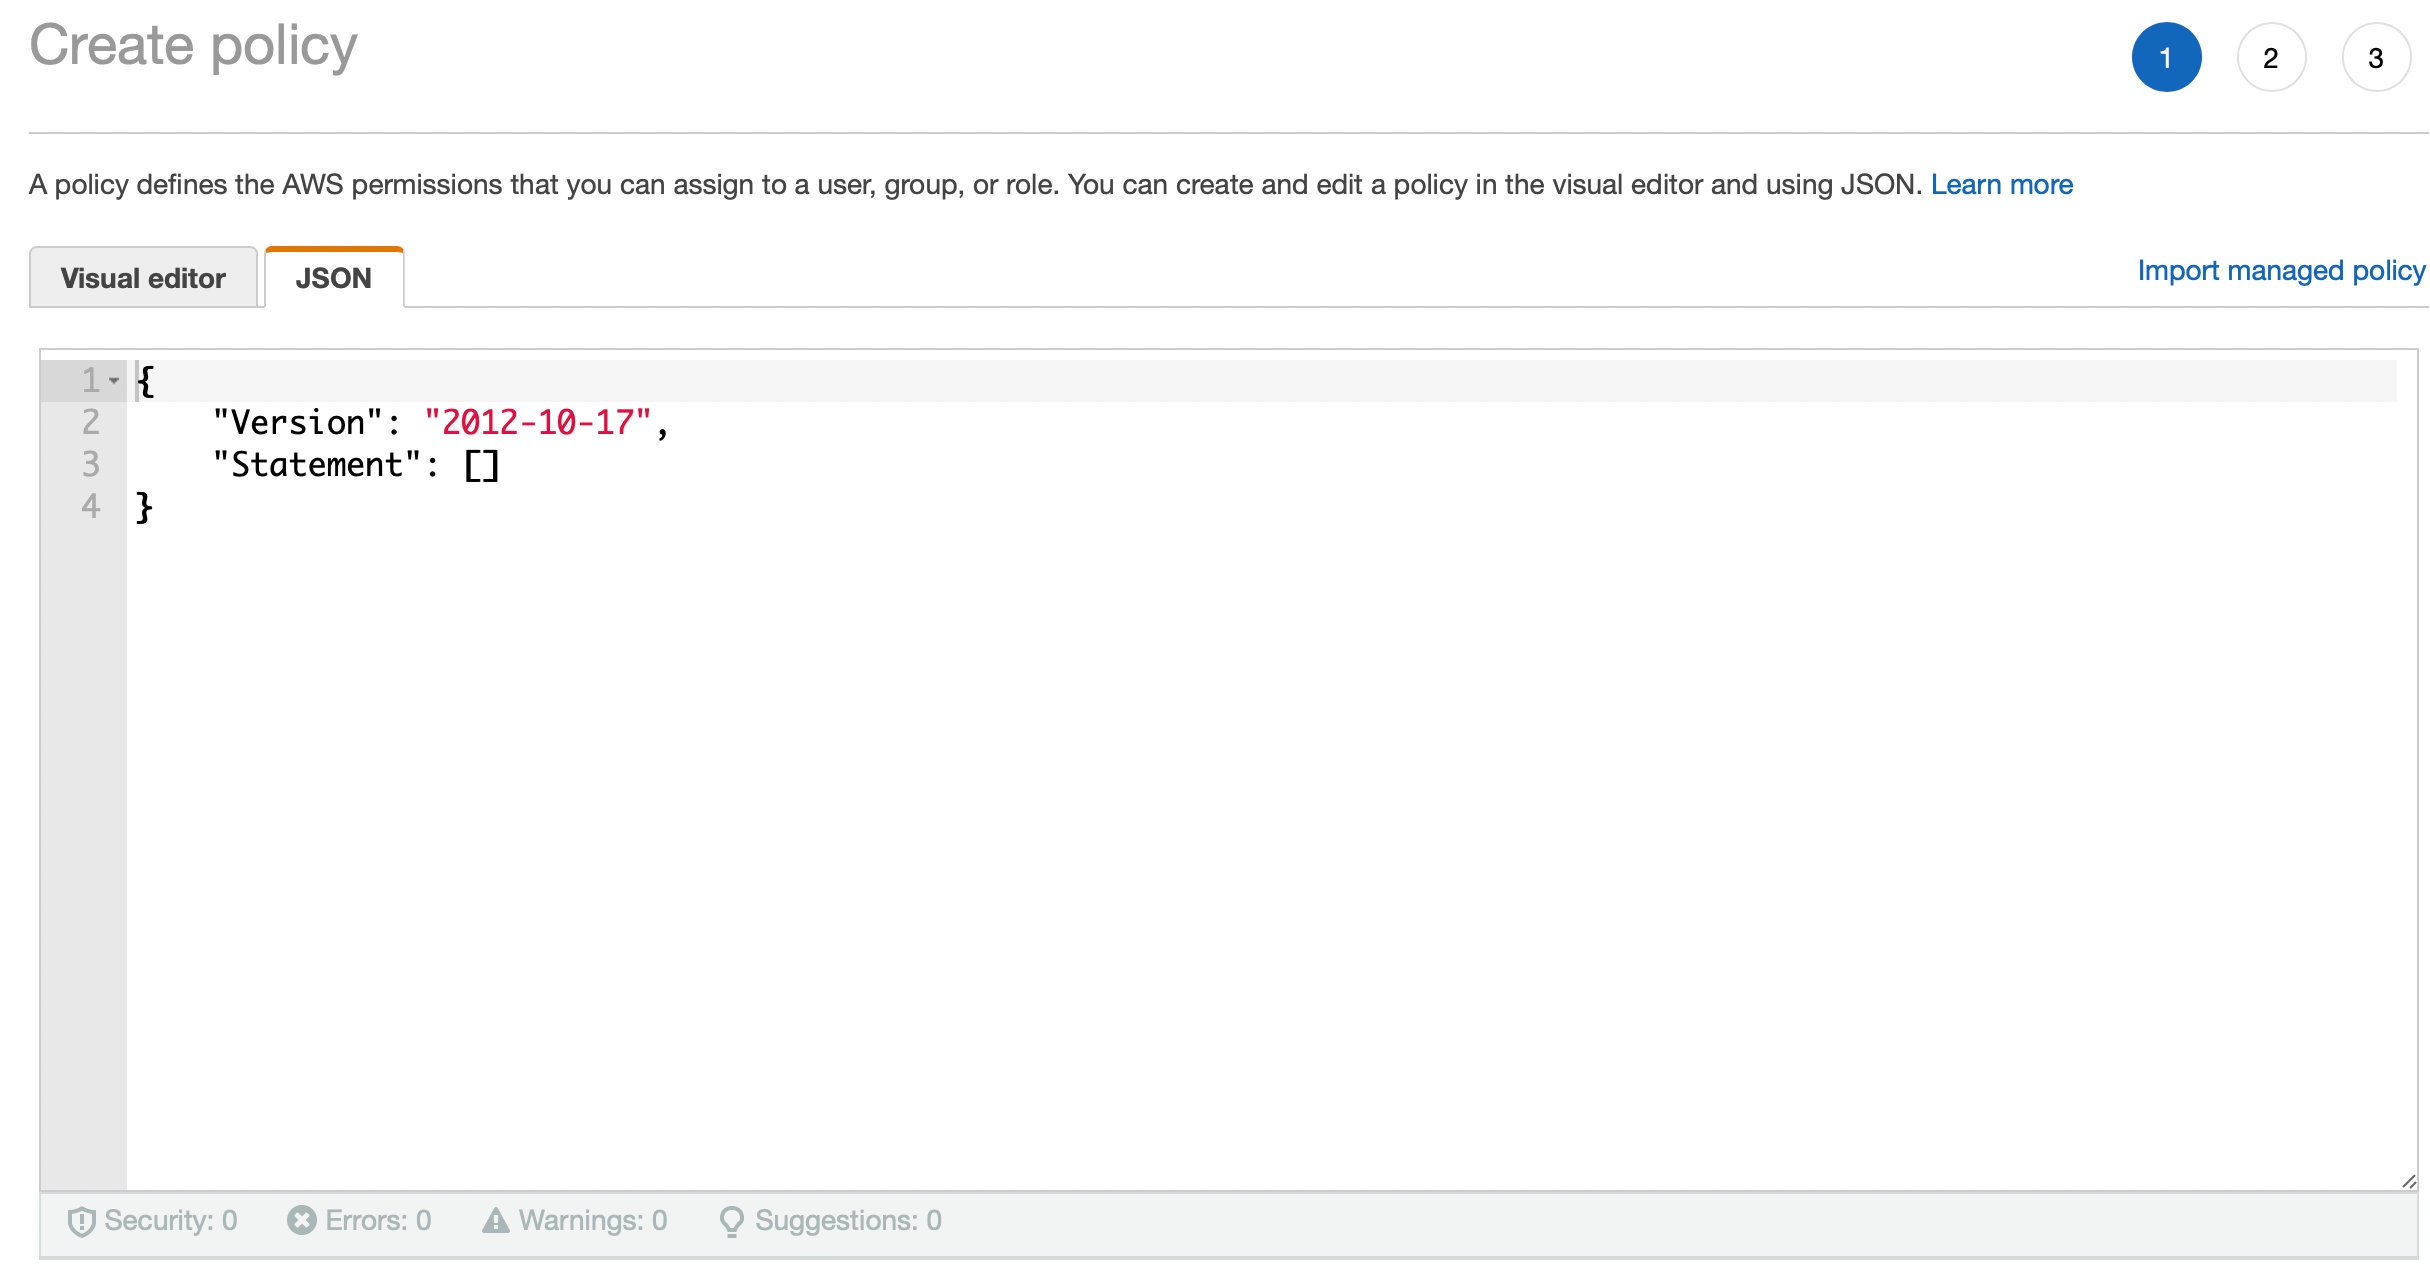
Click Create policy and switch to the JSON editor.
-
Paste the following code into the JSON policy editor (replace the placeholder A.B.C.D/32 address with the Elastic IP of your Aviatrix Controller — for example, 34.216.134.10):
{ "Version": "2012-10-17", "Statement": [ { "Action": "*", "Resource": "*", "Effect": "Deny", "Condition": { "NotIpAddress": { "aws:SourceIp": [ "A.B.C.D/32" ] } }} ] } -
Click Next: Tags.
-
Click Next: Review.
-
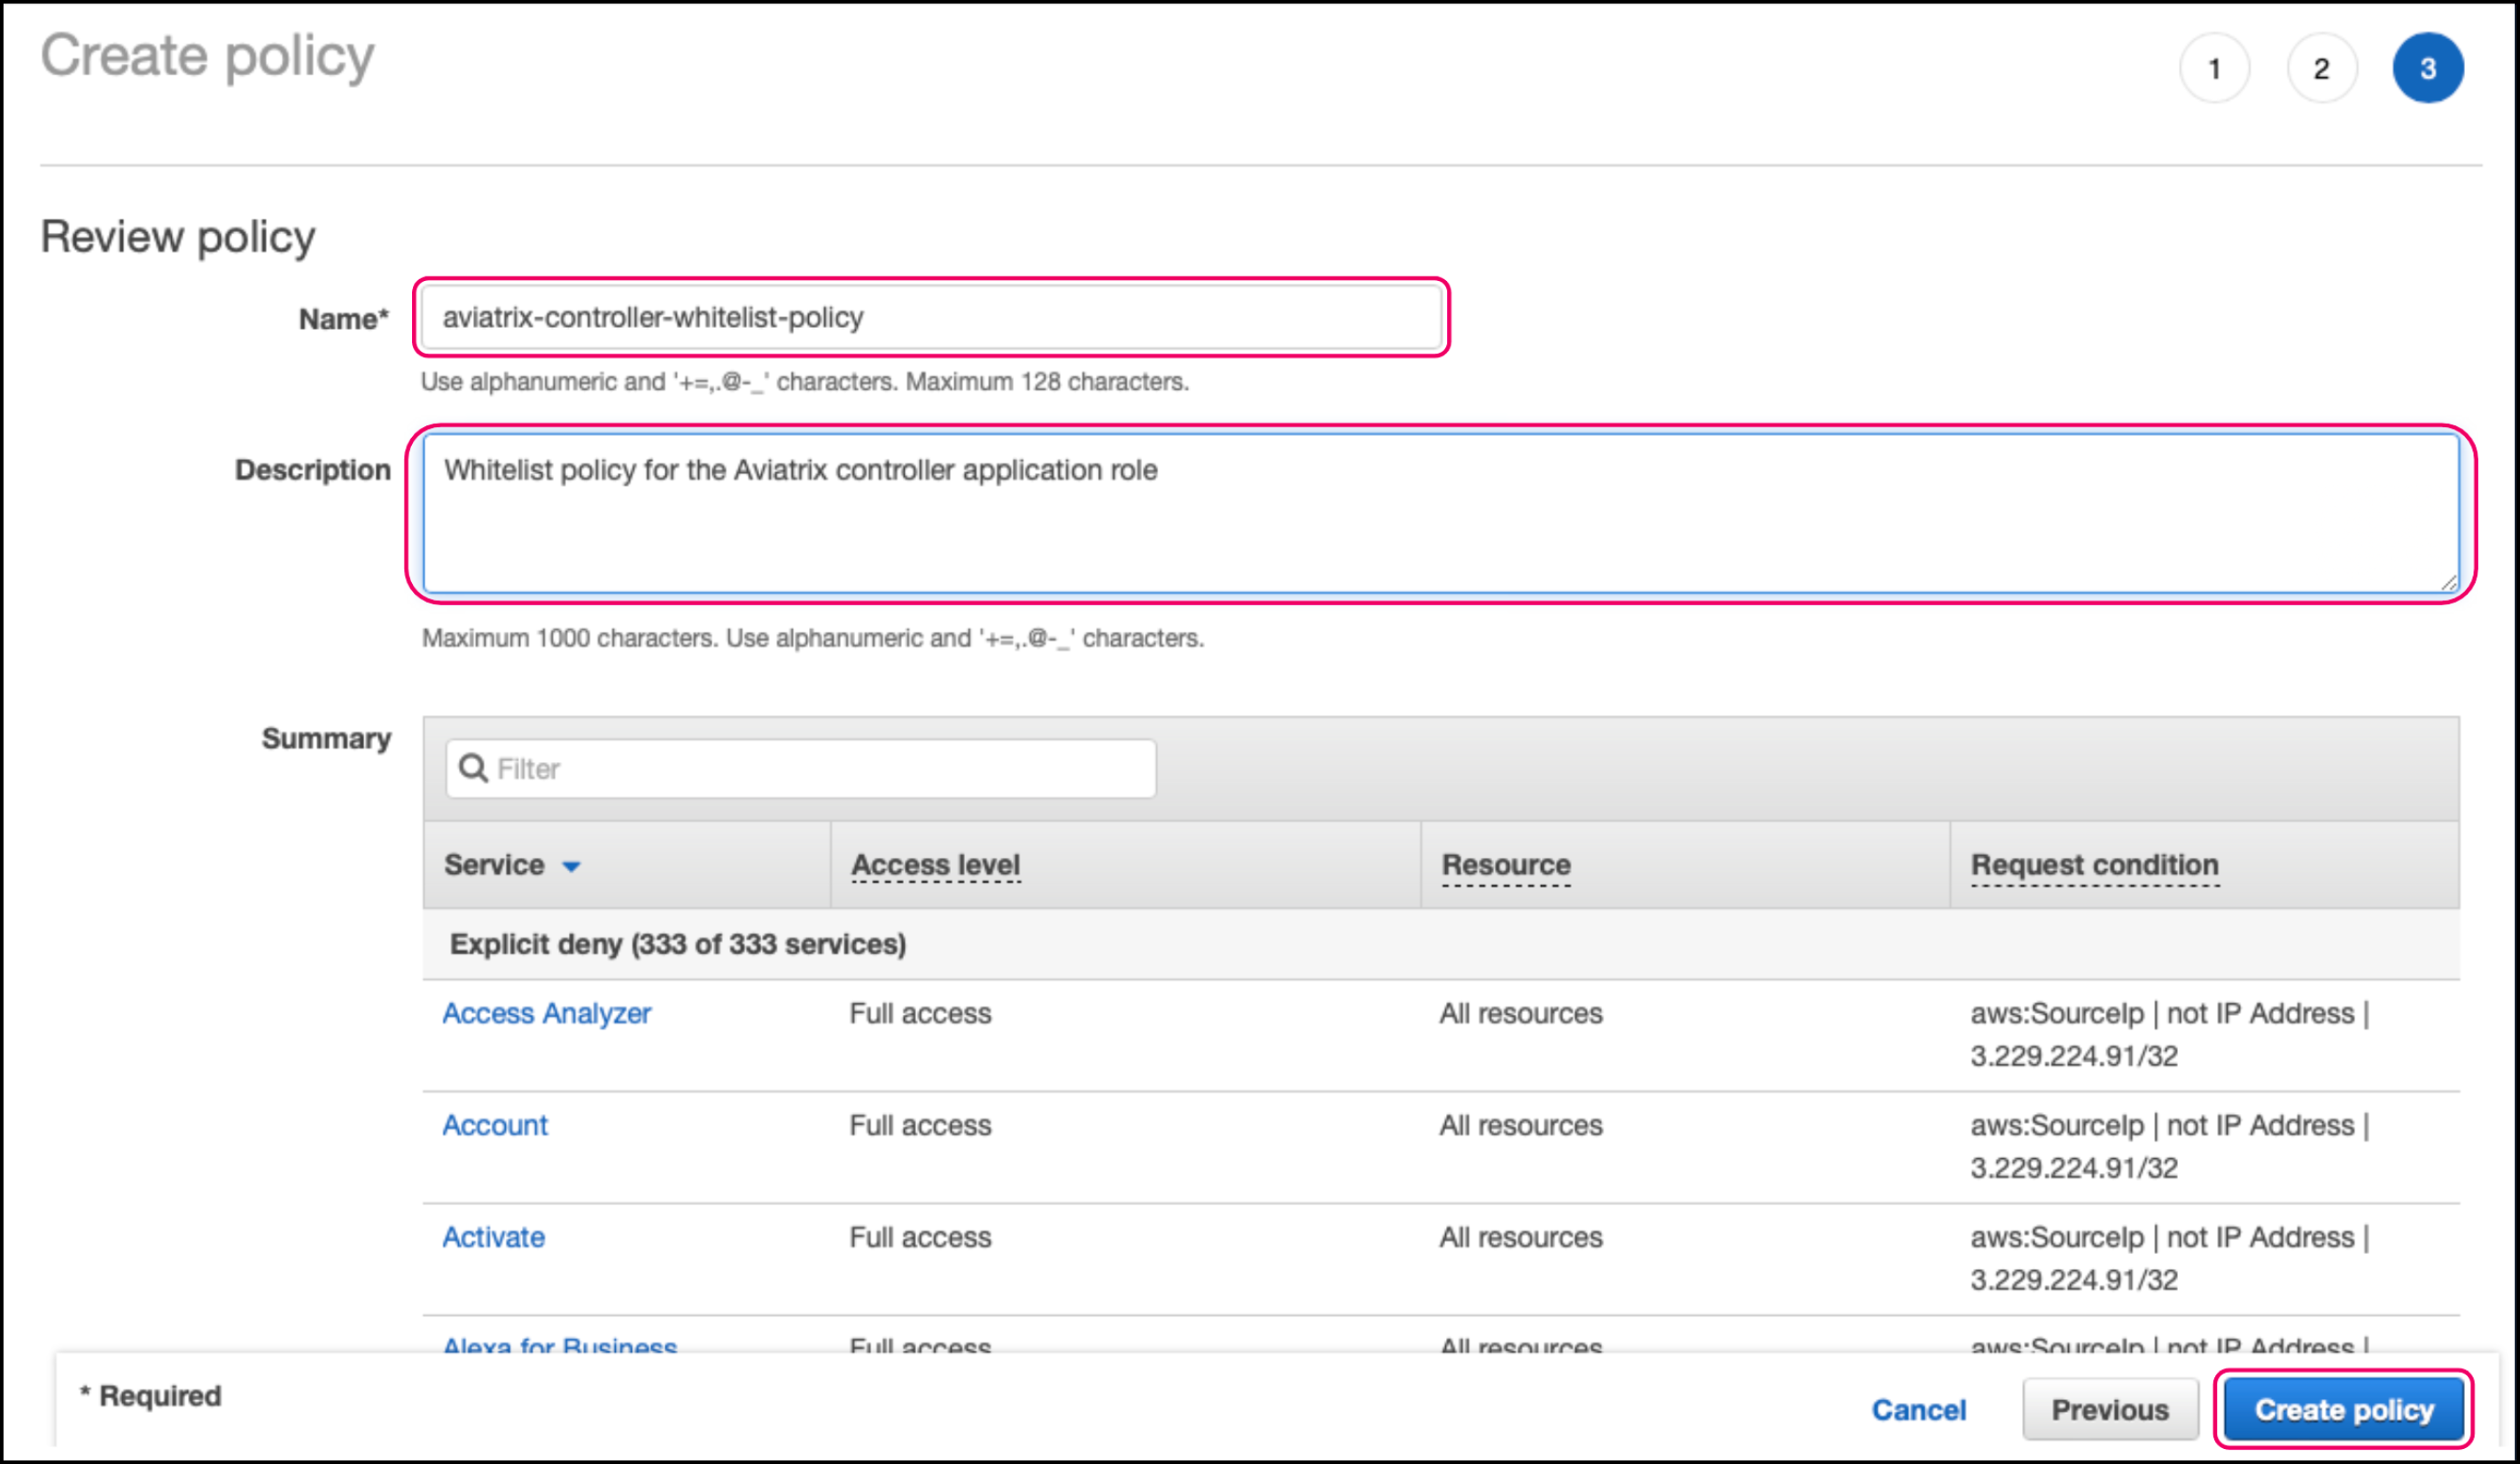
On the Create policy page, name the policy (for example, aviatrix-controller-whitelist-policy) and give it a description (optional).
-
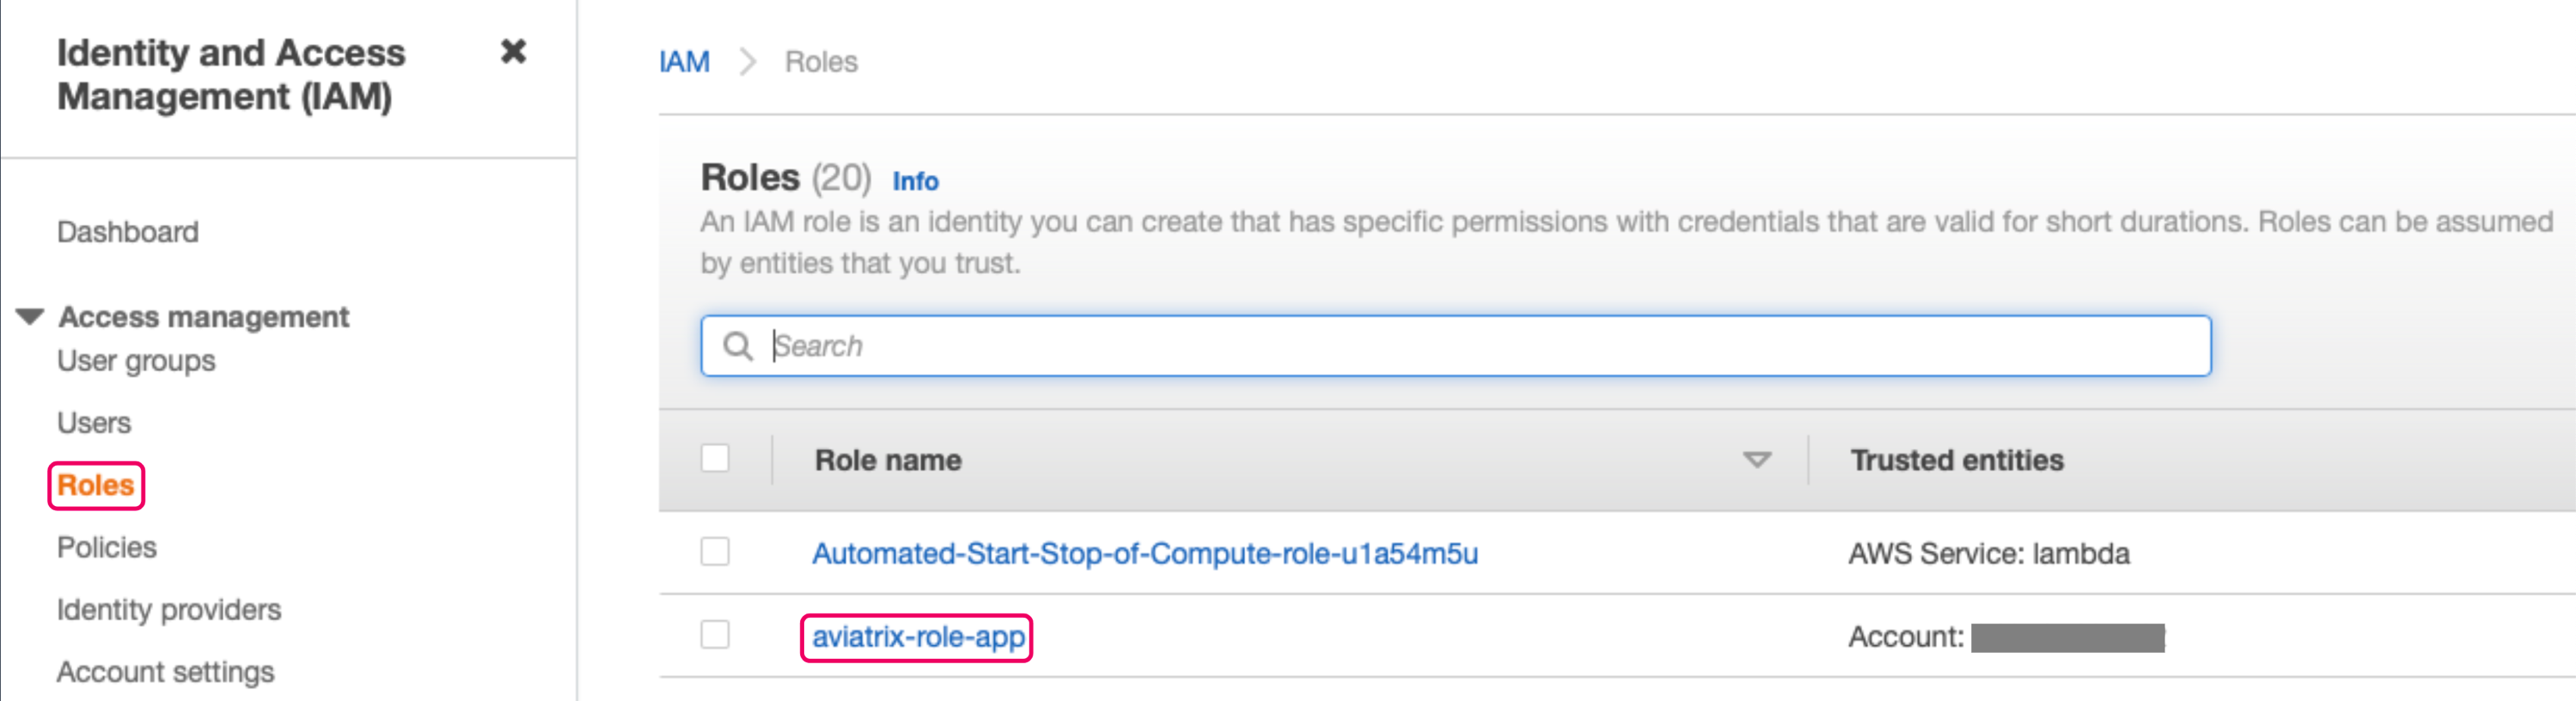
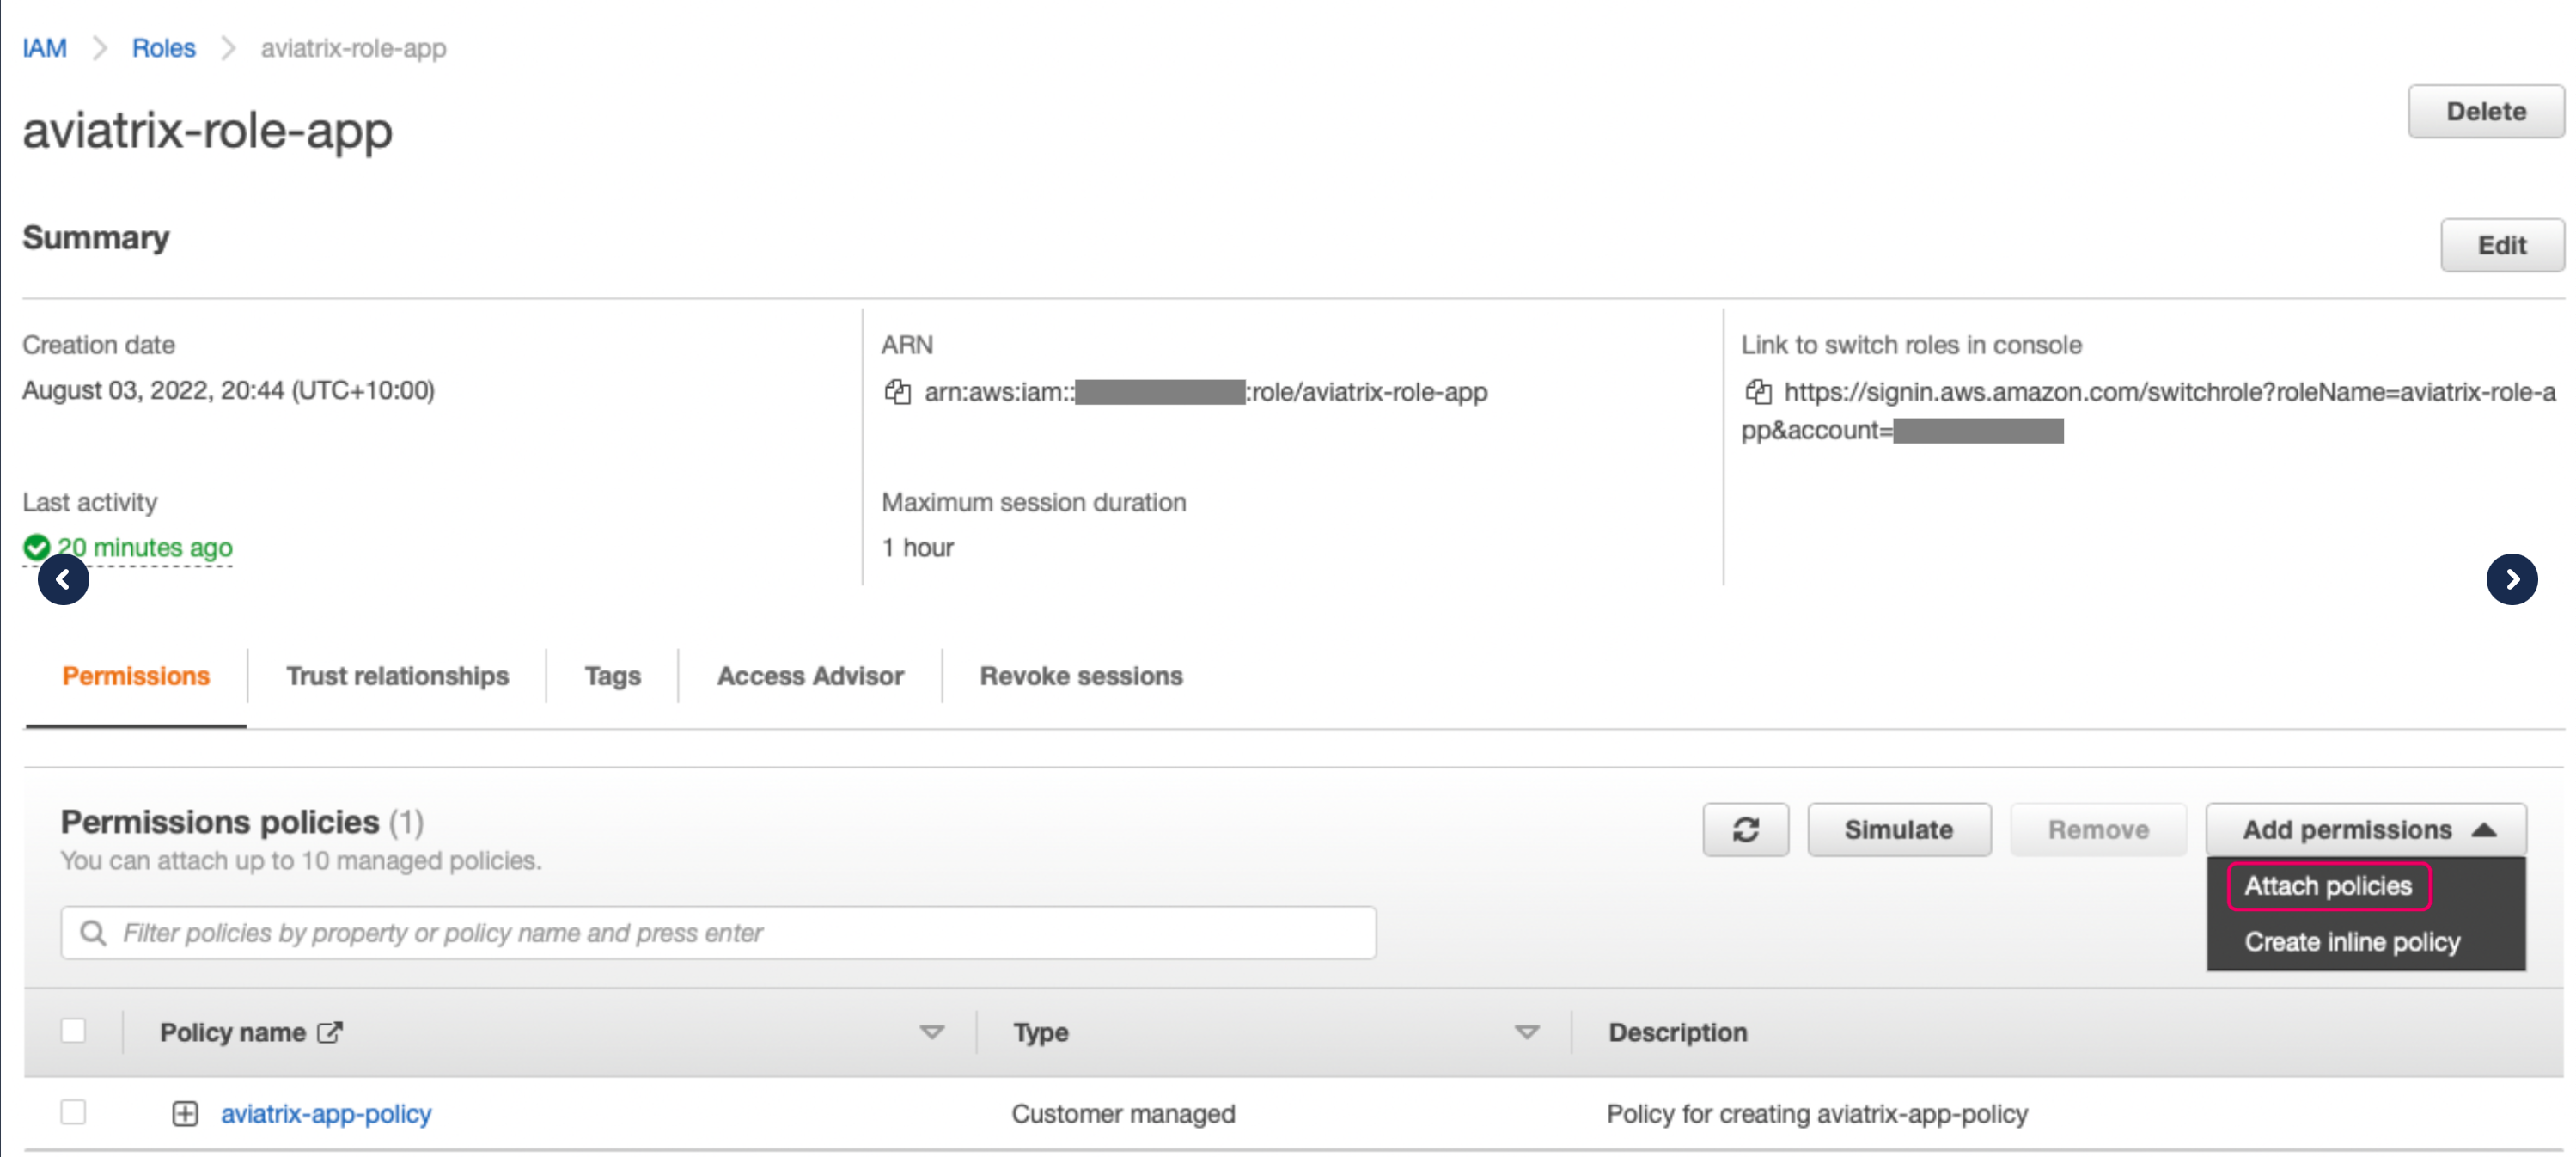
Click Create policy. Switch to the Access management > Roles view and click the aviatrix-role-app.
-
Select Attach policies from the Add permissions drop down menu.
-
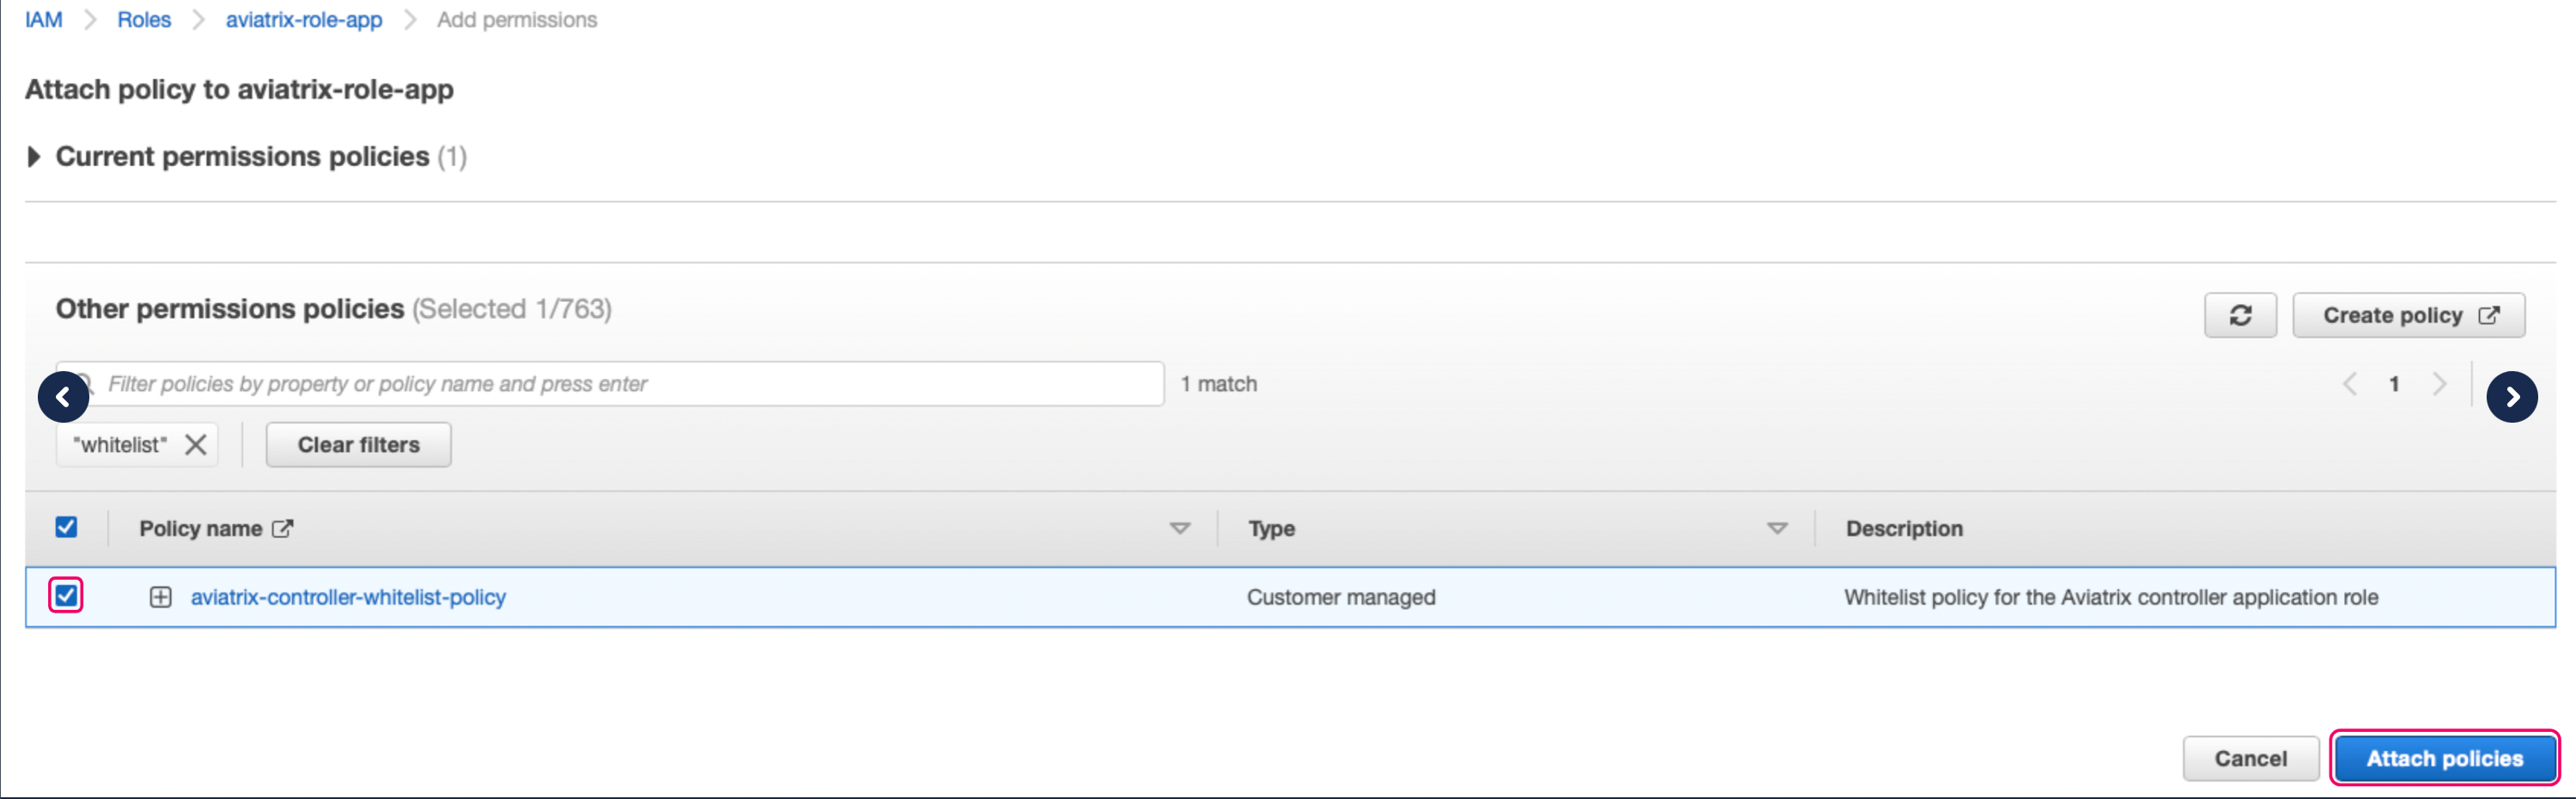
On the Add permissions page select the whitelist policy you just created and click Attach policies.
-
You should now see two policies attached to the aviatrix-role-app:
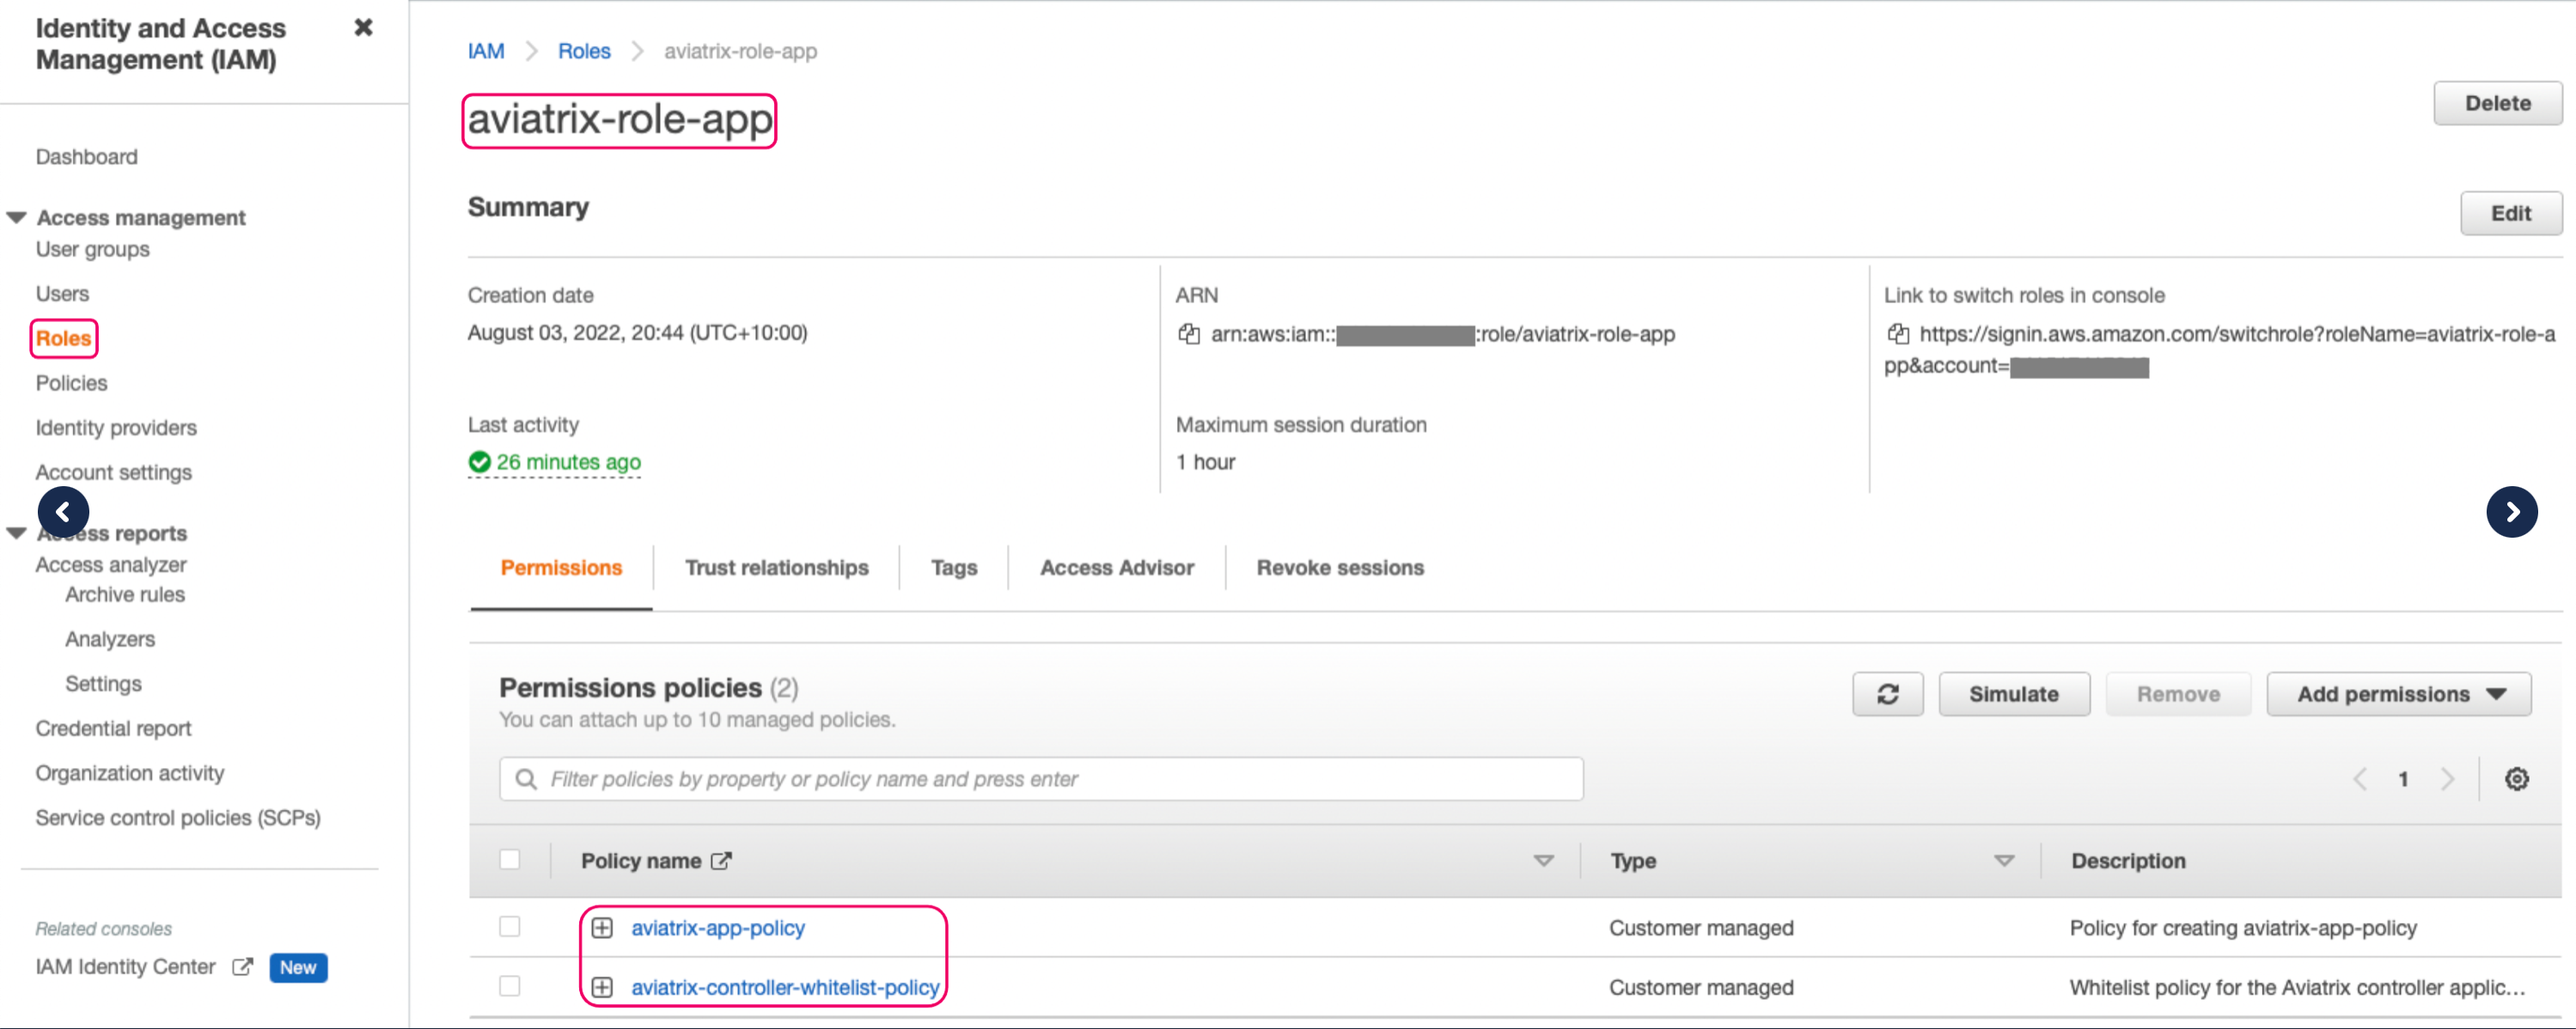
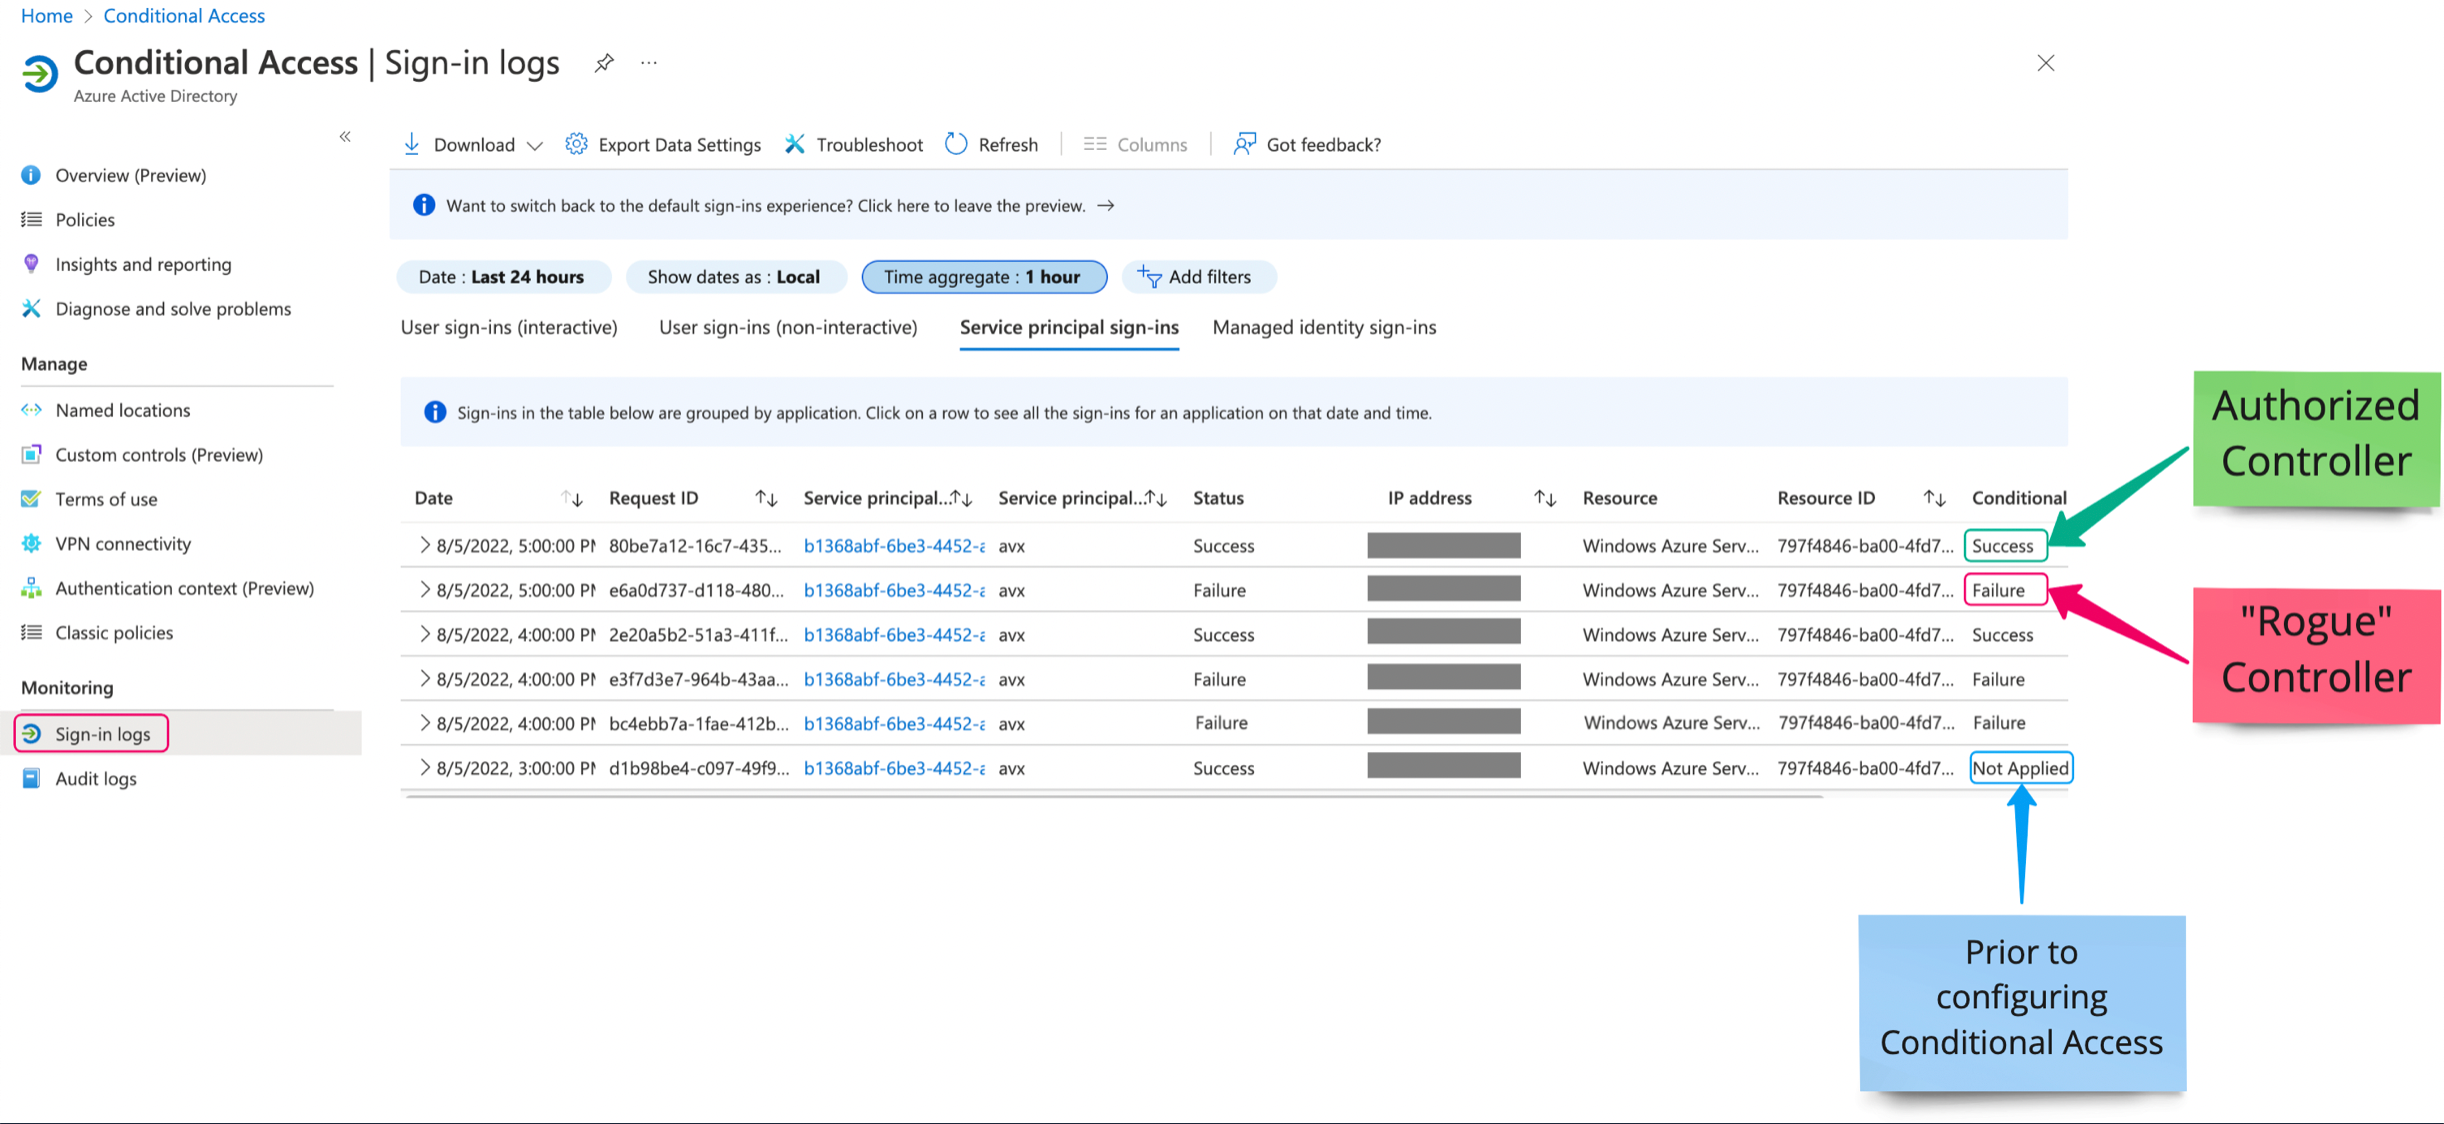
Your AWS account is now protected from unauthorized IP access and rogue Controllers.
Updating the Whitelist Policy
You should update the whitelist policy when you:
-
rebuild the Controller with a different Elastic IP
-
Invoke the Controller IP migration process
You can append the Elastic IP of the new Controller to the existing policy as shown in the following code snippet (replacing the placeholder IP addresses):
 {
    "Version": "2012-10-17",
    "Statement": [
        {
            "Action": "*",
            "Resource": "*",
            "Effect": "Deny",
            "Condition": {
                "NotIpAddress": {
                    "aws:SourceIp": [
                        "A.B.C.D/32", <-- Old Controller EIP, note the trailing comma
                        "W.X.Y.Z/32"  <-- New Controller EIP
                    ]
                }
            }
        }
    ]
}
Delete the comments before saving the policy.
| Remove the old Controller Elastic IP from the policy after successful migration or Controller rebuild. |
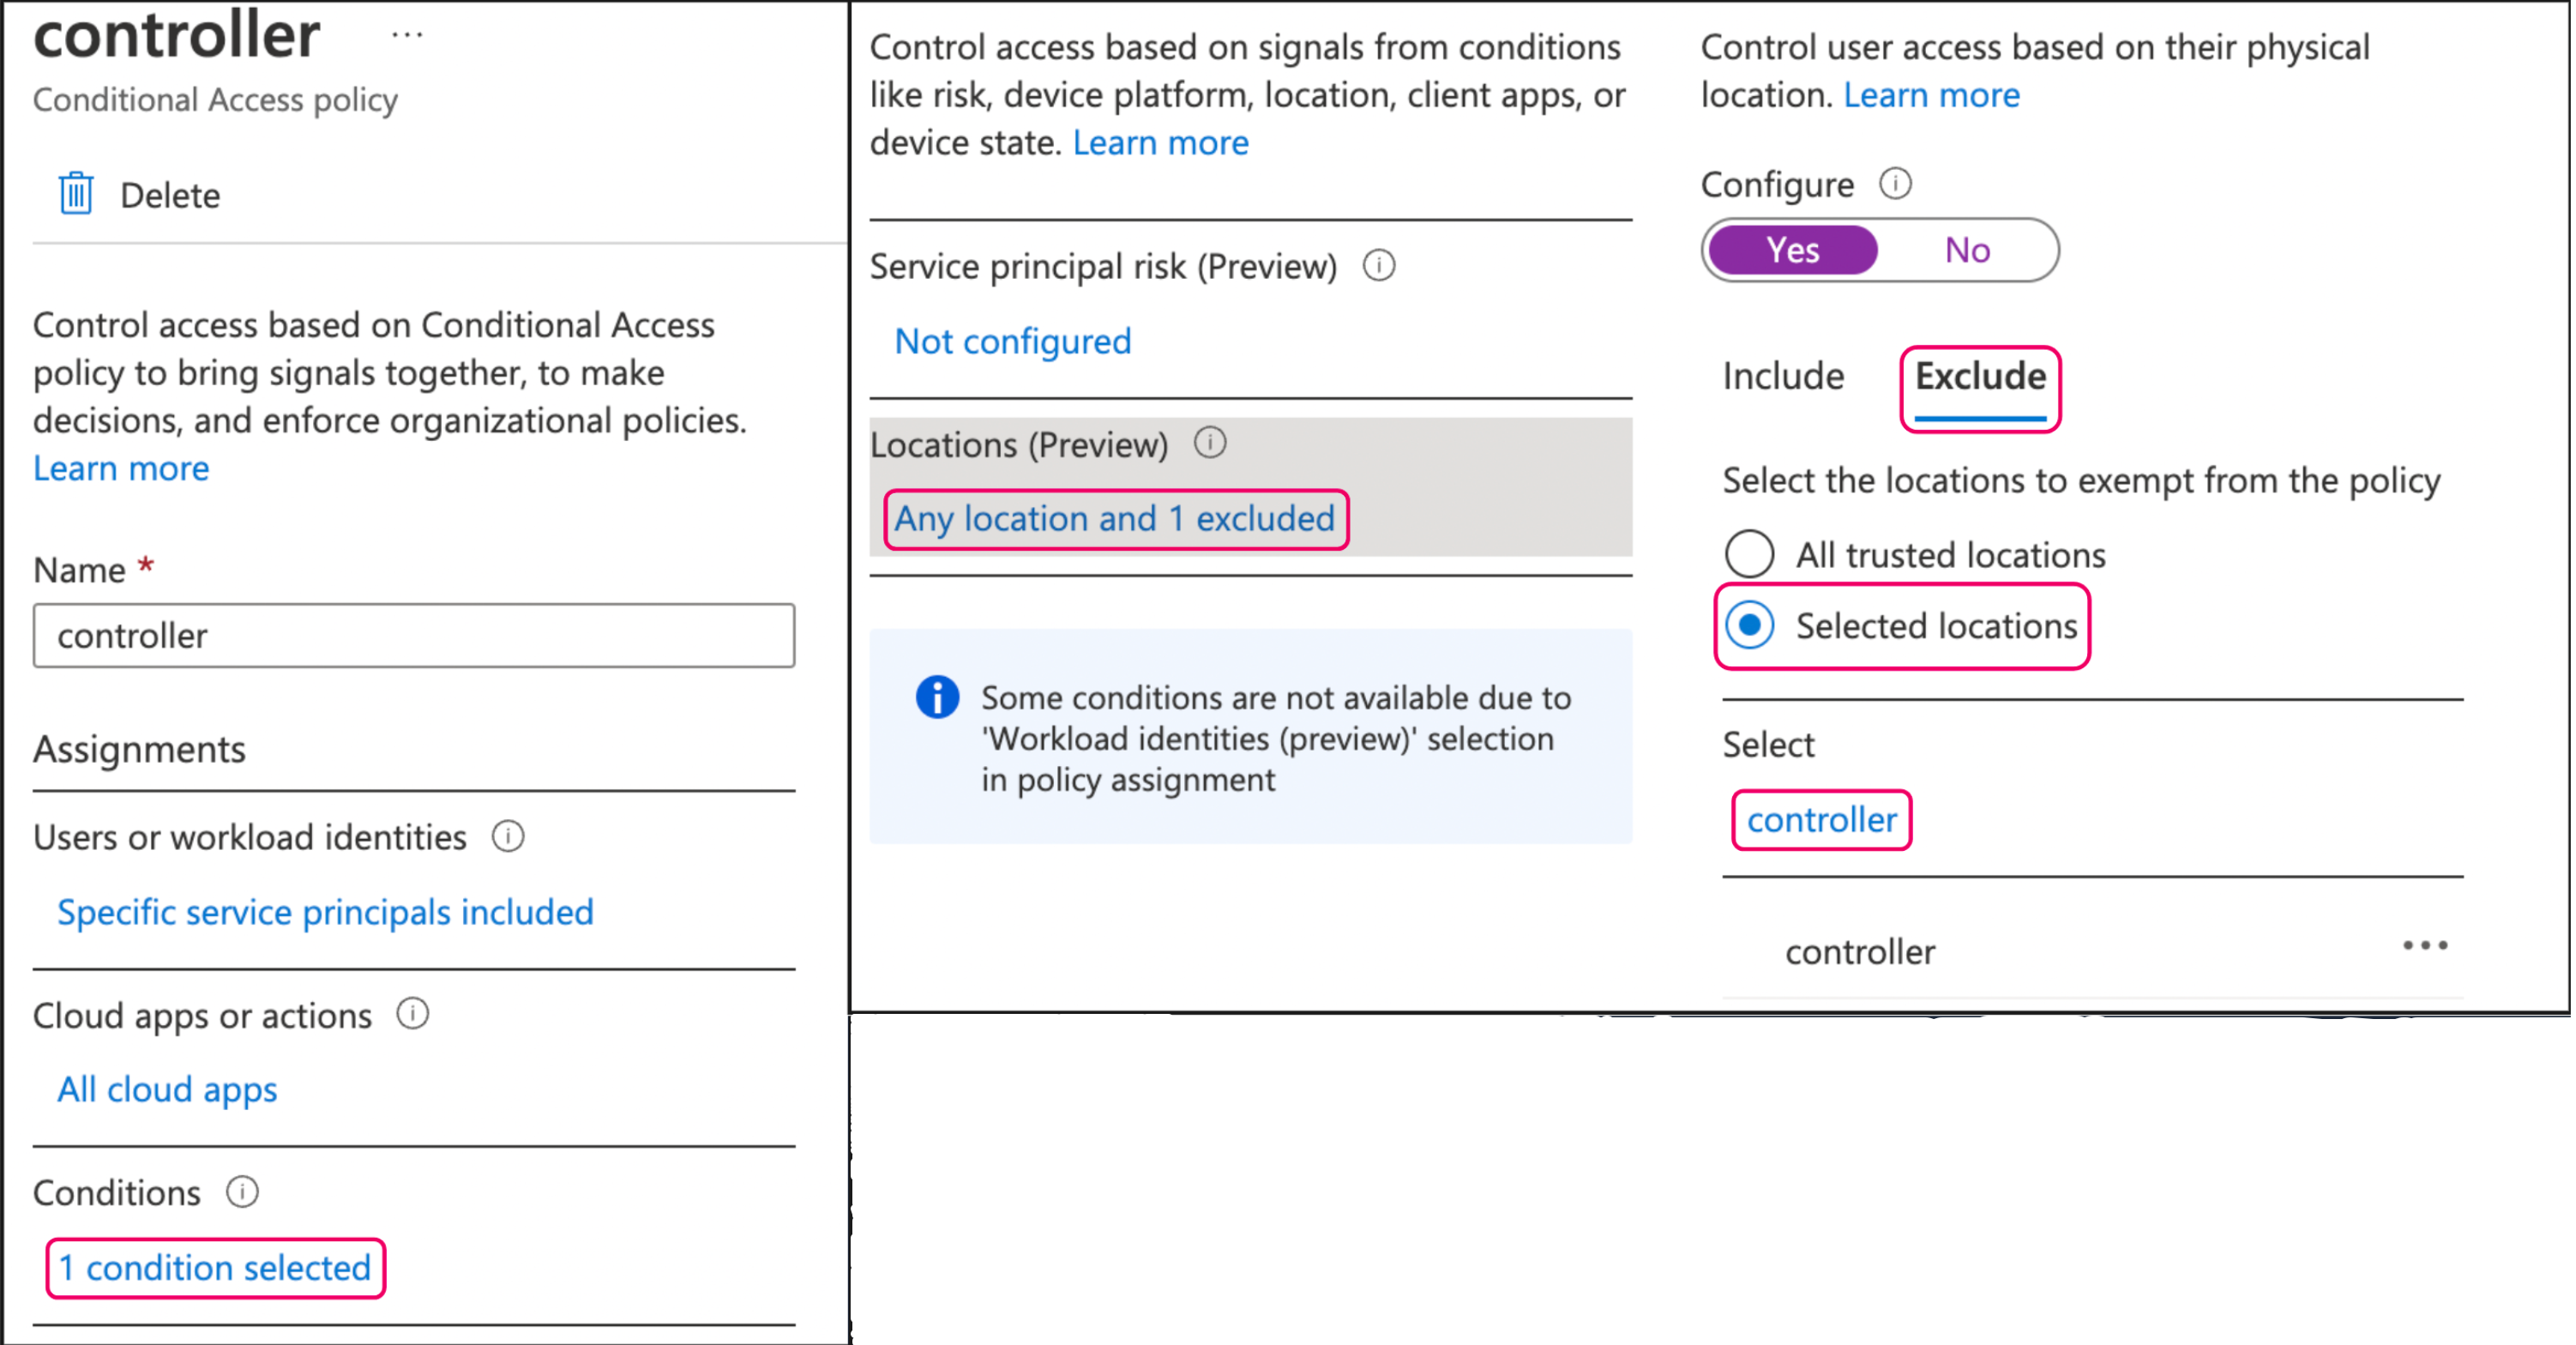
Whitelisting in Azure
Before configuring the IP-based Controller whitelisting in Azure you must:
-
have the service principal set up as described in Azure Account Credential Setup. The service principal may already exist if the Azure account was previously onboarded in the Aviatrix Controller. If the service principal already exists, you can determine its name by navigating to Azure Active Directory > App Registrations in the Azure portal.
-
an available Azure AD Premium P1 license. You can check Azure Active Directory > Licenses > All Products to see if you already have this license.
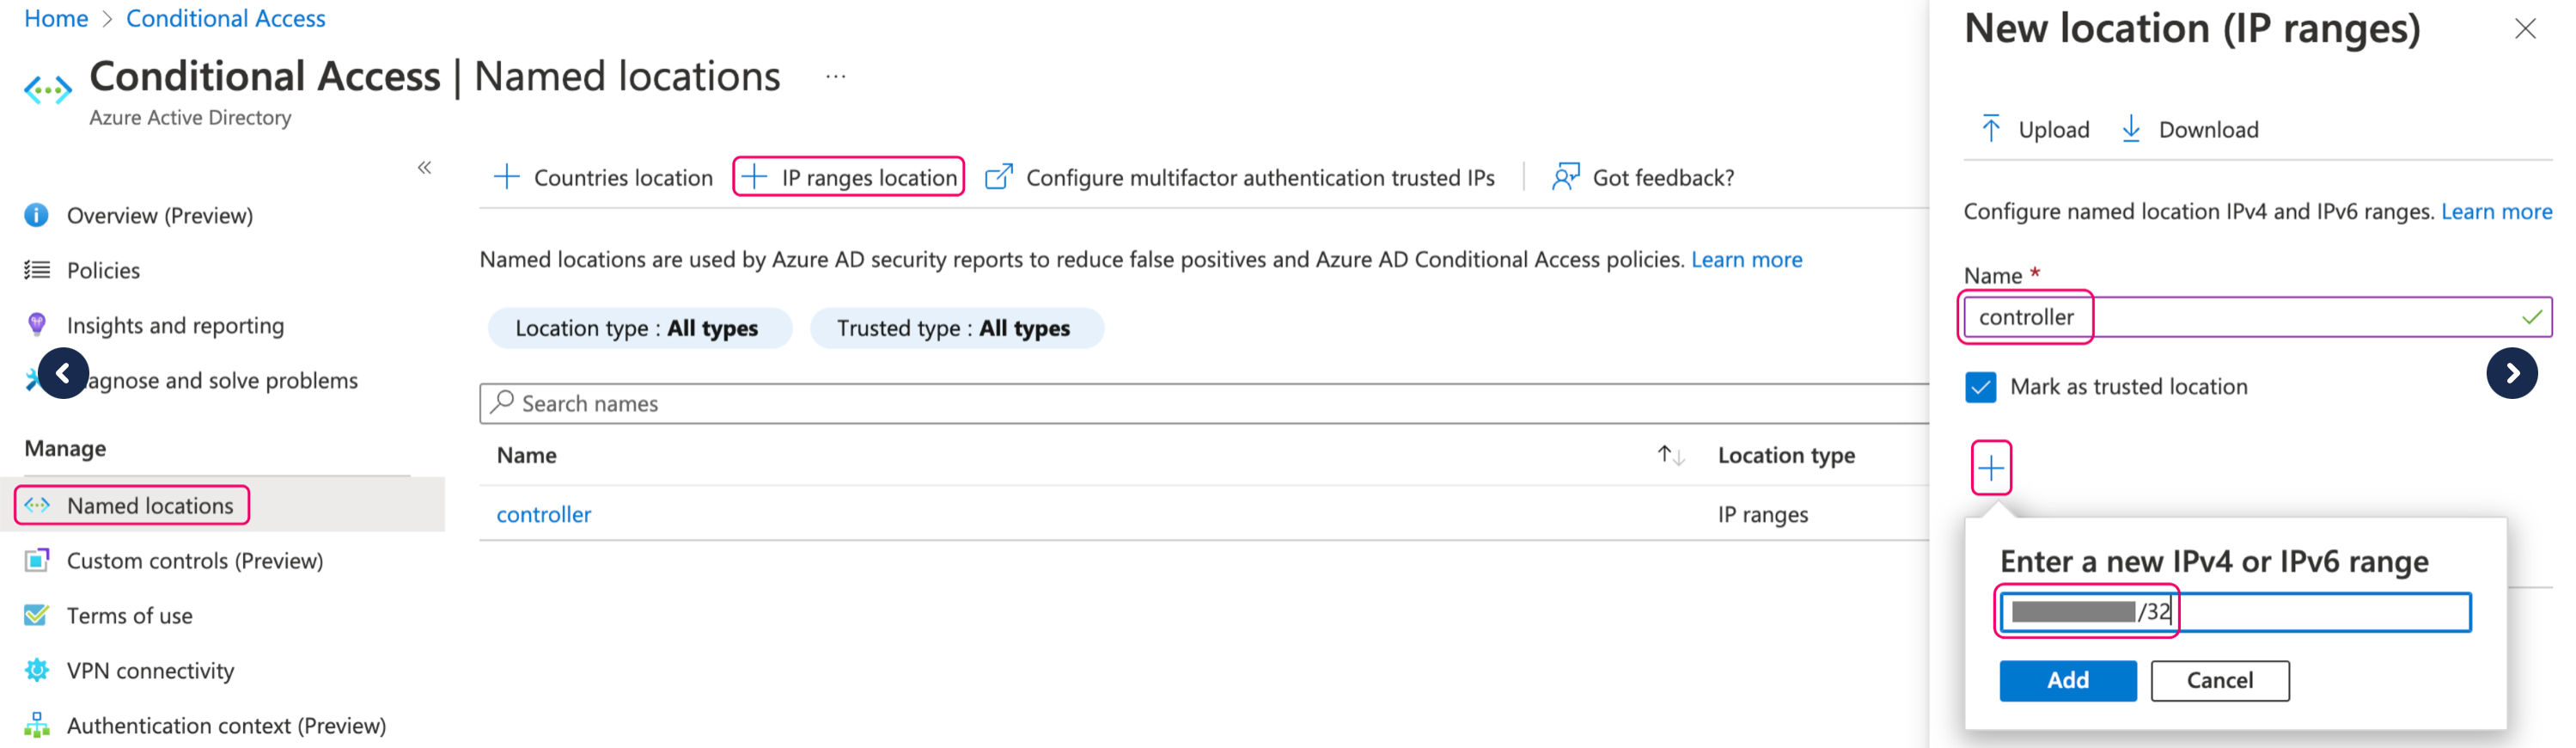
-
Navigate to Azure AD Conditional Access > Named Locations in the Azure portal and create a new IP ranges location with the current public IP address of the Controller.
-
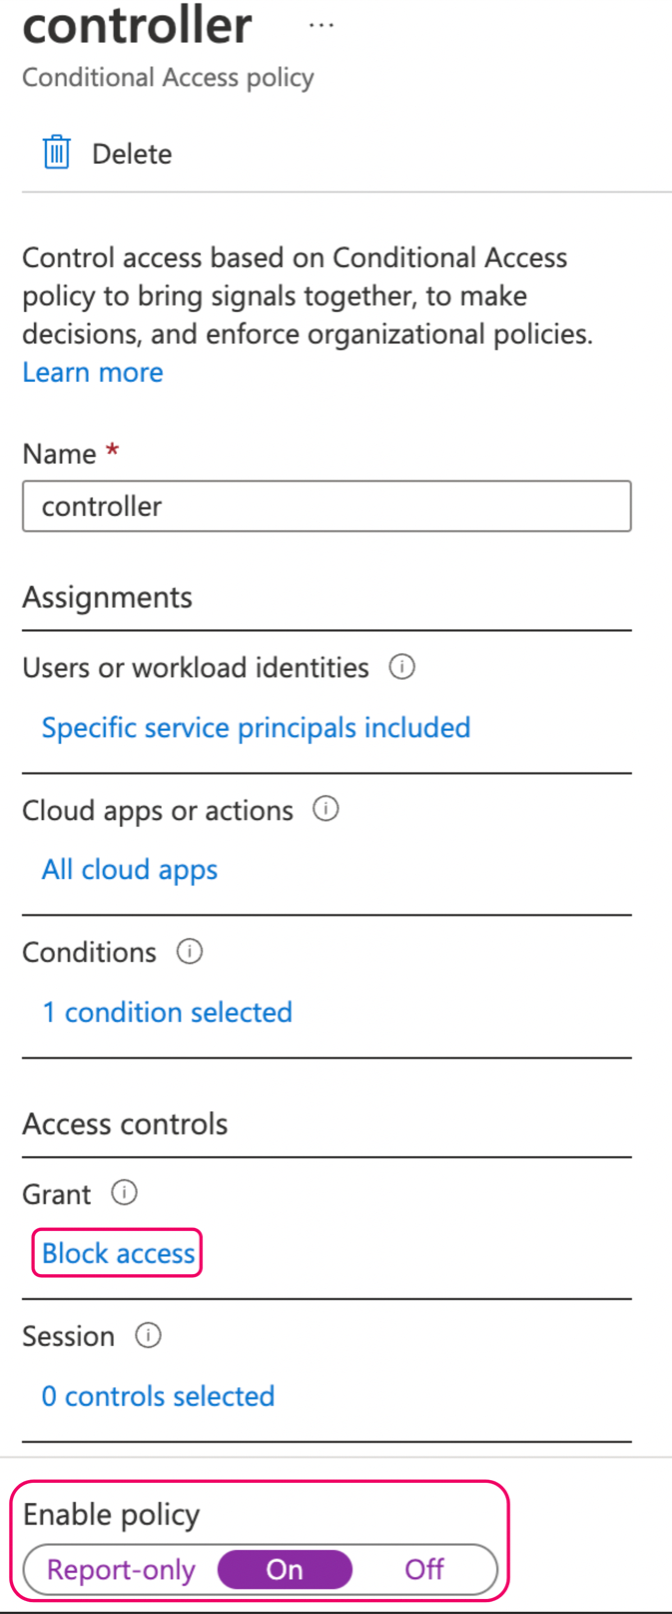
Navigate to Azure AD Conditional Access > Policies in the Azure portal and create a new policy.

-
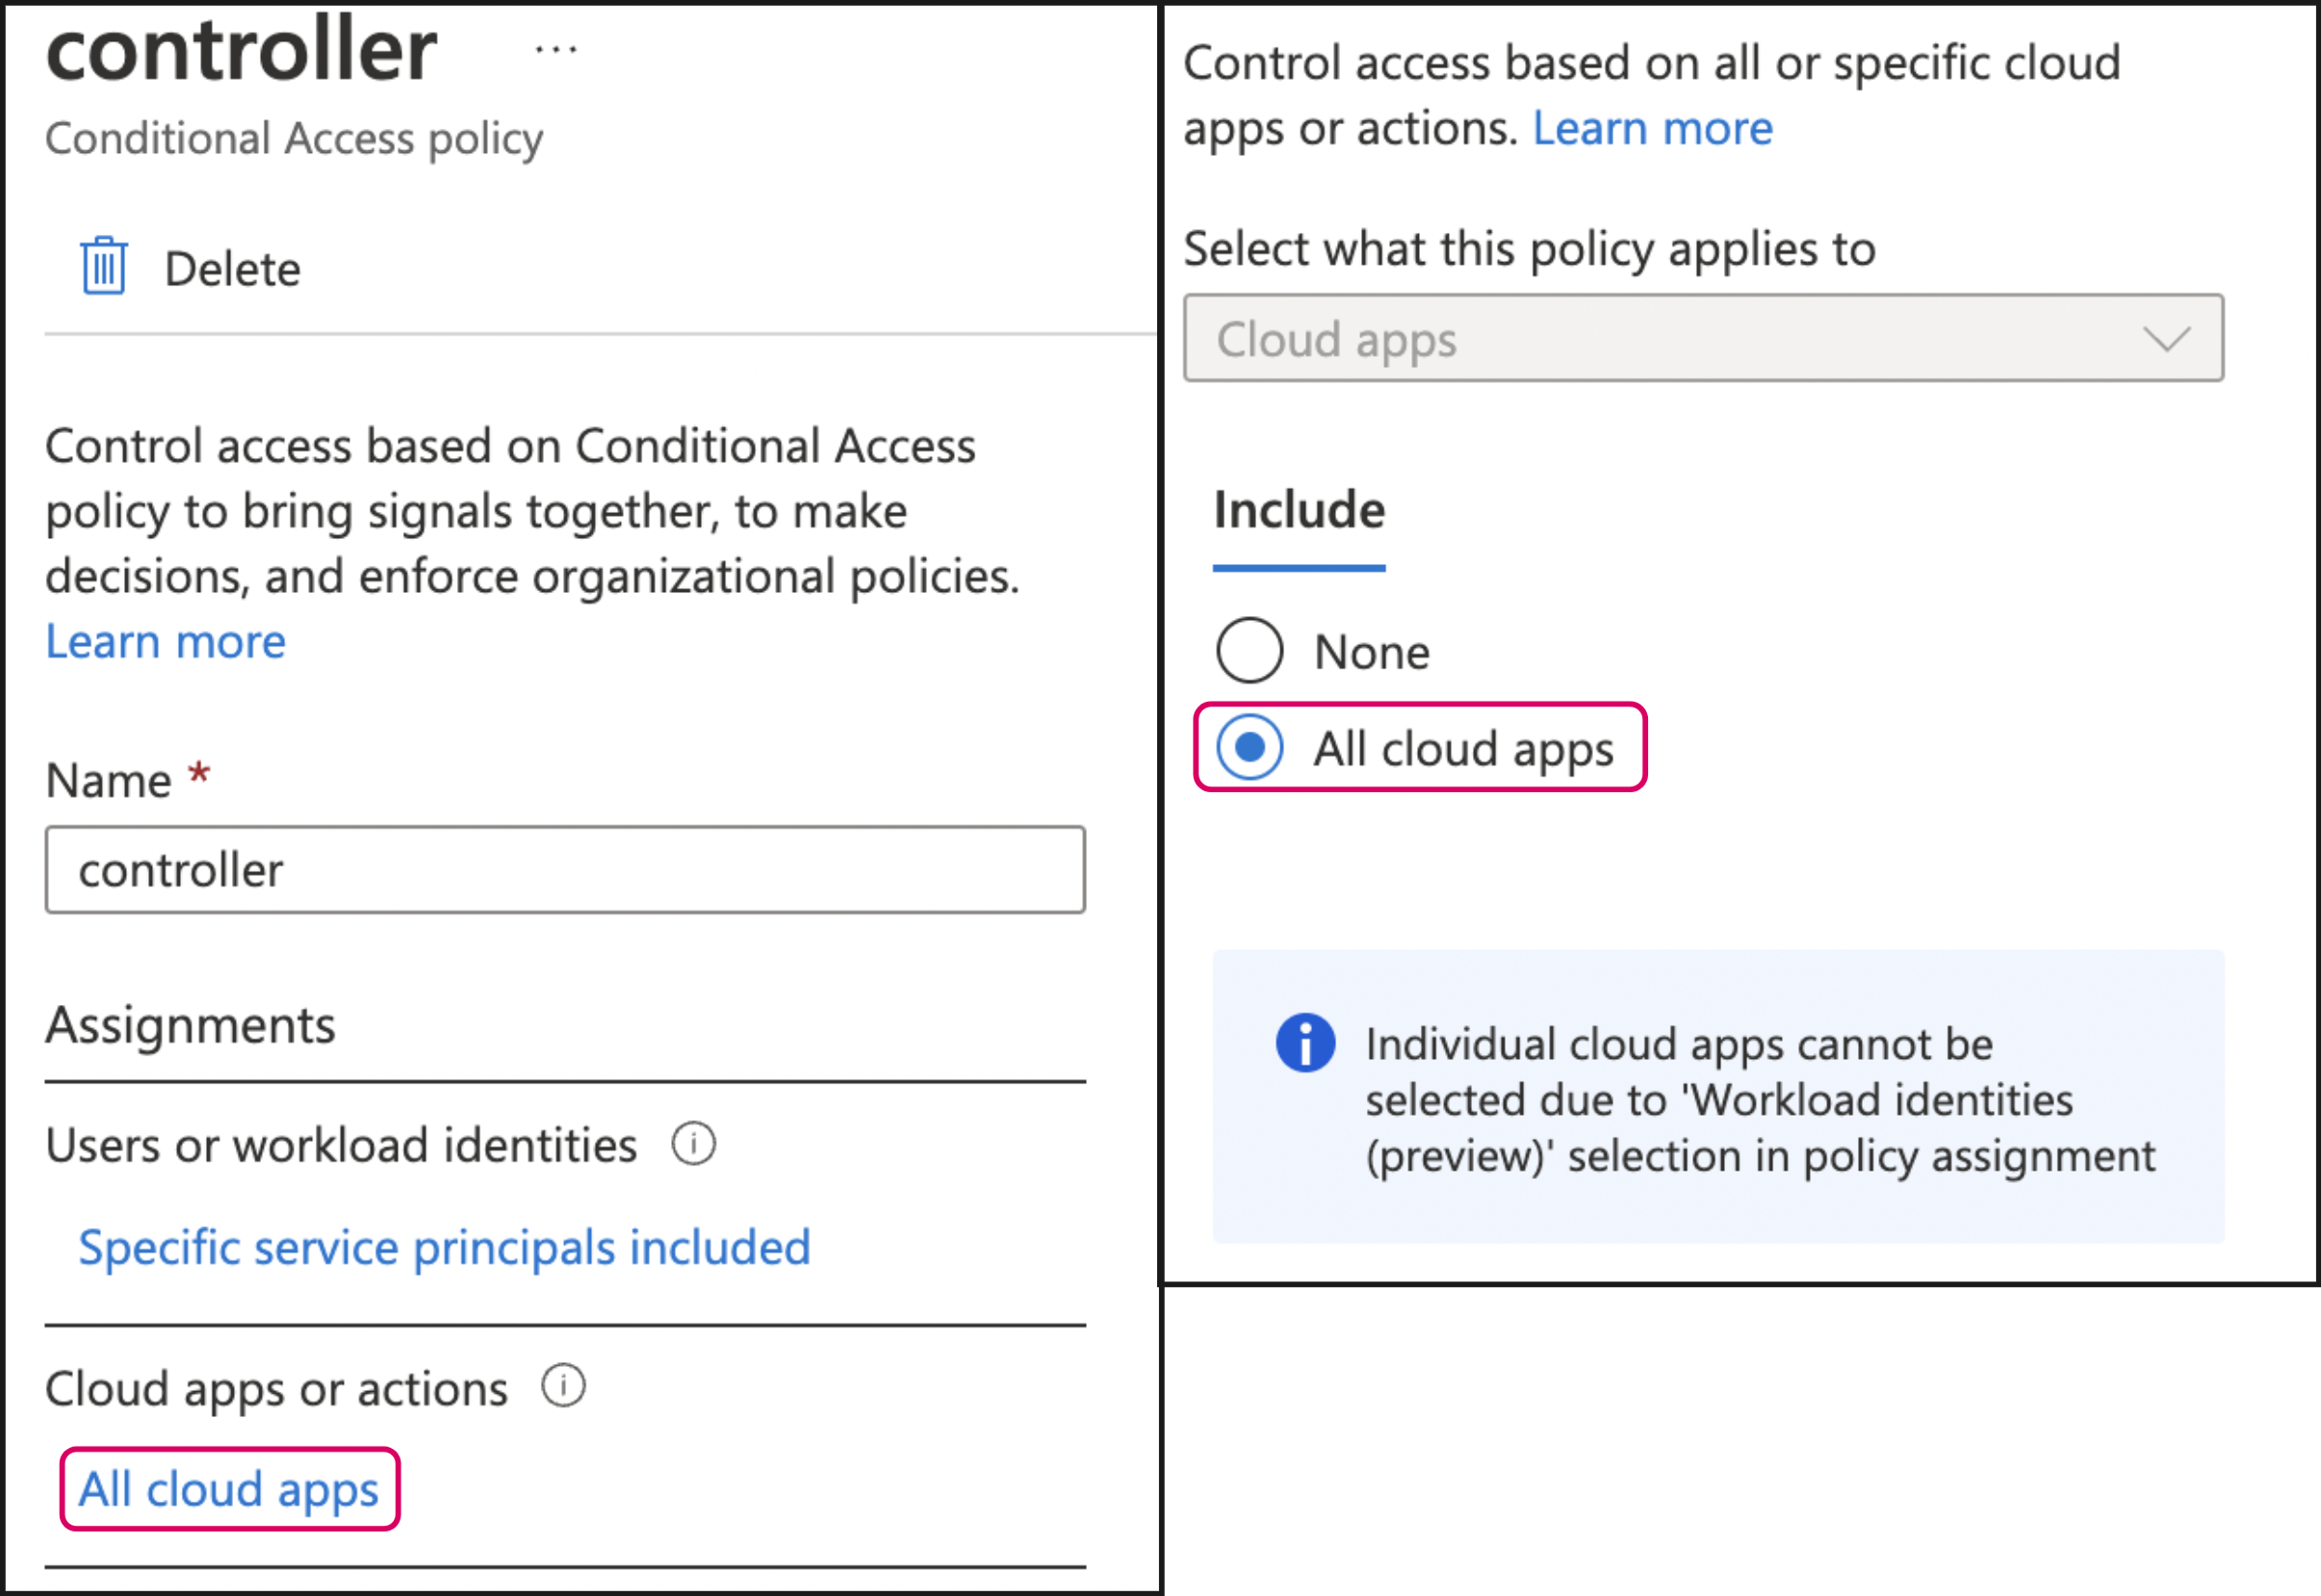
Name the policy and click Specific service principals included.

-
In the resulting dialog, do the following:
-
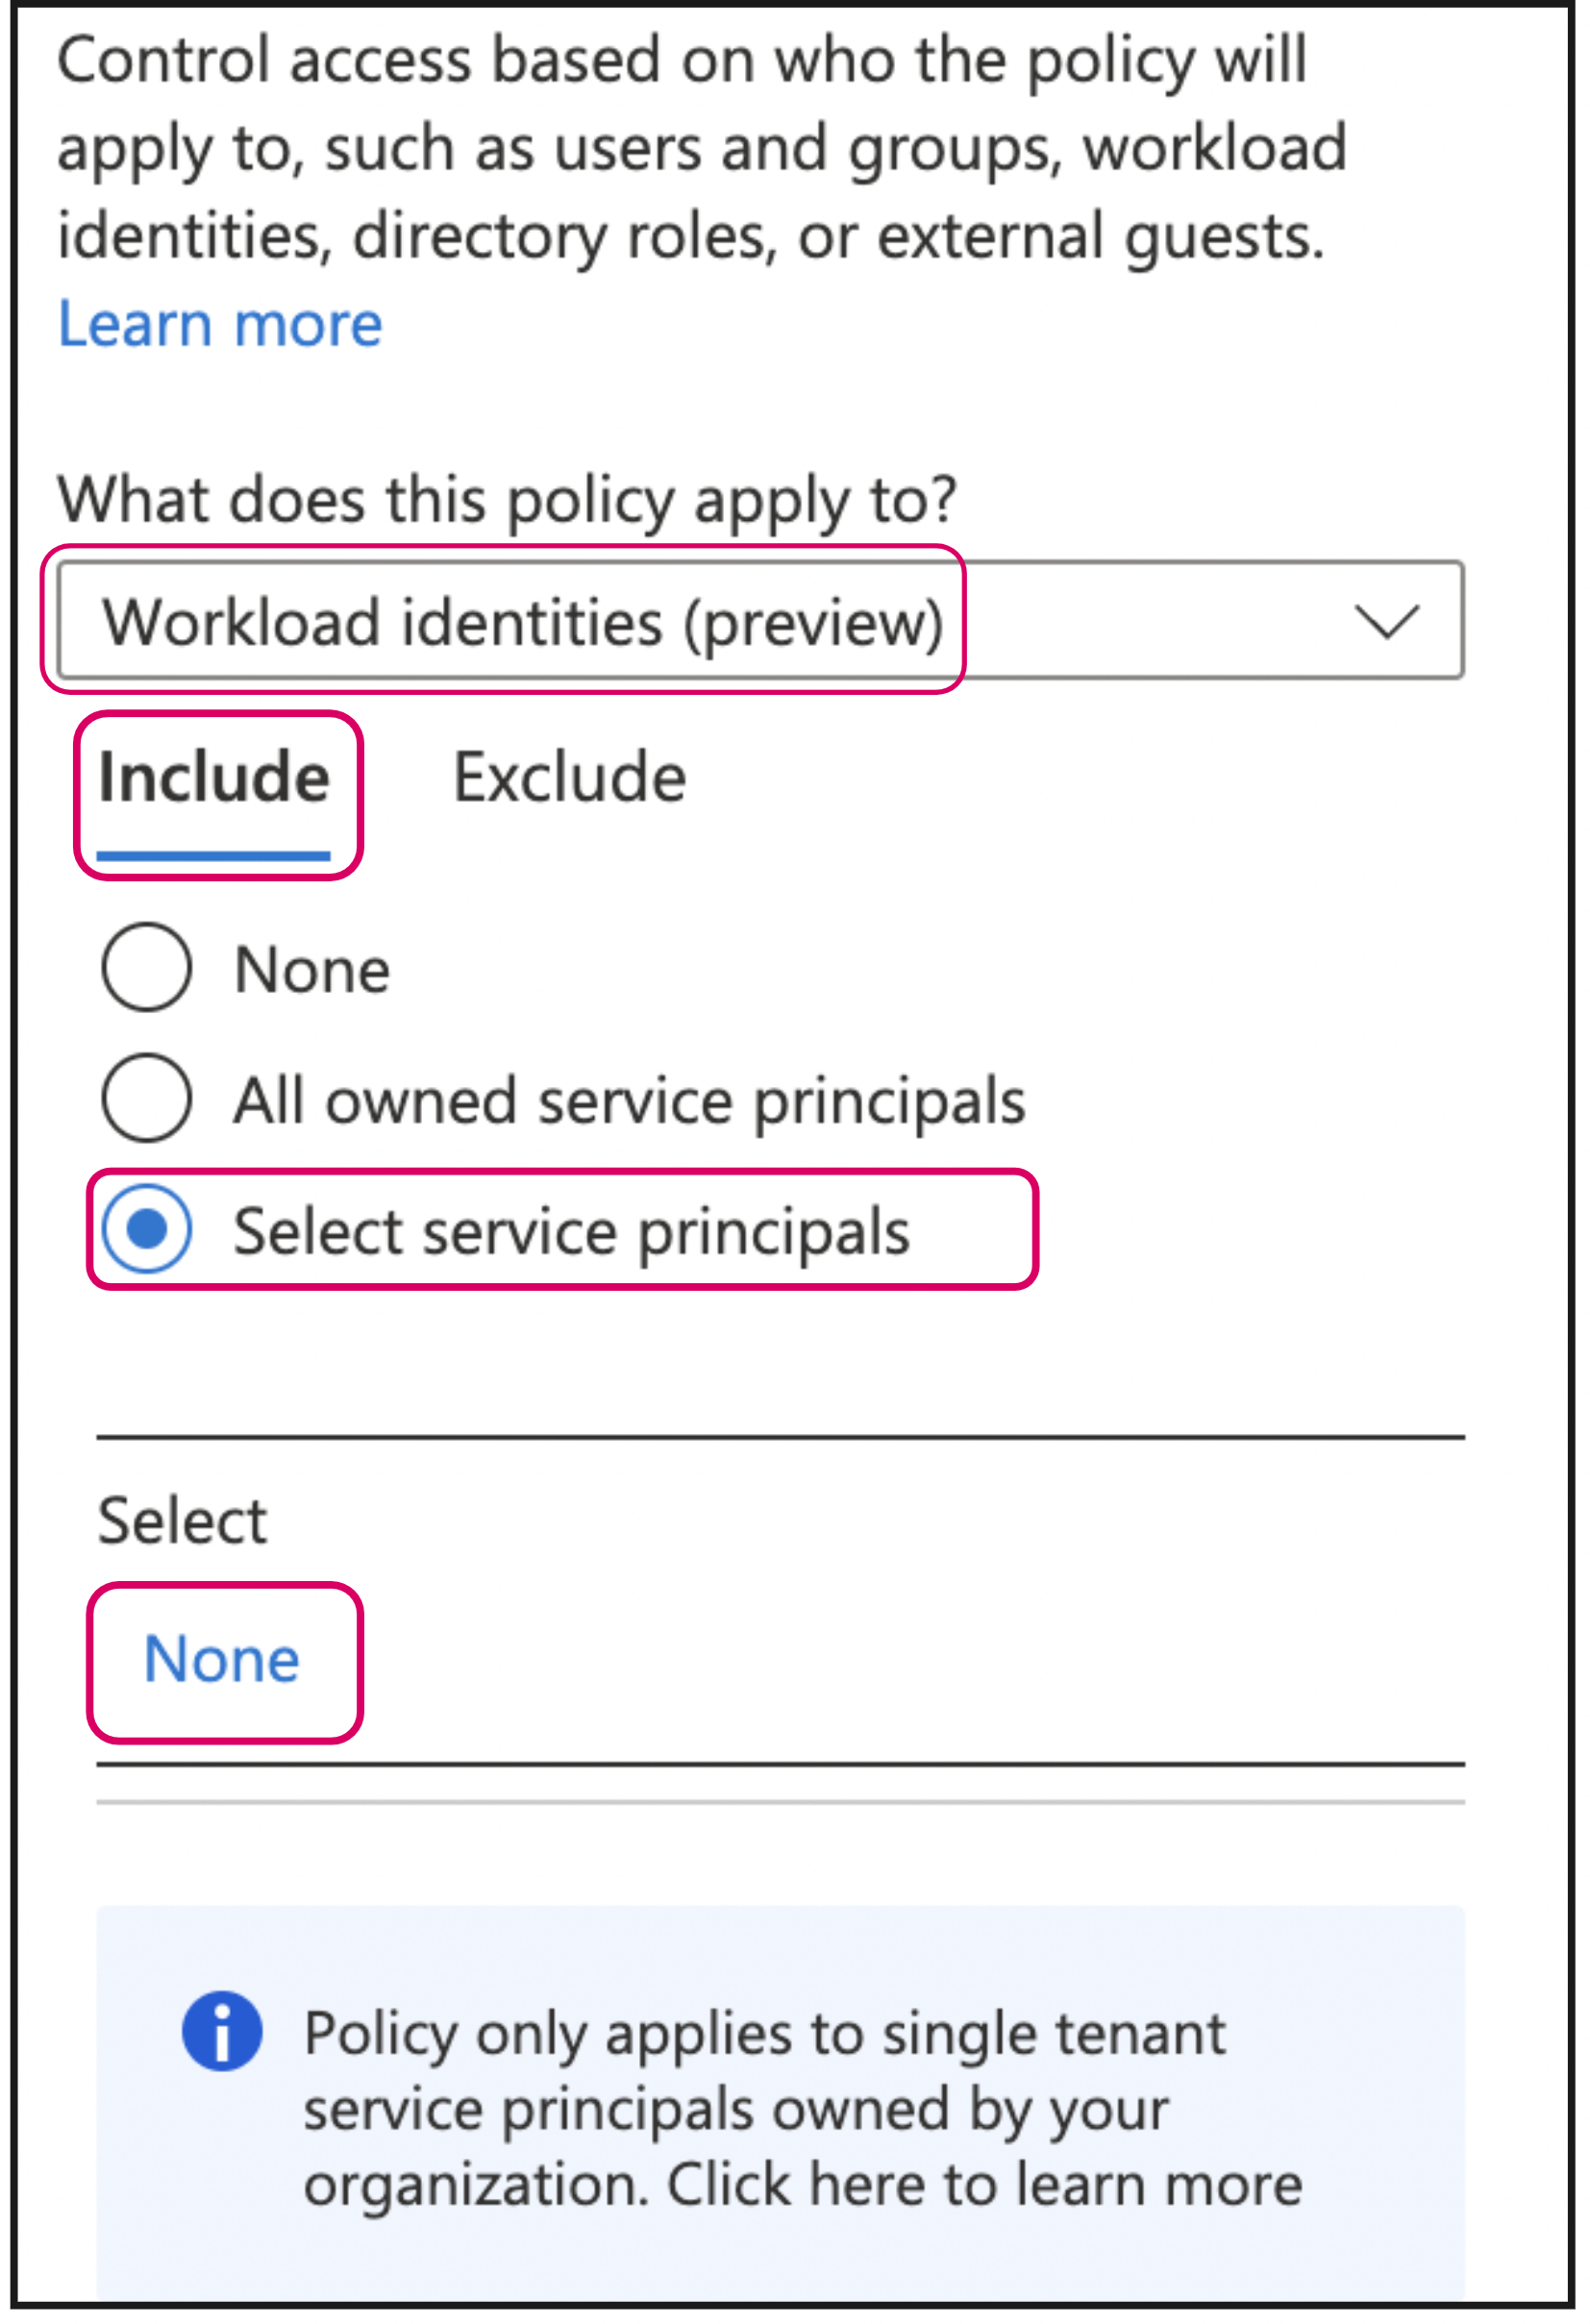
Select Workload identities from the What does this policy apply to list
-
Select the Include tab and select the Select service principals radio button
-
Click the None hyperlink
-
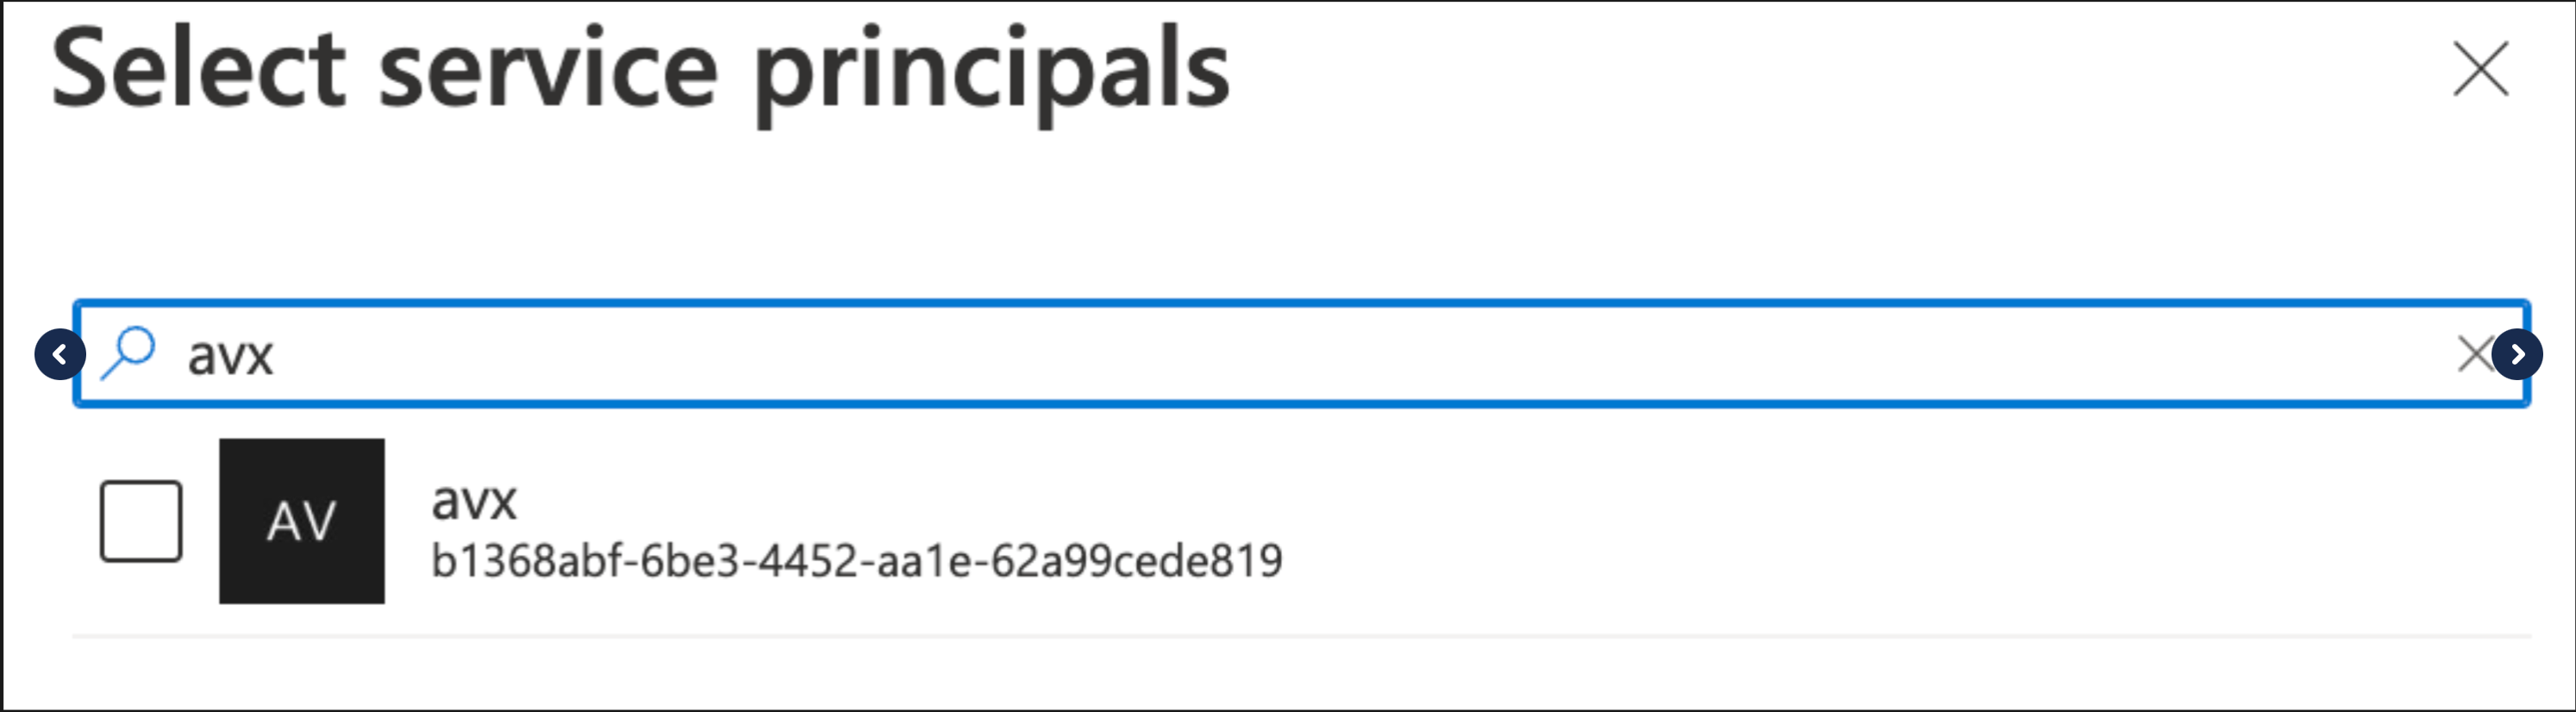
In the resulting dialog, select the principal you created/identified at the beginning of this procedure.
-
In the Conditional Access Policy configuration screen, click All cloud apps under Cloud apps or actions and then select the All cloud apps radio button.
-
After the condition is created, click the hyperlink in the Conditions section and create a location-based exclusion by selecting the named location created in step 1.
-
To finalize the configuration, set the Access controls to Block Access and set Enable policy to On.