Controller Certificate Management: Generate CSR and Import Certificate
Overview
You can use the Aviatrix certificate created at the time of installation for the Controller and Gateway, or you can customize the Aviatrix Controller and Gateway certificate to use an organization-specific certificate. Both type of certificates are issued locally through the Aviatrix Controller’s automated processes. All keys and certificates are in PEM format. To customize the Controller or gateway certificate, see below.
| Make sure there are no special characters (including spaces) in the file name. |
Controller Certificate Management
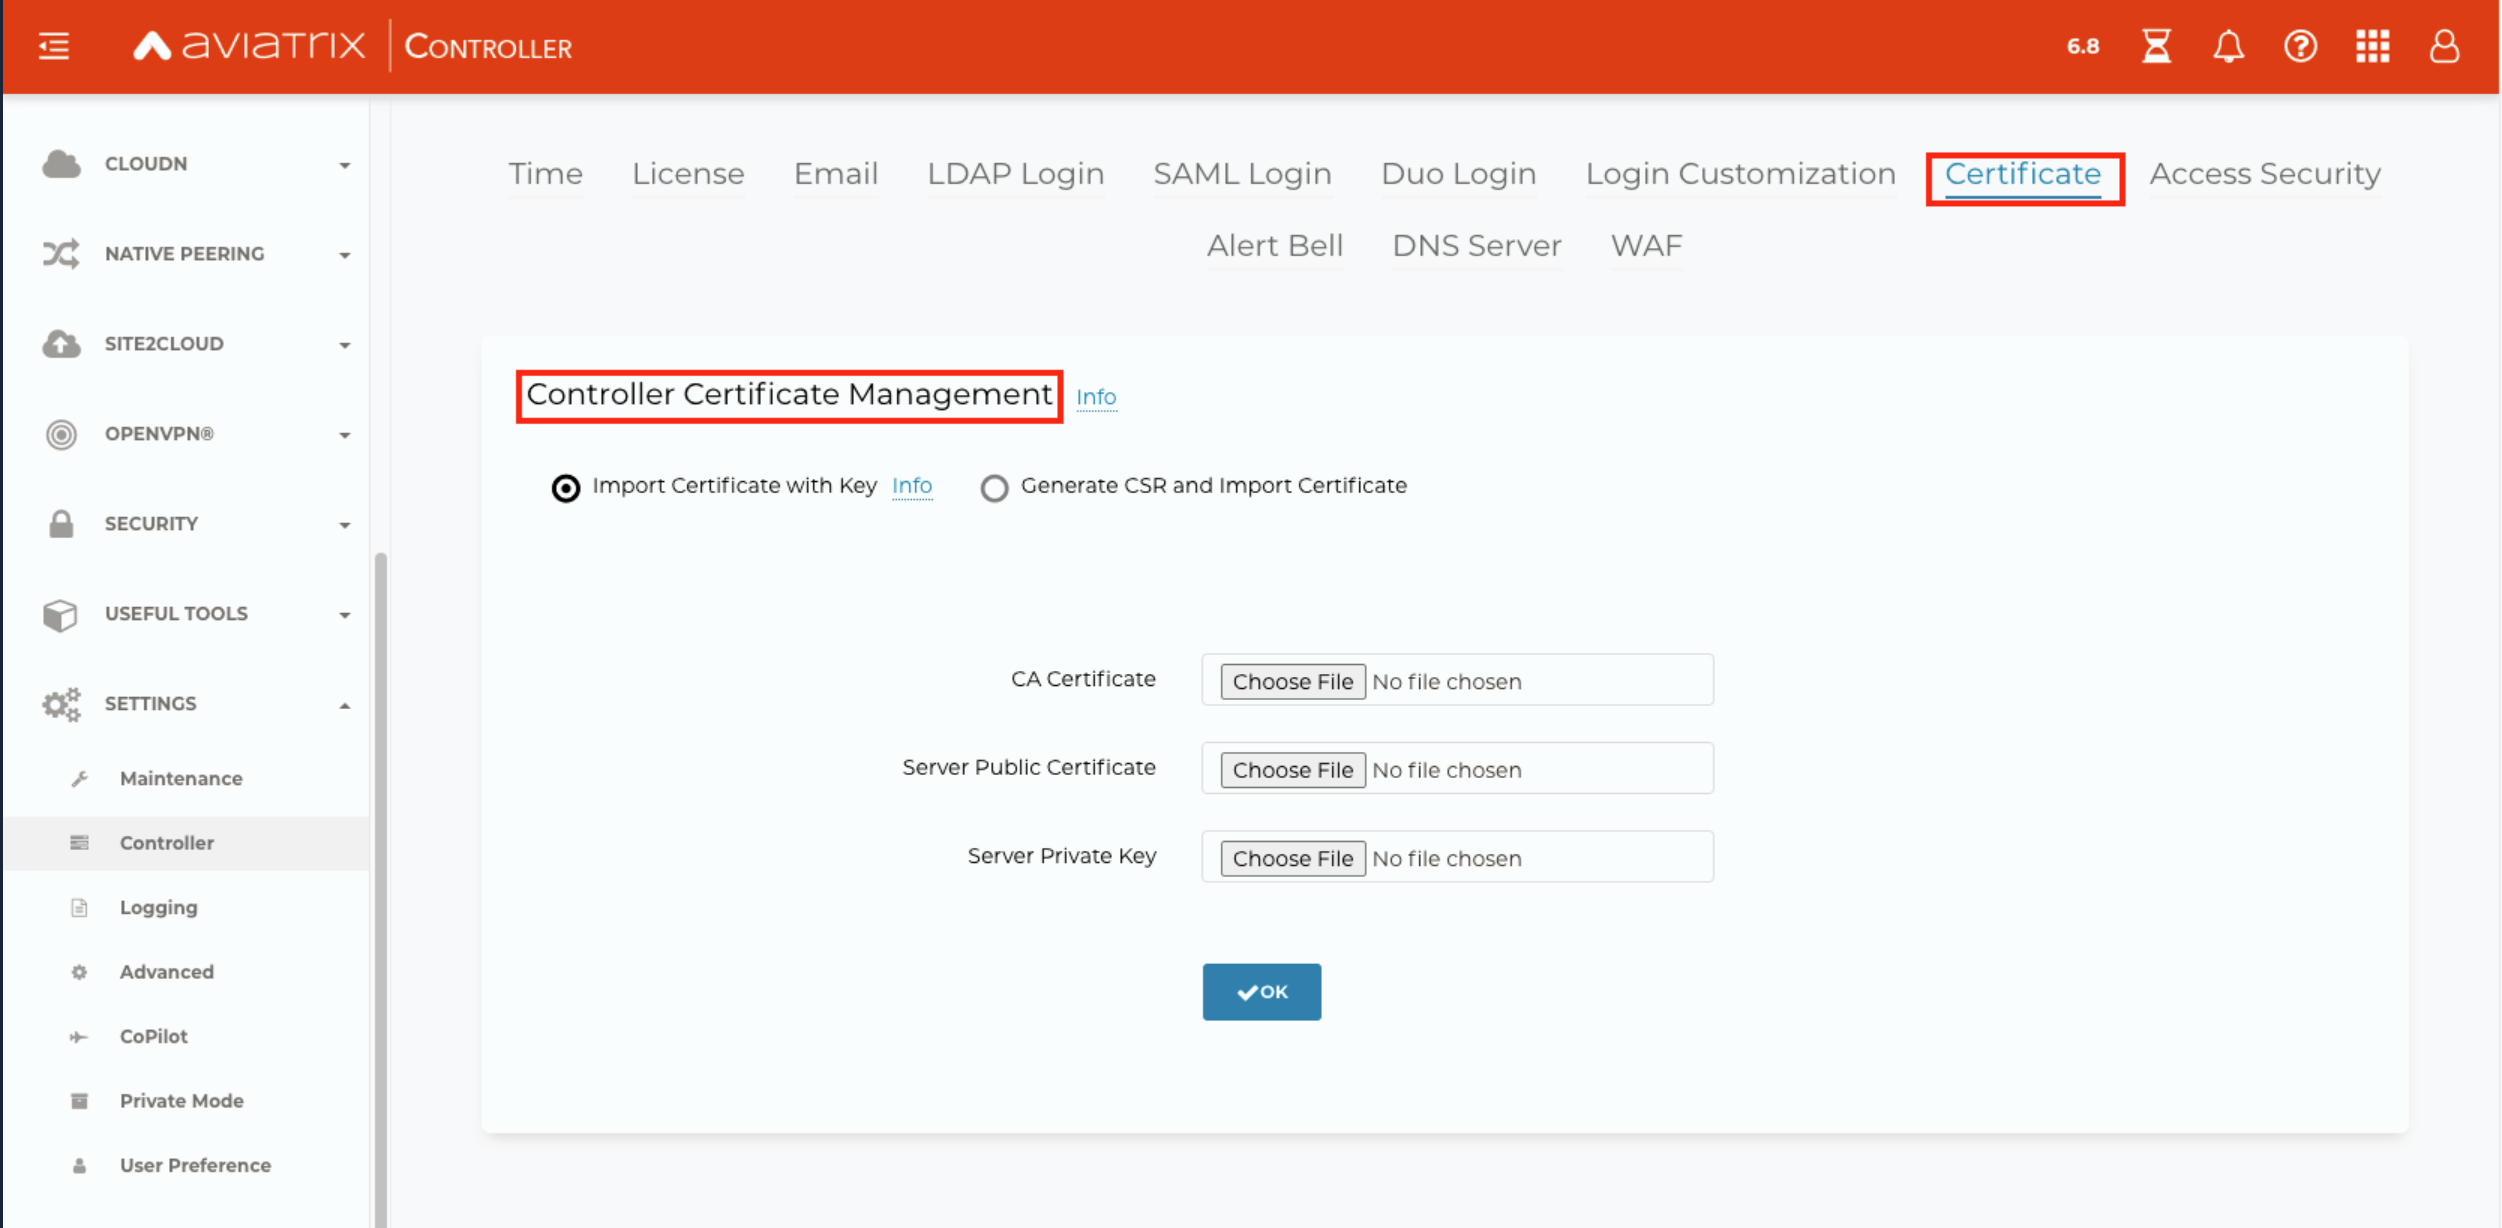
The Aviatrix Controller uses a self-signed certificate by default. That is why you see "Not Secure" in the browser. You can make the Controller more secure by importing a signed certificate.
There are two methods to accomplish this:
-
Generate CSR and Import Certificate
This is the preferred and more secure method, as it involves generating a Certificate Signing Request (CSR) and importing a signed certificate from a trusted certificate authority. The private key remains secure and never leaves the server or application where it was generated.
-
This method involves manually importing a certificate along with its private key, which can expose the private key and lead to potential security risks. While this method may be applicable in certain situations, it is generally not recommended for most modern applications or systems that require a high level of security.
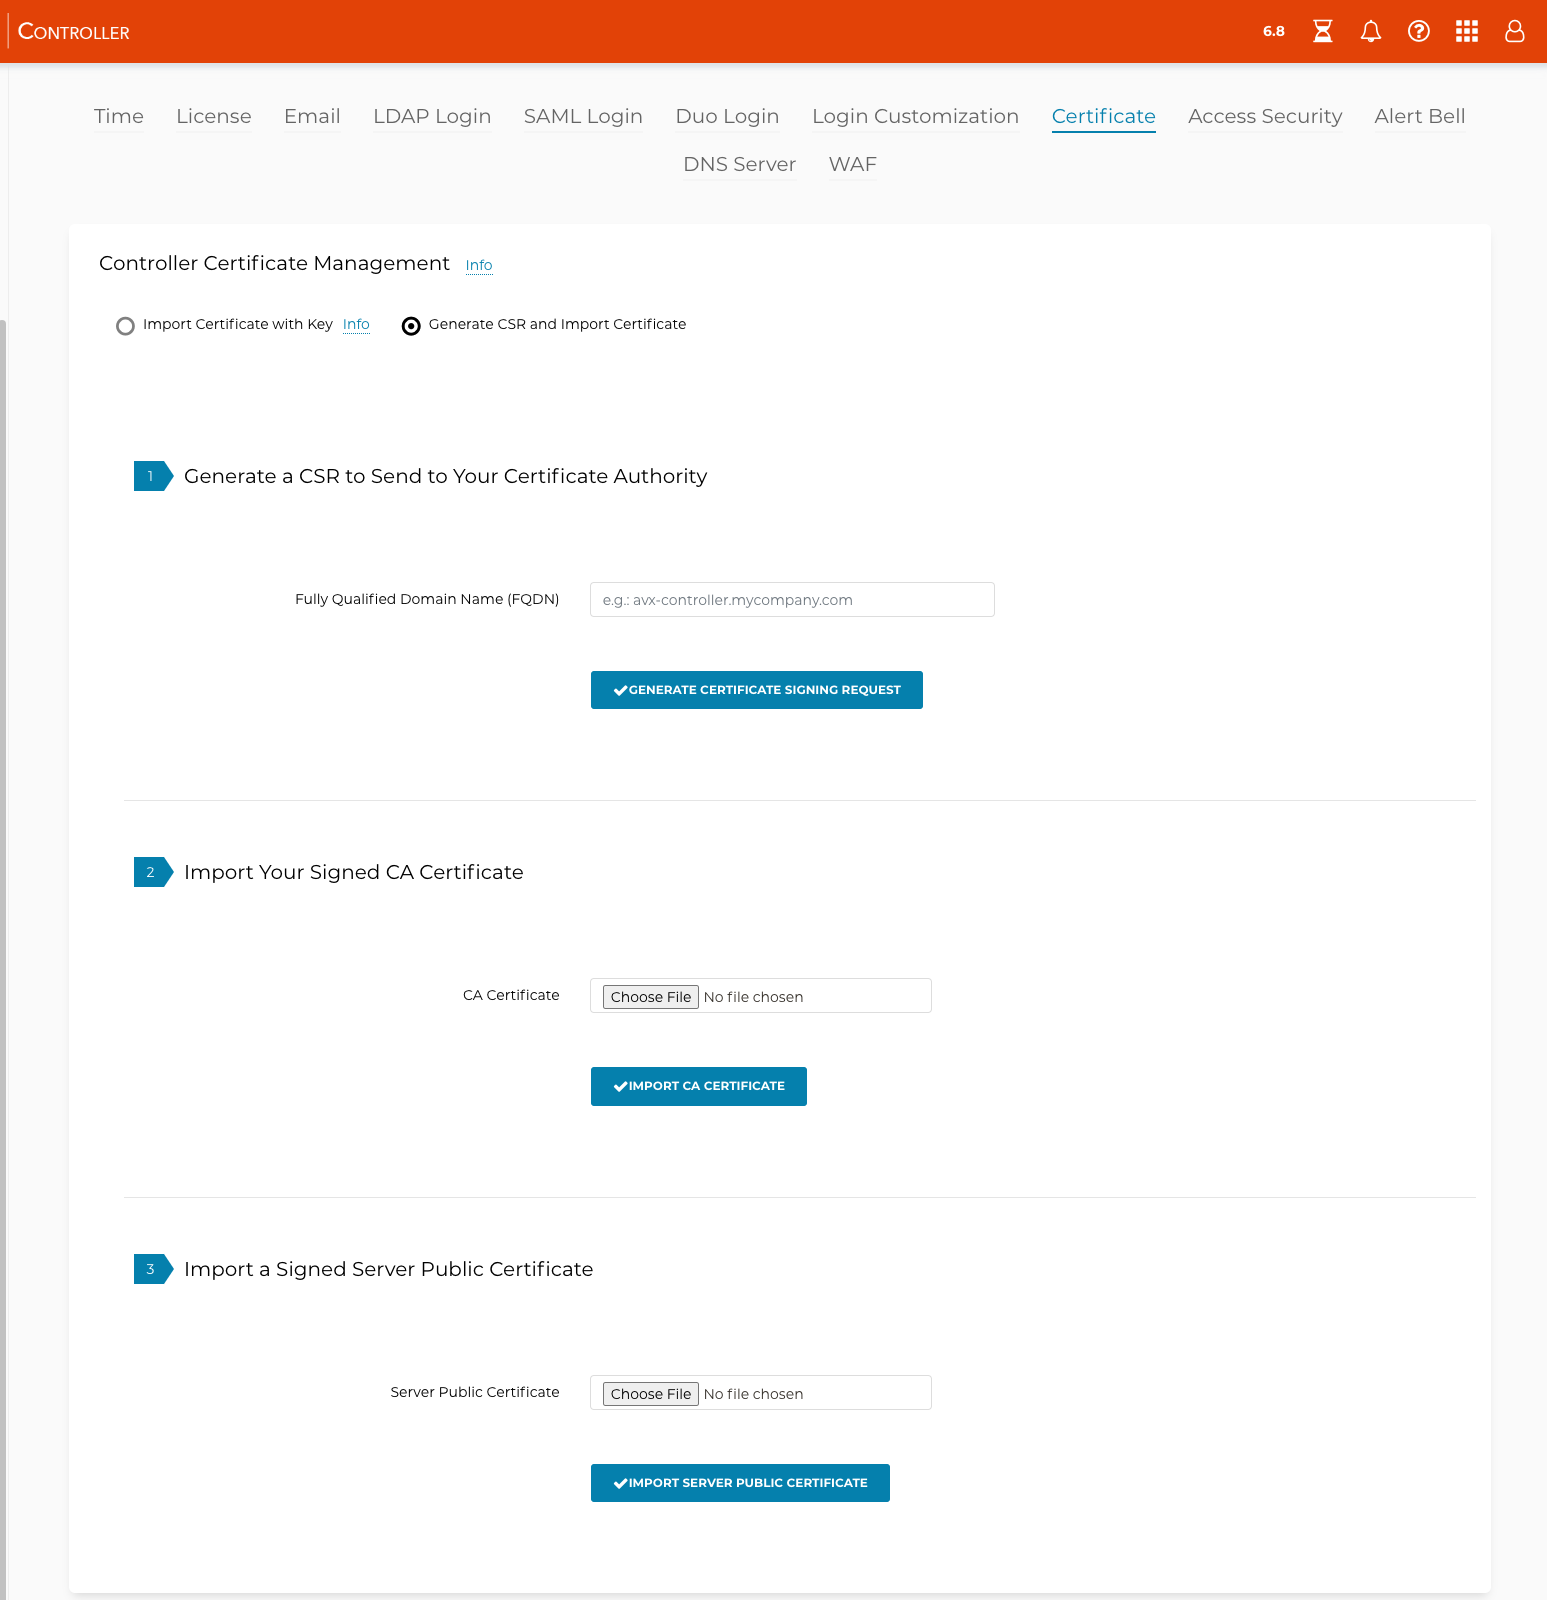
Generate CSR and Import Certificate
In this approach, you generate a .csr file, get it signed by a trusted certificate authority, and then import to the Controller.
Generate the CSR file
-
In the left pane of the Aviatrix Controller, navigate to SETTINGS > Controller, and then click the Certificate tab.
-
Under Controller Certificate Management, select the Generate CSR and Import Certificate option.
-
Enter the Fully Qualified Domain Name (FQDN) of the Controller.
-
Click GENERATE CERTIFICATE SIGNING REQUEST. The CSR is downloaded to your local host.
-
Upload the CSR to a trusted Certificate Authority (CA) and obtain a signed CA certificate and a Server certificate.
-
In the Aviatrix Controller, navigate to the Controller Certificate Management page and click Generate CSR and Import Certificate.
-
In the CA Certificate field, select the signed CA certificate and click IMPORT CA CERTIFICATE.
-
In the Server Public Certificate field, select the Server certificate from step the CA.
-
Click IMPORT SERVER PUBLIC CERTIFICATE to complete the process.
Gateway Certificate Management
| Setting up your custom gateway certificate only works in versions 6.0 or higher. Earlier versions will cause the custom certificate deployment to fail. You must update all existing gateways to at least version 6.0 before applying a custom certificate. Also, if any of your GCP gateways are version 14.04, using a custom gateway certificate is not supported. |
The gateway certificate is created when each gateway is launched via the Aviatrix Controller. At the time of gateway launch, an Aviatrix self-signed certificate is issued to the gateway to make sure all data transmission to and from the gateway is authenticated. If you don’t customize the certificate, your gateway will continue to operate with the default certificate. If you choose to customize the certificate with your organization credentials, you must apply the below steps to customize all existing and new gateways.
In addition, you can confirm and monitor each gateway certificate type in the Aviatrix Controller Console > Gateway > reference column Cert Type.
Setting up the Custom Gateway Certificate
Make sure that all gateways are green/running before you proceed.
-
In the left pane of the Aviatrix Controller, select Settings > Advanced and click the Gateway tab.
-
Under Gateway Certificate Management, the Import CA Certificate with Key option is selected by default. Click Choose File and navigate to the locations of the CA Certificate and the CA Private Key.
-
Click OK.