Configuring VM-Series ethernet1/1 with WAN Zone
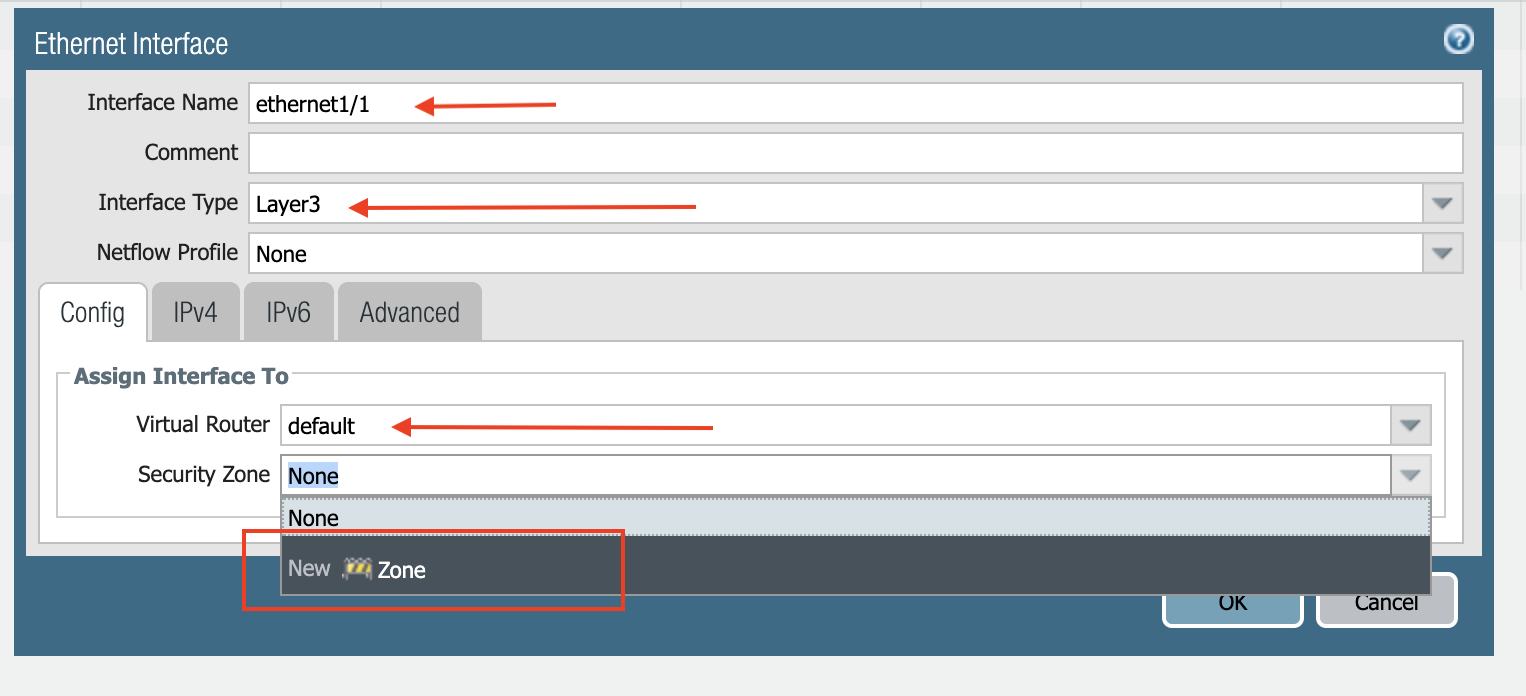
After logging in, select the Network tab and you should see a list of ethernet interfaces. Click ethernet1/1 and configure as per the following screenshot.
-
Select the Network tab.
-
Click ethernet1/1.
-
Select layer3 for Interface Type.
-
Select the Config tab in the popup Ethernet Interface window.
-
Select the default for Virtual Router at the Config tab.
-
Click New Zone for Security Zone to create a WAN zone.
-
At the next popup screen, name the new zone "WAN" and click OK.
-
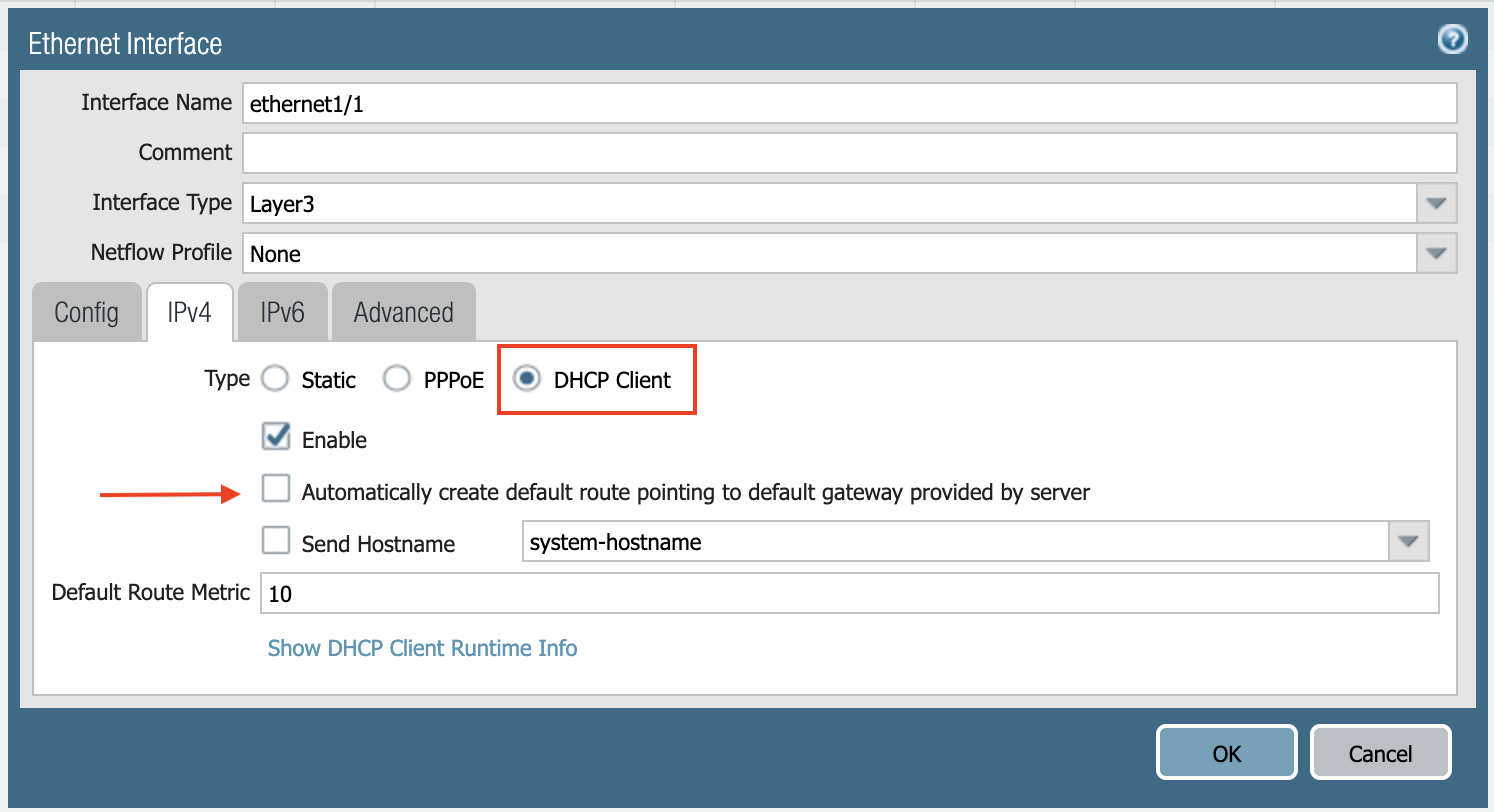
Select IPV4 tab in the popup Ethernet Interface window.
-
Select DHCP Client.
-
Unmark the Automatically create default route pointing to default gateway provided by server, as shown below.
-
Click Commit. Once Commit is complete, you should see the Link State turn green at the Network page for ethernet1/1.