Logging in to Firewall and Configuring Interfaces
-
Barracuda recommends configuring its instances with the Firewall Admin, a stand-alone Windows application. Directions on downloading and using it can be found here.
-
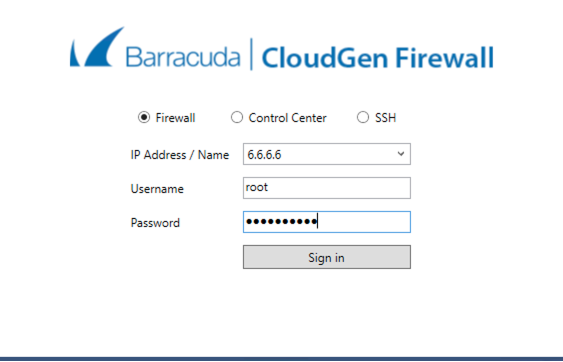
Open the Admin Client and use the Elastic IP, root as the Username, and the instance id from the AWS console as the initial password.
-
You will be prompted to change the password when you first log in. After changing the password and logging in again, you must choose how you will administer the Firewall. Choose Manage via Firewall Admin and confirm.

-
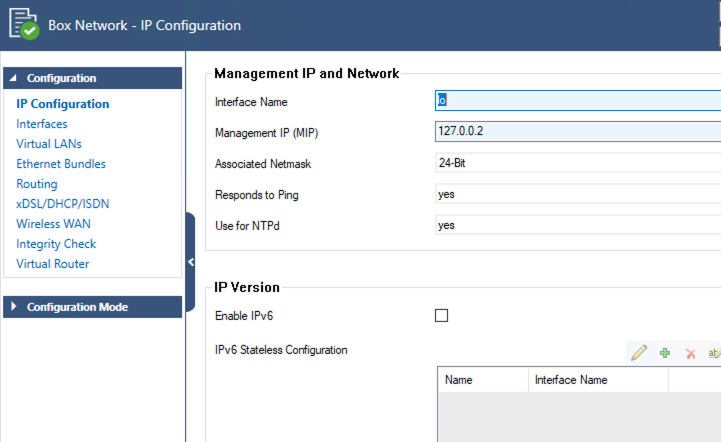
These steps follow the Barracuda Documentation for adding an additional interface. Once logged in you will need to configure the second(eth1) interface on Barracuda. Go to Configuration > Configuration Tree > Box > Network.
-
Click Lock.
-
In the left menu, click Interfaces.
-
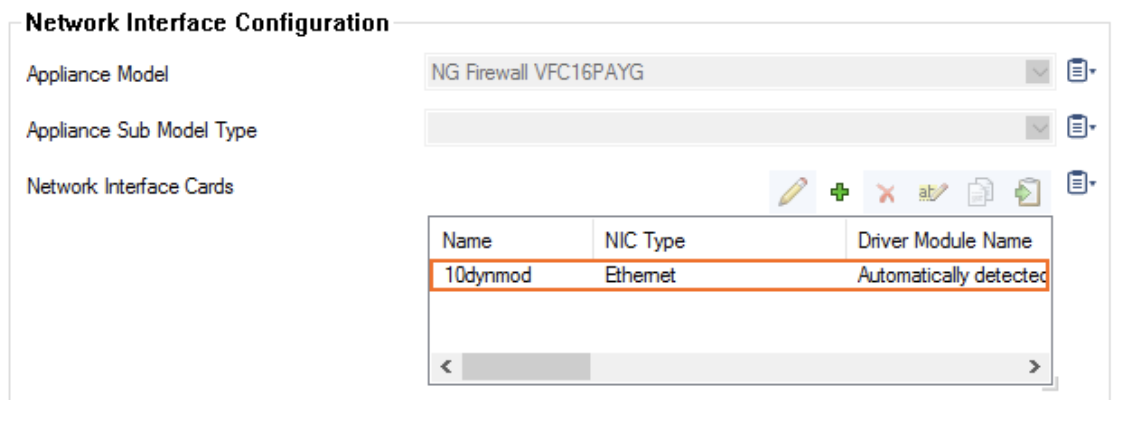
In the Network Interface Cards table, double-click the 10dynmod entry.
-
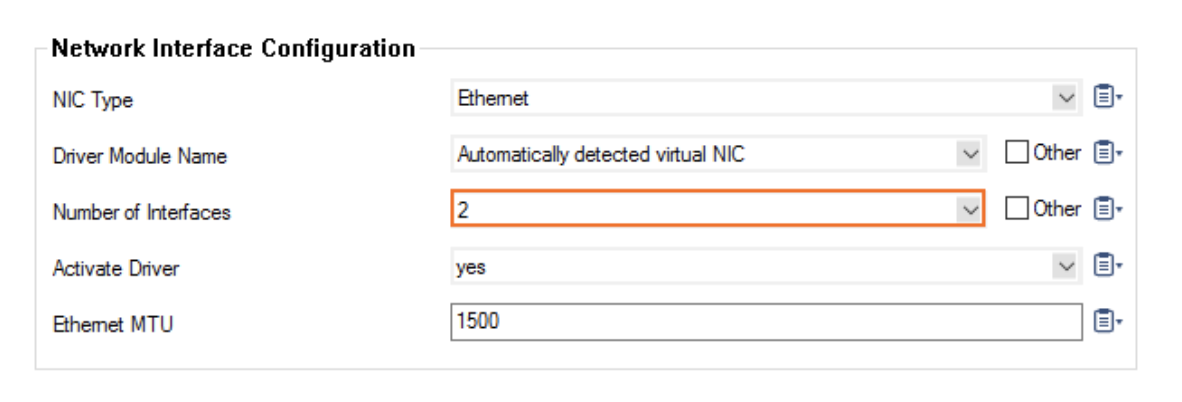
In the resulting Network Interface Configuration dialog,select the number of network interfaces attached to the firewall instance (in this case, 2). Click OK.
-
Click Send Changes and Activate.
Adding a Direct Attached Route for the Second Network Interfce
-
Go to Configuration > Configuration Tree > Box > Network.
-
Click Lock.
-
In the left menu, click Routing.
-
Click +in the IPv4 Routing Table to add an attached route.
-
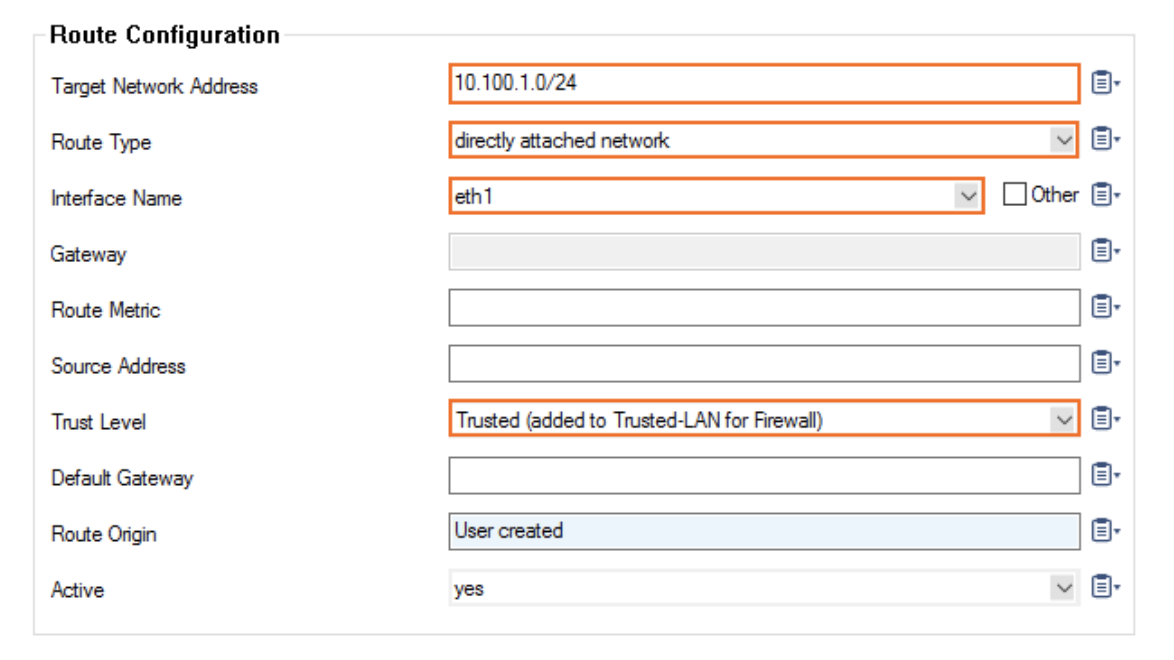
Target Network address will be the subnet you put on eth1, the aviatrix-fireGW-DMZ-firewall subnet.
-
For the Route Type, select direct attached network.
-
For the Interface Name, select eth1.
-
For the Trust Level, select Trusted.
-
-
Click OK.
-
Click Send Changes and Activate.
Activating the Network Configuration
-
Go to Control > Box.
-
In the Network section of the left menu, click Activate new network configuration. The Network Activation window opens.
-
Click Failsafe.
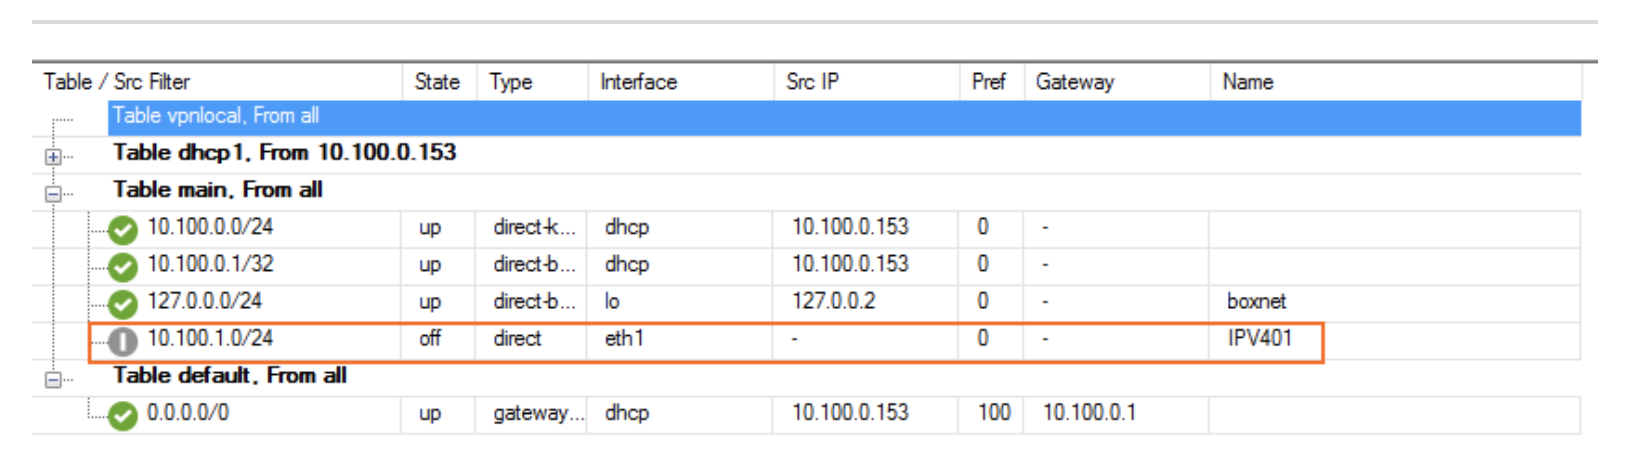
The route is now pending in Control > Network.
Adding a Virtual IP to the Virtual Server
A virtual IP needs to be added to the Virtual Server. It will be the private IP assigned to your eth1 interface from the AWS console.
-
Go to Configuration > Configuration Tree > Box > Virtual Servers > your virtual server > Server Properties.
-
Click Lock.
-
Click + in the Additional IP table. The Additional IP window opens.
-
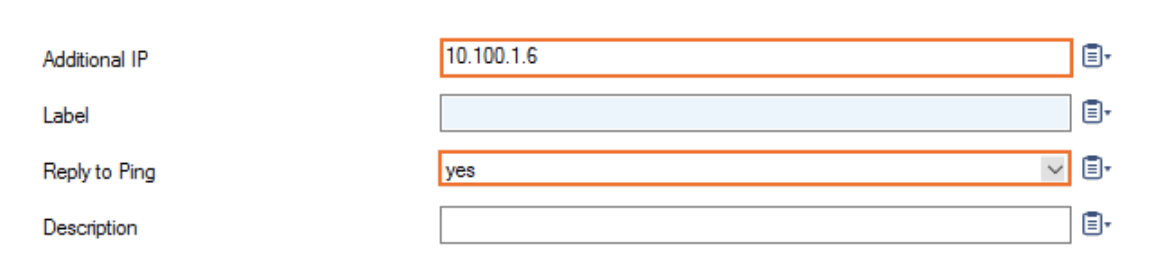
In Additional IP, add the private IP address configured for the network interface in step 1.
-
Reply to Ping and select Yes.
-
-
Click OK.
-
Click Send Changes and Activate.