Bootstrap Configuration Example for FortiGate Firewall in Azure
Using the bootstrap option significantly simplifies Fortinet FortiGate initial configuration setup.
In this document, we provide a bootstrap example to set up an "Allow All" firewall policy, firewall health check policy and static routes for the FortiGate to validate that traffic is indeed sent to the FortiGate for VNet-to-VNet traffic inspection.
For a manual setup, follow the manual setup example.
There are two ways to configure Fortinet FortiGate via Bootstrap Configuration.
Method 1: Configuring FortiGate Firewall via User Data
Follow the Aviatrix Firewall Network (FireNet) workflow to this step to launch the firewall instance.
To configure FortiGate using Custom Data:
-
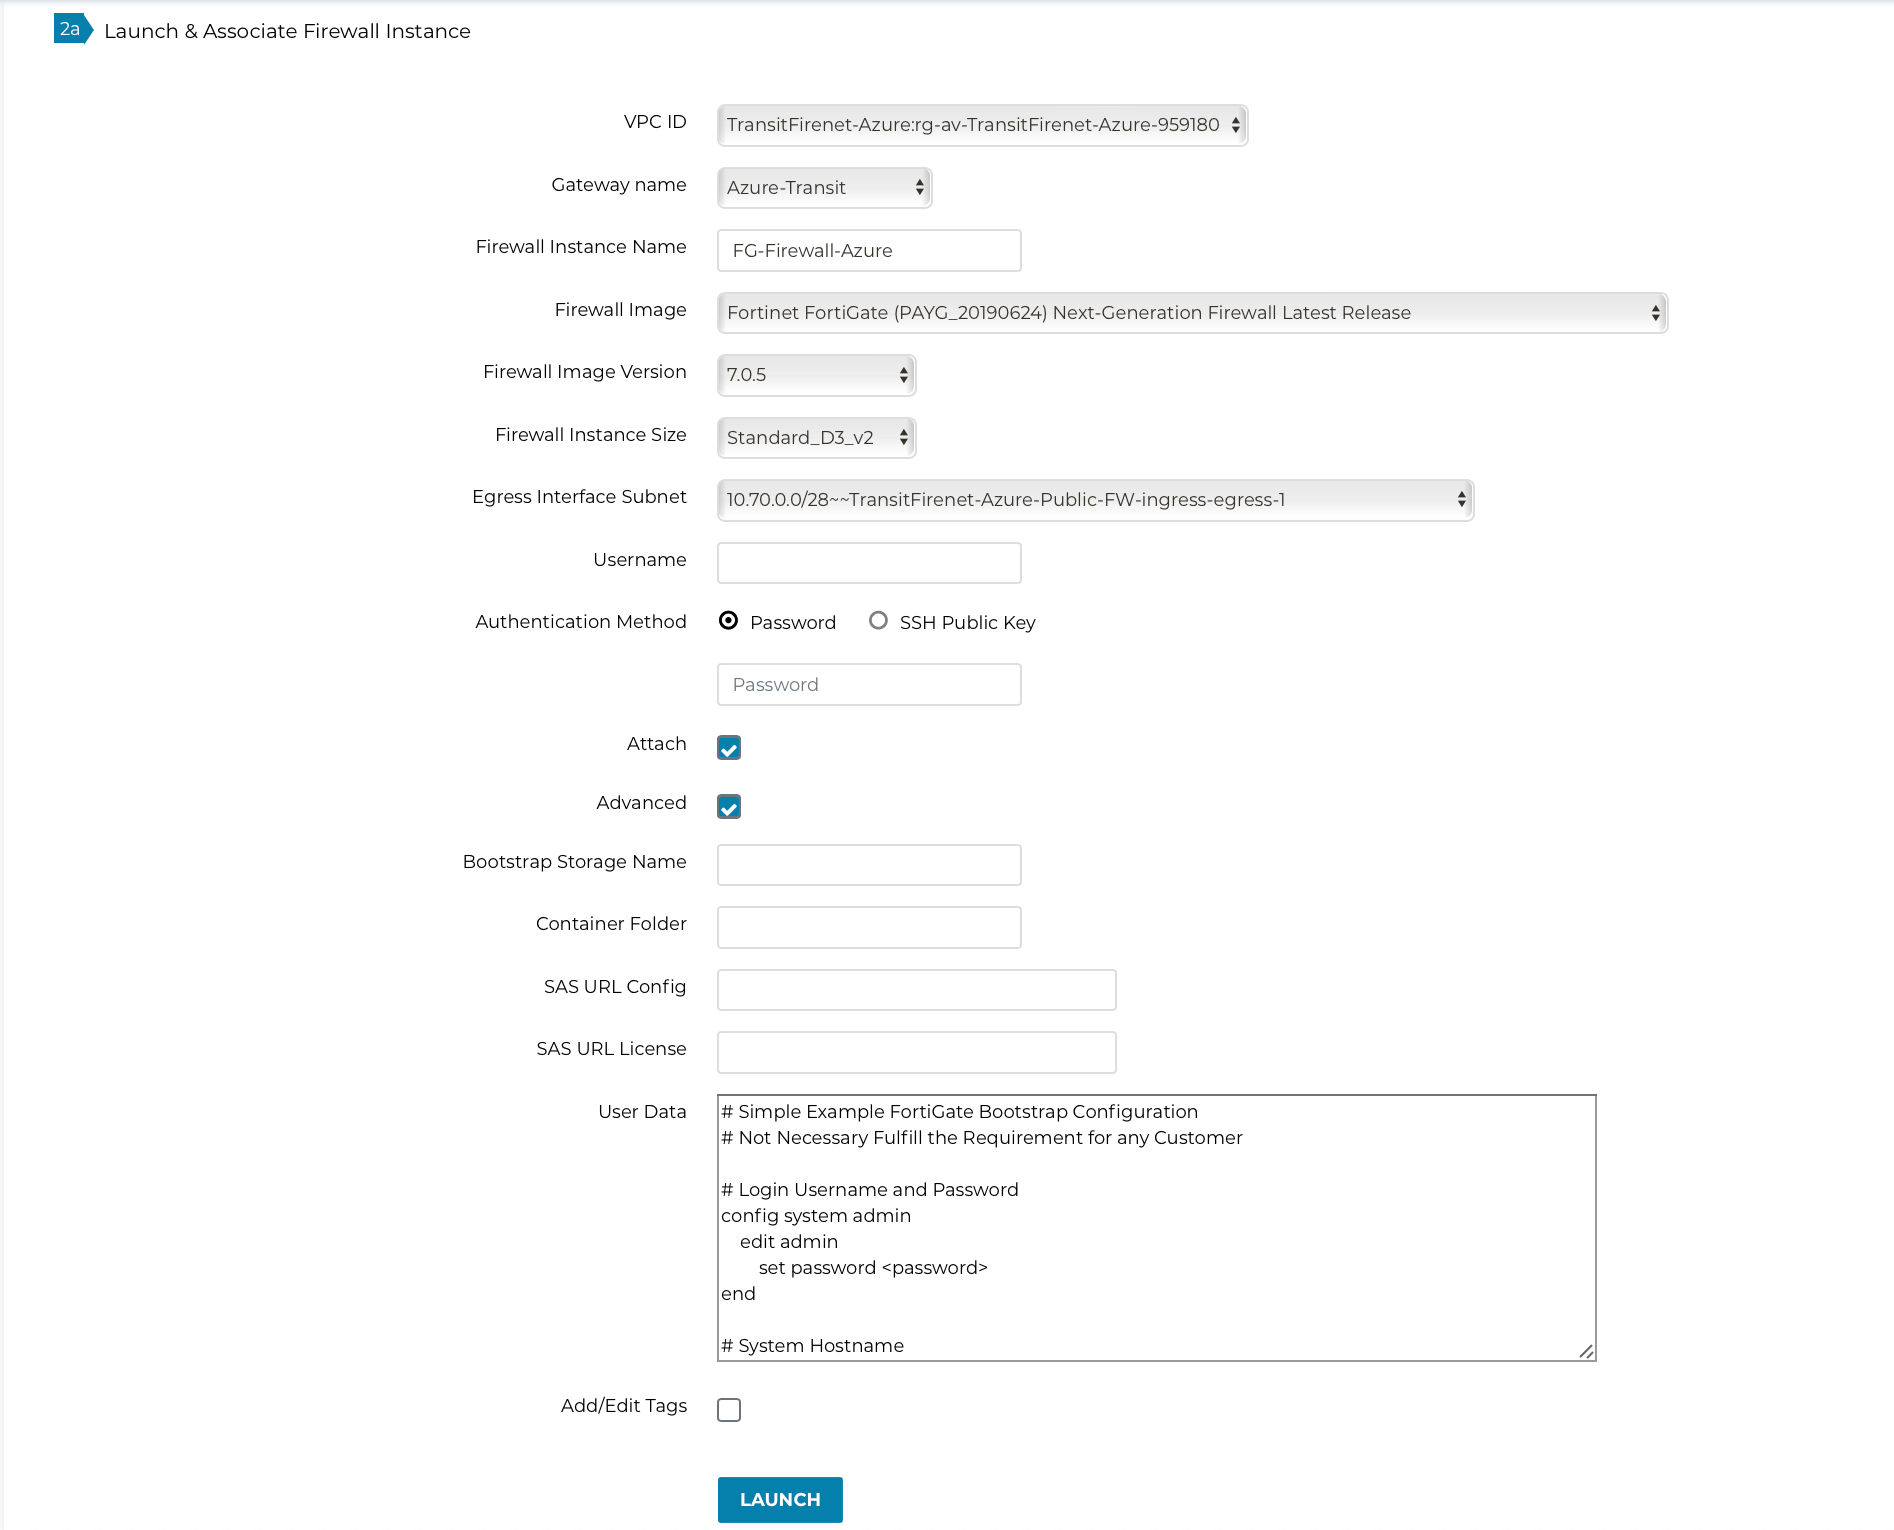
In the Aviatrix Controller, navigate to Firewall Network > Setup > Firewall > Launch & Associate Firewall Instance.
-
Fill in the required fields. Click Advanced. Fill in the following parameters.
| Advanced Field | Example Value |
|---|---|
User Data |
Bootstrap Configuration as shown below |
Sample FortiGate Bootstrap Configuration to configure firewall "Allow-all" policy, health check policy and RFC 1918 static routes is shown below:
# Simple Example FortiGate Bootstrap Configuration
# Not Necessary Fulfill the Requirement for any Customer

# Login Username and Password
config system admin
    edit admin
        set password <password>
end

# System Hostname
config system global
    set hostname myhost
    set timezone 04
end

# Important HTTPS needs to be allowed on LAN interface for Firewall Health Check
config system interface
    edit port2
        set allowaccess https
    next
end

#RFC 1918 Routes and Subnet Default Gateway
config router static
    edit 1
        set dst 10.0.0.0 255.0.0.0
        set gateway 10.26.0.81
        set device port2
    next
    edit 2
        set dst 192.168.0.0 255.255.0.0
        set gateway 10.26.0.81
        set device port2
    next
    edit 3
        set dst 172.16.0.0 255.240.0.0
        set gateway 10.26.0.81
        set device port2
    next
    # LoadBalancer IP
    edit 4
        set dst 168.63.129.16 255.255.255.255
        set gateway 10.26.0.81
        set device port2
    next
end

# Firewall Allow All Policy Example
config firewall policy
    edit 1
        set name allow_all
        set srcintf port2
        set dstintf port2
        set srcaddr all
        set dstaddr all
        set action accept
        set schedule always
        set service ALL
    next
end
-
Launch the instance. Wait for 15 minutes for it to boot up and initialize.
-
Log in to the HTTPS interface of the public IP with username "admin" and the password specified in the example Fortigate Bootstrap Configuration. For initial FortiGate login information, go to Credentials for FortiGate Initial Login. You must be registered to access the Aviatrix Customer Support website. If you are not already registered, you can sign up at https://support.aviatrix.com.
Method 2: Configure Fortigate Using Azure Blob
Creating Storage Account and Private Container
Log in to Azure’s console and create a storage account, and private container in the Azure blob for bootstrap with a unique name, for example "bootstrap-fortigate", using steps 2 and 3 in this guide with the following structure:
Storage Account
    Container
        fortigatebootstrap/
            init.txt
            license.txt
Uploading Config Files
-
The example init.conf file contains the "Allow All" setup. To download the file, click init.txt.
-
For the example license.lic file (optional), click license.txt.
-
Upload these two files in the blob. Please follow Step 4 in this guide.
Launching the Fortigate Instance
First follow Step 5 to get the SAS URL for Configuration and License.
Follow the Aviatrix Firewall Network (FireNet) workflow to this step.
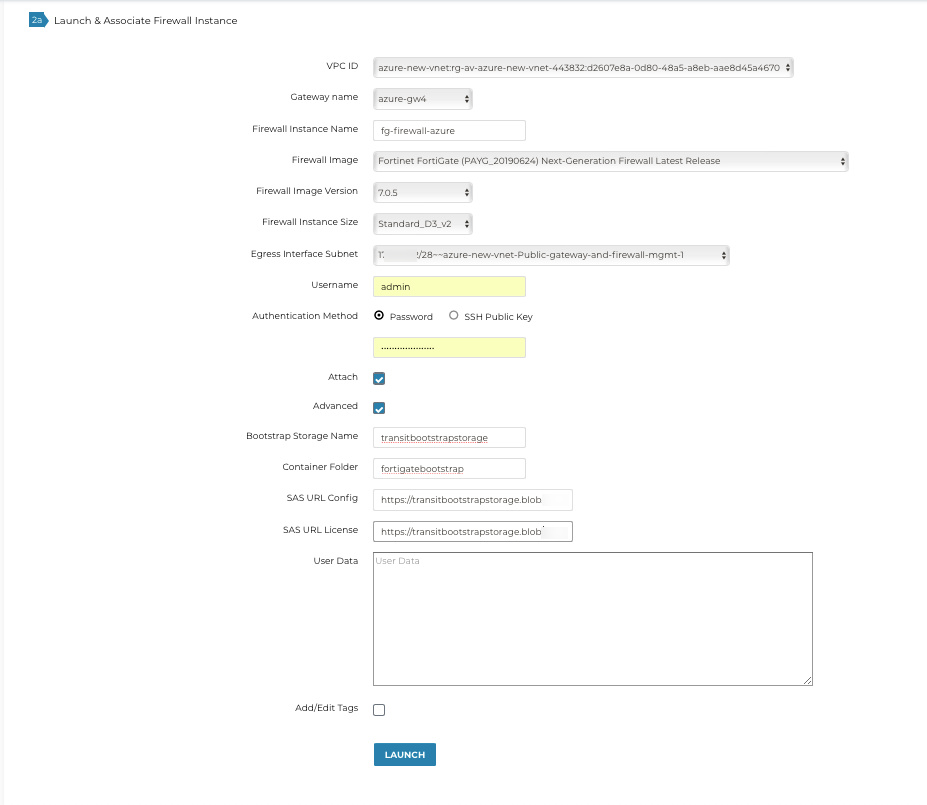
Fill in the required fields. Click Advanced. Fill in the following parameters.
| Advanced Field | Example Value |
|---|---|
Bootstrap Storage Name |
Azure Storage Name (e.g. transitbootstrapsotrage) |
Container Folder |
Private Container Name (e.g. fortigatebootstrap) |
SAS URL Config |
SAS Config URL (Follow the given guide) |
SAS URL License |
SAS License URL (Follow the given guide) |
Example Screenshot:
Launch the instance. Wait for 15 minutes for it to boot up and initialize. Please make sure to verify the RFC 1918 and Internet static route in FortiGate firewall.
Log in to the HTTPS interface of the public IP with username "admin" and the password specified in the example FortiGate Bootstrap Configuration. For initial FortiGate login information, go to ZENDESK_TITLE. You must be registered to access the Aviatrix Customer Support website. If you are not already registered, you can sign-up at https://support.aviatrix.com.
Ready to Go
Now your firewall instance is ready to receive packets.
The next step is to validate your configurations and polices using FlightPath and Diagnostic Tools (ping, traceroute etc.).
Launch one instance in PROD Spoke VNet and one in DEV Spoke VNet. Start pinging packets from an instance in DEV Spoke VNet to the private IP of another instance in PROD Spoke VNet. The ICMP traffic should go through the firewall and be inspected in the firewall.