Google Cloud Getting Started Guide
See Required Marketplace Offers for descriptions of the required subscriptions for Google Cloud.
Introduction
The Aviatrix cloud network solution consists of two components, the Controller and Gateway, both of which are Google Compute Engine instances. The gateway is launched from the Controller. The management interface is called CoPilot. This guide helps you to launch the Controller instance and CoPilot in Google Cloud Platform (GCP):
A Google Cloud project corresponds to an Aviatrix cloud account or an AWS (IAM) account with its own credentials. A network in a Google Cloud project is logically equivalent to a VPC in AWS, but with a few significant differences. For example, a network in Google Cloud project can have disparate subnets and a subnet can connect across regions.
The Aviatrix Platform is a secure multicloud networking platform. After you deploy your Aviatrix Controller with a CSP, then you can deploy your gateways in any supported cloud.
Aviatrix pricing offers you a pay-as-you-go option without any up-front commitments or contract negotiations.
Prerequisites
See Planning Your Controller Deployment for prerequisites for deploying from the Google Cloud Marketplace, including:
-
Receive your Aviatrix Customer ID.
-
Create a Google Cloud Account.
-
Create a Google Cloud Project.
-
(Optional) Create networks.
Launch Controller on Google Cloud
Deploy Aviatrix Controller in Google Cloud Marketplace
-
Go to Google Cloud marketplace.
-
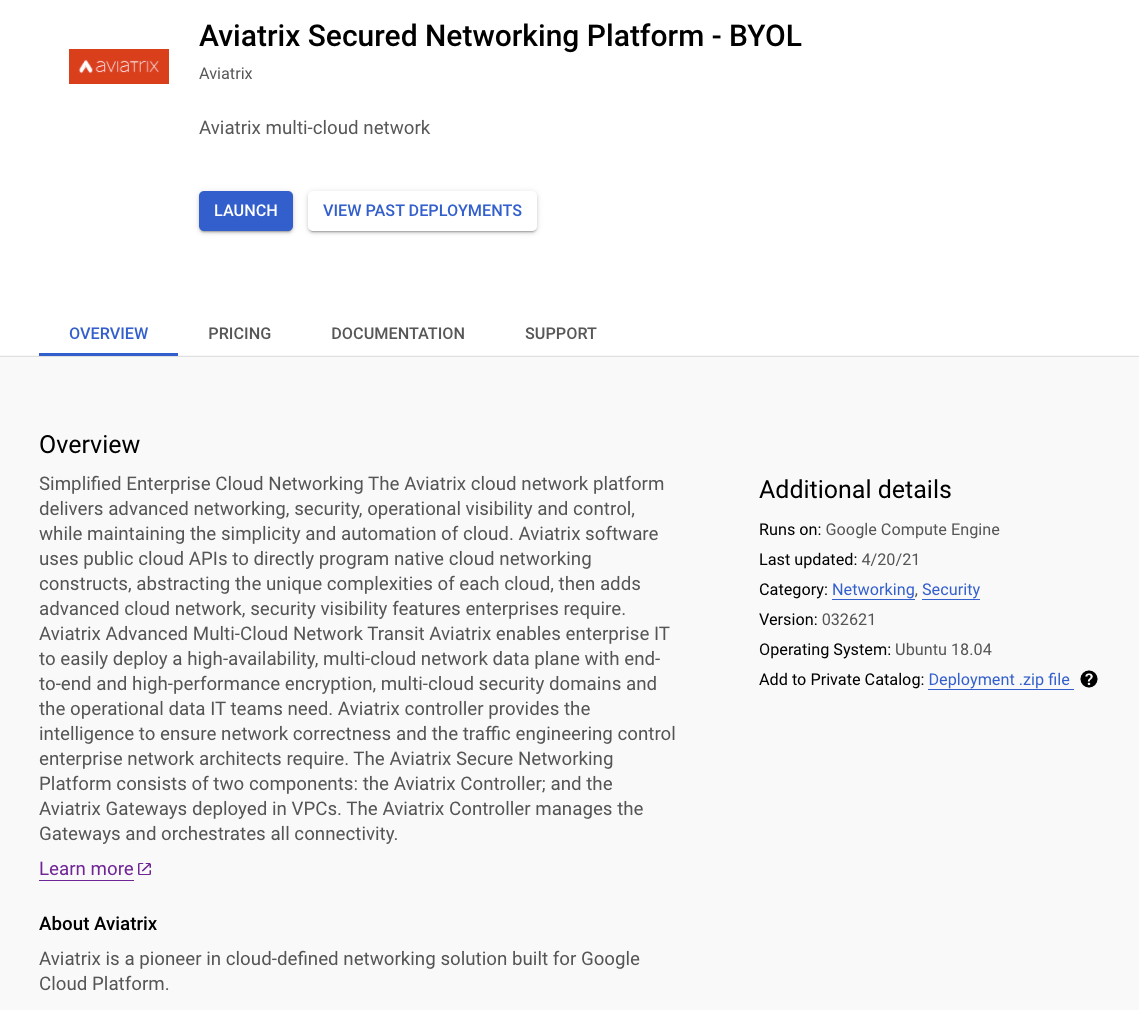
Find the product "Aviatrix Secured Networking Platform - BYOL".
-
Click Launch.
-
If prompted, enable required APIs.
-
Make sure the selected Machine type has at least 2 vCPUs with 8 GB memory.
-
Boot Disk is SSD Persistent Disk with at least 64 GB.
-
Under Firewall, mark the Allow HTTPS traffic from the Internet checkbox and create a firewall rule that lists only the IP addresses needed for onboarding.
Do not leave the Firewall field blank, as that opens the Aviatrix Controller up to access by any and all IP addresses. After successfully deploying the Controller, you can return to this setting and restrict access further as needed.
-
Click Deploy.
Access the Aviatrix Controller
After the instance is created on Google Cloud, click the Controller instance name, and note its External IP address and Internal IP address. Go to https://External_IP_of_the_controller.
At the login prompt, type "admin" for username and type the internal IP address for the password, as shown below:
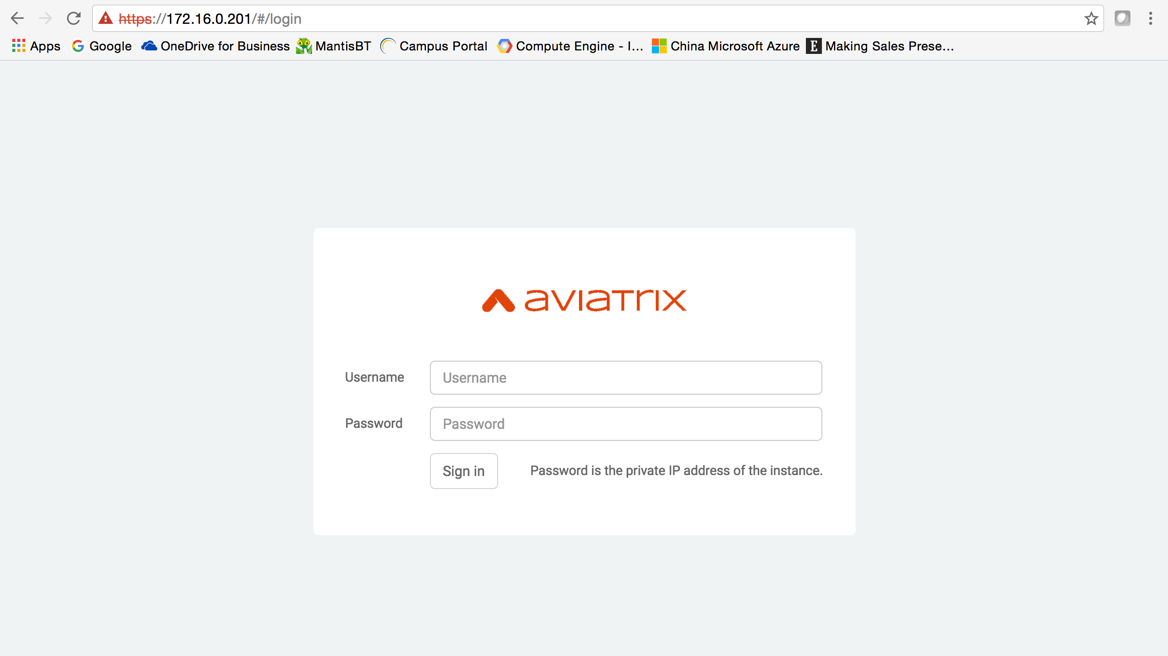
Follow the initial setup process to set up an admin email address and password and install the latest software. Log in again with your new admin password.
|
Any resources created by the Aviatrix Platform, such as Aviatrix gateways, GCP routing tables, subnets, LB, etc., must be deleted from Aviatrix Platform. If you delete them directly on AWS console, Aviatrix Platform’s view of resources will be incorrect, which will lead to features not working properly. |
Prepare to Onboard a GCP Account to Aviatrix Controller
Before creating a cloud account for Google Cloud console on the Aviatrix Controller, follow the steps below to make sure you have the credentials set up for API calls.
If you are onboarding a Kubernetes cluster, see Kubernetes Clusters and the Kubernetes Prerequisites and Permissions for GCP.
-
Create a Google Cloud account (https://cloud.google.com/). Continue to the next step if you already have an account.
The Controller supports multiple accounts with each account associated with a different Google Cloud project, but there needs to be at least one account to start with.
-
Create a Project.
Enable Compute Engine API on the Selected Project
-
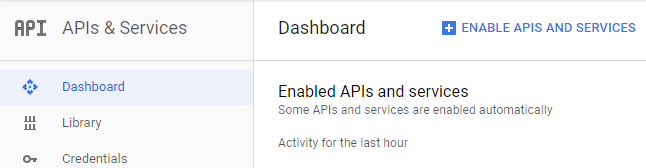
Go to your Google Cloud console, click on the dropdown menu in the top left, and select APIs and Services. At the Dashboard, click Enable APIs and Services.
-
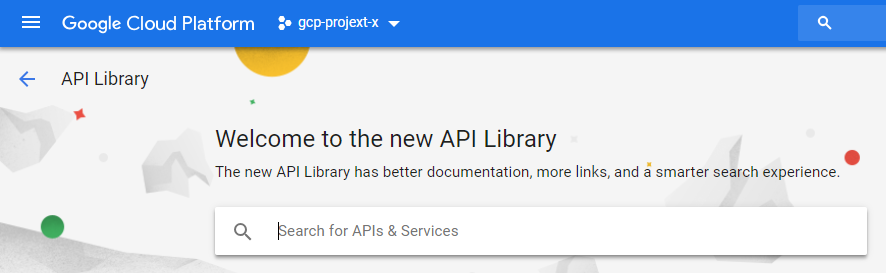
In the Search box, enter "Compute Engine API" and select it from search results.
-
Click Enable.
Create a Credential File
When you create a cloud account on the Aviatrix Controller for Google Cloud, you will upload a Google Cloud Project Credentials file. Follow the steps below to download the credential file from the Google Developer Console.
-
Open the Credential page.
-
Select the project you are creating credentials for.
-
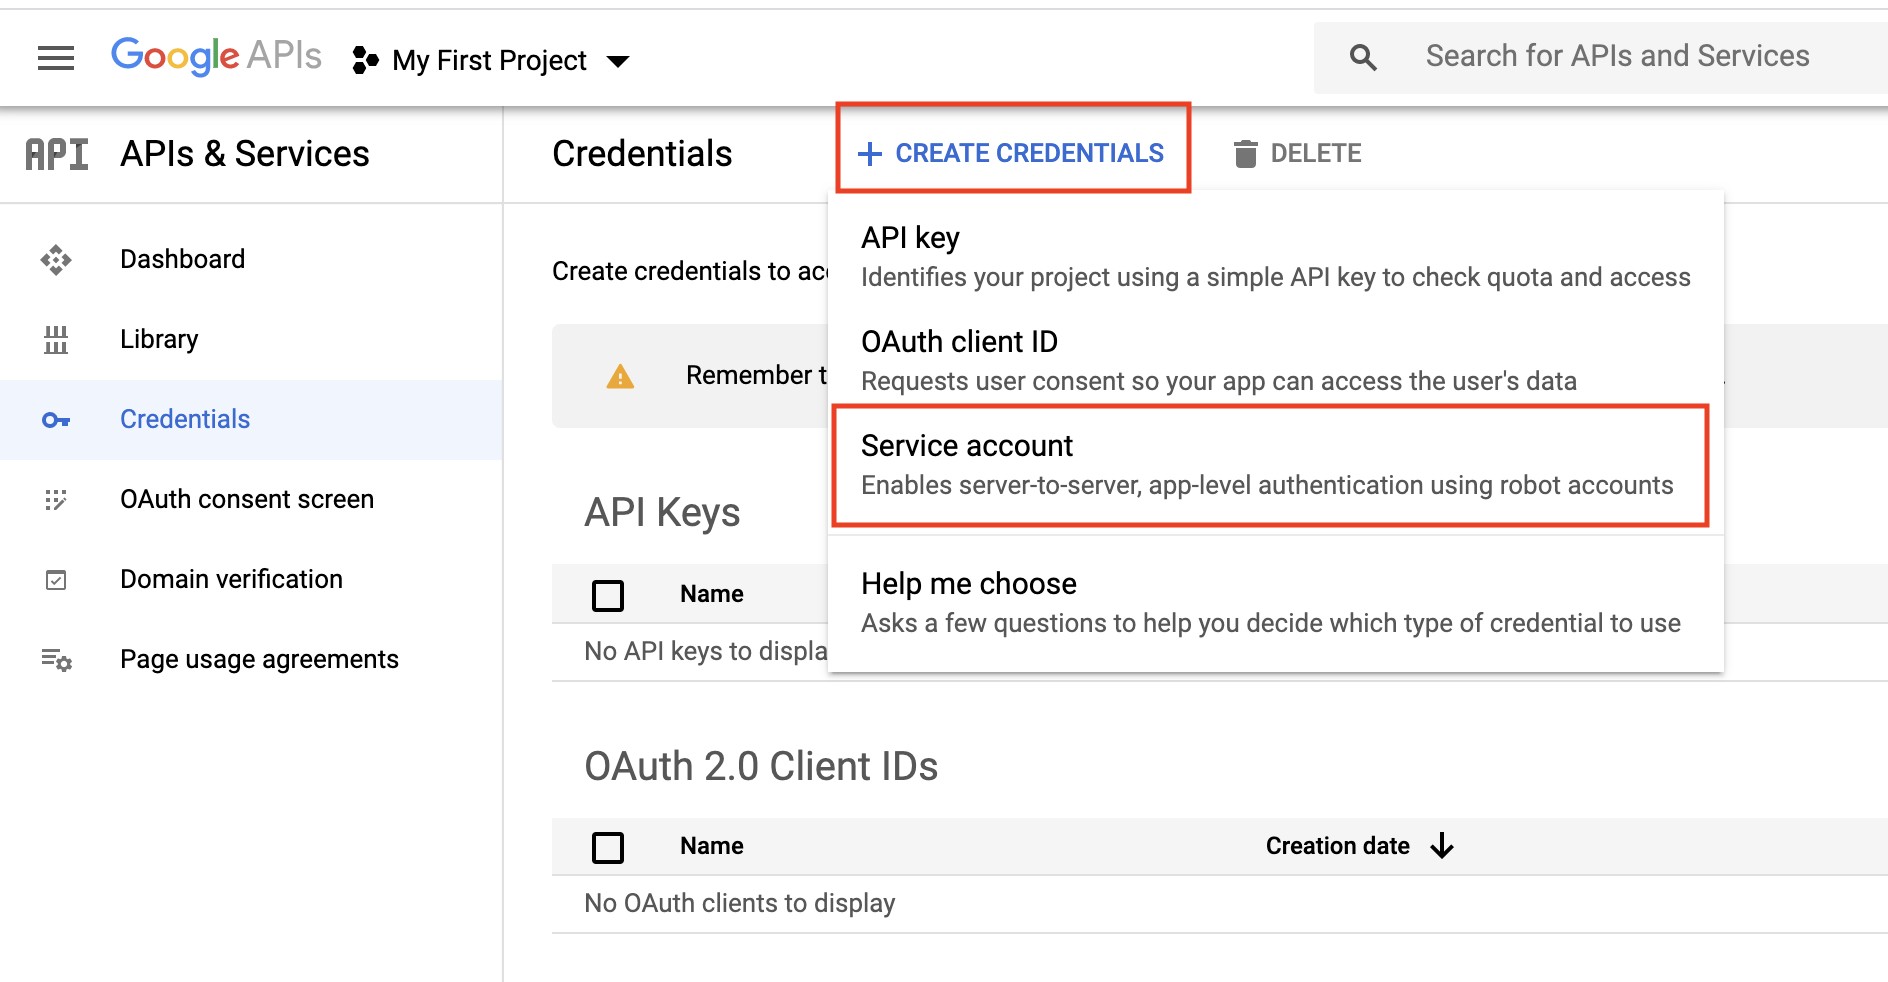
At Credentials, click Create credentials and select Service account as shown below.
-
At the Service Accounts, enter a service account name and click Create.
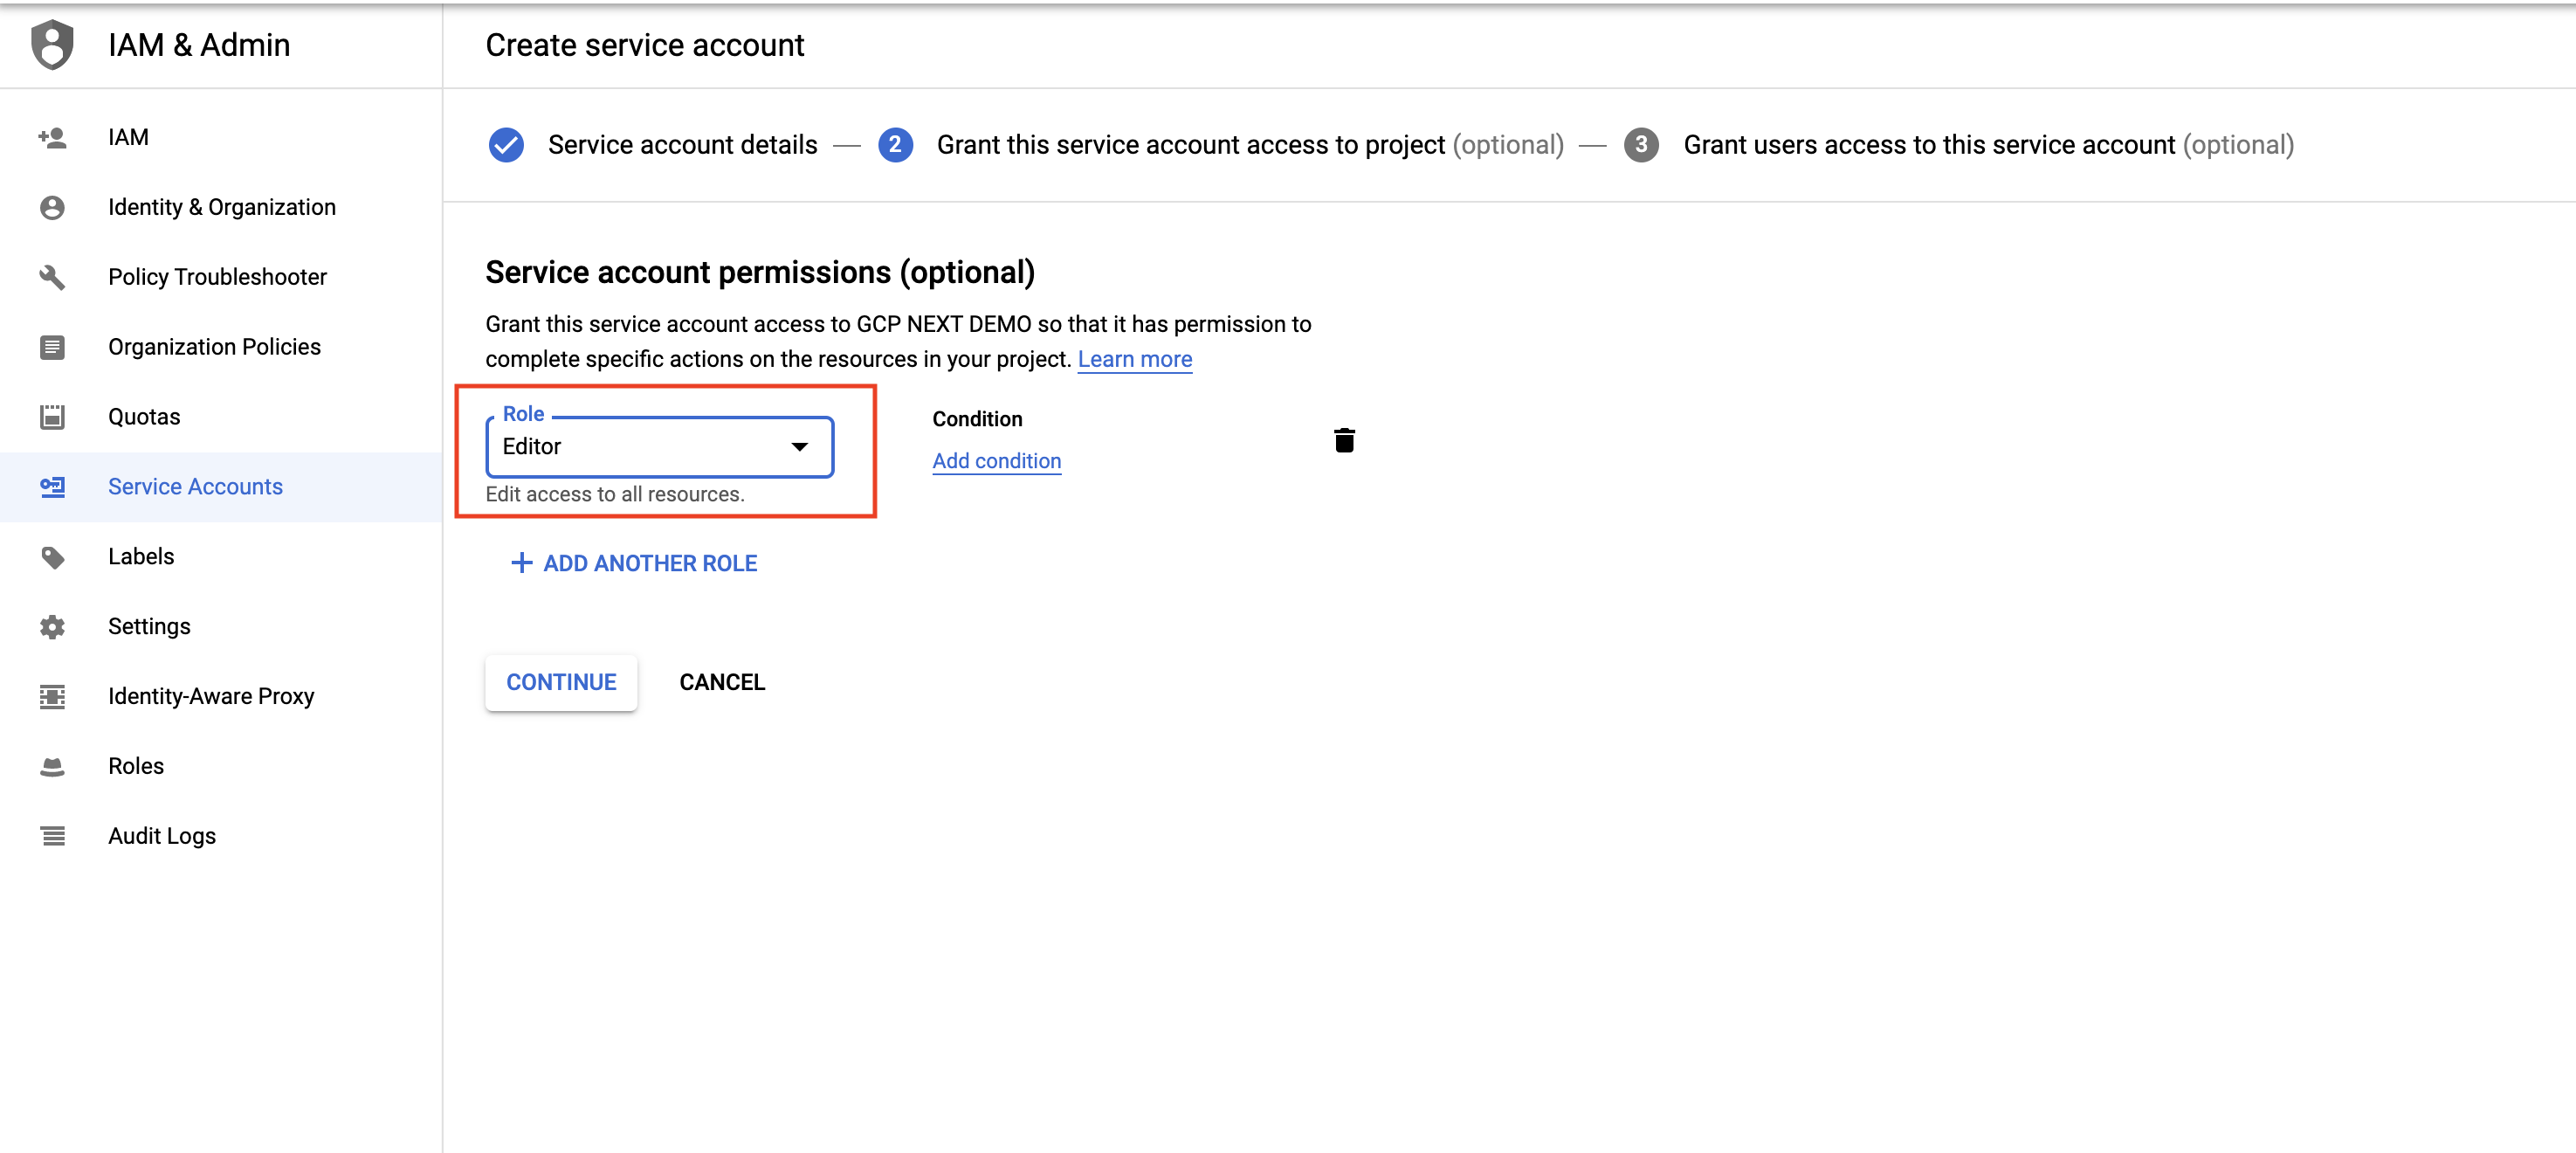
For Service account permissions, select Project, Editor, as shown below.
-
Select a service account and then select the Keys tab
-
Click the Add Key dropdown menu, and select Create new key.
-
Select the JSON radio button and click Create.
-
Click Create.
The credential file downloads to your local computer.
-
Upload the Project Credential file to the Aviatrix Controller at the Google Cloud Platform account create page.
Creating a Service Account with Restricted Access
We recommend creating the service account with the Editor role, but in some cases an organization might want to further restrict permission for the service account. In such a situation Aviatrix recommendation is to have at least following roles assigned to service account so that Aviatrix can perform its functions properly, such as managing the compute resources, route tables, firewall rules, shared service VPC network, etc.
-
Compute Admin
-
Service Account User
-
Organization Administrator (required for GCP Shared VPC)
-
Project IAM Admin (required for GCP Shared VPC)
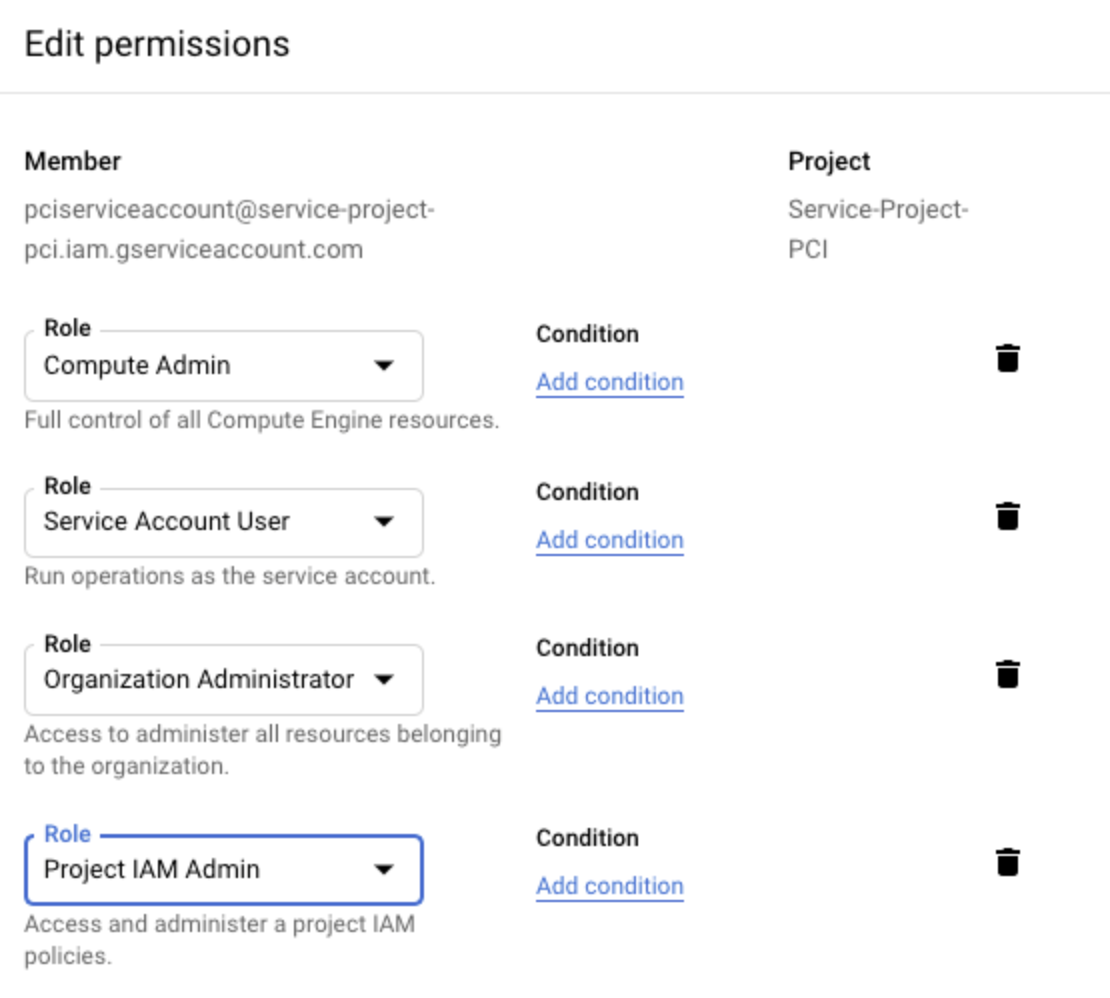
If an organization is currently using GCP Shared VPC or planning to use in future, then enabling Organization Administrator and Project IAM Admin is also required.
In addition to restricting the GCP roles, you can restrict the rights for those roles. You can grant roles permission to perform the following tasks:
compute.addresses.create
compute.addresses.createInternal
compute.addresses.delete
compute.addresses.deleteInternal
compute.addresses.get
compute.addresses.list
compute.addresses.use
compute.addresses.useInternal
compute.disks.create
compute.disks.get
compute.firewalls.create
compute.firewalls.delete
compute.firewalls.get
compute.firewalls.list
compute.firewalls.update
compute.forwardingRules.create
compute.forwardingRules.delete
compute.forwardingRules.list
compute.globalOperations.get
compute.healthChecks.create
compute.healthChecks.delete
compute.healthChecks.useReadOnly

compute.httpHealthChecks.create
compute.httpHealthChecks.get
compute.httpHealthChecks.useReadOnly
compute.images.list
compute.images.useReadOnly
compute.instanceGroups.create
compute.instanceGroups.delete
compute.instanceGroups.get
compute.instanceGroups.update
compute.instanceGroups.use
compute.instances.create
compute.instances.delete
compute.instances.get
compute.instances.list

compute.instances.setDeletionProtection
compute.instances.setMachineType
compute.instances.setMetadata
compute.instances.setTags
compute.instances.start
compute.instances.stop
compute.instances.updateNetworkInterface
compute.instances.use
compute.licenses.get
compute.networks.addPeering
compute.networks.create
compute.networks.delete
compute.networks.get
compute.networks.list
compute.networks.listEffectiveTags
compute.networks.removePeering
compute.networks.updatePolicy
compute.projects.get
compute.projects.setCommonInstanceMetadata
compute.regionBackendServices.create
compute.regionBackendServices.delete
compute.regionBackendServices.get
compute.regionBackendServices.update
compute.regionBackendServices.use
compute.regionOperations.get
compute.routes.create
compute.routes.delete
compute.routes.list
compute.subnetworks.create
compute.subnetworks.delete
compute.subnetworks.get
compute.subnetworks.list
compute.subnetworks.use
compute.subnetworks.useExternalIp
compute.targetPools.addInstance
compute.targetPools.create
compute.targetPools.delete
compute.targetPools.get
compute.targetPools.removeInstance
compute.targetPools.use
compute.zoneOperations.get
compute.zones.list
iam.serviceAccounts.actAs
logging.logEntries.create
pubsub.subscriptions.consume
pubsub.subscriptions.create
pubsub.subscriptions.delete
pubsub.subscriptions.get
pubsub.topics.attachSubscription
pubsub.topics.create
pubsub.topics.delete
pubsub.topics.get
pubsub.topics.publish
resourcemanager.projects.get
If you want to monitor egress traffic on a GCP cloud account, ensure that the following APIs are enabled to grant the required GCP Resource Manager and GCP Container permissions:
 container: container.googleapis.com
 cloud Resource Manager: cloudresourcemanager.googleapis.com
For more information about requirements for monitoring egress traffic on GCP, see Implementing Egress in an Aviatrix-Managed Network.
For Google Kubernetes Engine (GKE) clusters, also include the following permissions:
container.clusters.connect
container.clusters.get
container.clusters.list
container.endpointSlices.list
container.namespaces.list
container.nodes.list
container.pods.list
container.services.list
Onboard a GCP Account in Your Controller
To onboard your Google Cloud (GCP) account into your Aviatrix Controller, use the following steps.
-
Open your Controller and go to Onboarding > Google Cloud Platform.
-
Under Enter Aviatrix Customer ID, enter the customer ID you received in an email.
-
Skip the Enter Certificate Domain field.
-
Under Create Primary Access Account, enter the following information.
Parameter Description Account Name
Enter a clear Account Name.
Project ID (Optional)
In the Project ID field, enter the name of the Google Cloud project for this account.
Project Credentials
Click Choose file and choose the correct JSON file downloaded from your GCP account.
-
Click Create.
Onboard Multiple GCP Service Accounts
The Controller supports multiple Service Accounts from different Google Cloud projects. Onboard each GCP account separately using a unique Account Name, the correct Project ID for each project, and the JSON credentials file from the main Management Account.
For example, you may need to set up a Service Account in the first or Management GCP Project, and then give that Service Account access to a second Google Cloud Project where they can deploy gateways.
-
First, in your GCP account, create the first or Management Project and the secondary project.
-
Create a Service Account from within the Management Project.
-
Generate a JSON file from the Management Project. This JSON file is the credentials file you will use while onboarding this account in your Controller.
-
Give this Service Account permission to access the secondary project.
-
Log into your Controller and go to Onboarding > Google Cloud Platform.
-
Enter a clear Account Name, use the Management Project Name as the Google Cloud Project ID, and upload the JSON credentials file, and then click Create.
-
Now, onboard the secondary account. Enter a clear Account Name that helps you distinguish these projects, use the secondary project ID as the Project ID, and upload the same JSON credentials file from the Management Project. Click Create.
Now, your Controller has access to the Management Project and the secondary project where you can deploy gateways.
Resource Names
The maximum length of a gateway name cannot exceed 50 characters when configuring Aviatrix Google Cloud gateway. Other resource names like subnet and VPC have a maximum character limit of 63, a requirement for Google Cloud.
Launching Gateway
The following gateway sizes are supported for Google Cloud:
'n1-standard-1', 'n1-highcpu-2', 'n1-standard-2', 'n1-highmem-2', 'n1-highcpu-4', 'n1-standard-4', 'n1-highmem-4', 'n1-highcpu-8', 'n1-standard-8', 'n1-highmem-8',vn1-highcpu-16', 'n1-standard-16', 'n1-highmem-16', 'n1-highcpu-32', 'n1-standard-32', 'n1-highmem-32', 'n1-highcpu-64', 'n1-standard-64', 'n1-highmem-64', 'n1-highcpu-96', 'n1-standard-96', 'n1-highmem-96', "n2-highcpu-4', 'n2-highcpu-8', 'n2-highcpu-16', 'n2-highcpu-32', 'c2-standard-4', 'c2-standard-8", 'c2-standard-16', 'c2-standard-30', 'c2-standard-60'
Support
Check out the Help menu for Frequently Asked Questions (FAQs), Reference Design and Release Notes. All features have descriptions embedded and should be self-explanatory.
An alert message will be displayed on the Dashboard menu when a new release becomes available.
For support, please open a support ticket at Aviatrix Support Portal.
If the cloud account creation fails, check the error message on your Aviatrix Controller and try again with the steps provided in this document.
For additional support, please open a support ticket at Aviatrix Support Portal.
If no Google Cloud account has been set up, you will be guided through the onboarding process. It takes only a few steps. Once that is done, follow the quick tour guide to start launching gateways.
| For information about how to subscribe to an Aviatrix License if you subscribe to a trial license and it expires, see Aviatrix Licensing. |
Launch your CoPilot instance in Google Cloud Platform
| It is recommended to deploy CoPilot based on the latest CoPilot image release. For information about Aviatrix CoPilot image releases, see Aviatrix CoPilot Image Release Notes. |
To provision and launch your CoPilot instance in GCP:
-
Go to GCP marketplace.
-
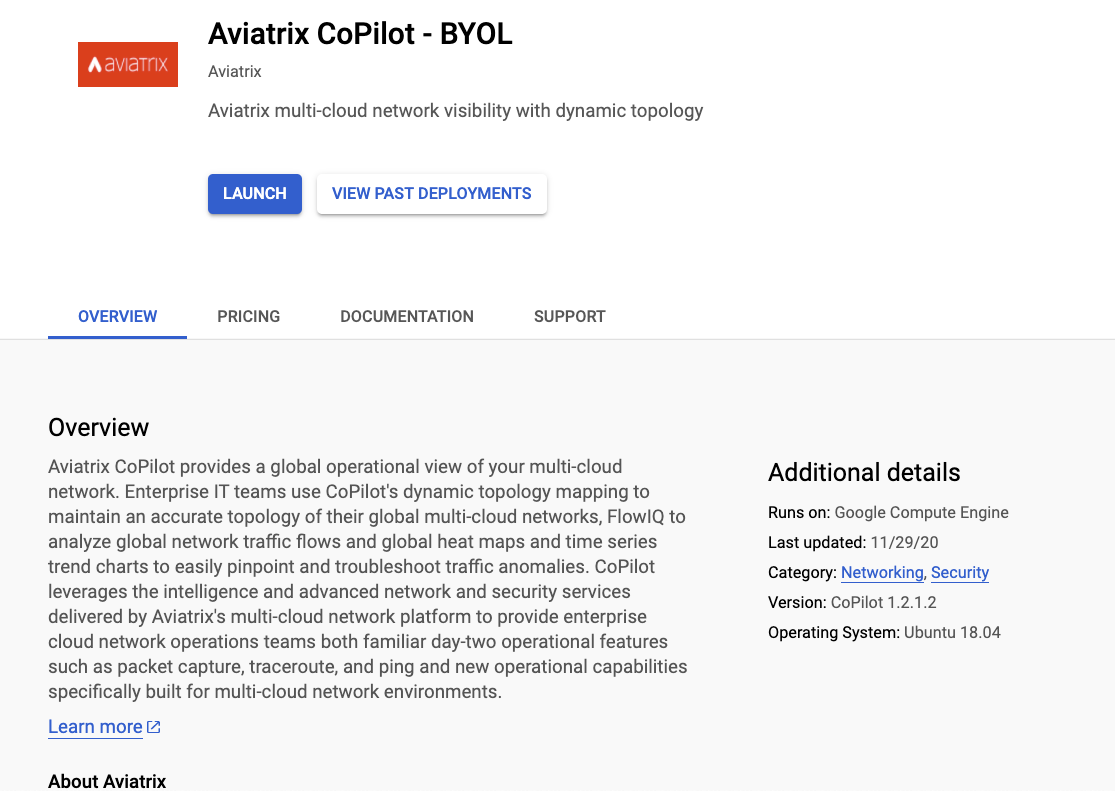
Find the product "Aviatrix CoPilot - BYOL".
-
Click "LAUNCH".
-
Specify the settings for the CoPilot instance.
-
For Machine type, take note of the Minimum Instance (VM) System Requirements for CoPilot.
-
You must attach at least one data disk (data volume) to your CoPilot instance to be used for expandable storage; this is a secondary data storage separate from the root disk that comes with CoPilot. For more information, see CoPilot Disk (Volume) Management. Create your disk (volume) and attach the disk (volume) to your CoPilot instance. You can choose the disk type (volume type) that meets your business needs given the size of your environment and performance requirements. There is no minimum requirement for the storage you add at this stage.
-
For source IP ranges for traffic, see Instance (Virtual Machine) System Requirements for CoPilot.
-
-
Click "Deploy".
-
Go to your Controller instance in your cloud service provider. Add your CoPilot IP address into your Controller security group with TCP protocol and port 443 on the cloud service provider so that CoPilot server can communicate with Controller API.
-
You are now ready to launch CoPilot in a web browser or from the Aviatrix Controller homepage and perform initial setup. See Initial Setup of CoPilot.