Azure Getting Started Guide
Aviatrix provides a product launch experience with automation and a simple UI guided flow to make it easy for you to begin using the product.
Prerequisites
Ensure you have met the prerequisites for an Azure deployment.
See Preparing for Your Azure Deployment for pre-deployment requirements and considerations.
Azure Simple Product Launch Overview
The launch experience is currently available for Azure at launch.aviatrix.com. The launch experience automates the following:
-
Creation of a VNet for Controller and CoPilot (or you can select an existing VNet)
-
Deployment and configuration of IAM
-
Deployment of Controller and CoPilot into an existing or newly created VNet
-
Creation of network security groups securing platform access to only your IP
-
Initialization of Controller and CoPilot to current version
-
Configuration and integration between Controller and CoPilot
|
The entire process completes in about 20 minutes when orchestrated with Terraform. |
The guided flow involves four simple steps. The details for each step are outlined in Launch Step Details.
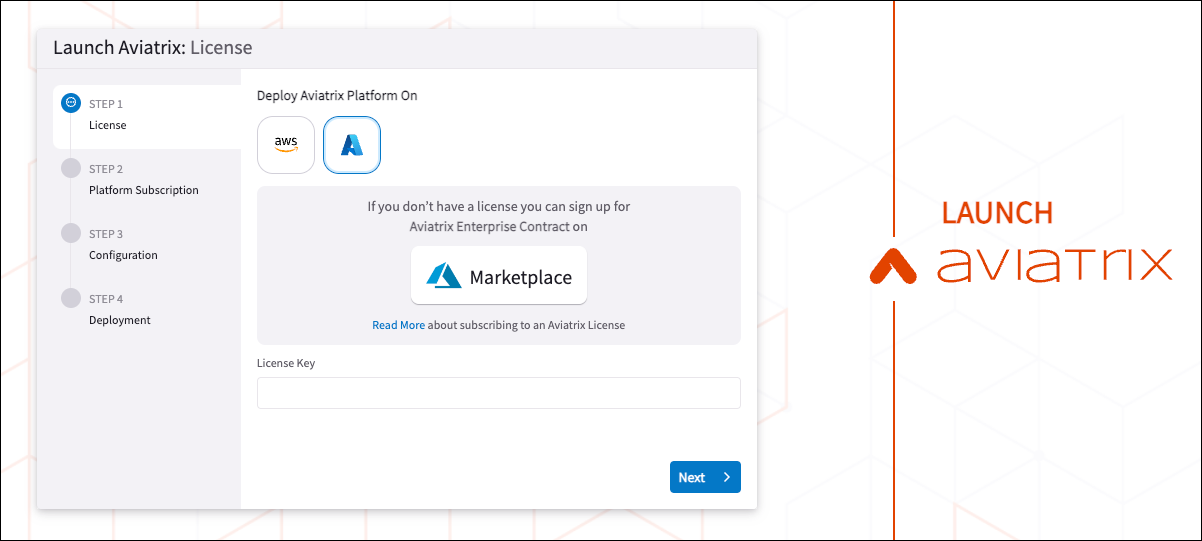
Step 1: Aviatrix License
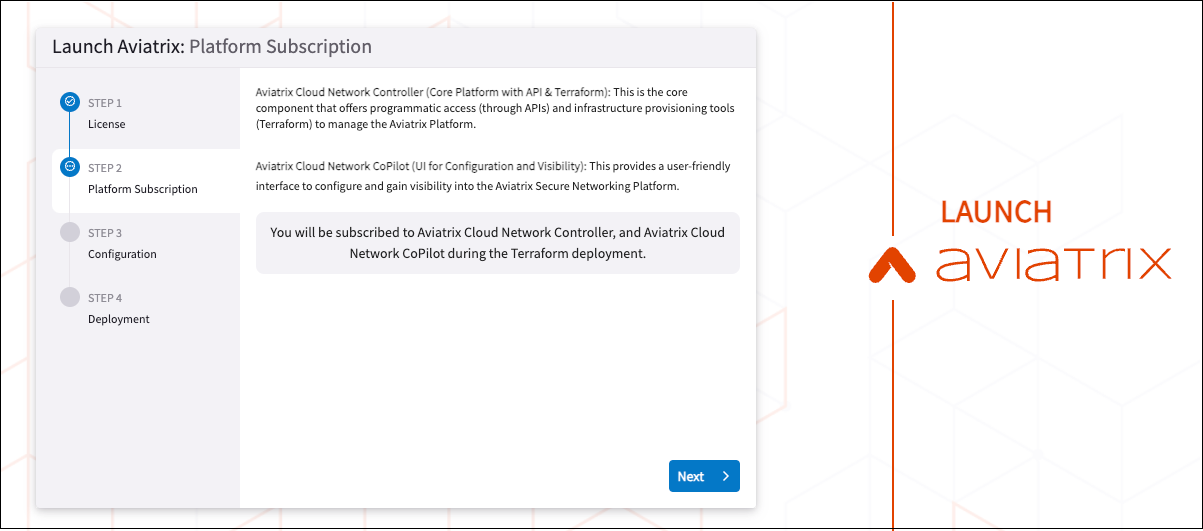
Step 2: Platform Subscription
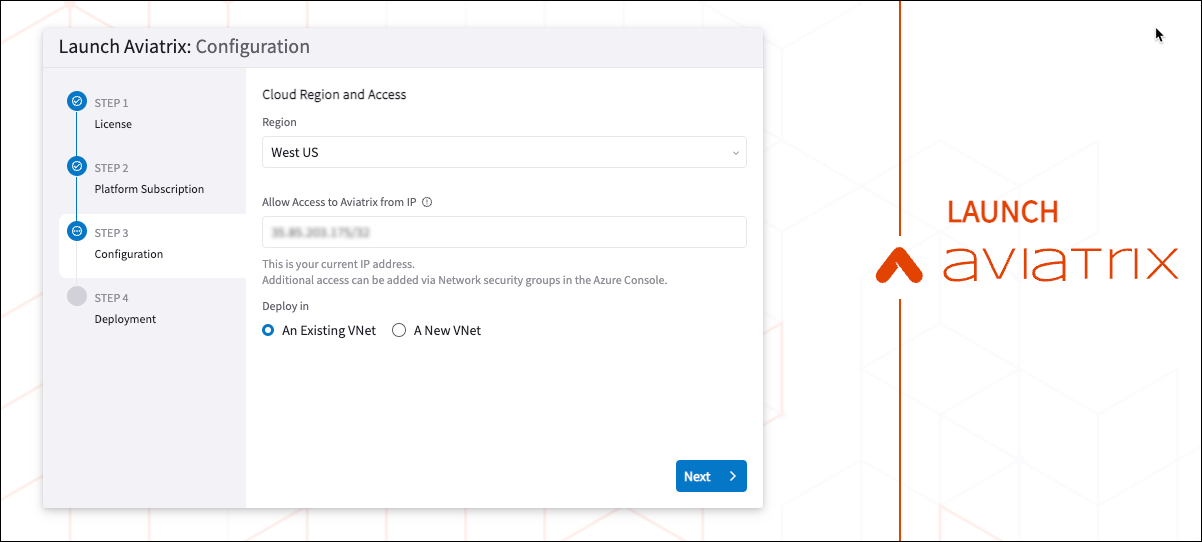
Step 3: Configuration
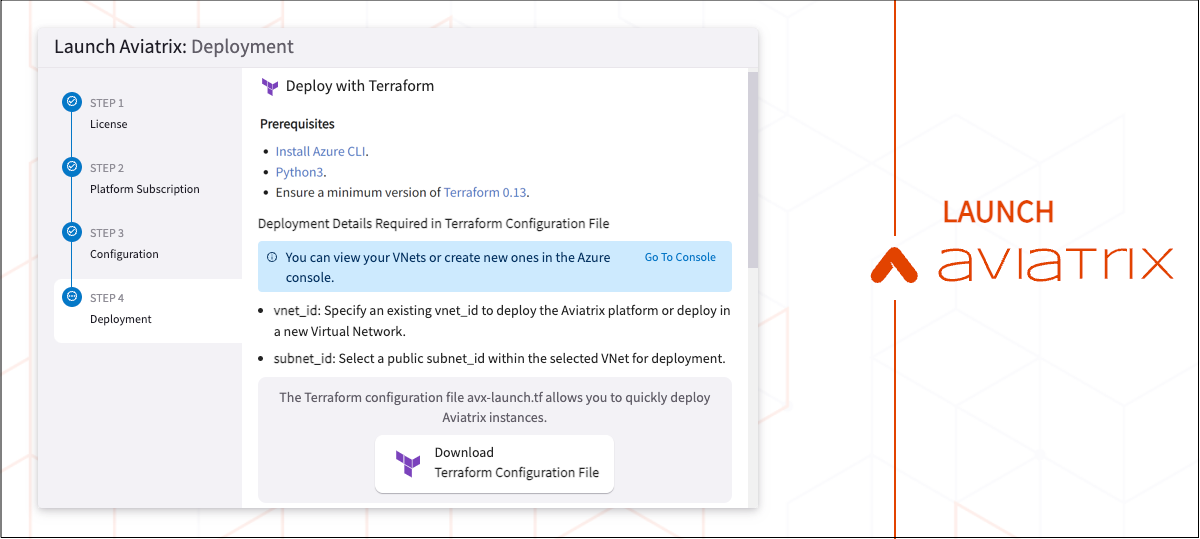
Step 4: Deployment
Log in to CoPilot
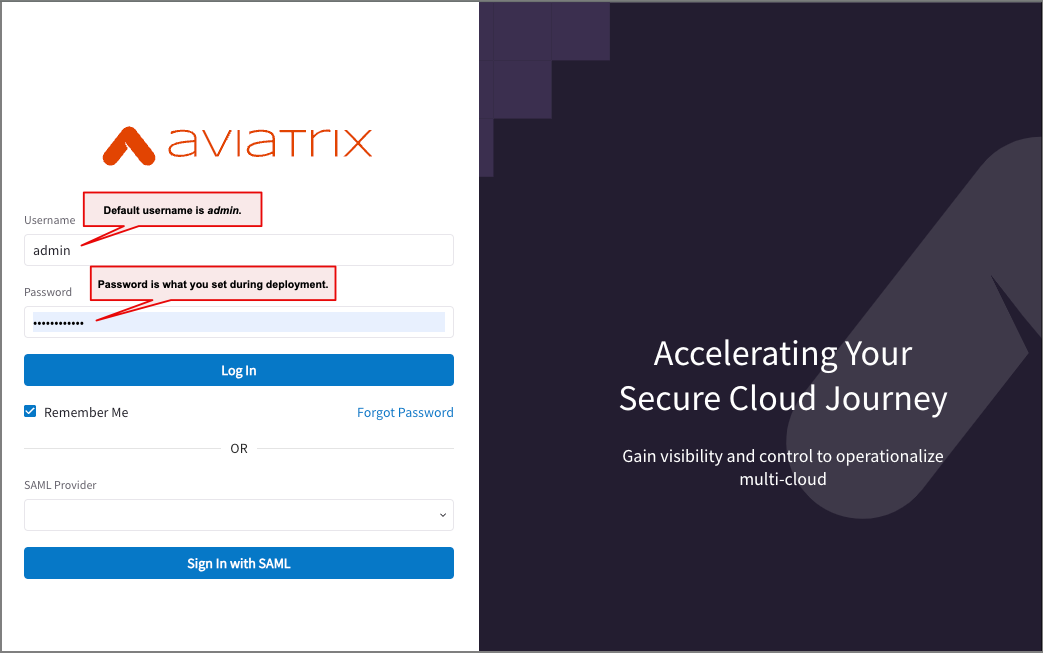
The default username is admin, and the password is what you entered during the Terraform implementation.
Required Aviatrix License and Marketplace Offers
Three Azure Marketplace subscriptions are required to deploy the Aviatrix platform.
You will subscribe to these offerings by accessing the Launch Aviatrix guided experience. For new deployments, you will subscribe to the following:
| License or Offer | Description |
|---|---|
Aviatrix Enterprise Contract |
The Aviatrix Enterprise Contract provides the license (customer-id) needed to access the Aviatrix Cloud Network Controller and Aviatrix Cloud Network CoPilot. This service also calculates Aviatrix bills based on usage. |
Aviatrix Cloud Network Controller |
This Bring Your Own License (BYOL) offer integrates with the Aviatrix license. |
Aviatrix Cloud Network CoPilot |
This Bring Your Own License (BYOL) offer integrates with the Aviatrix license. |
|
If you subscribe to the free trial license, you receive notification emails 14, 7, and 1 day before the free trial expires and billing begins. |
Launch Step Details
The Aviatrix launch experience guides you through a quick configuration process to get the Aviatrix Cloud Networking Platform up and running in your Azure environment.
You can access the Aviatrix launch experience from launch.aviatrix.com.
| Do not click the browser refresh or back buttons while using Launch Aviatrix. To go back to a previous page, click on a Step in the Launch navigation. |
Step 1: Register an Aviatrix License
-
In the Launch Aviatrix licensing window, do one of the following:
-
If you need a license, click your preferred CSP Marketplace to open the Marketplace listing in a separate tab and continue to the next step.
-
If you already have a license, enter the key in the License Key field and skip to Platform Subscription.
You received the key in an email when you originally registered. The key is not retained anywhere else. If you do not have the key, contact your account manager.
-
-
On the Aviatrix Enterprise Contract page, review the Plans + Pricing and click Get It Now.
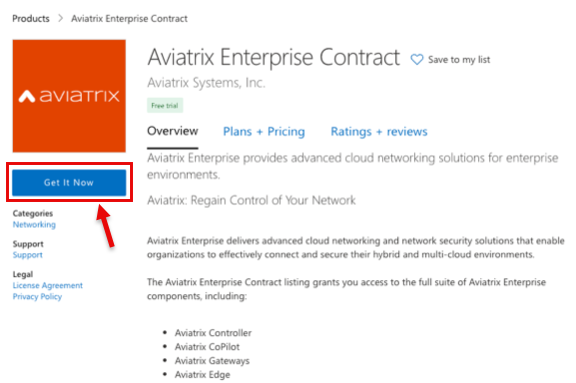
All plans start with a 30-day free trial.
-
Read and accept the acknowledgment notice and click Continue.
-
On the Aviatrix Enterprise Contract page, select the Plan you want and click Subscribe.
-
On Subscribe To Aviatrix Enterprise Contract, enter the name for a new resource group and verify the resource group location.
-
Enter a descriptive name for the SaaS subscription and click Review + Subscribe.
-
Review the subscription details and click Subscribe.
-
When the subscription process completes, click Configure account now.
You will be redirected back to Launch Aviatrix.
-
Enter your business email address and click Verify Email.
An email is sent to you from launch@email.aviatrix.com that contains a verification code.
-
Copy the code from the email, enter it in the field in Launch Aviatrix, and then click Next.
A success page displays and shows your unique license key. This key and a subscription ID are also emailed to you.
This license key is not available anywhere else. Save the key and subscription ID in a safe place. You might need them in the future. -
Click Next.
Step 2: Platform Subscription
Review the information about Aviatrix Cloud Network Controller and Aviatrix Cloud Network CoPilot. They will be onboarded in a later step.
-
Click Next.
Step 3: Configuration
Provide configuration details for the Terraform template.
-
Select the Azure region for deployment.
-
Confirm that the IP address you are currently using is displayed in the IP field.
Your IP address populates automatically based on your client IP. The /32 is appended to the address to ensure that only the IP that initiated provisioning can initially access the Controller and CoPilot UIs.
If needed, you can change the IP address after provisioning is complete.
-
Click Next.
-
Select whether an existing VNet or a new VNet should be used for deployment.
If you choose an existing VNet, then during deployment you will be able to select which VNet and subnet to use.
If you choose a new VNet, the VNet and Resource Group are automatically created for you during deployment.
Step 4: Deployment
You can deploy Aviatrix Platform by using Terraform.
You do not need to be familiar with Terraform modules to use this method. However, to deploy with Terraform, you must have done the following:
-
Installed the Azure CLI.
-
Installed a minimum version of Python3.
-
Installed a minimum version of Terraform 0.13.
If using an existing VNet you need the following information available:
-
Name of the target resource group in your target region
-
Name of the VNet in the resource group
-
Name of the subnet in the VNet
-
Subnet ID of the subnet
If you need assistance locating the required VNet information in the Azure portal, see Information Required for Azure Deployment to an Existing VNet.
You can monitor provisioning details in the terminal where you run the Terraform commands. To see a list of the resources created by Terraform, go to Resources Created in Azure.
Perform the following steps in Launch Aviatrix.
-
Click Download Terraform Configuration File to download aviatrix-launch.tf.
-
Modify the following lines in the aviatrix-launch.tf file and save the file:
resource_group_name = "CHANGEME"  # Put your resource group name
vnet_name           = "CHANGEME"  # Put your VNet name
subnet_name         = "CHANGEME"  # Put your Subnet name
subnet_id           = "CHANGEME"  # Put your subnet ID
For steps to get this information in the Azure portal, see Information Required for Azure Deployment to an Existing VNet.
-
In a terminal window, run the following commands in the directory in which you saved the TF file:
-
Log in to Azure.
az login
In the terminal output, you will need to select the Azure subscription to associate with the Aviatrix account.
-
Initialize Terraform.
terraform init
-
Preview a list of the changes (execution plan) Terraform will implement.
terraform plan
If you get a message about the -out option, you can safely ignore it and continue.
-
Apply the changes and enter Yes when requested.
terraform apply
The terraform apply command previews the execution plan again. You can use the --auto-approve option to apply the execution plan without a second confirmation. It takes about 14 minutes for the Terraform process to complete.
-
-
Copy and save the output that results from the Terraform execution.
Example:
"Copilot_management_login" = <"https://172.31.255.255/">"password" = <";a1wkE:P#mad3,*f">"username" = "admin"You will use this information to log in to the Aviatrix Platform.
| If you want to view the newly created resources in the Azure portal, go to Resource groups and select the new resource group. |
After the Aviatrix Controller and CoPilot are configured, you can access your CoPilot instance.
Access the CoPilot UI
Congratulations! You have successfully launched your Aviatrix platform.
-
In a browser window, enter the IP address for Copilot_management_login that you copied from the Terraform output.
Example:
"Copilot_management_login" = <"https://172.31.255.255/">
-
In the CoPilot login window, enter your credentials:
-
Username: The default is admin.
-
Password: Use the password from the Terraform output.
Example: "password" = <";a1wkE:P#mad3,*f">
-
Next Steps
Check the Post Deployment documentation for any tasks you might want to perform after launching CoPilot.