VPN Access Gateway Selection by Geolocation of User
If you have a global workforce that needs to access the cloud with the best user experience, building a cloud network with GeoVPN access capability is the right solution for you.
The geolocation VPN feature combines the Aviatrix scale out VPN solution with latency-based routing to dynamically route VPN users to the nearest VPN access gateway based on the latency between the user and the gateways.
|
GeoVPN service is currently only available for AWS cloud. |
VPN Access Details
An example deployment in AWS is shown below. In this configuration, there are two VPN access gateways: one in us-west-2 and another in eu-central-1. Each VPN access gateway is fronted by a load balancer in AWS.
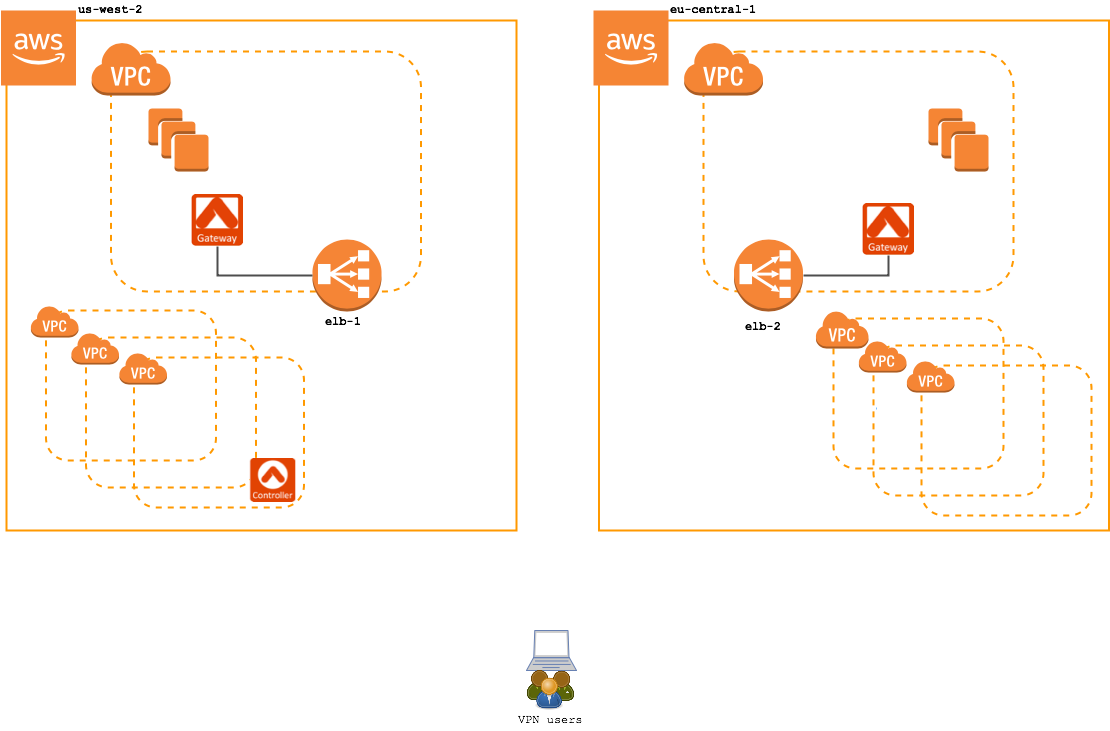
Let’s look at the difference between a standard VPN access service and VPN access service with the Geolocation feature enabled:
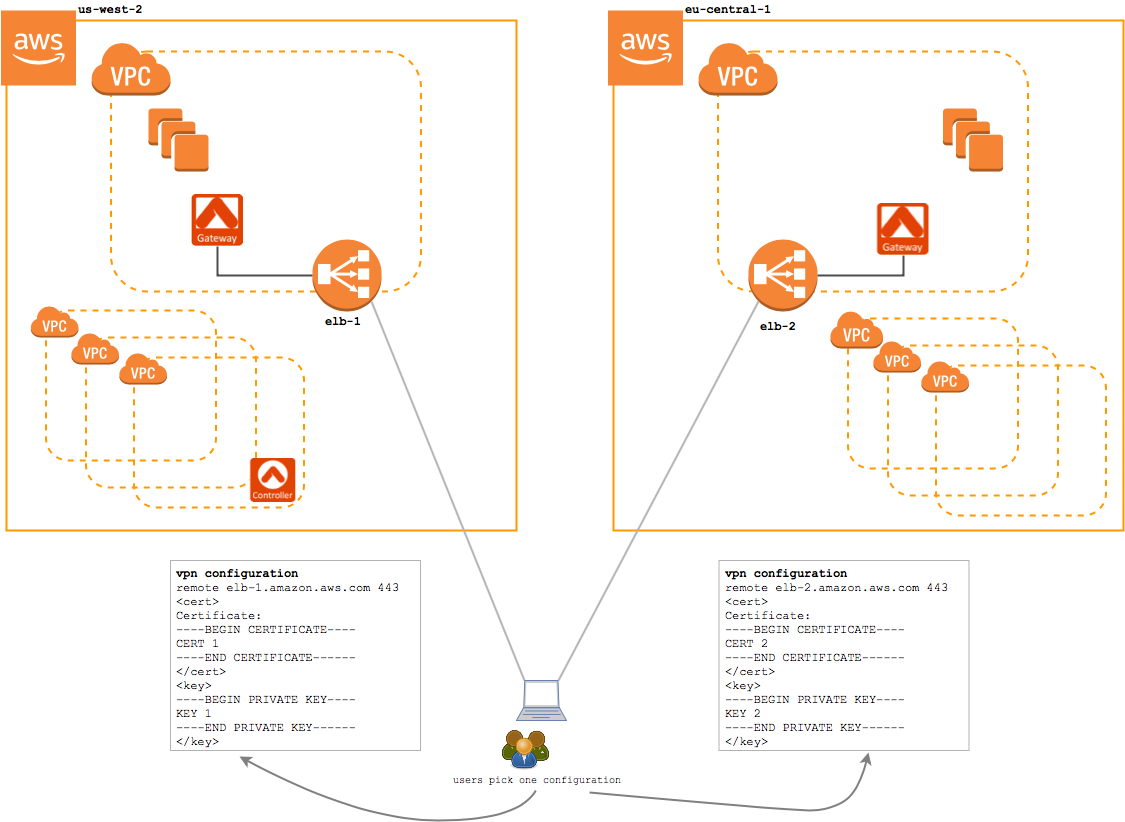
Standard VPN Service (without geolocation feature enabled)
Without the Geolocation feature enabled, when a user connects to the VPN service, they will connect to one of the two regions' VPN gateway. Each gateway is independently administered, meaning users need a separate configuration profile for each region they will access.
In this configuration, an EU-based user would be given a configuration profile for the eu-central-1 load balancer. And, a US-based user will be provided with a us-west-2 configuration profile. If either user relocates or travels to the opposite region, they will need a separate configuration profile in that region and they will need to manually switch the active configuration profile.
Geolocation VPN Service
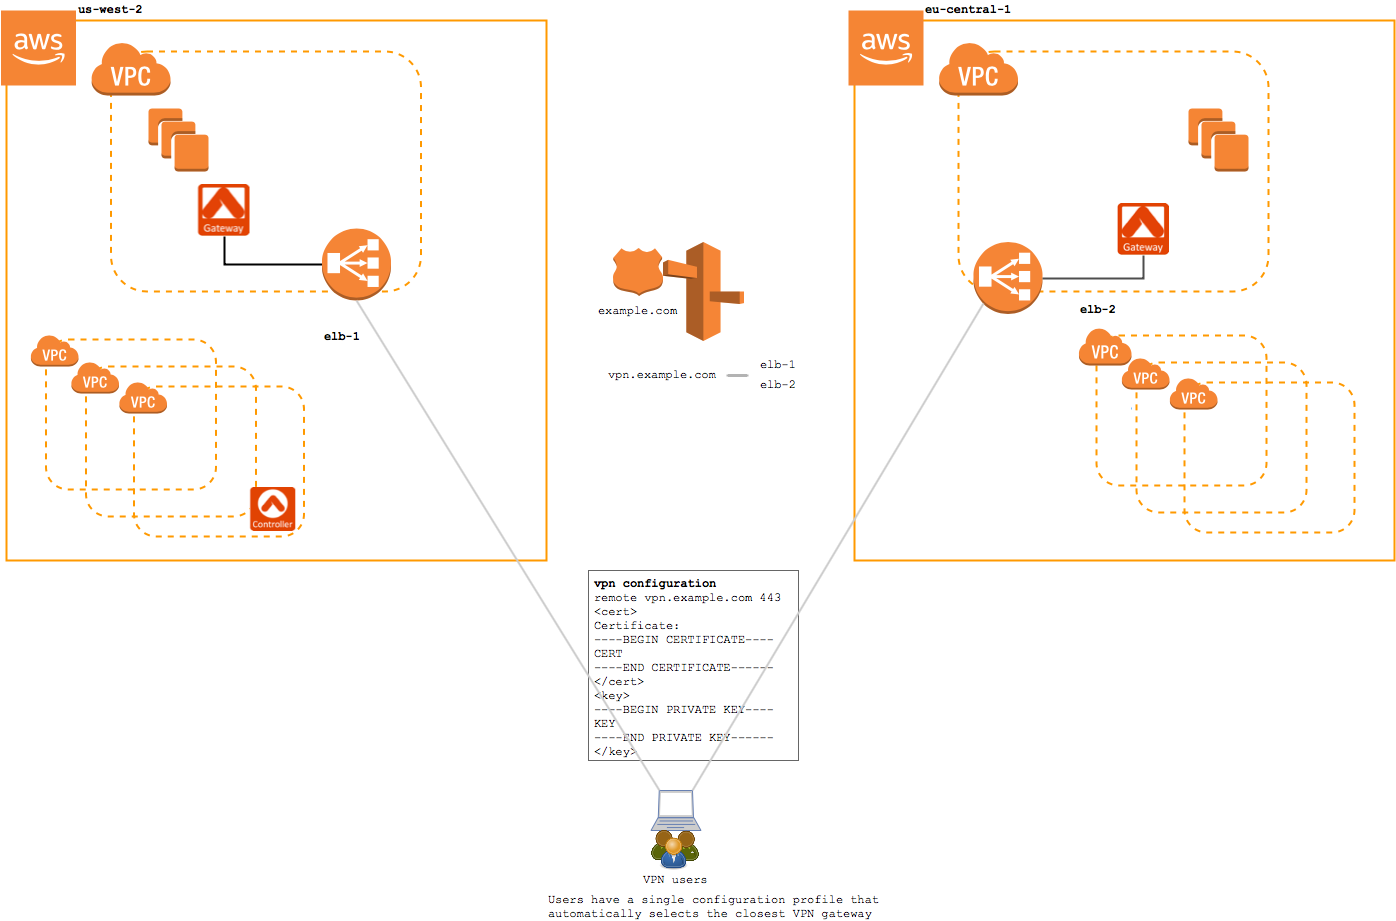
With the Geolocation feature enabled, when a user connects to the VPN service, they are directed to a Route 53 that uses a latency-based routing policy to choose between the available regions.
In this configuration, both the EU-based user and the US-based user would be given the same configuration profile. This configuration profile will select the closest region automatically using a latency-based routing policy defined on the DNS record.
Configuration Workflow
-
Create a VPN gateway in each region.
Enable ELB on each gateway that will be associated with the GeoVPN feature.
You must create at least one gateway to enable GeoVPN. You can add more gateways to the pool at any time.
-
Once you have at least one VPN gateway created with ELB enabled, you are ready to proceed to the enable GeoVPN feature. Click on OpenVPN in the navigation menu and select Advanced.
-
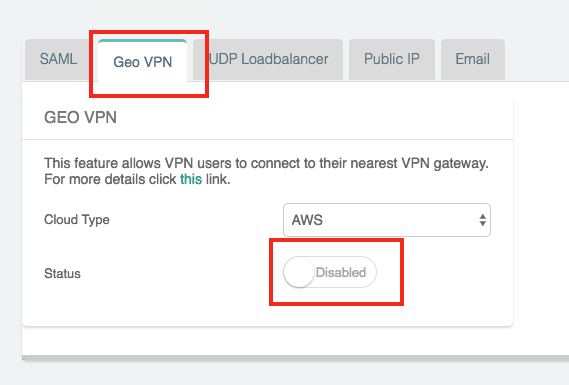
Click the GeoVPN tab.
-
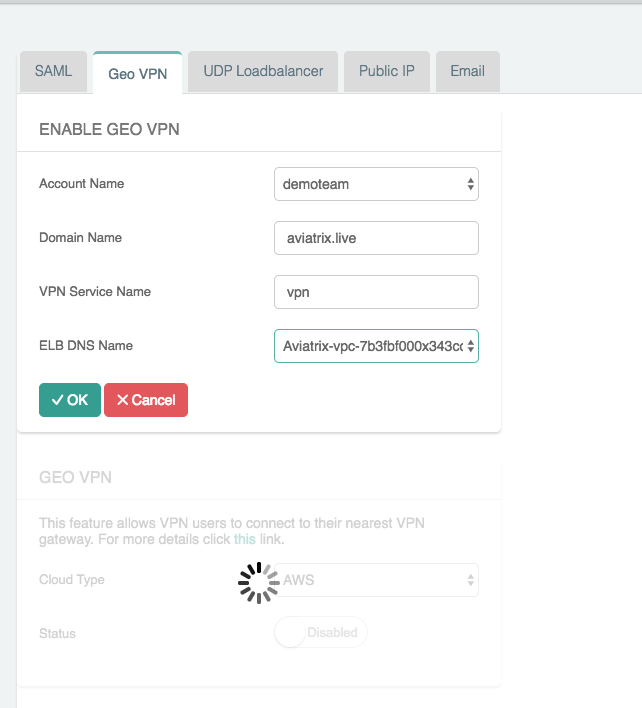
Select the Cloud Type and click on the Disabled status to Enable the GeoVPN feature.
-
Populate the fields:
| Field | Description |
|---|---|
Account Name |
Select the cloud account where the DNS domain is hosted. |
Domain Name |
The hosted domain name. IMPORTANT: This domain name must be hosted by AWS Route53 in the selected account. |
VPN Service Name |
The hostname that users will connect to. A DNS record will be created for this name in the specified domain name. |
ELB DNS Name |
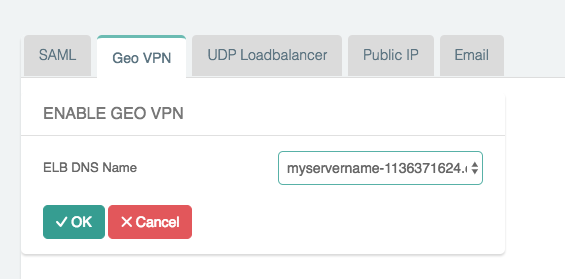
Select the first ELB name to attach to this GeoVPN name. You can add others after this feature is enabled. |
-
Click OK.
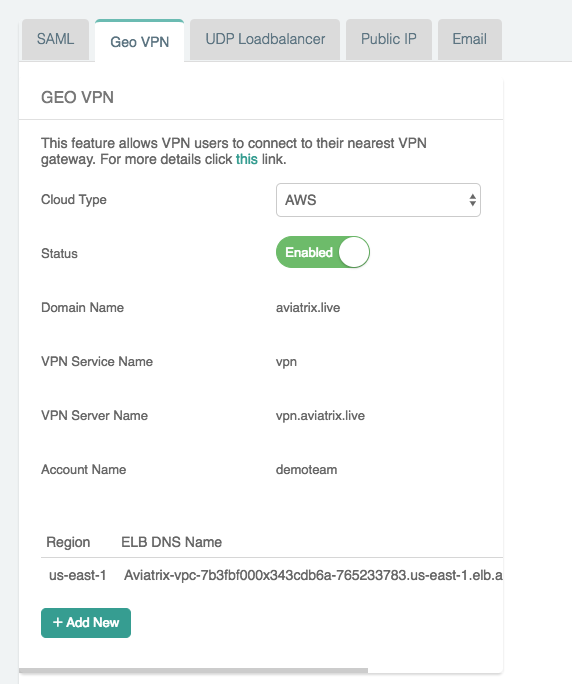
If enabling GeoVPN fails, make sure the Domain Name you enter is a registered name under AWS Route 53 in a public hosted zone. In addition, this Domain name must be hosted in the account that you have access privilege. If the domain name is hosted by another account, you will not be able to add DNS record.
-
For each additional region, repeat these steps:
-
Click + Add New.
-
Select the ELB DNS Name.
-
Click OK.
-
|
Add encrypted peering to connect regions. |
Add Users
Once you have GeoVPN enabled, you can add users. Follow these steps to add users:
-
Click OpenVPN on the left sidebar.
-
Click VPN Users.
-
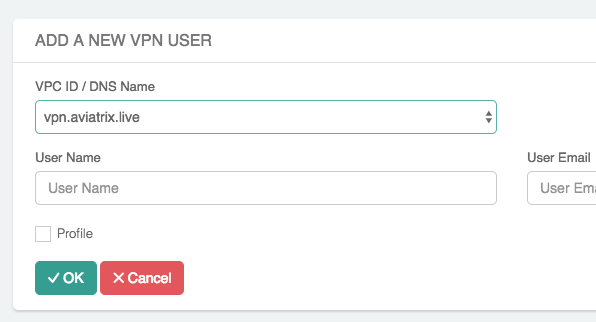
Click + Add New.
-
In the VPC ID / DNS Name dropdown menu, select the GeoVPN VPN service name created in the previous steps.
-
Enter the User Name and optionally the User Email.
-
Click OK.
Managing the GeoVPN Configuration
Once you have GeoVPN feature enabled, you can centrally manage all the VPN gateways' configuration under the GeoVPN service. Follow these steps to configure them:
-
Click OpenVPN on the left sidebar.
-
Click Edit Config.
-
In the VPC ID/VNet Name dropdown menu, select the GeoVPN service name created in the previous steps.
-
Update the VPN configuration regarding to your requirements.
Advanced Settings : Managing VPN Configuration for Individual DHCP Setup
GeoVPN can use DHCP Setting for DNS name resolution from the cloud private network where the VPN gateway is deployed. This reduces latency as DNS service is likely to be closer to the source of the VPN user location. Follow these steps to configure DHCP configuration for individual VPN gateway:
-
Click*OpenVPN* on the left sidebar.
-
Click Edit Config.
-
In the VPC ID/VNet Name dropdown menu, select the specific VPC ID and LB/Gateway Name instead of GeoVPN service name.
-
Update the supported VPN configuration as below regarding to your requirement in each VPN gateway.
-
Additional CIDRs
-
Nameservers
-
Search Domains
The attributes “Additional CIDRs, Nameservers, and Search Domains” are able to be edited for individual LB//Gateway Name only if the split tunnel mode is selected under the GeoVPN service.
-
-
Check this document for more info.
OpenVPN is a registered trademark of OpenVPN Inc.
