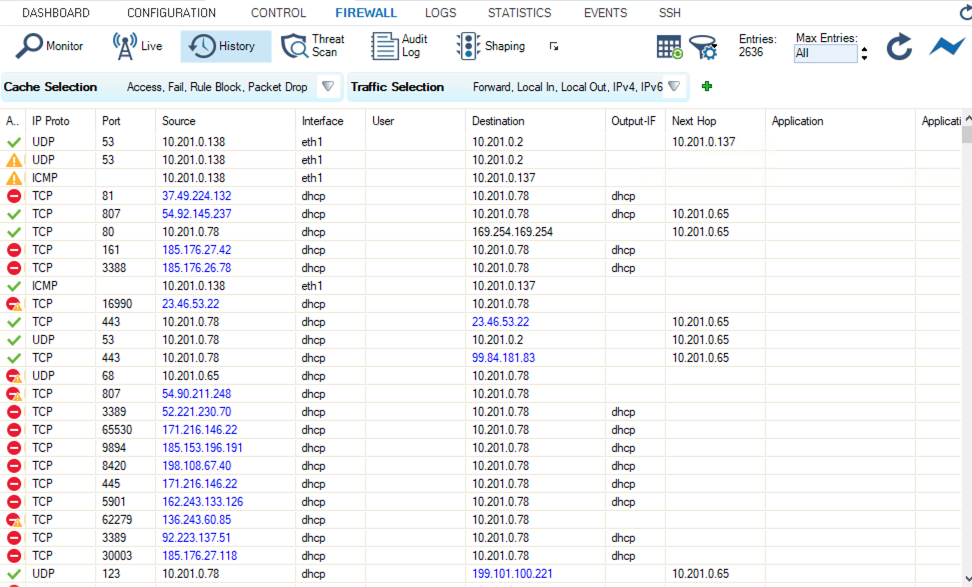
Setting up Your Barracuda Firewall
Some notes before deployment
-
This document complements the existing deployment guide that was designed to help you to associate a Palo Alto VM-Series. The assumption is that you have completed all the steps up to launching and associating a firewall instance before launching this firewall instance. Launching and associating a firewall instance is not necessary as it is Palo Alto VM-Series specific.
-
Currently, we do not have full integration between the Aviatrix dashboard and the Barracuda CloudGen Firewall, which means that you will not be able to update the firewall routing table via API, as it is currently possible with the Palo Alto VM-Series.
The goal of this document is to provide a step-by-step guide to launch and configure one or more Barracuda CloudGen Firewall instances to be integrated with the Aviatrix Firewall Network.
This setup will include basic “allow-all” policies to serve as initial configuration to validate intended traffic is passing through the firewall instance.
Setting up Firewall Network (FireNet)
Complete all the steps of the Firewall Network Workflow in the Aviatrix Controller up to Attaching Aviatrix FireNet Gateway to TGW Firewall Domain to prepare your Firewall VPC (FireNet VPC). This will also set up the subnets that you will need later for launching a Barracuda Firewall instance.
Deploying the Barracuda CloudGen Firewall Instance from the AWS Marketplace
The Barracuda CloudGen Firewall is available as a Pay-As-You-Go (PAYG) or Bring-Your-Own-License (BYOL) model. For ease of use, we will use the PAYG model in this example.
-
Select the Launch Instance link in the AWS console from the Region your FireNet has been deployed in:
-
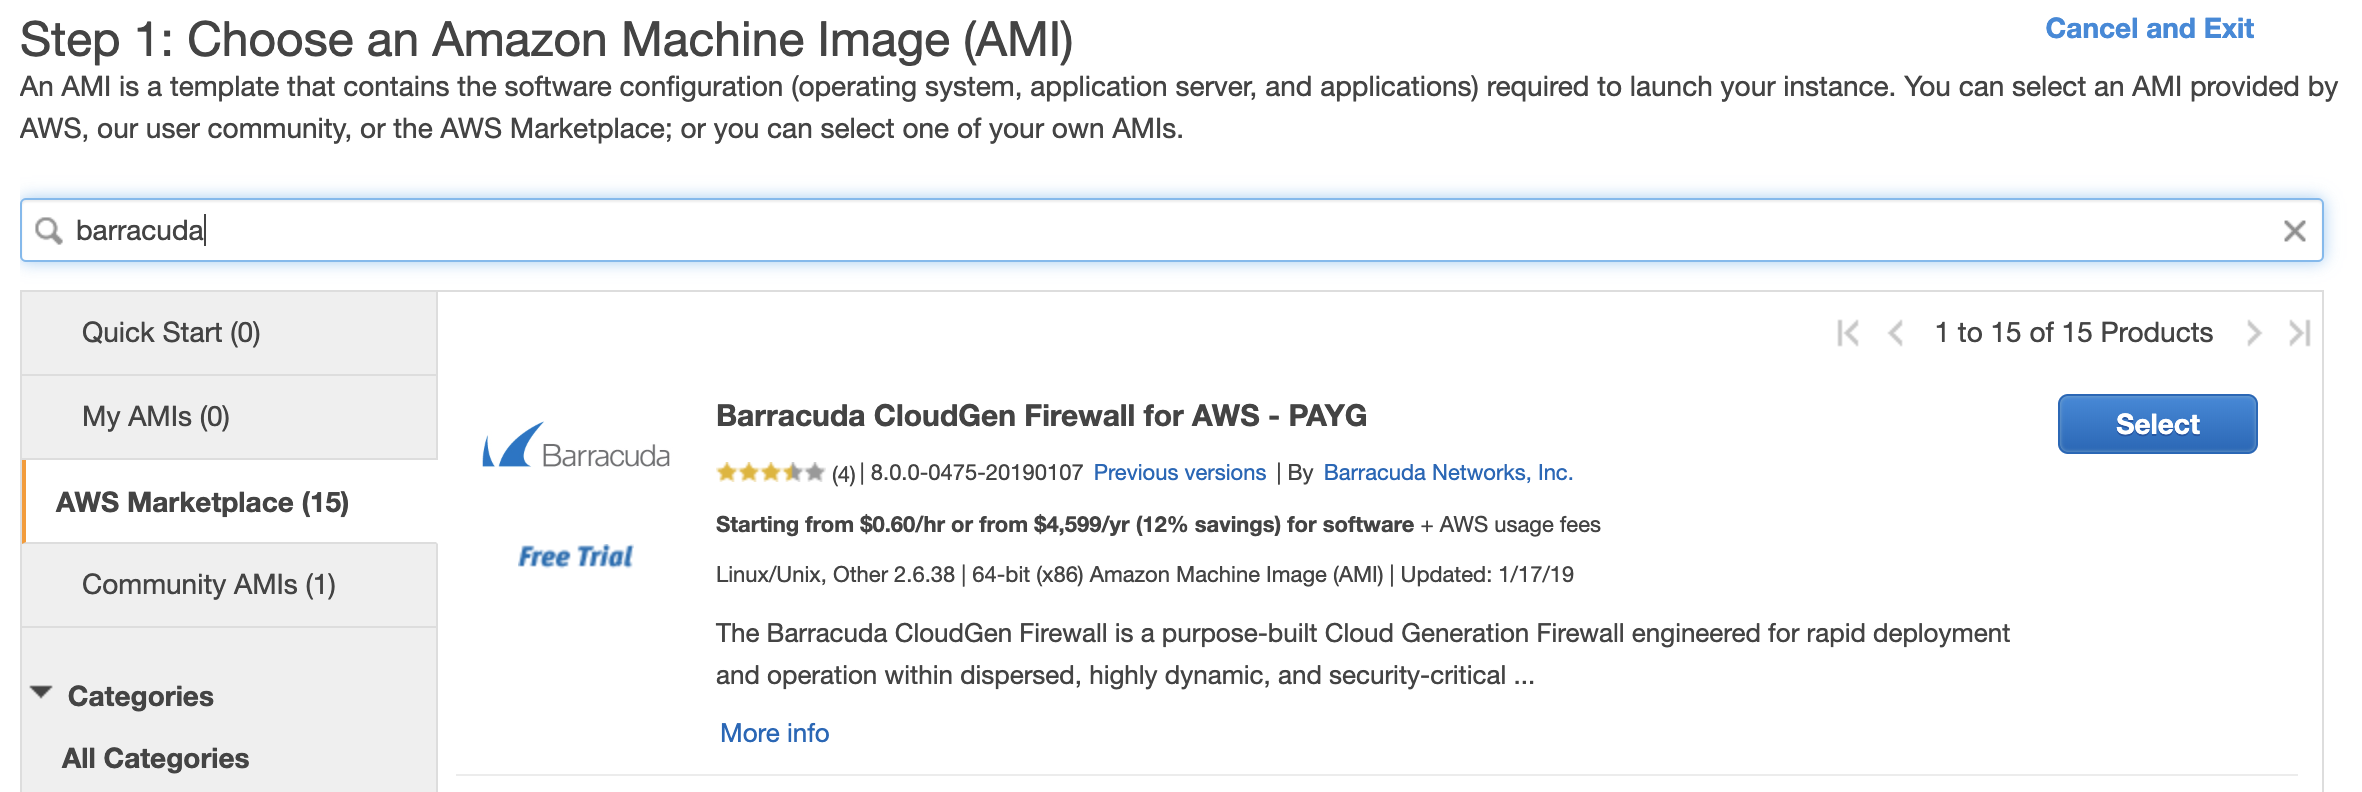
Choose the AWS Marketplace link and search for Barracuda.
-
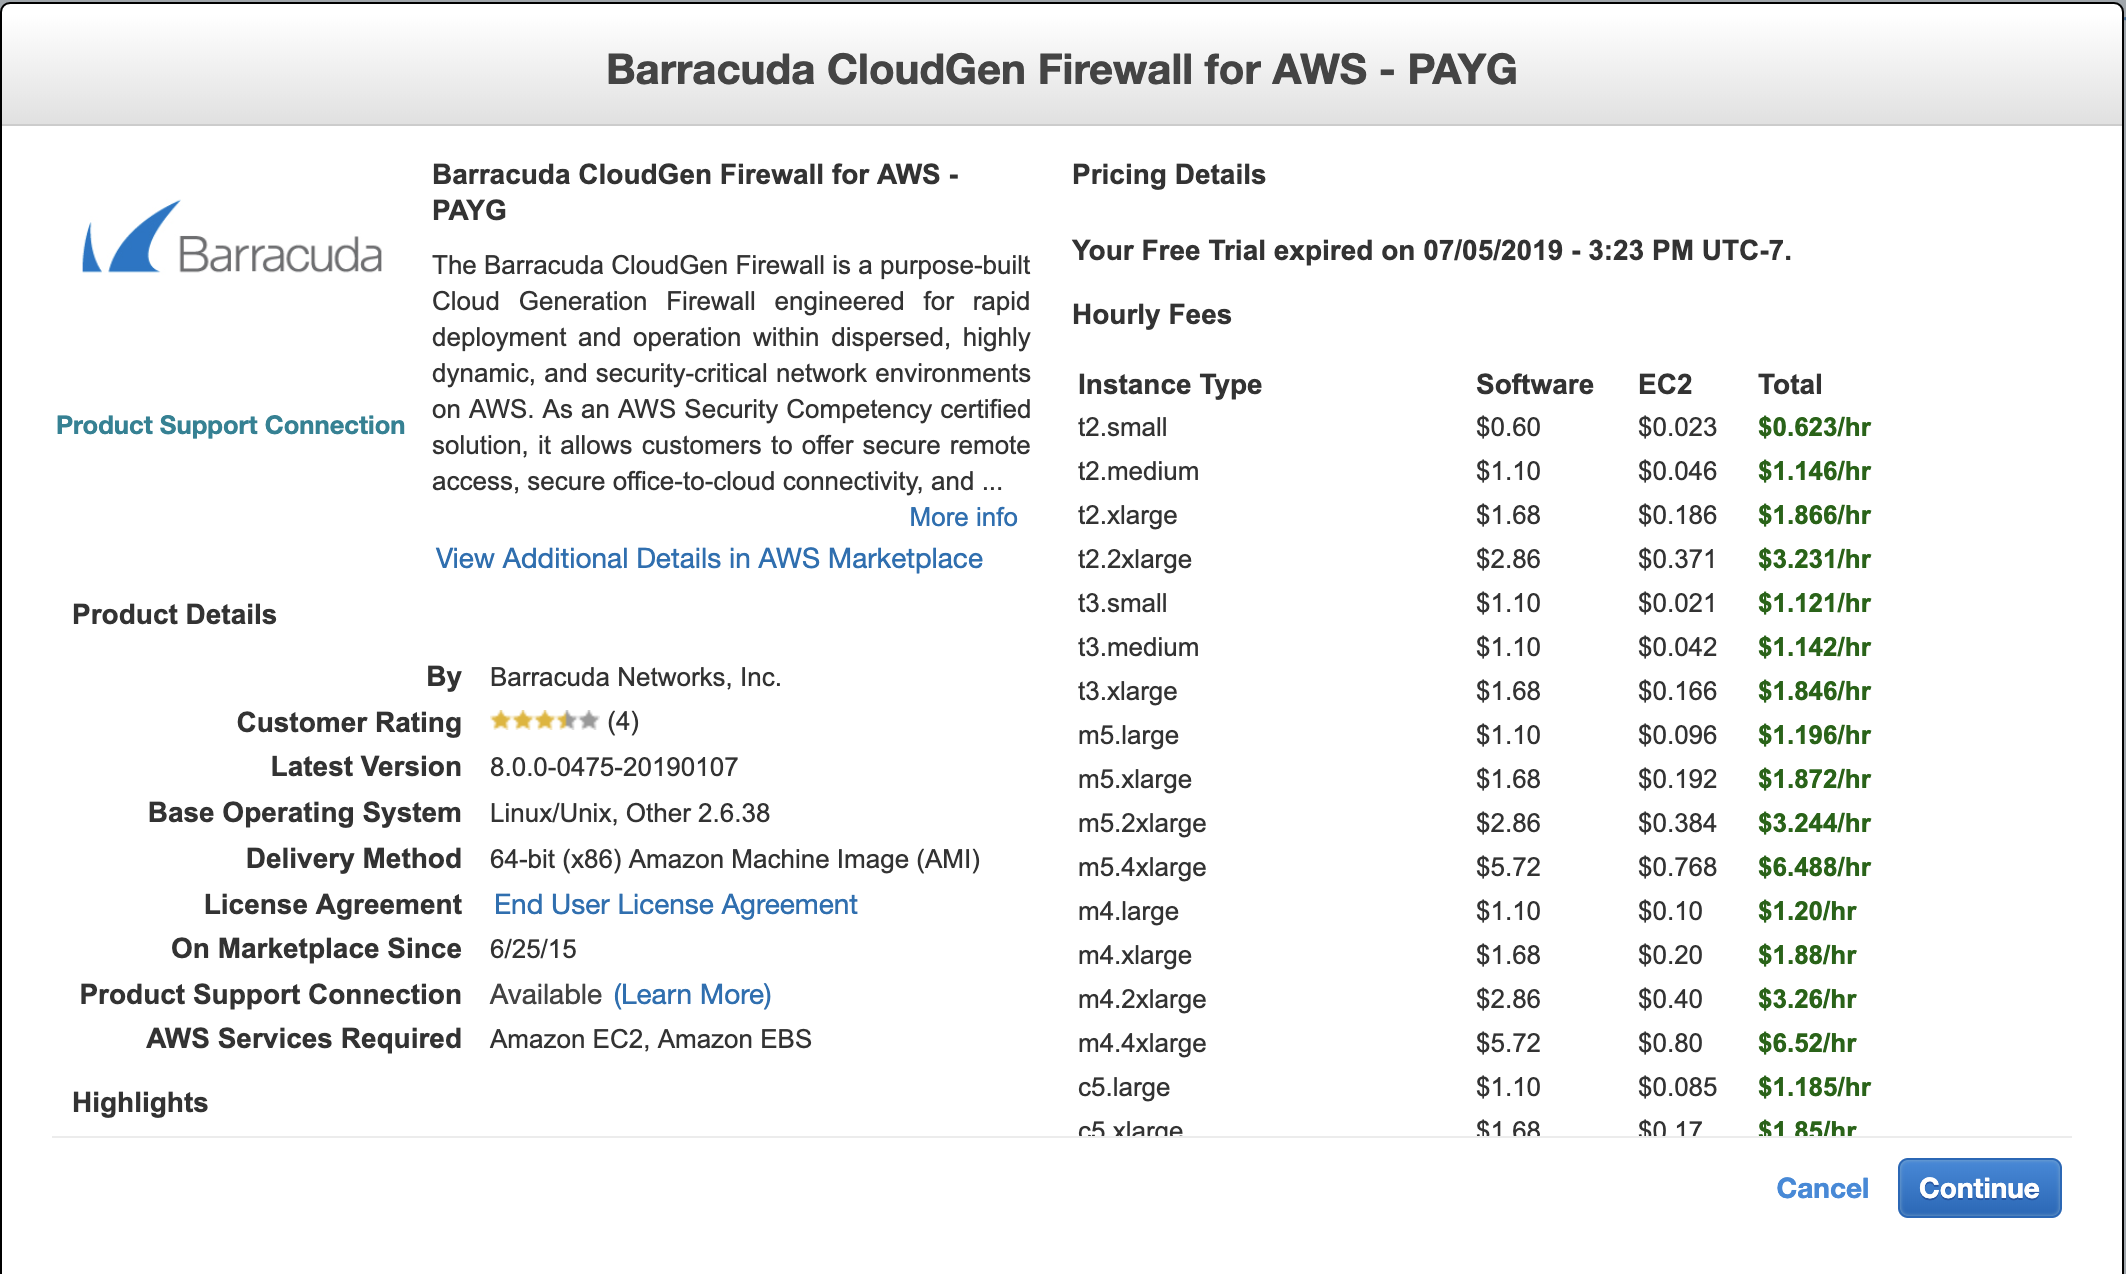
Choose the Barracuda CloudGen Firewall for AWS - PAYG.
-
-
Click Continue when prompted.
-
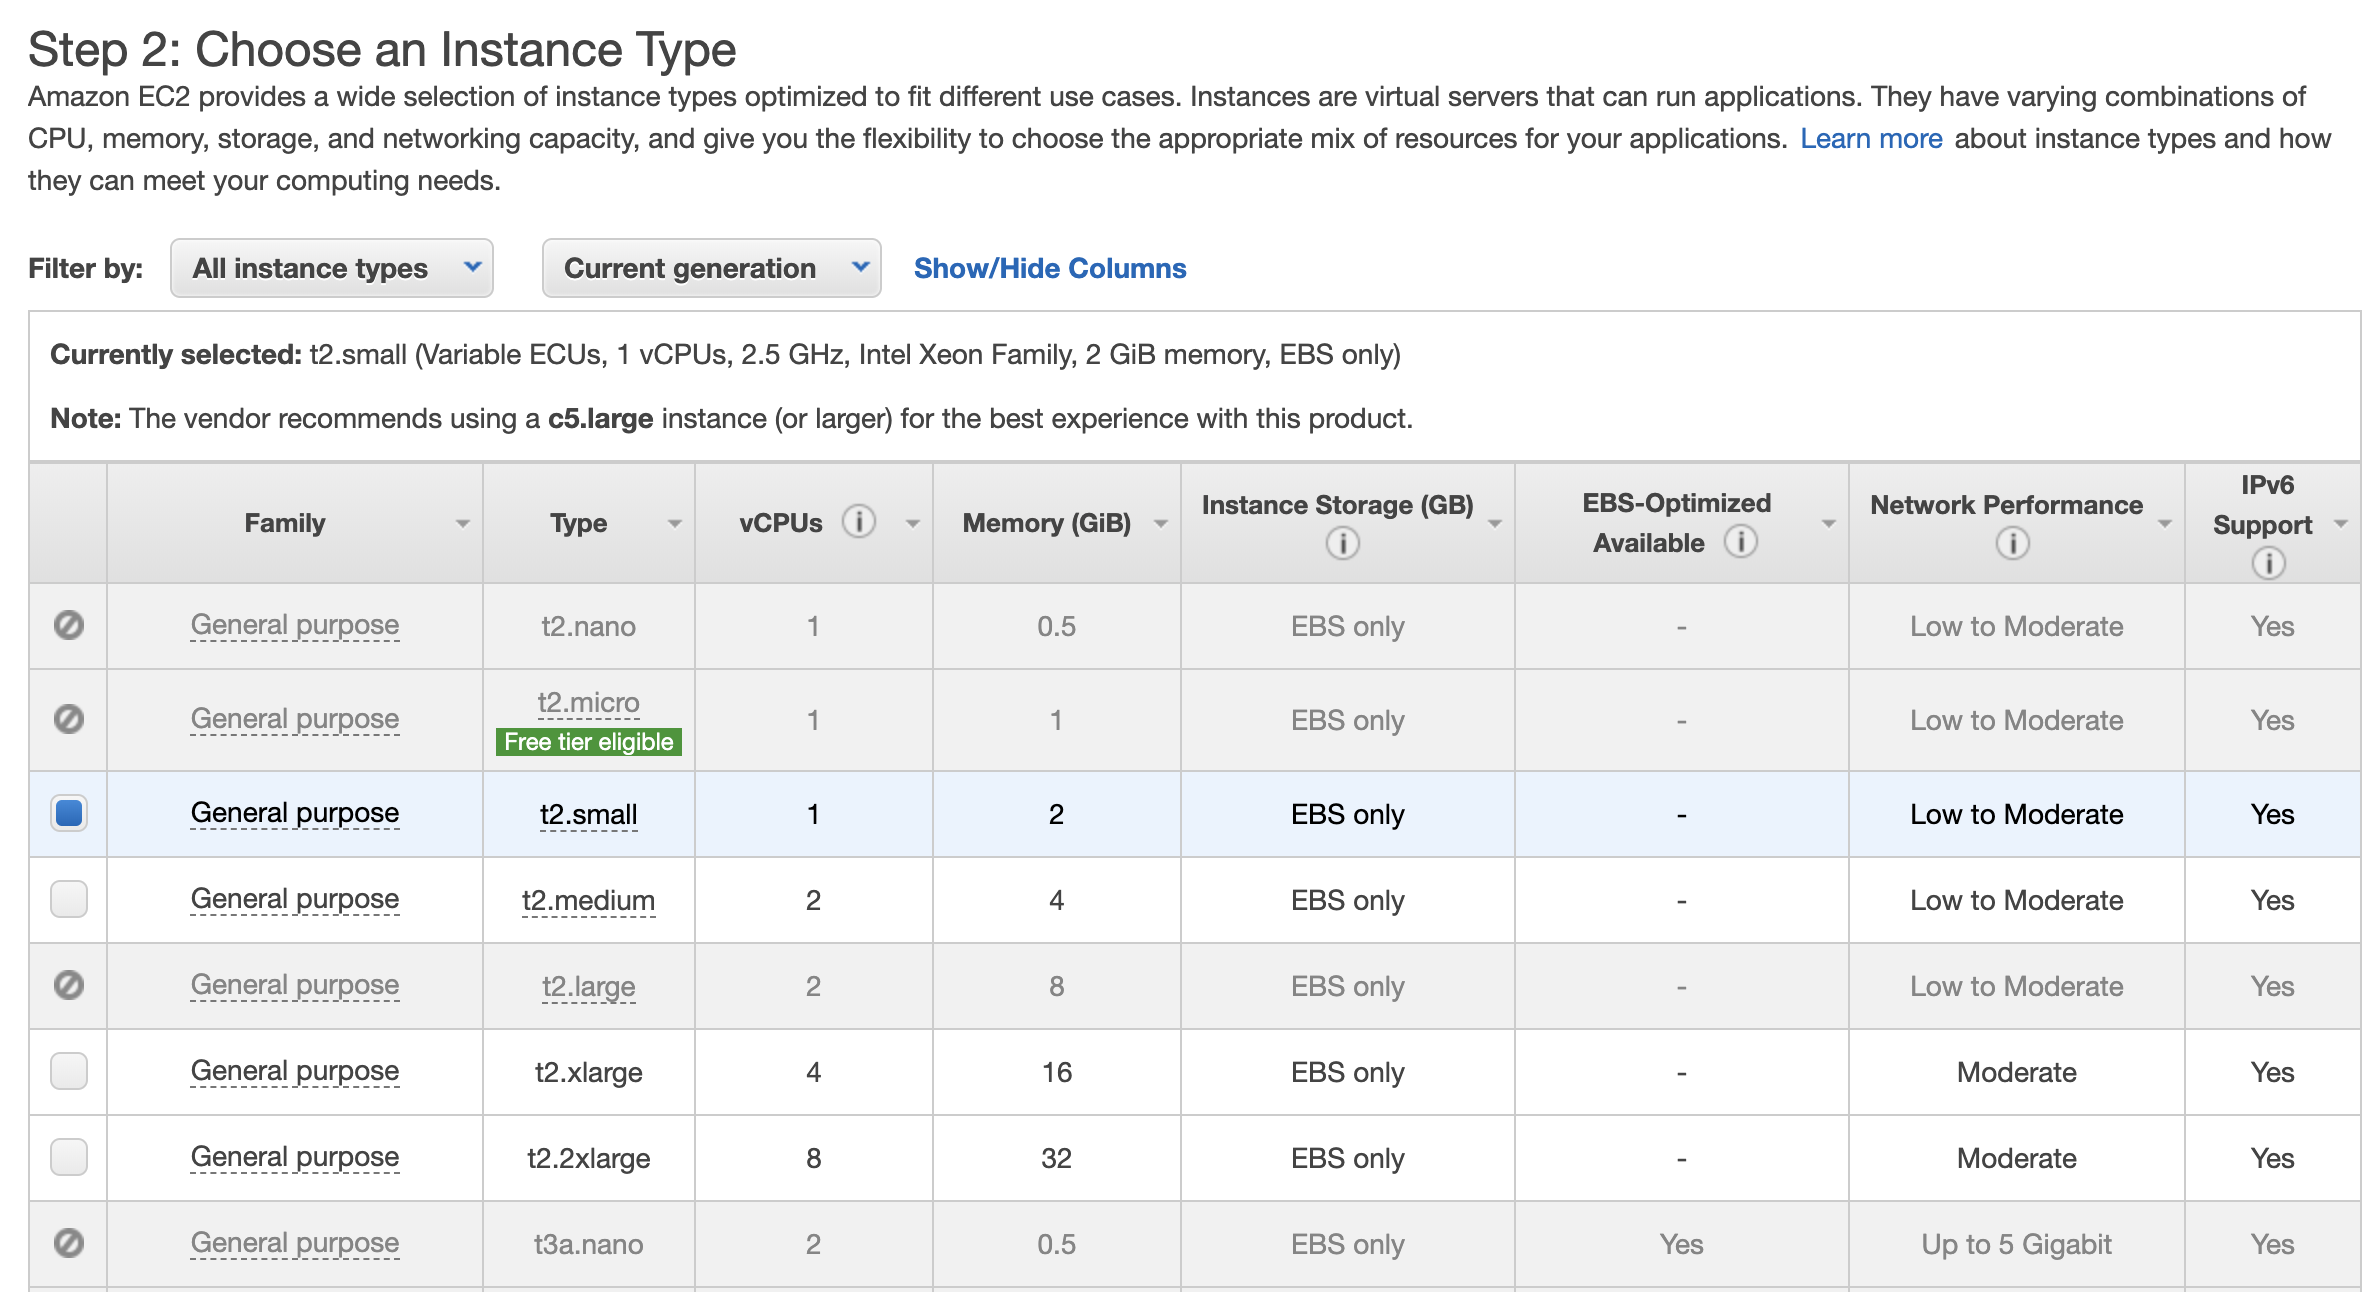
Choose an instance size. A t2.small can be used for the Demo. Click Next: Configure Instance Details.
-
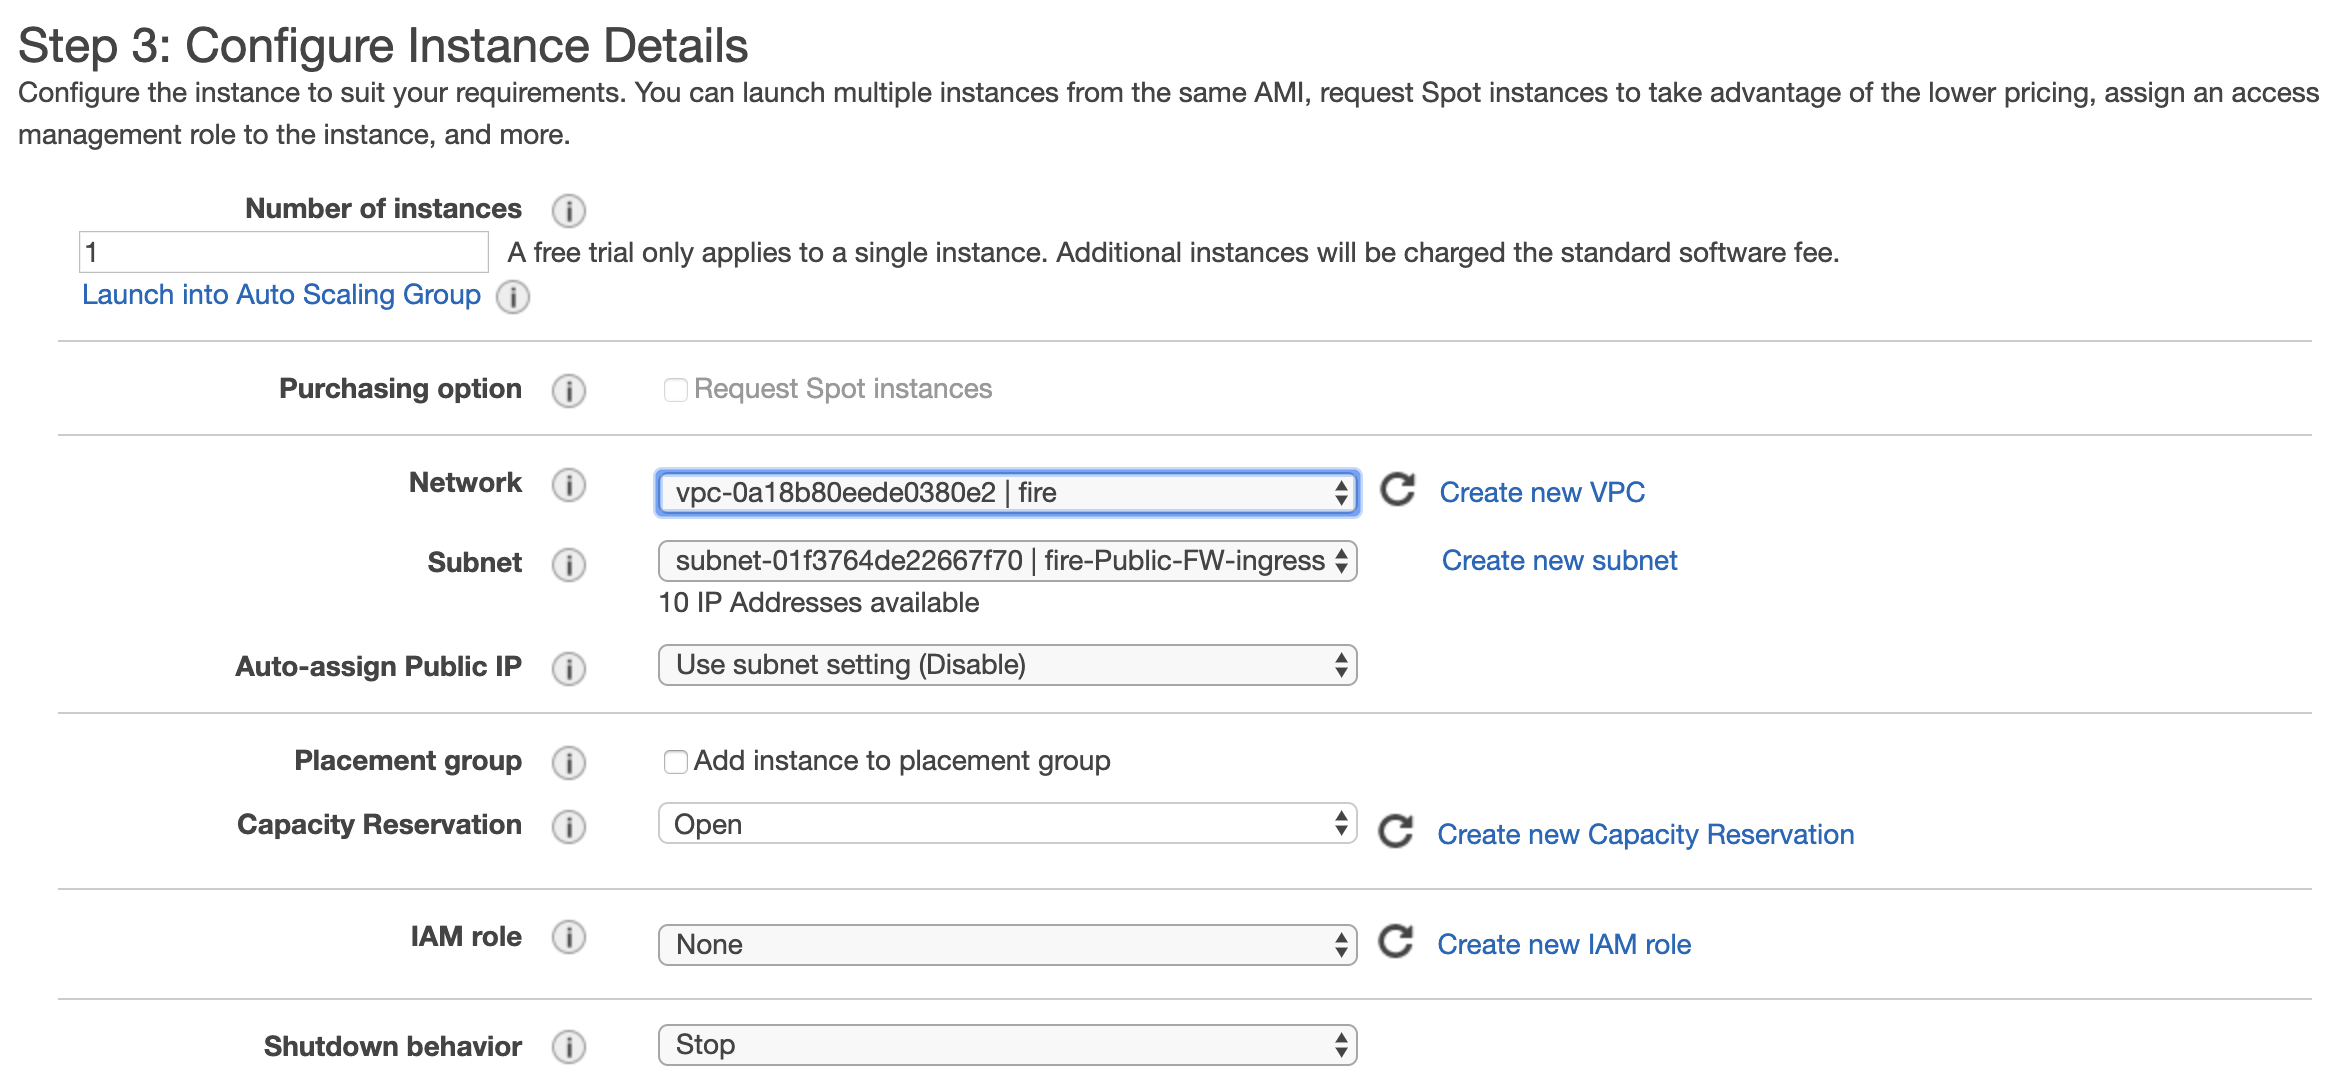
Choose the VPC created for the Aviatrix FireNet from the dropdown. Click the Public-FW-ingress-egress-us-east-1b subnet. In this example, we are using the US-East region.
-
Scroll down to adjust the network interfaces. Click Add Device to add another Network Interface. On the Subnet dropdown for eth1, choose the aviatrix-fireGW-DMZ-firewall subnet.

-
Click Next: Add Storage, then Next: Add Tags.
-
Add any necessary tags then click Next: Configure Security Group. No changes need to be made to the Security Group now.
-
Click Review and Launch, the Launch on the next screen. You will be prompted for a key pair. None will be needed for the Firewall.
-
Choose Launch Instances.
-
Configure an Elastic IP in the AWS Console to connect to the Barracuda management interface. Once allocated, it must be associated to the private IP address of the Barracuda on eth0.
Logging in to Firewall and Configuring Interfaces
-
Barracuda recommends configuring its instances with the Firewall Admin, a stand-alone Windows application. Directions on downloading and using it can be found here.
-
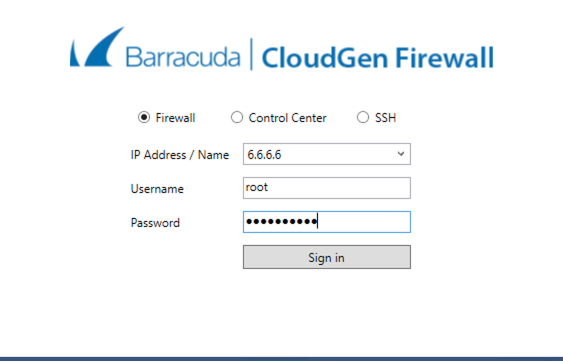
Open the Admin Client and use the Elastic IP, root as the Username, and the instance id from the AWS console as the initial password.
-
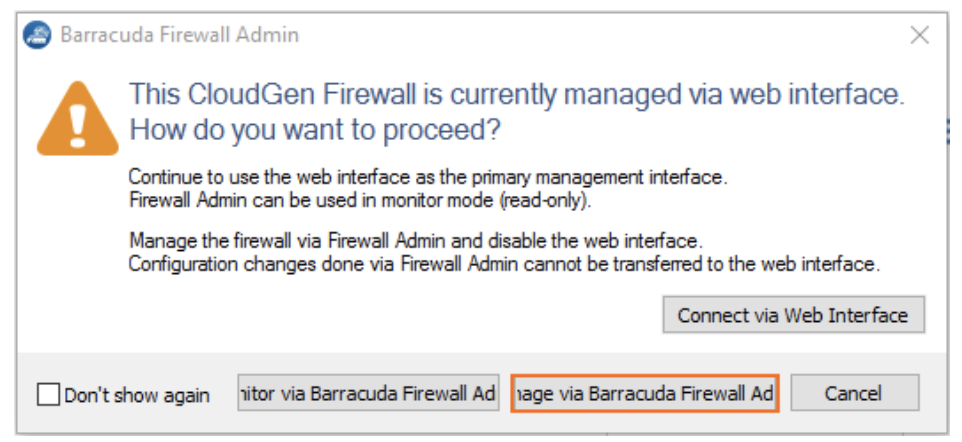
You will be prompted to change the password when you first log in. After changing the password and logging in again, you must choose how you will administer the Firewall. Choose Manage via Firewall Admin and confirm.
-
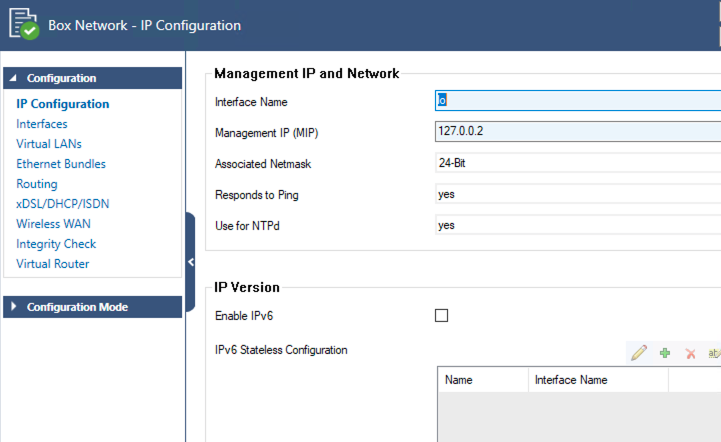
These steps follow the Barracuda Documentation for adding an additional interface. Once logged in you will need to configure the second(eth1) interface on Barracuda. Go to Configuration > Configuration Tree > Box > Network.
-
Click Lock.
-
In the left menu, click Interfaces.
-
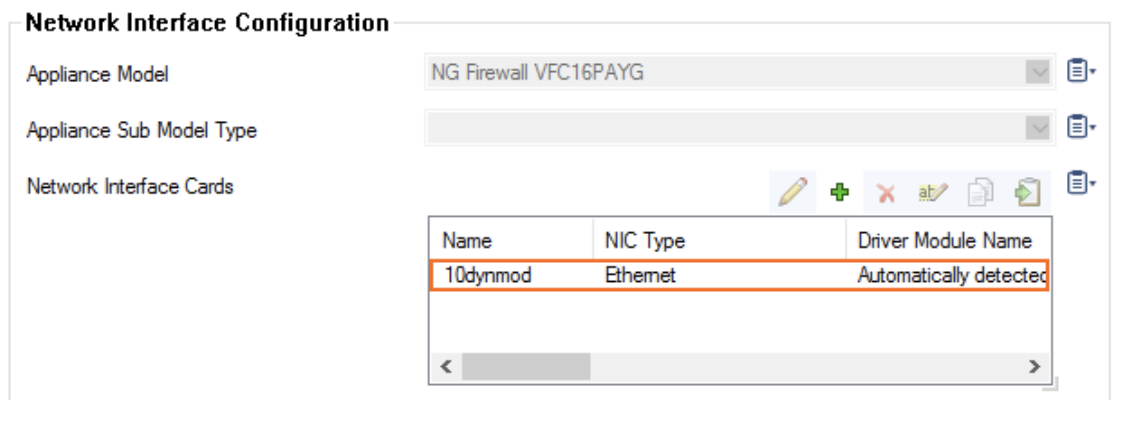
In the Network Interface Cards table, double-click the 10dynmod entry.
-
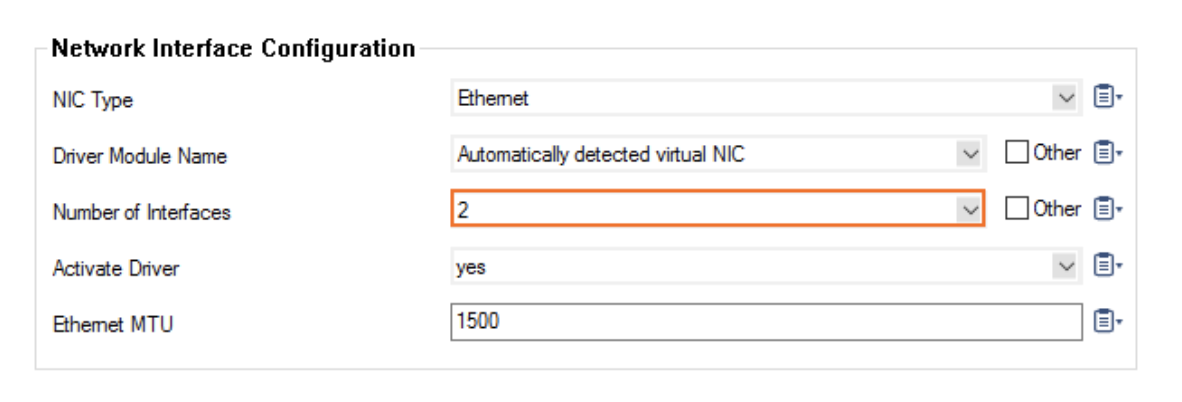
In the resulting Network Interface Configuration dialog,select the number of network interfaces attached to the firewall instance (in this case, 2). Click OK.
-
Click Send Changes and Activate.
Adding a Direct Attached Route for the Second Network Interfce
-
Go to Configuration > Configuration Tree > Box > Network.
-
Click Lock.
-
In the left menu, click Routing.
-
Click +in the IPv4 Routing Table to add an attached route.
-
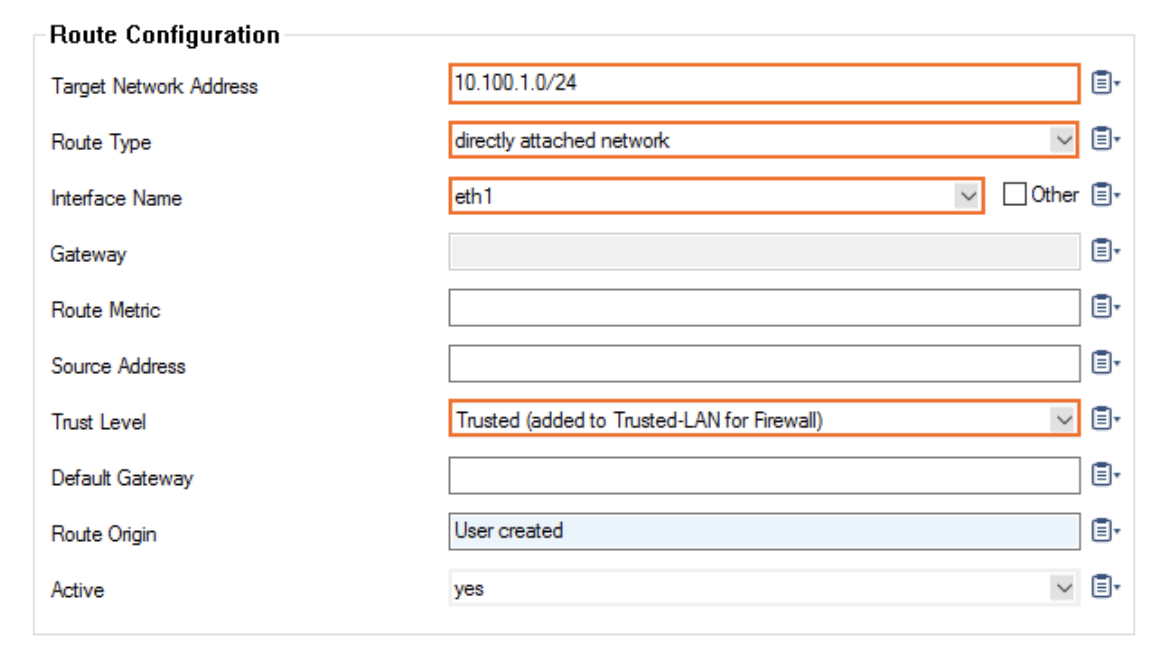
Target Network address will be the subnet you put on eth1, the aviatrix-fireGW-DMZ-firewall subnet.
-
For the Route Type, select direct attached network.
-
For the Interface Name, select eth1.
-
For the Trust Level, select Trusted.
-
-
Click OK.
-
Click Send Changes and Activate.
Activating the Network Configuration
-
Go to Control > Box.
-
In the Network section of the left menu, click Activate new network configuration. The Network Activation window opens.
-
Click Failsafe.
The route is now pending in Control > Network.

Adding a Virtual IP to the Virtual Server
A virtual IP needs to be added to the Virtual Server. It will be the private IP assigned to your eth1 interface from the AWS console.
-
Go to Configuration > Configuration Tree > Box > Virtual Servers > your virtual server > Server Properties.
-
Click Lock.
-
Click + in the Additional IP table. The Additional IP window opens.
-
In Additional IP, add the private IP address configured for the network interface in step 1.
-
Reply to Ping and select Yes.
-

-
Click OK.
-
Click Send Changes and Activate.
Creating Static Routes for Routing of Traffic VPC-to-VPC
The next step is to update the route table. For the purpose of this guide, we suggest adding three routes, each for a RFC1918 address pointing to the private IP of the eth2/ENI of the Aviatrix gateway in question (whether you are attaching the instance to the main or to the backup gateway).
-
Go to Configuration > Configuration Tree > Box > Network.
-
Click Lock.
-
In the left menu, click Routing.
-
Click + in the IPv4 Routing Table to add a gateway route.
-
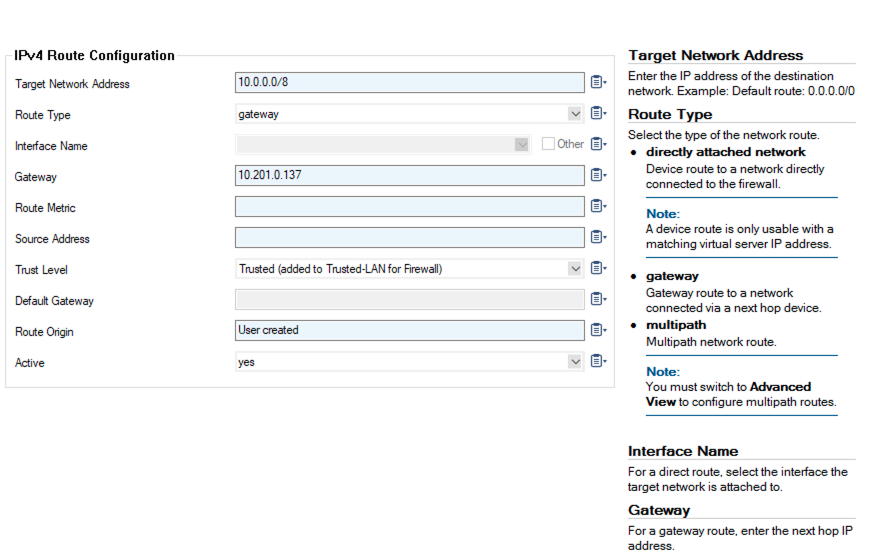
The Target Network Address will be a summary of your VPCs or all private addresses.
-
Select gateway as the Route Type.
-
In the Gateway field, add the private IP of the eth2 interface of your primary Aviatrix FireNet Gateway.
-
Selected Trusted as the Trust Level.
-
-
Click OK.
-
Click Send Changes and Activate.
The Network Configuration must now be activated.
-
Go to Control > Box.
-
In the Network section of the left menu, click Activate new network configuration. The Network Activation window opens.
-
Click Failsafe.
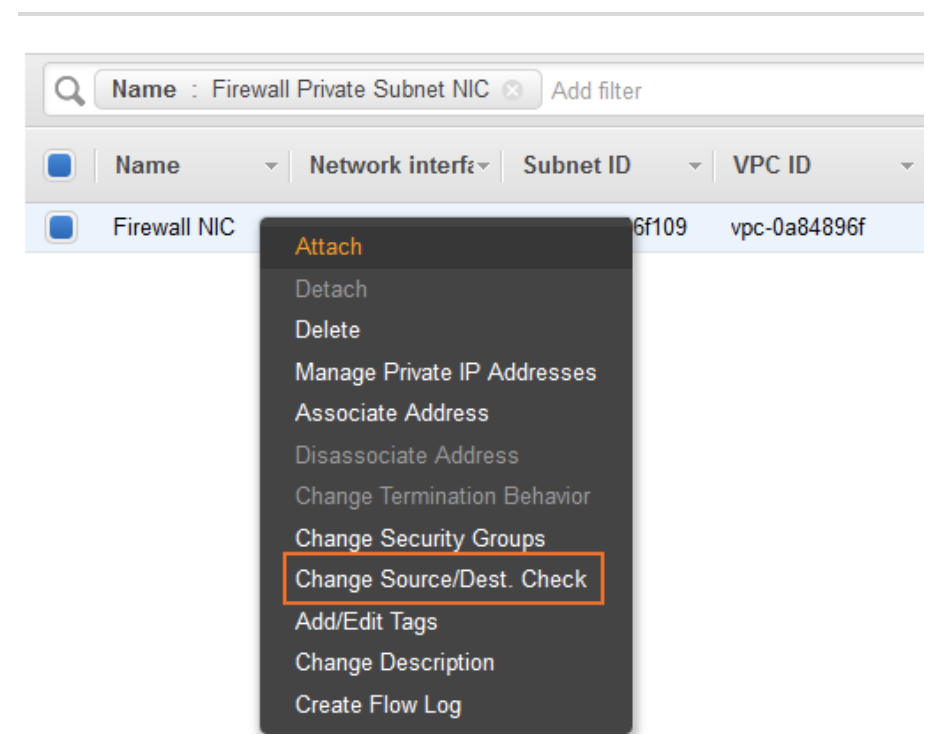
For the second interface to become available to the Barracuda the instance will need to be rebooted from the AWS console. If it hasn’t already been done, Source/Dest. Check will also need to be disabled for both of the ENIs associated to the Barracuda.
Configuring Basic Traffic Policy to Allow Traffic
Security Groups in AWS for the Barracuda ENIs will need to be adjusted as necessary to allow the traffic from the various VPCs to reach the interface.
You may need to build rules to allow VPC-to-VPC traffic, and Egress traffic if needed.
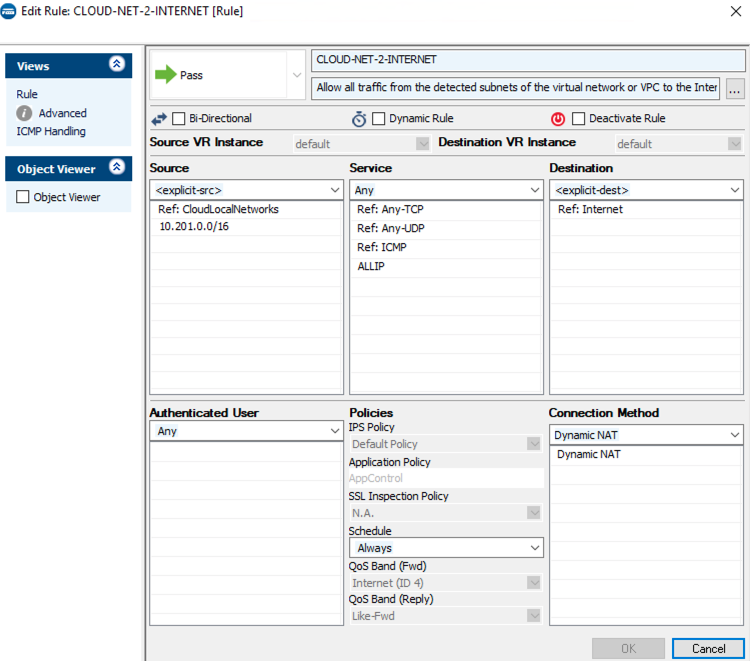
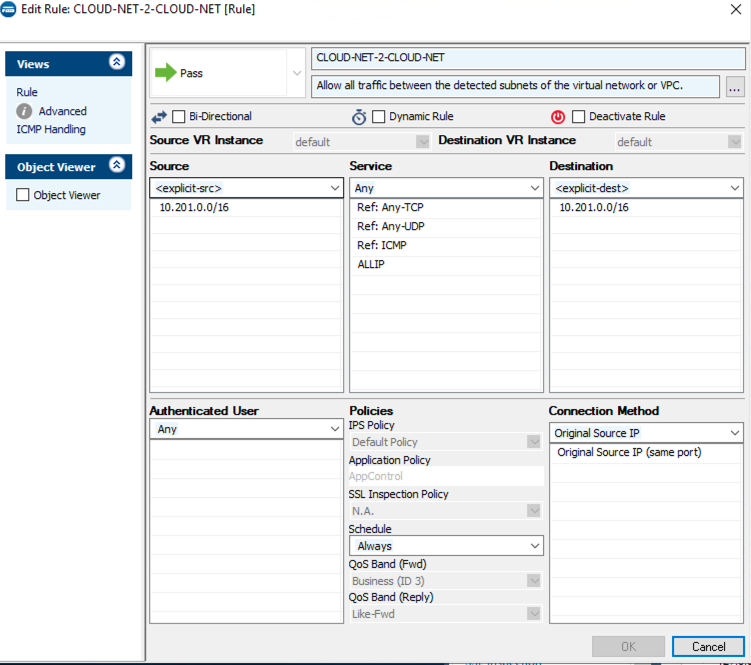
There are two pre-built rules, CLOUD-NET-2-INTERNET and CLOUD-NET-2-CLOUD-NET, that can be adjusted to match your VPCs within AWS.
-
In your Barracuda UI, go to Configuration > Configuration Tree > Virtual Servers > your virtual server > NGFW(Firewall) > Forwarding Rules.
-
Click Lock.
-
Open the CLOUD-NET-2-INTERNET rule and add your VPCs CIDR ranges to the Source field.
-
Click OK.
-
Click Send Changes and Activate.
Do the same for the CLOUD-NET-2-CLOUD-NET rule, adding your VPCs to the Source and Destination fields. Leaving the Connection Method as Original Source IP will help in any future troubleshooting or logging.
Ready to Go
Now your firewall instance is ready to receive packets. The next step is specifying which Network Domain needs packet inspection by defining a connection policy that connects to the firewall domain. This is done here in the Firewall Network workflow.
For example, deploy Spoke-1 VPC in Network_Domain_1 and Spoke-2 VPC in Network_Domain_2. Build a connection policy between the two domains. Build a connection between Network_Domain_2 to Firewall Domain.
Launch one instance in Spoke-1 VPC and Spoke-2 VPC. From one instance, ping the other instance. The ping should go through.
