Launching the Controller
After subscribing to the metered offer and receiving your license key, click the link in the “License key for Aviatrix Metered Controller and Copilot” email you received. This link opens the Azure marketplace to the Aviatrix Secure Networking Platform BYOL (Bring Your Own License) page.
| As explained above, this BYOL offer activates the metered subscription. |
Launching the Controller VM from the Azure Marketplace Portal
-
On the Aviatrix Secure Network Platform BYOL page, click Get it Now.

-
Under Create this app in Azure, click Continue.
-
Under Aviatrix Secure Networking Platform BYOL, click Create.
-
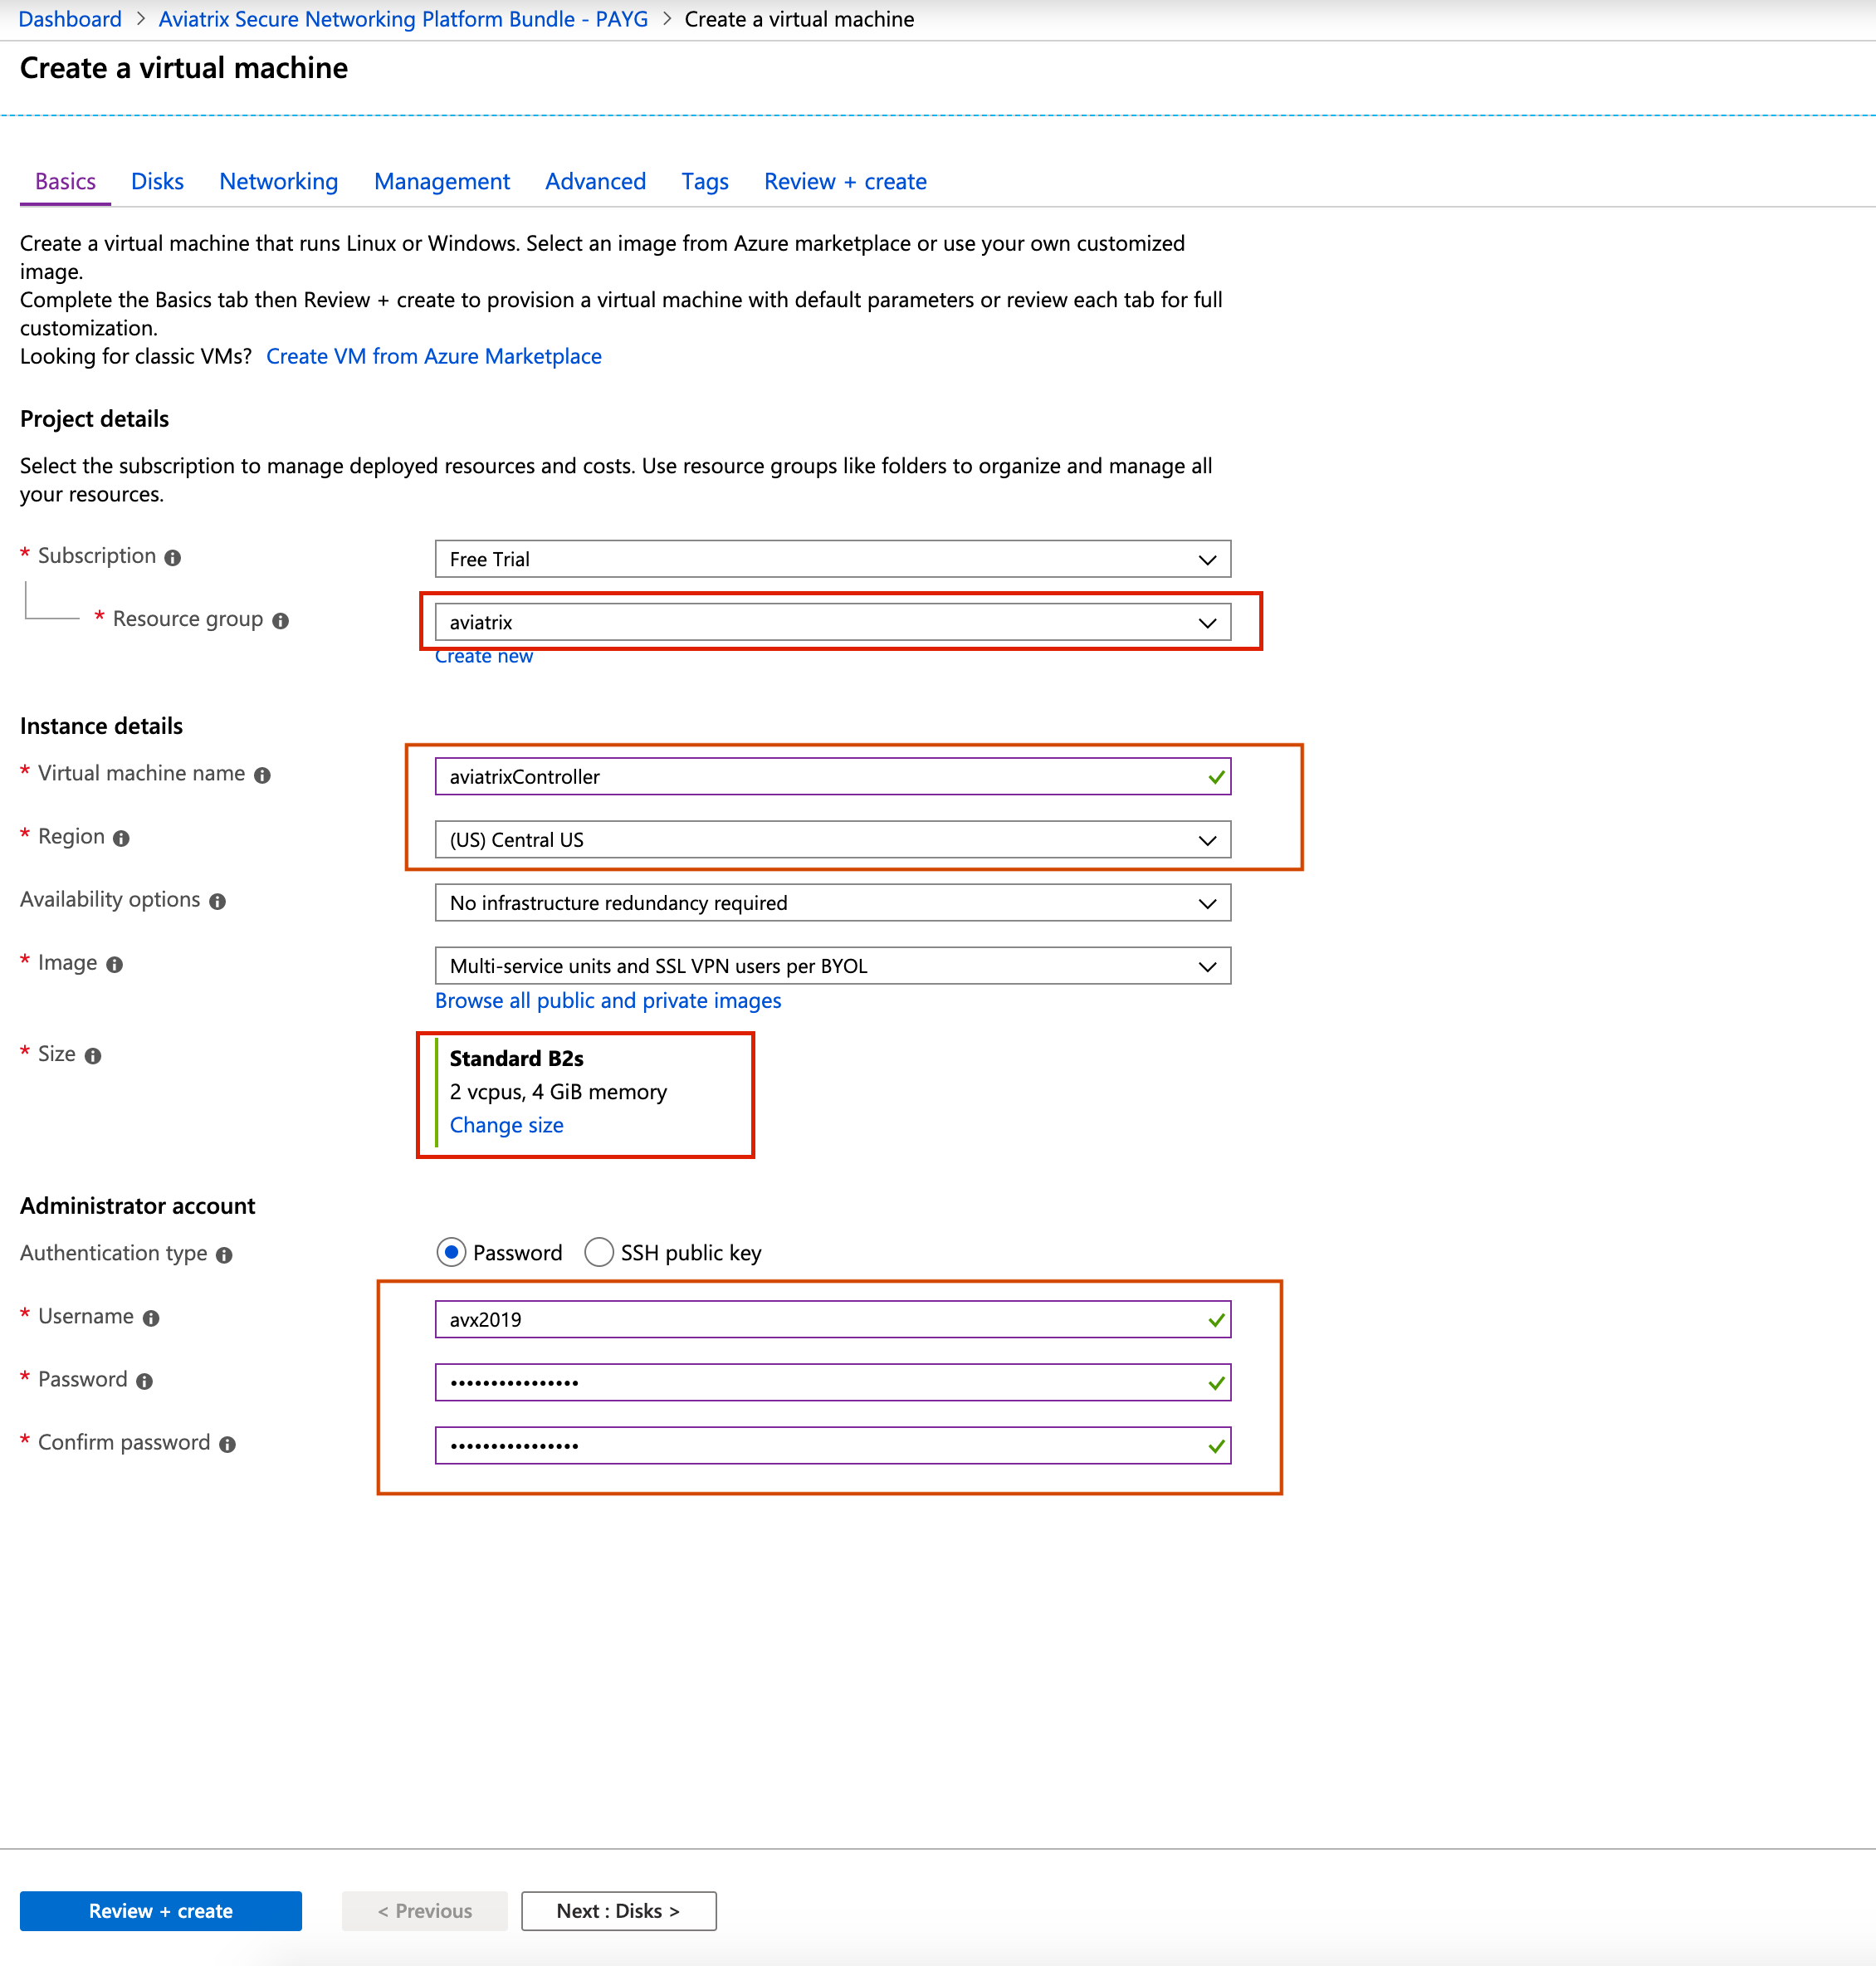
Create a new Resource Group titled “aviatrix.” The virtual machine name can be “aviatrixController.” For the instance size, at least 8GB of RAM is recommended; the B2ms instance size should be sufficient.
-
Next, enter a username, password, and Resource group.
|
Please do not use “ubuntu” as username if you use password as the authentication type. |
-
Click Review + create.
-
Click Create.
-
Under Generate new key pair, click Download private key and create resources to download your secret key.
-
When you receive the message that your deployment is compete, click Go to resource.
-
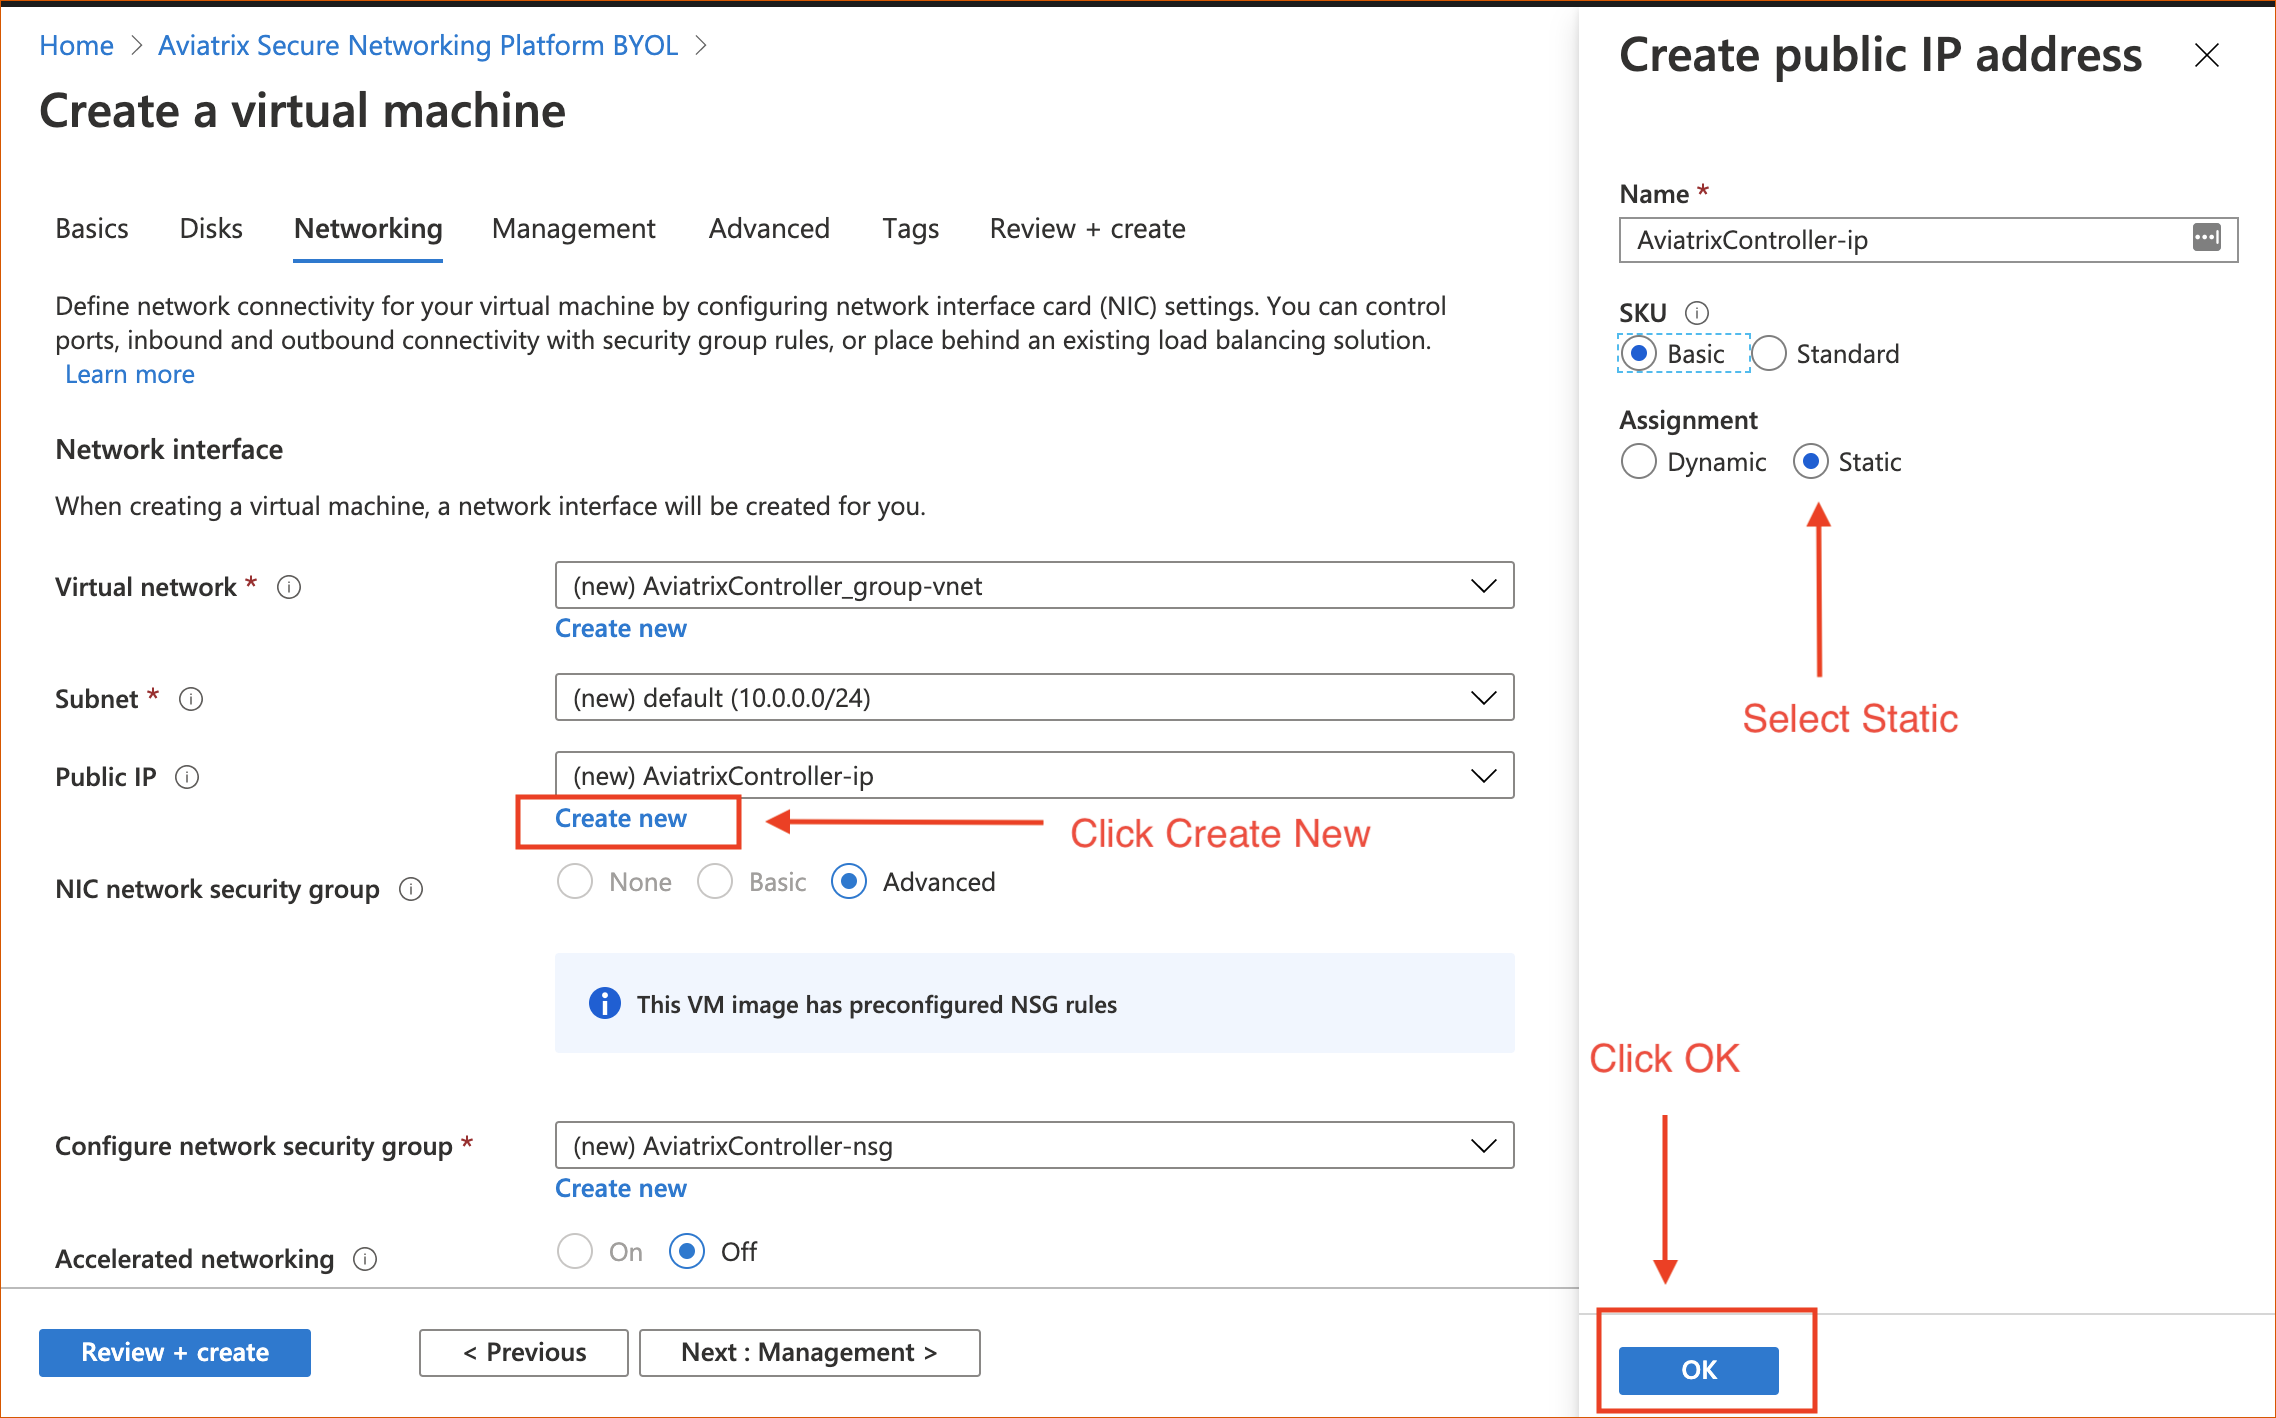
At the networking header, this will be preconfigured with a default subnet and security group. You should not need to change anything here. For Public IP, click Create New.
-
At Assignment, select Static and click OK.
-
The management, advanced, and tag headers should not need any configuration changes.
Keep each Controller Security Group’s outbound rules at their default, open to Internet or All, to avoid blocking your Controller’s IP address from accessing the Internet.
-
Click Create to finish launching the VM.
-
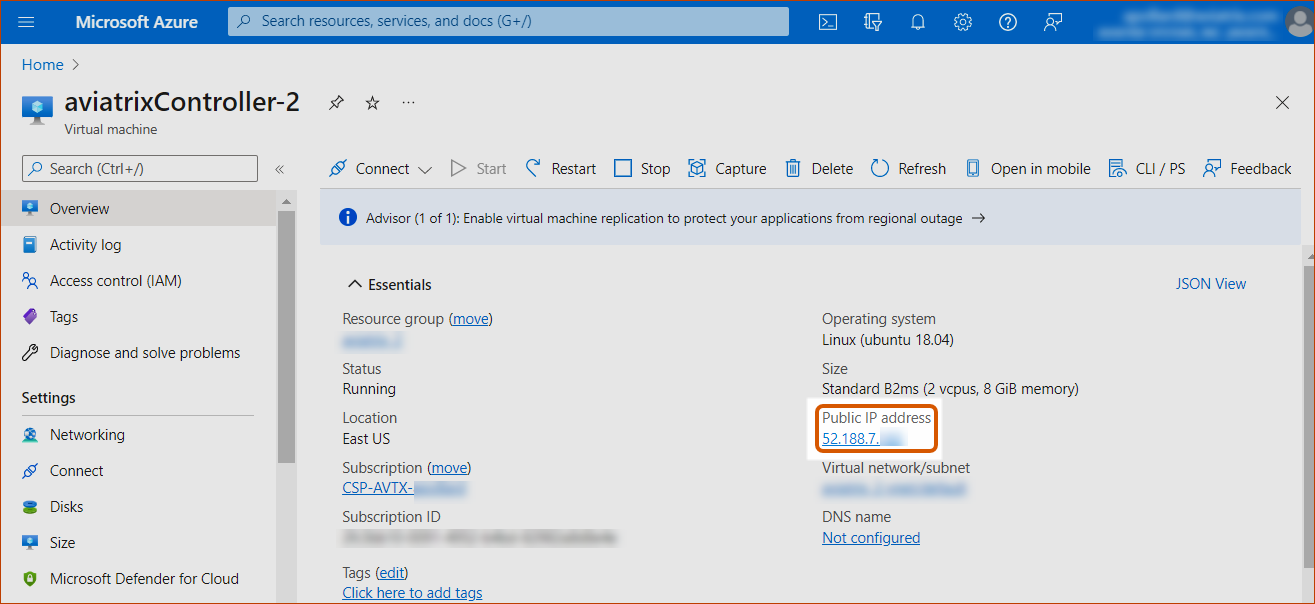
Find the VM’s public IP address, as shown below:
-
Use a browser to access the Controller VM. In this example, it is https://52.188.7.xxx
-
At the login page, enter "admin" as the username. The initial password is the internal IP address of the VM.
-
Log into your new Controller.
-
After logging in, click on the Onboarding tab.
|
Any resources created by the Controller, such as Aviatrix gateways, Azure routing entries, subnets, etc, must be deleted from the Controller console. If you delete them directly on Azure console, the Controller’s view of the resources will be incorrect, which will lead to features not working properly. |