Creating Policies
After creating SmartGroups, you create policies that consist of rules, to define the access control to apply on the traffic between those SmartGroups.
| If your SmartGroups contain Spoke Gateways, ensure that those Spoke Gateways have Egress enabled. |
For example, in the workload isolation use case, all traffic (i.e., ports and protocols) between the ShoppingCart application and the Product Logging app must be blocked (Denied). You can decide which policies to enforce, and if you want to log the actions related to a rule. These rules are enforced (if enabled) on your Spoke gateways, and are executed against the Spoke gateways in the order that they are shown in the rule list.
A SmartGroup traffic flow can belong to more than one rule. If this occurs, the priority of the rule determines the action that is taken first.
To create a new Distributed Cloud Firewall policy:
-
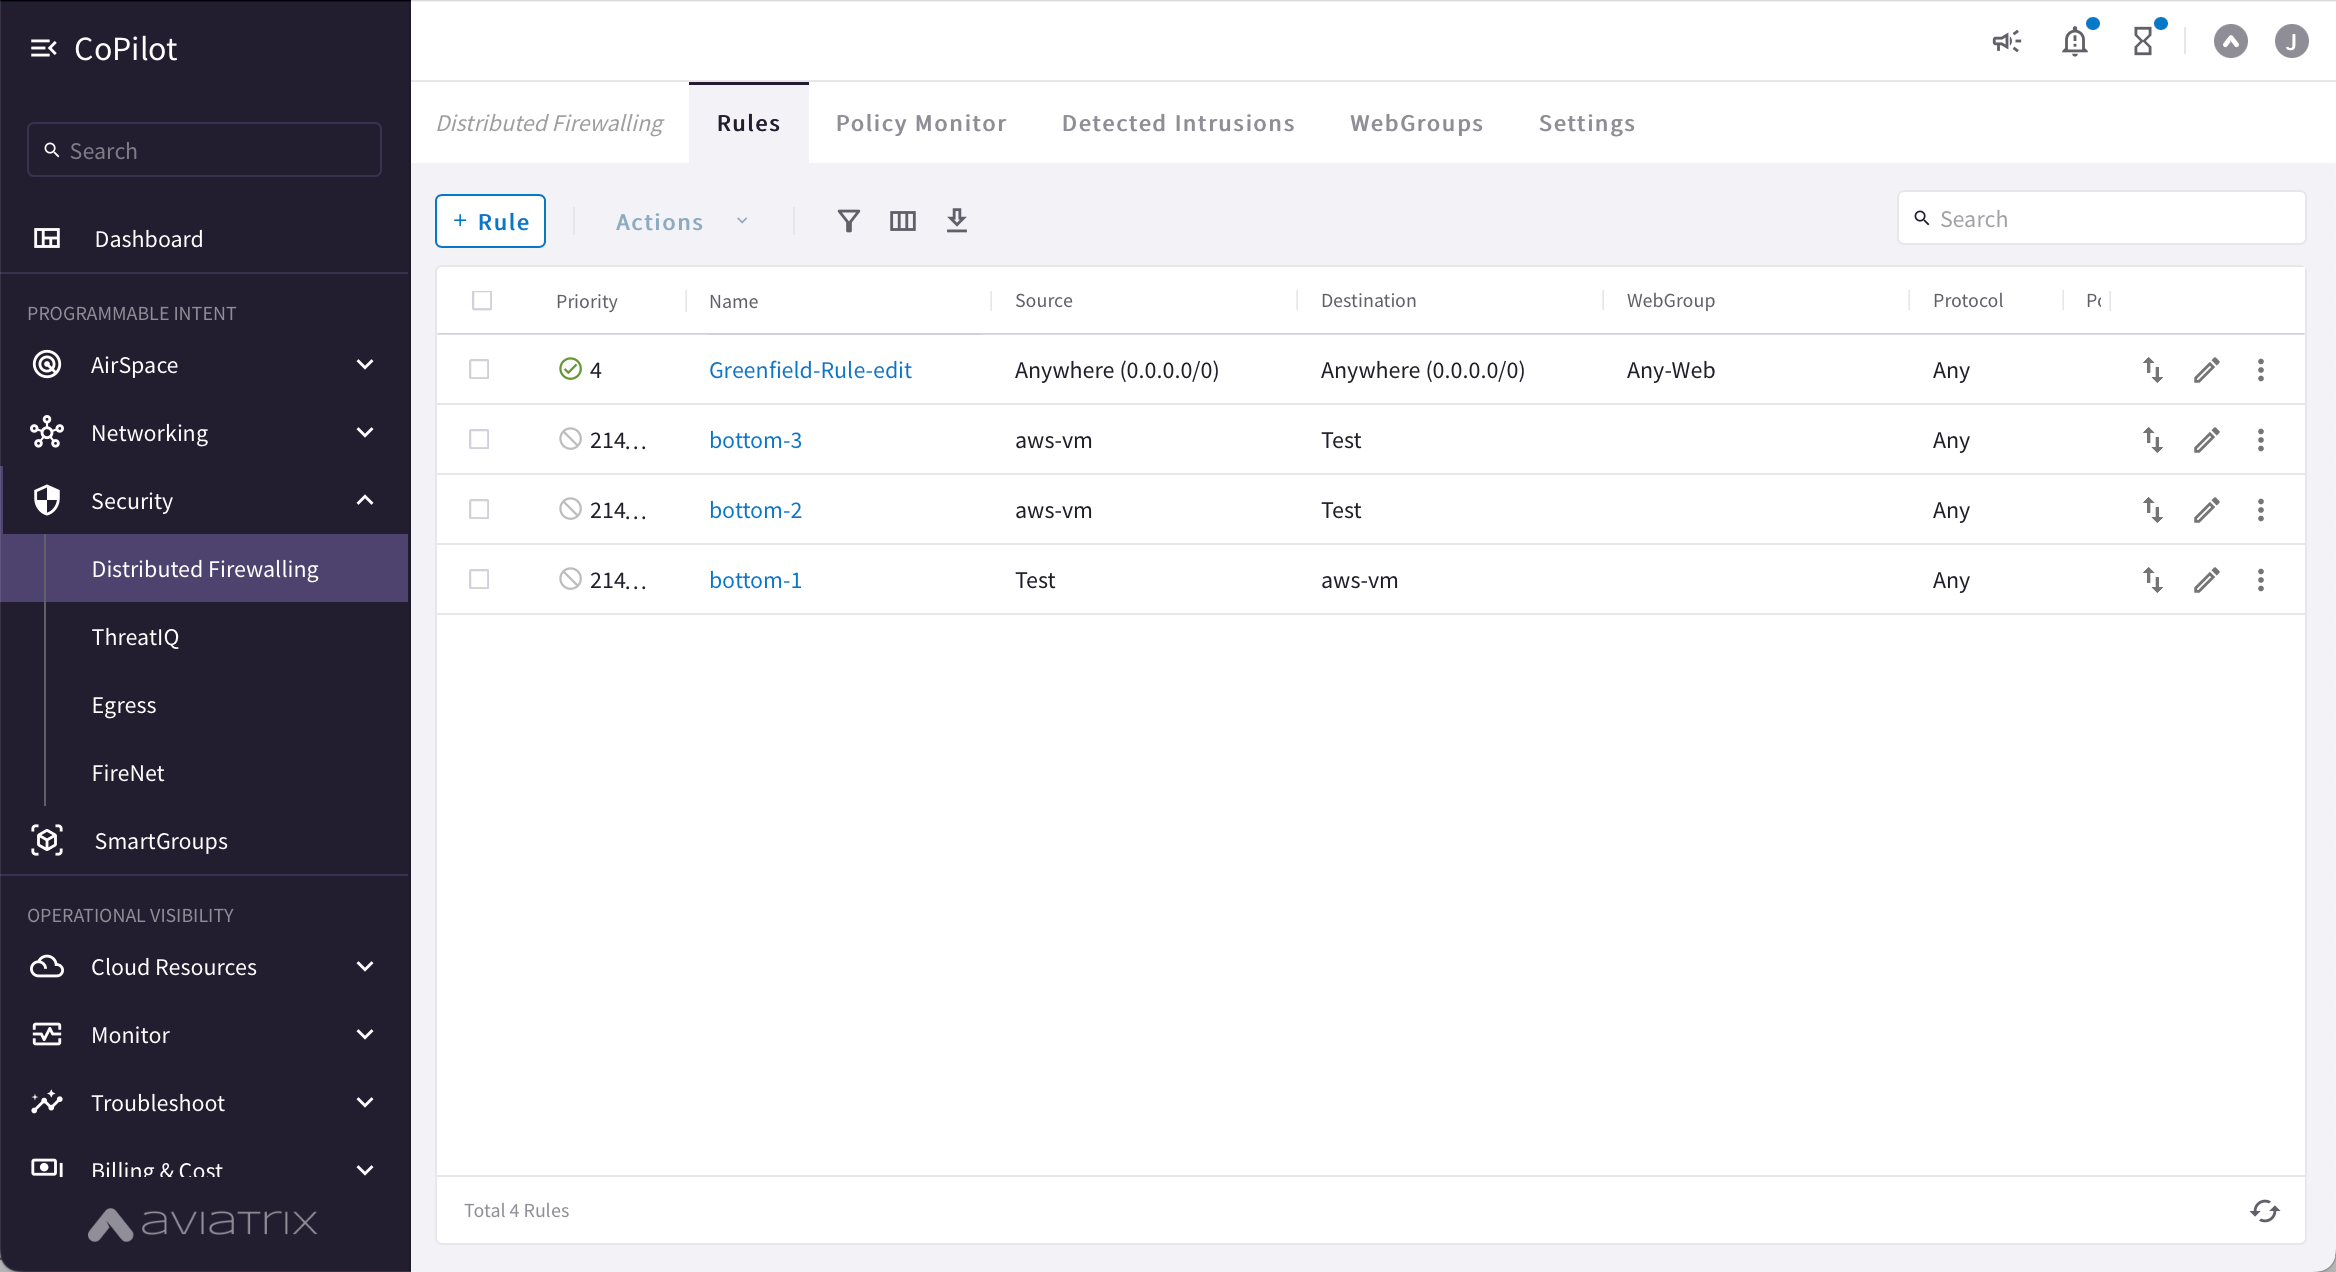
In CoPilot, navigate to Security > Distributed Cloud Firewall.
-
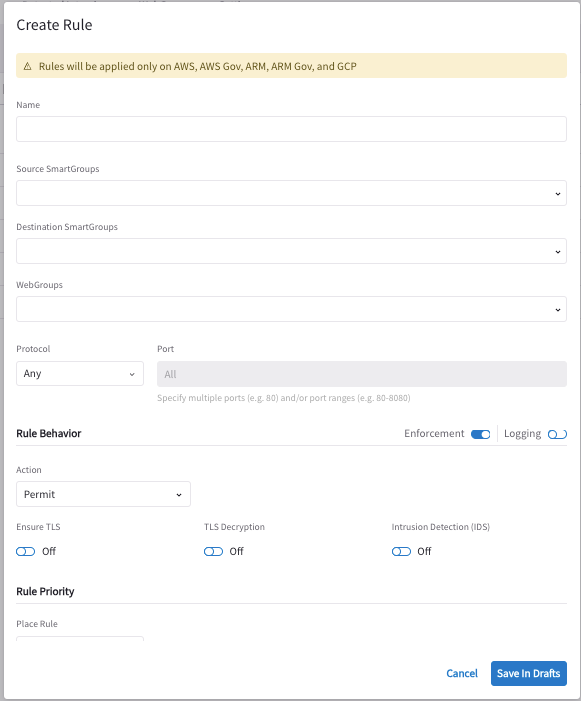
Click +Rule. The Create New Rule dialog displays.
Make sure you are aware of the prerequisites and limitations for Intrusion Detection before creating a policy with Intrusion Detection enabled.
-
Enter a name for the rule.
-
Select the Source SmartGroups that originate traffic.
-
Select the Destination SmartGroups that terminate traffic.
If you are using Distributed Cloud Firewall rules for egress purposes, you must select Public Internet as the Destination SmartGroup. Also, SNAT must be enabled on the Spoke gateways that enforce the egress policy.
-
(optional) Select the WebGroups for filtering egress traffic. You must have already created the WebGroups.
The Destination SmartGroup automatically switches to 'Public Internet' if all of the following are true:
-
You are creating a new rule
-
The Destination SmartGroup has not already been modified
-
At least one WebGroup has been selected
-
-
Select the protocol used: TCP, UDP, ICMP, or Any. If you select TCP or UDP you can enter a port number or port range.
-
If the Enforcement slider is On (the default), the rule is enforced in the data plane. If the Enforcement slider is Off, the packets are only watched. This allows you to observe if the traffic impacted by this rule causes any inadvertent issues (such as traffic being dropped).
For any VNets that have Security Group Orchestration applied, and that are included in a rule that is not enforced, the application security group (ASG) in the network security group (NSG) rule remains associated with the VM even though the NSG rule using the ASG is not present. After the rule is created you can enable or disable rule enforcement from the vertical ellipsis
 menu next to the rule.
-
If the Logging slider is On, information (such as five-tuple, source/destination MAC address, etc.) related to the action is logged.
Since logging uses a lot of disk space, be careful when enabling logging on your rules. It is best to enable logging for only a short period of time while you are debugging, and then disable logging again when you are finished. Logs for inter-VPC/VNet rules are available on the Distributed Cloud Firewall > Monitor tab.
After the rule is created you can enable or disable logging from the vertical ellipsis
menu next to the rule.As per the workload isolation use case above (blocking traffic between the Shopping Cart application and the Product Logging app), the rule would look like this:
-
Source SmartGroup: Shopping Cart application
-
Destination SmartGroup: Product Logging app
-
Action: Deny
-
Protocol: Any
-
Ports: 0-65535 (Any)
-
Logging: Off
-
Enforcement: On
-
-
Select if the rule is allowed or denied. This determines the action to be taken on the traffic.
-
The SG (Security Group) Orchestration toggle is On by default unless any of the conditions in the note below are true.
If the toggle is On the rule is available for Security Group Orchestration. You can change this toggle to Off if you do not want the rule to be available for Security Group Orchestration.
The SG Orchestration toggle is Off and disabled for new rules when any of the following conditions are true:
-
WebGroup is present in the rule
-
Source SmartGroup is 'Anywhere' and action is 'Permit'
-
Source SmartGroup is 'Anywhere'; Destination SmartGroup is 'Anywhere'; and action is 'Deny'
-
-
Enable Ensure TLS if you want any traffic that matches the ports and Source and Destination SmartGroups, but that is not TLS, to be dropped. Traffic is also dropped even if it is HTTP traffic that matches the domains or URLs in the WebGroups.
-
You can enable TLS Decryption (if the rule action is Allow) and Intrusion Detection. If Intrusion Detection is enabled, traffic is inspected for threats, and the results are displayed on the Detected Intrusions tab.
If Intrusion Detection and TLS Decryption are both enabled, the TLS stream is temporarily decrypted, and the decrypted data is examined for intrusions.
Before creating a policy with IDS or TLS Decryption, you must download the provided Aviatrix CA certificate (if using Controller 7.0), or upload your own certificate (if using Controller 7.1).
The Intrusion Detection column on the Distributed Firewalling tab indicates if Intrusion Detection is "On" or "On with TLS Decryption." The results are available on the Detected Intrusions tab.
-
Determine the rule order by selecting the following in the Place Rule list:
-
Above, Below, Top or Bottom. If you select Above or Below, you must select the existing rule that is affected by the position of the new rule.
-
Priority; you then enter a Priority Number for the rule. If an existing rule already has that priority, it is bumped down in the list. Zero (0) is the highest priority number.
-
After the rule is created you can click the arrow icon next to that rule in the Rule table to change the priority.
-
Click Save in Drafts.
| Before committing the rule, you can click the rule on the Rules tab and click Discard Change in the vertical ellipses menu to discard the most recent change (whether it was an addition, deletion, or an edit). |
-
Make additional modifications as needed by clicking the pencil icon next to the rule.
-
You can then review, commit, or discard the rule changes.