You must first have launched a firewall instance in your AWS cloud portal.
Resetting the VM-Series Password
You must download the access key to change the password for the Palo Alto VM-Series. You do this from the Security > FireNet tab.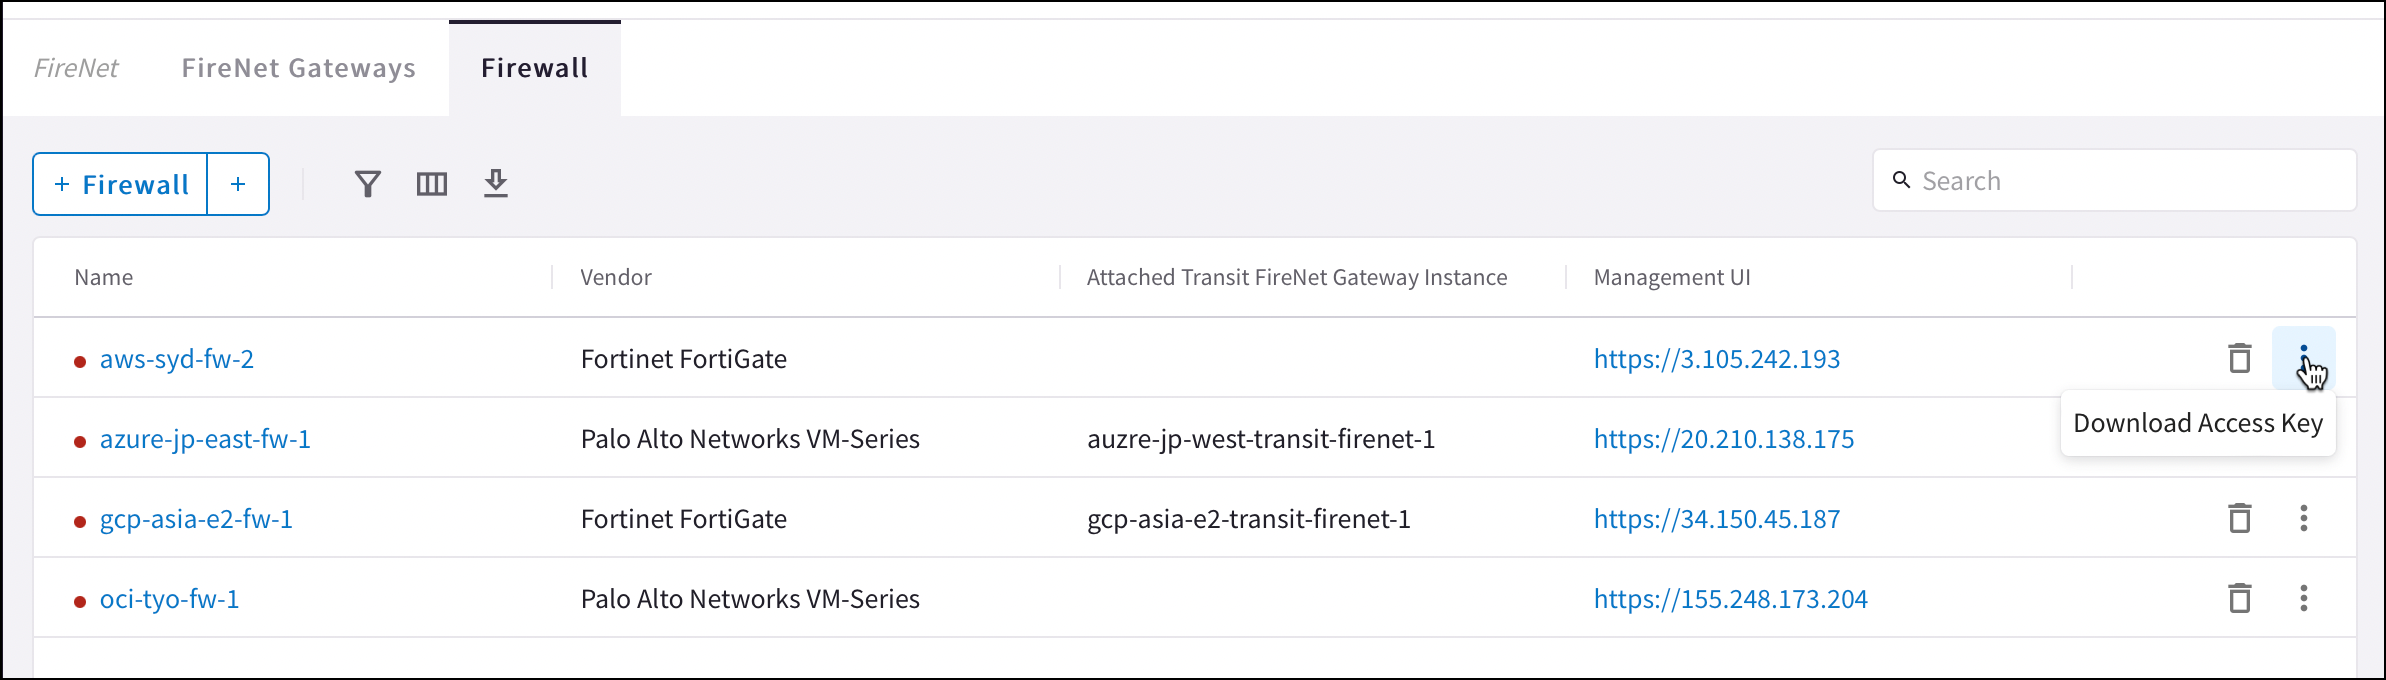
After you download the .pem file, change the file permission to 600. If you are asked to enter a password during the login, the VM-Series is still not ready. Wait and try again. It usually takes up to 15 minutes for the VM-Series to be ready. When the VM-Series is ready, you will no longer be prompted for a password.
Logging into the VM-Series
Click the Management UI link on the FireNet tab (shown above) to access the UI of the Palo Alto VM-Series firewall. Your login information is “admin” and the password you configured in the previous section.Dynamic Updates
To make sure your firewall is up-to-date, in your firewall UI you can navigate to Device > Dynamic Updates and click Check Now. You can then download and install the latest versions of Applications and Threat Wildfire updates.Configuring VM-Series Ethernet 1/1 with WAN Zone
WAN is Wide Area Network. Ethernet 1/1 is a data plane interface assigned to the WAN zone. Provides external access to the Internet.- Once logged in, click on the Network tab to see a list of ethernet interfaces. Click ethernet1/1 and configure as per the following screenshot.
- Select the Network tab.
- Click ethernet1/1.
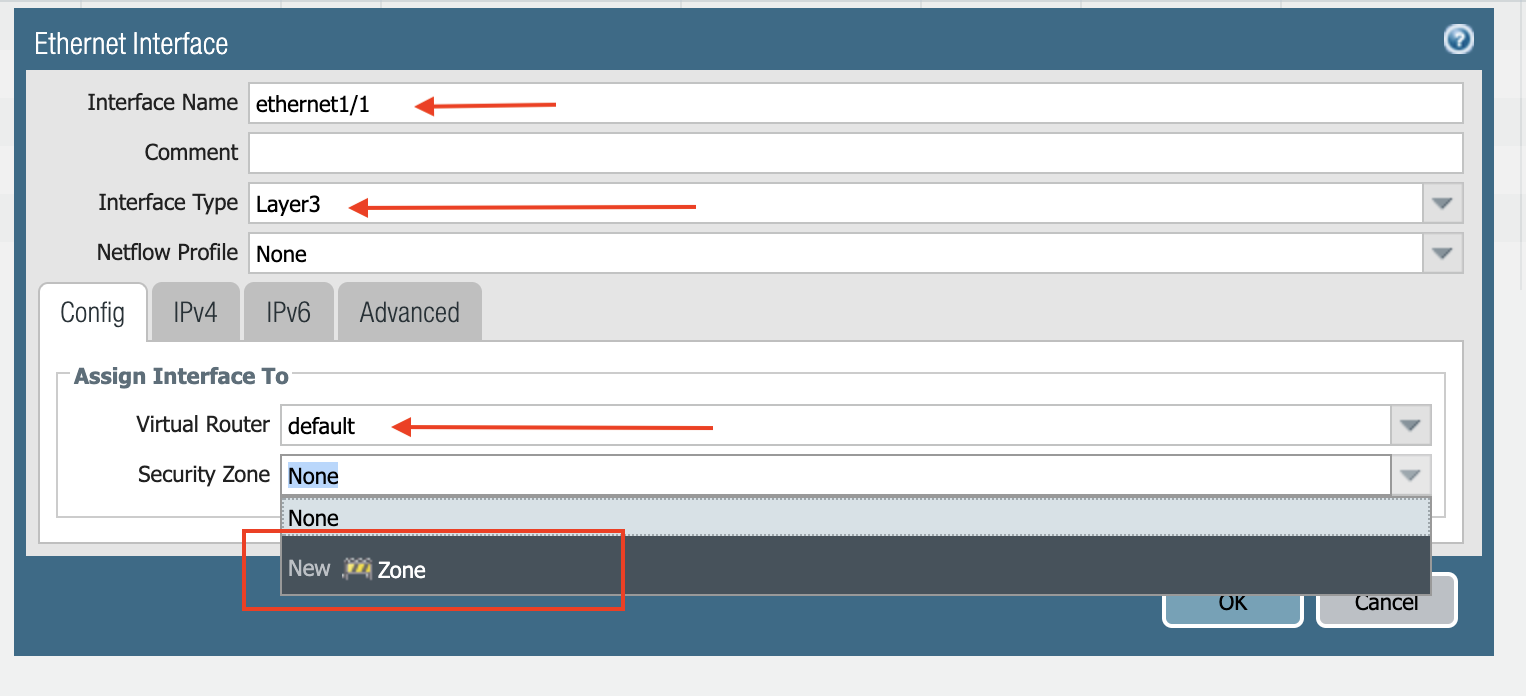
- Select layer3 for Interface Type.
- Select the Config tab in the popup Ethernet Interface window.
- Select default for Virtual Router at the Config tab.
- Click New Zone for Security Zone to create a WAN zone.
- At the next popup screen, name the new zone WAN and click OK.
- Select the IPV4 tab in the popup Ethernet Interface window.
- Select DHCP Client.
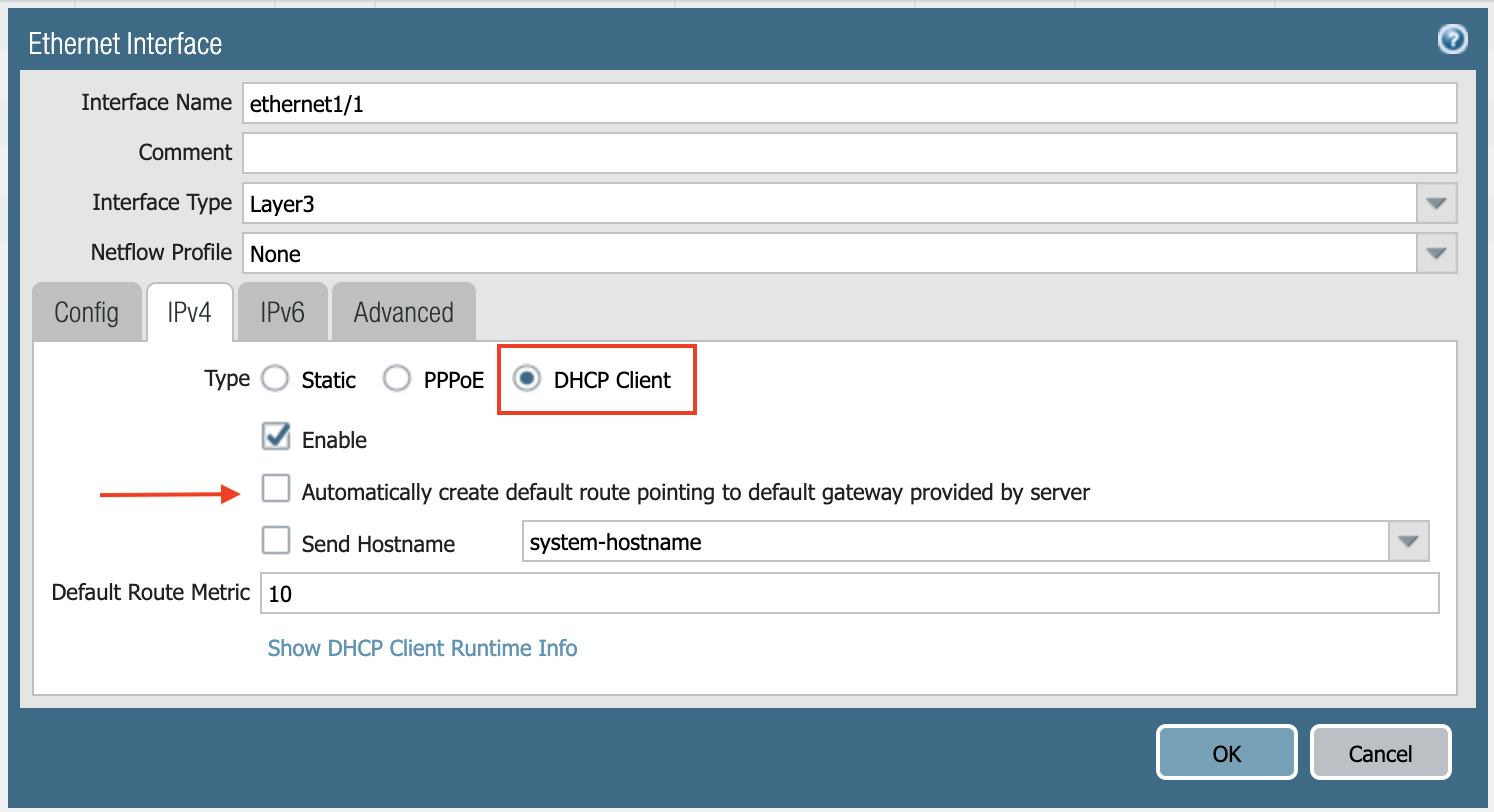
- Clear the Automatically create default route pointing to default gateway provided by server checkbox as shown below.
- Click Commit. Once Commit is complete, you should see the Link State turn green at the Network page for ethernet1/1.
Configuring VM-Series Ethernet 1/2 with LAN Zone
- Repeat the steps from Configuring VM-Series ethernet1/1 with WAN Zone section above for ethernet1/2. Name the new zone LAN.
- Click Commit. Once Commit is complete, you should see the Link State turn green at the Network page for ethernet1/2.
Configuring Allow Outbound Policies
- Navigate to Policies > Security > Click Add.
- Name the policy “Outbound,” then select the Source tab.
- Select LAN zone > Destination tab.
- Select WAN zone > Click OK.
Configuring NAT for Egress
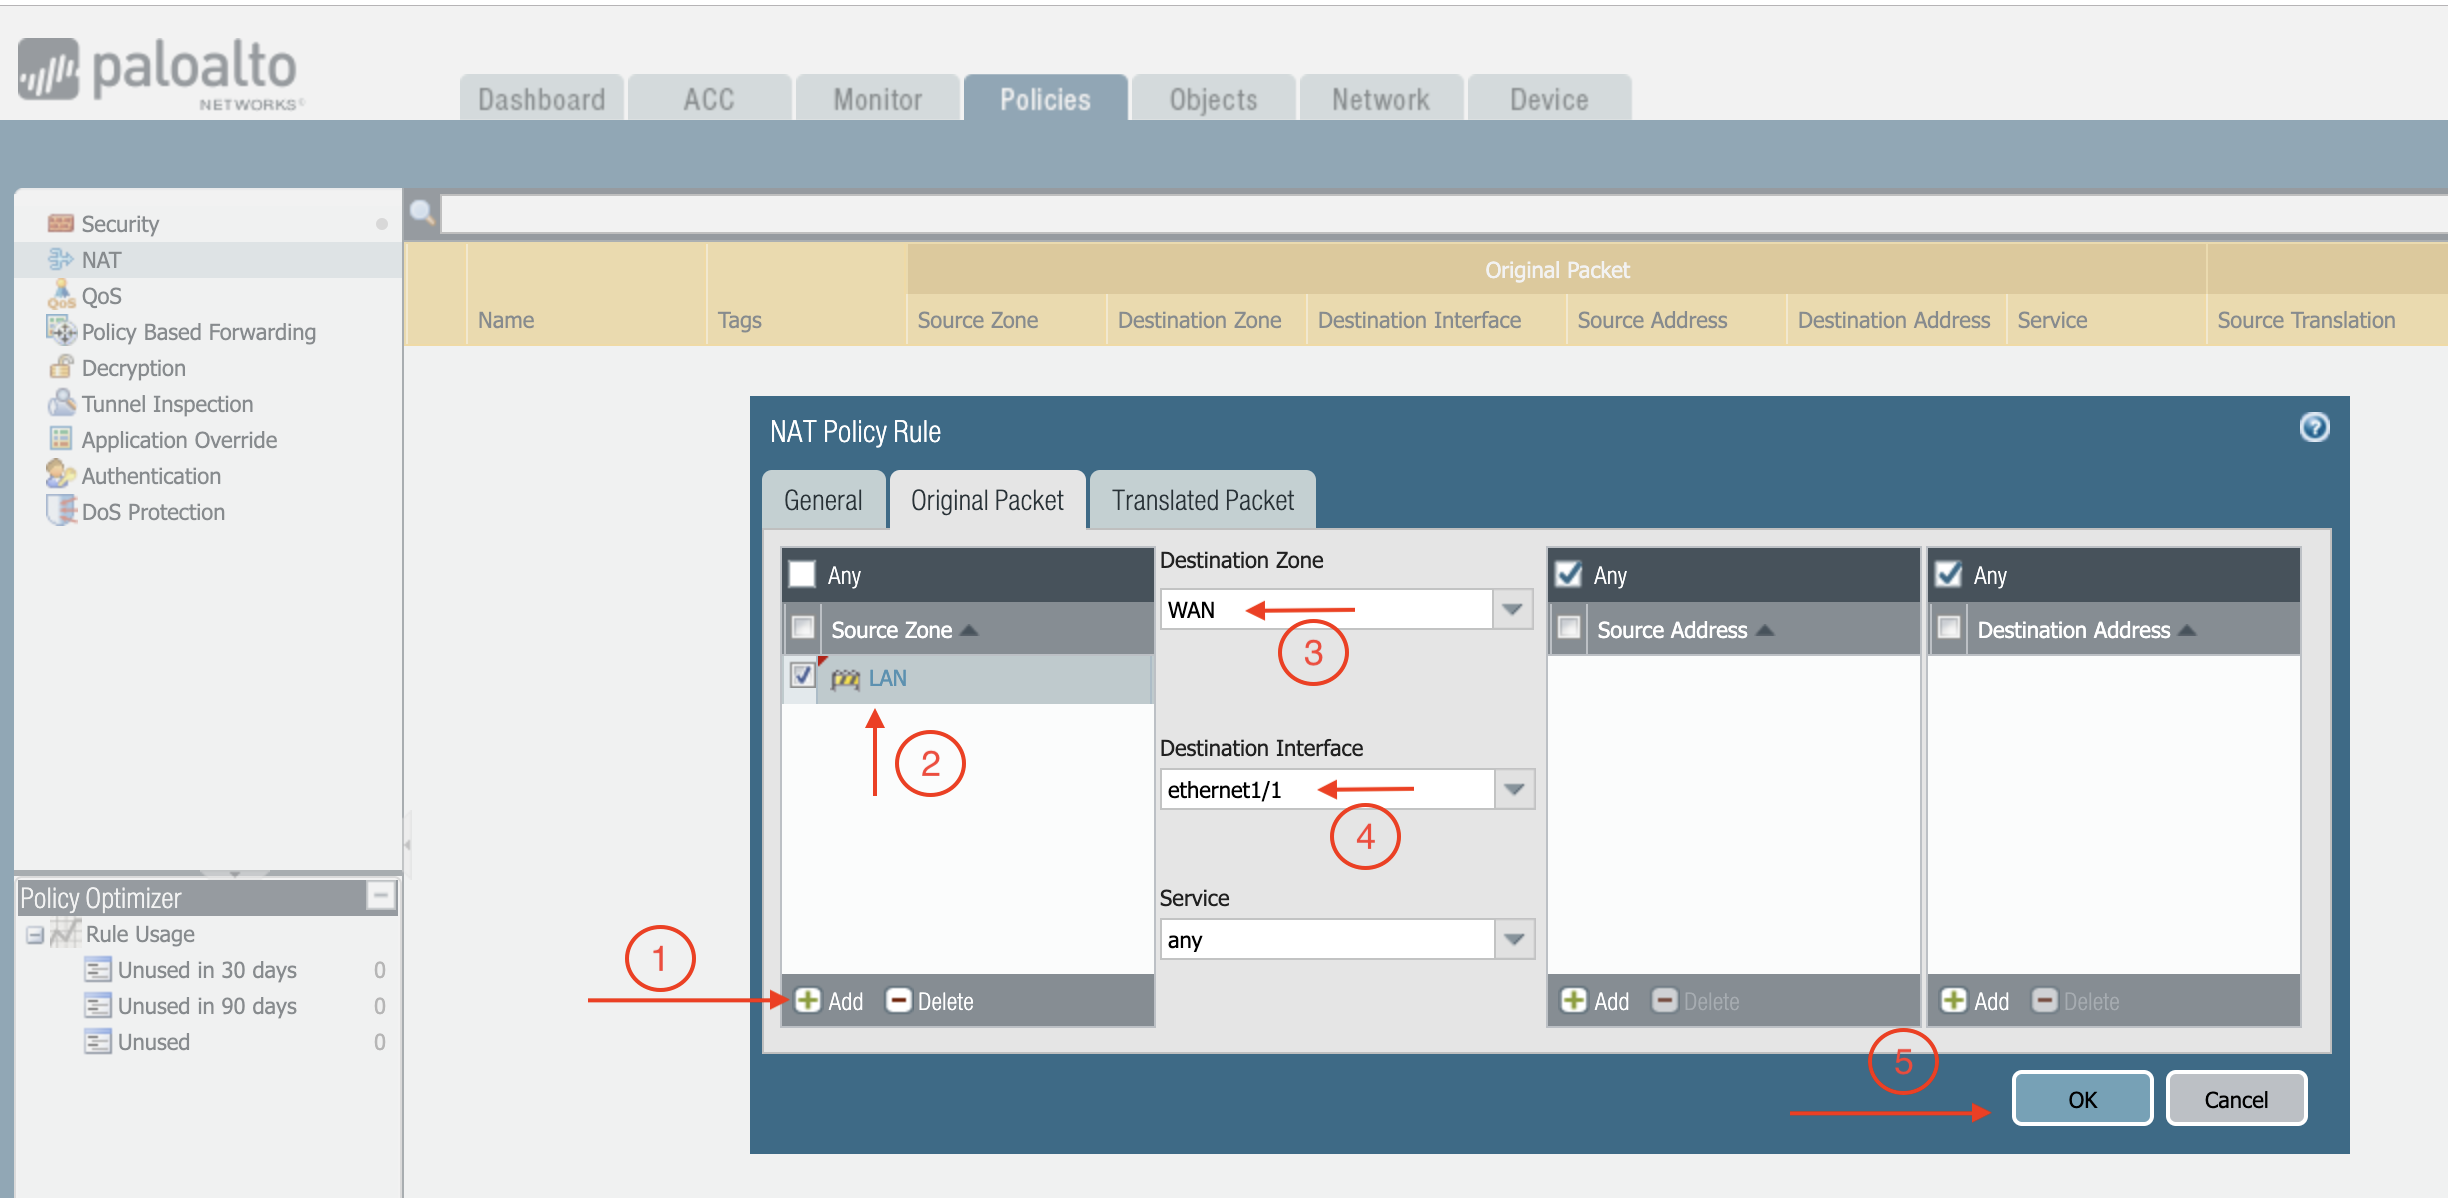
Complete the following steps to enable NAT, to test Egress of the firewall.- Navigate to Policies > NAT and click Add.
- Select the General tab and name the policy.
- Click Original Packet.
- At Source Zone, click Add, and select LAN.
- At Destination Zone, select WAN.
- At Destination Interface, select Ethernet1/1, as shown below.
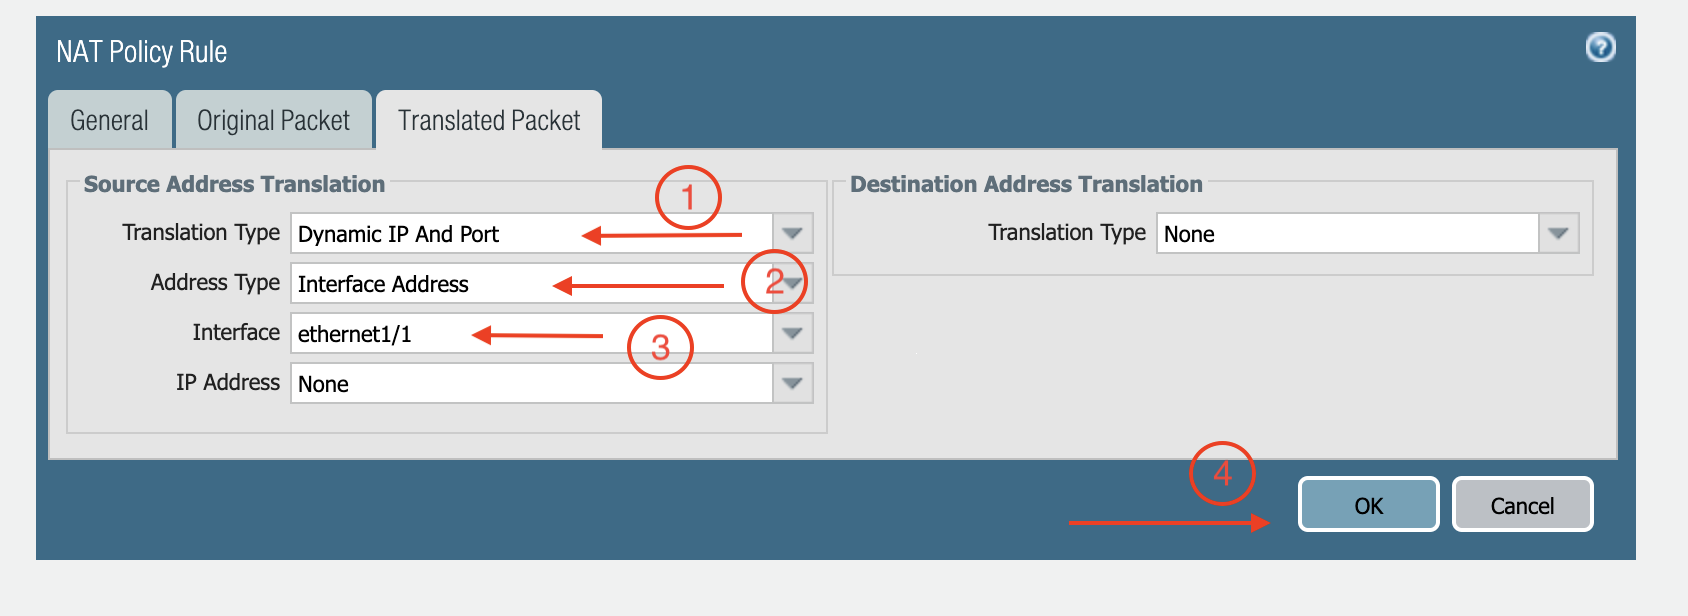
- Click Translated Packet. At Translation Type, select Dynamic IP And Port.
- At Address Type, select Interface Address.
- At Interface, select ethernet1/1, as shown below.
Setting up API Access
Follow the instructions in Setting up API Access to Palo Alto Networks VM-Series to enable API access.View Traffic Log
You can view if traffic is forwarded to the firewall instance by logging in to the VM-Series console.- Click Monitor.
- Start pinging packets from one Spoke VPC to another Spoke VPC where one or both of Network Domains are connected to Firewall Network Domain.