Controller Certificate Management: Import a Certificate with Key
The Aviatrix Controller uses a self-signed certificate by default. That is why you see "Not Secure" In the browser. You can make it secure by importing a signed certificate.
| For a more secure certificate management method, we recommend using the Generate CSR and Import Certificate option. |
Alternatively, you can import a certificate with the key using the Import a Certificate with Key method. However, please note that this method is less secure and can potentially lead to vulnerabilities.
| The Import a Certificate with Key method involves importing a certificate along with its private key, which can expose the private key and lead to potential security risks. As such, this method is not recommended for some applications or systems that require a high level of security. |
This example utilizes Godaddy as the CA. However, steps 1 and 3 should be universal for any certificate provider.
Disable Imported Certificate
If a certificate is already present on the Controller you must disable “Imported Certificate Status” before uploading new certificates. Otherwise, an error occurs.

The Controller will perform a validity check between the Server Certificate and the Private Key.
Create Private Key and Certificate Signing Request
-
Log into SSH on a Linux or macOS device and run the following command to create the private key:
mymac$ openssl genrsa -out my_prv.key 4096
-
Create the CSR:
-
Run the following command and fill out the necessary information as it relates to your company.
-
Leave the password blank.
-
mymac$ openssl req -new -sha256 -key my_prv.key -out controller.csr
Upload the CSR to a Certificate Authority and Retrieve the Certificates
-
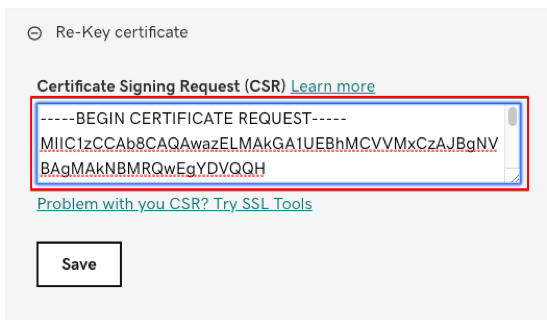
Upload the CSR.
Site Path: GoDaddy.com > SSL > Certificates > Your Desired Domain Name > Rekey & Manage > Re-Key Certificate
-
Paste the Certificate Signing Request (CSR) into the entry field.

-
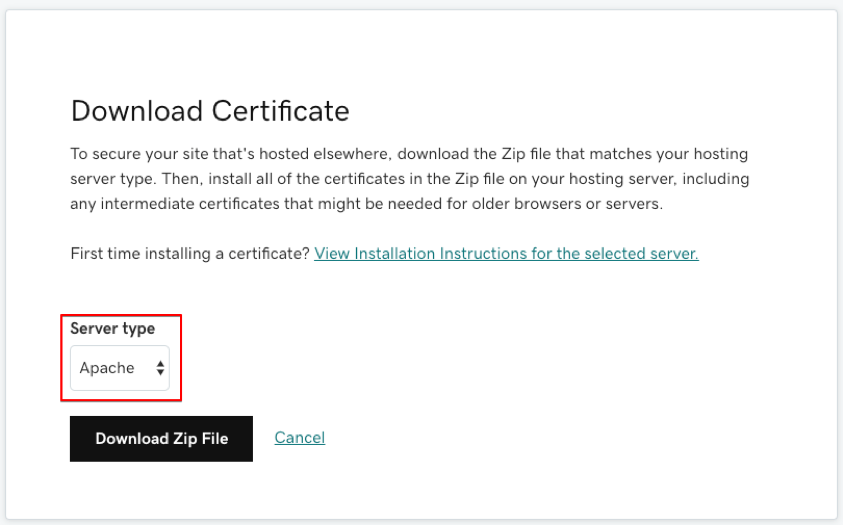
Retrieve the Certificate:
Site Path: GoDaddy.com > SSL > Certificates > Your Desired Domain Name > Download
-
Wait for GoDaddy to respond with Certs. This usually takes ten minutes (an email confirmation is sent).
-
Download the Certificates.

Upload the Certificates to the Controller
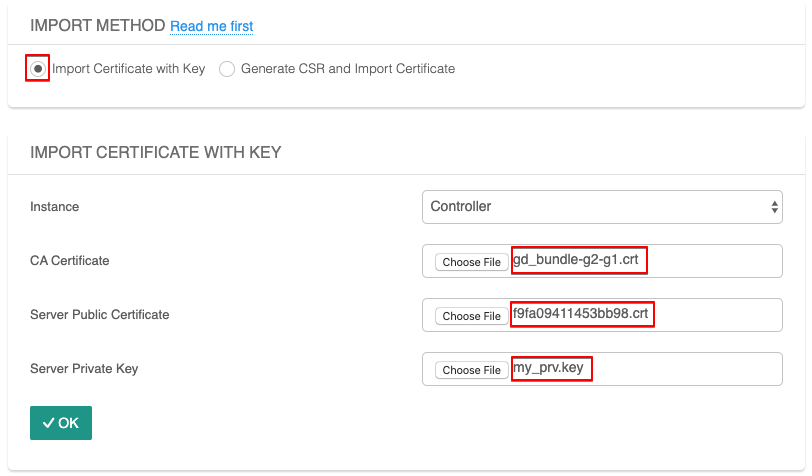
From Controller UI, SETTINGS > Controller > Certificate > Controller Certificate Management > Import Certificate with Key, perform the following steps:
-
Select Import Certificate with Key. Then upload the CA certificate, server certificate, and the Private key.
In our example:
-
The CA certificate – the file named gd_bundle.
-
The Server certificate - the other file ending in .crt.
-
The Private Key – the file produced in step 1 of this documentation.
-
-
Click OK.


The Controller signed certificate procedure is complete.