

- Users
- Permission Group
- Access Management
Purpose
The Users page shows user accounts and their permission group assignments. You can view, add, and edit users from this page. Each user must belong to at least one permission group to access CoPilot.Elements

- + User button: Opens dialog to create new user.
- Search box: Filters users by name or email.
- Filter button: Shows filter options for the table.
- Columns button: Selects visible columns in the table.
- Export button: Exports table data.
- Users table: Shows list of users with name, email, and permission groups.
- Edit button: Edits user configuration.
- Delete button: Deletes user account.
- Actions button: Opens menu with the Reset Password option.
- Refresh button: Refreshes table data.
Actions
View Users
View Users
To view users:
- Go to Administration > User Access > Users.
- The Users page appears with the table (Name, Email, Permission Groups) and + User, Search, Filter, Columns, Export, Refresh.
- Optionally, use Search, Filter, or Columns to narrow the list.
Parameter Details
| CoPilot Parameter Name | Description |
|---|---|
| Name | Shows user name. |
| Shows user email address. | |
| Permission Groups | Shows permission groups assigned to user. |
Add User
Add User
To add a user:
- Go to Administration > User Access > Users.
- Click + User.
- In the dialog, enter Username, Email, Password, and select Permission Groups. Click Save.
Parameter Details
| CoPilot Parameter Name | Description |
|---|---|
| Username | Enter a unique username for the user. |
| Enter the user’s email or email mailing list. | |
| Password | Enter a strong password or passphrase for the user. |
| Permission Groups | Select the permission groups this user should belong to (each user must belong to at least one). |
Edit User
Edit User
To edit a user:
- Go to Administration > User Access > Users.
- Locate the user in the table and click Edit.
- In the dialog, update Email and Permission Groups as needed (Username is read-only). Click Save.
Parameter Details
| CoPilot Parameter Name | Description |
|---|---|
| Username | Shows the username (read-only when editing). |
| Edit the user’s email address. | |
| Permission Groups | Add or remove permission groups (click dropdown to add; click x to remove). |
Purpose
The Permission Group page shows permission groups that define which areas, pages, and tabs of CoPilot users can access and which Controller permissions they have. You can view, create, and edit permission groups to enforce granular access control.Elements
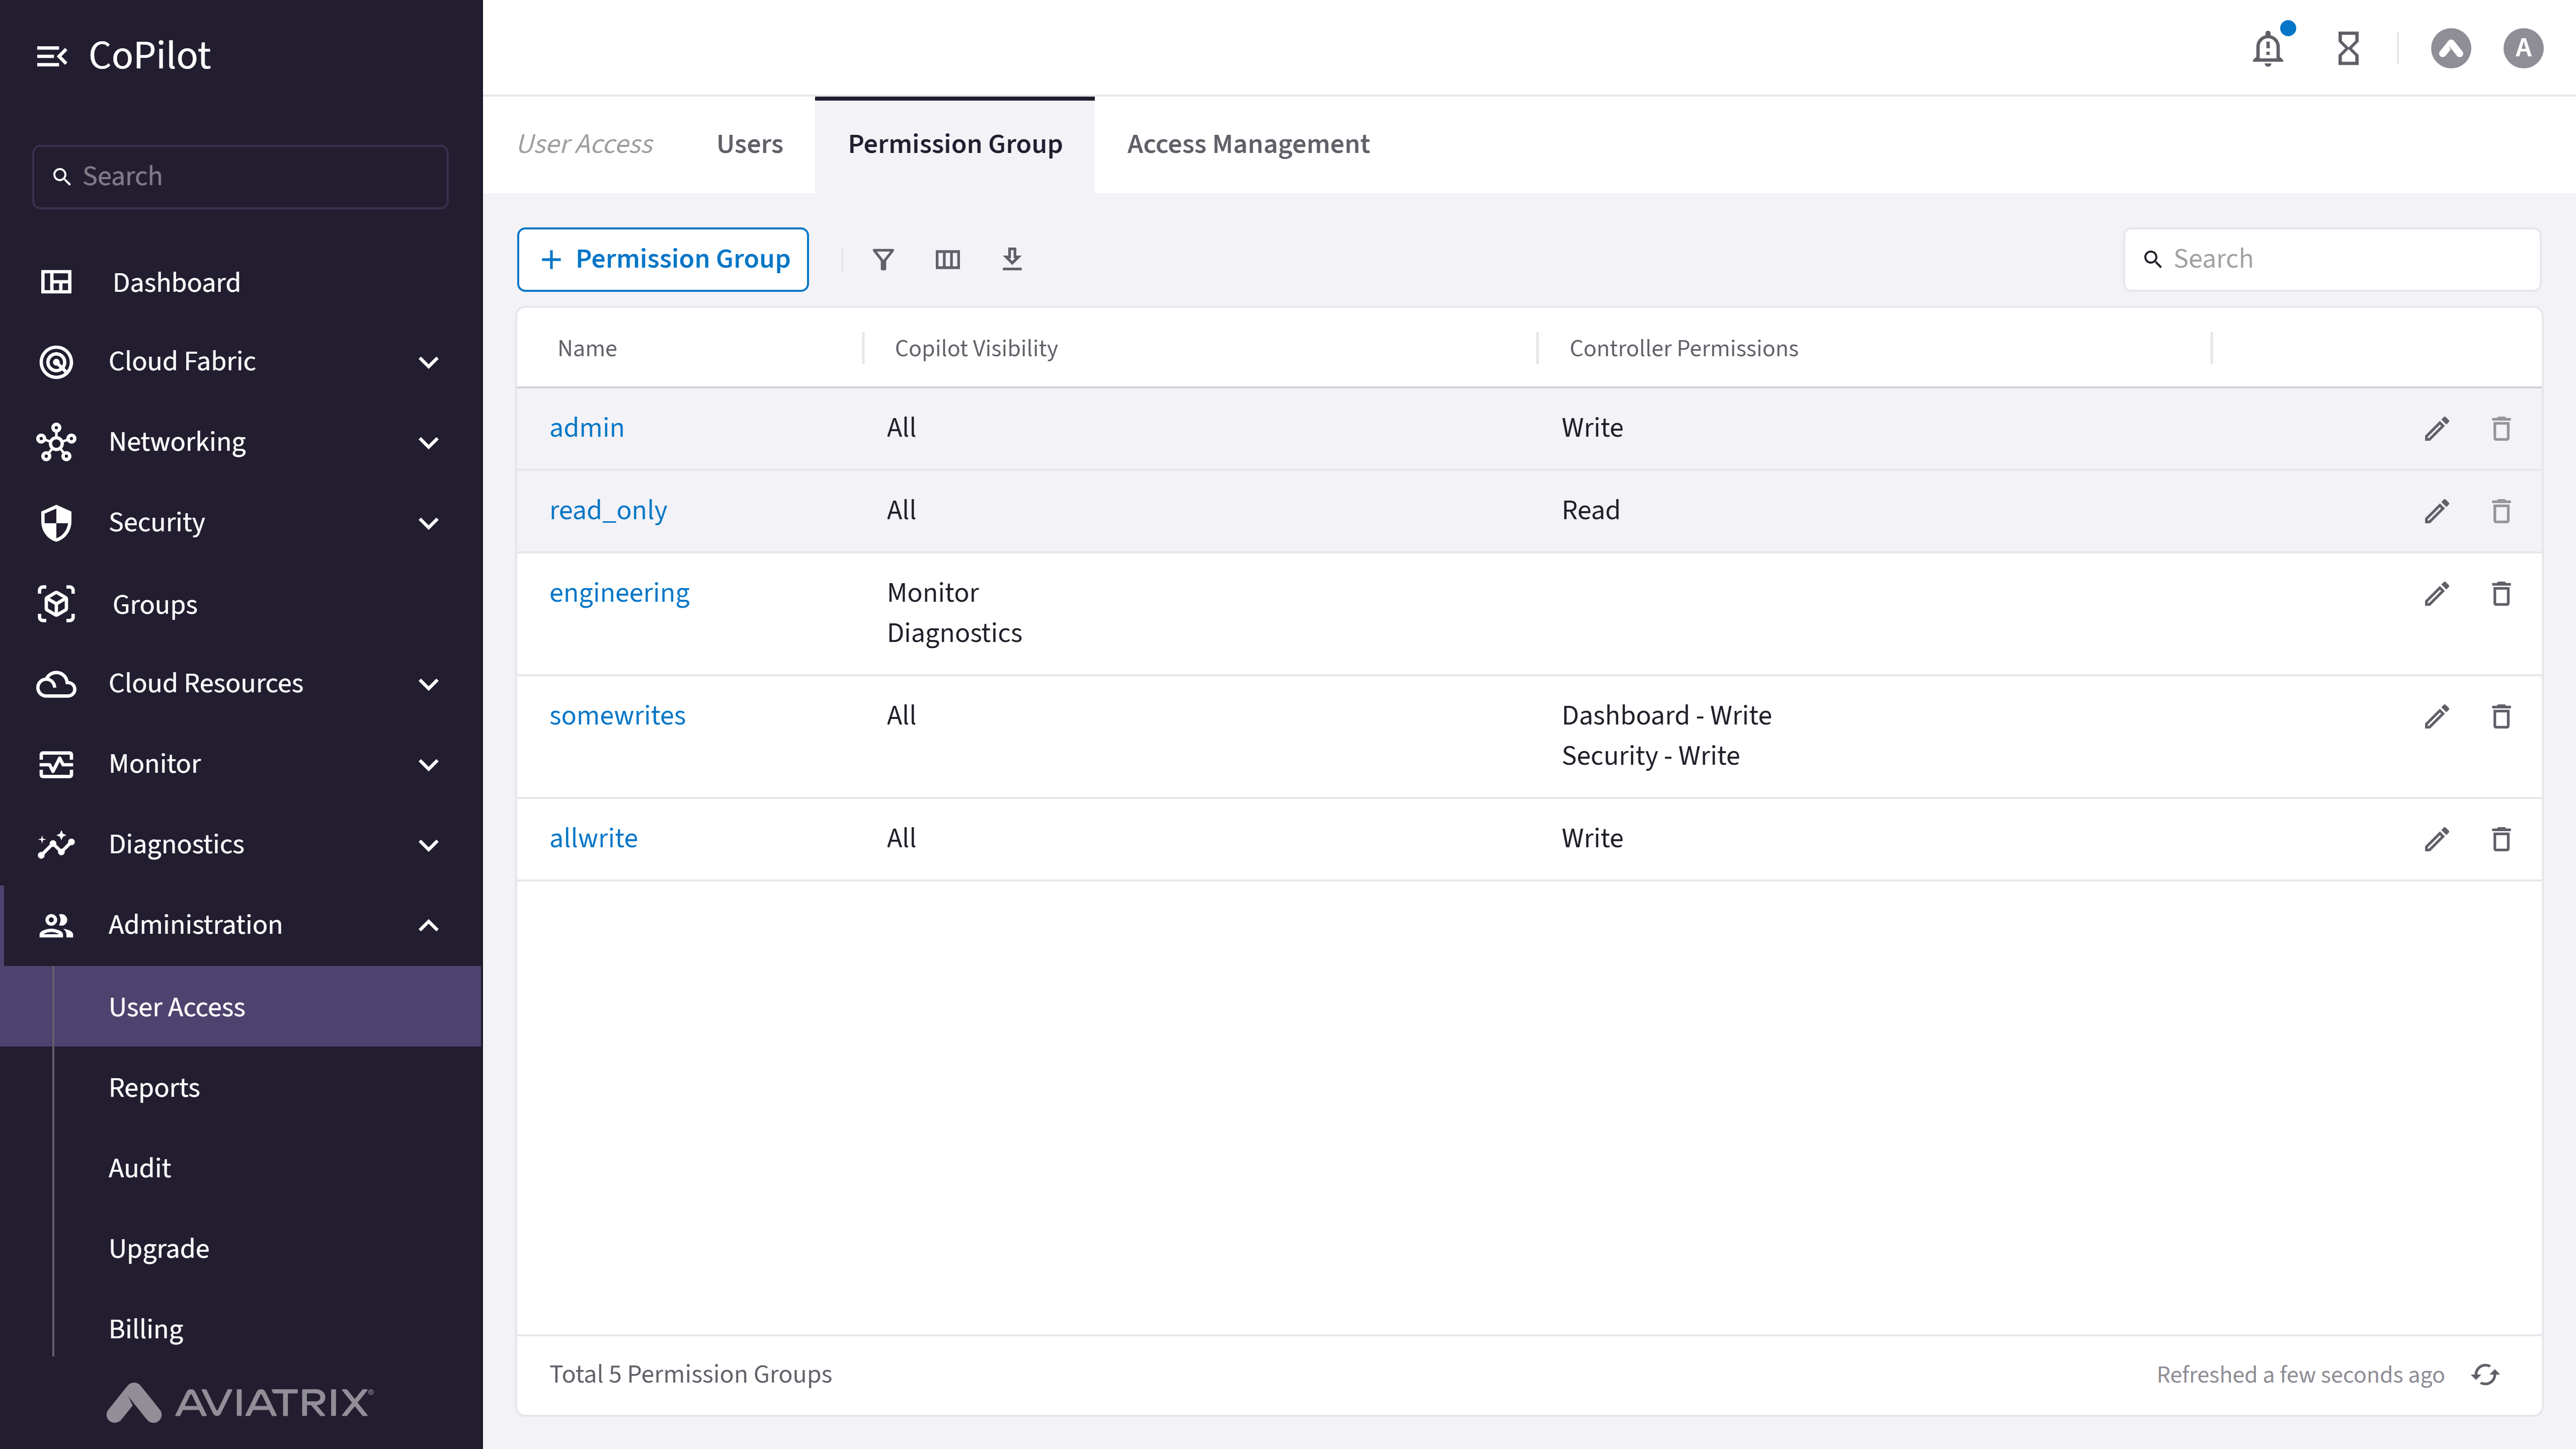
- + Permission Group button: Opens dialog to create new permission group.
- Search box: Filters permission groups by name.
- Filter button: Shows filter options for the table.
- Columns button: Selects visible columns in the table.
- Export button: Exports table data.
- Permission Groups table: Shows list of permission groups with name, CoPilot visibility, and controller permissions.
- Edit button: Edits permission group configuration.
- Delete button: Deletes permission group.
- Refresh button: Refreshes table data.
Actions
View Permission Groups
View Permission Groups
To view permission groups:
- Go to Administration > User Access > Permission Group.
- The page appears with the table (Name, Copilot Visibility, Controller Permissions) and + Permission Group, Search, Filter, Columns, Export, Refresh.
- Optionally, use Search, Filter, or Columns to narrow the list.
Parameter Details
| CoPilot Parameter Name | Description |
|---|---|
| Name | Shows permission group name. |
| Copilot Visibility | Shows CoPilot visibility settings for permission group. |
| Controller Permissions | Shows controller permissions for permission group. |
Create Permission Group
Create Permission Group
To create a permission group:A notification appears confirming the permission group was created.
- Go to Administration > User Access > Permission Group.
- Click + Permission Group.
- In the dialog, enter Name, select Users and Access Accounts, configure CoPilot Visibility and Controller Permissions. Click Save.
Note: CoPilot Visibility is labeled Preview in the CoPilot UI.
Parameter Details
| CoPilot Parameter Name | Description |
|---|---|
| Name | Enter a clear name for this Permission Group. |
| Users | Select users to add to this Permission Group. |
| Access Accounts | Select which Cloud Accounts members of this group should be able to access. |
| CoPilot Visibility | Select which pages and tabs users in this group can access in CoPilot (write access for selected areas). |
| Controller Permissions | Select which Controller permissions (API/Terraform) this group has. |
Edit Permission Group
Edit Permission Group
To edit a permission group:
- Go to Administration > User Access > Permission Group.
- Locate the group in the table and click Edit.
- In the dialog, update Users, Access Accounts, CoPilot Visibility, and Controller Permissions (Name is read-only). Click Save.
Parameter Details
| CoPilot Parameter Name | Description |
|---|---|
| Name | Shows permission group name (read-only when editing). |
| Users | Select users to assign to this permission group. |
| Access Accounts | Select which Cloud Accounts members of this group can access. |
| CoPilot Visibility | Edit which areas, pages, and tabs this group can access in CoPilot. |
| Controller Permissions | Edit which Controller features this group can access. |
Security and Password Settings
Security and Password Settings
Purpose
The Security and Password Settings section configures the password policy for local login, refreshes credentials on the Controller and gateways, and controls whether the admin user is allowed to log in.Elements
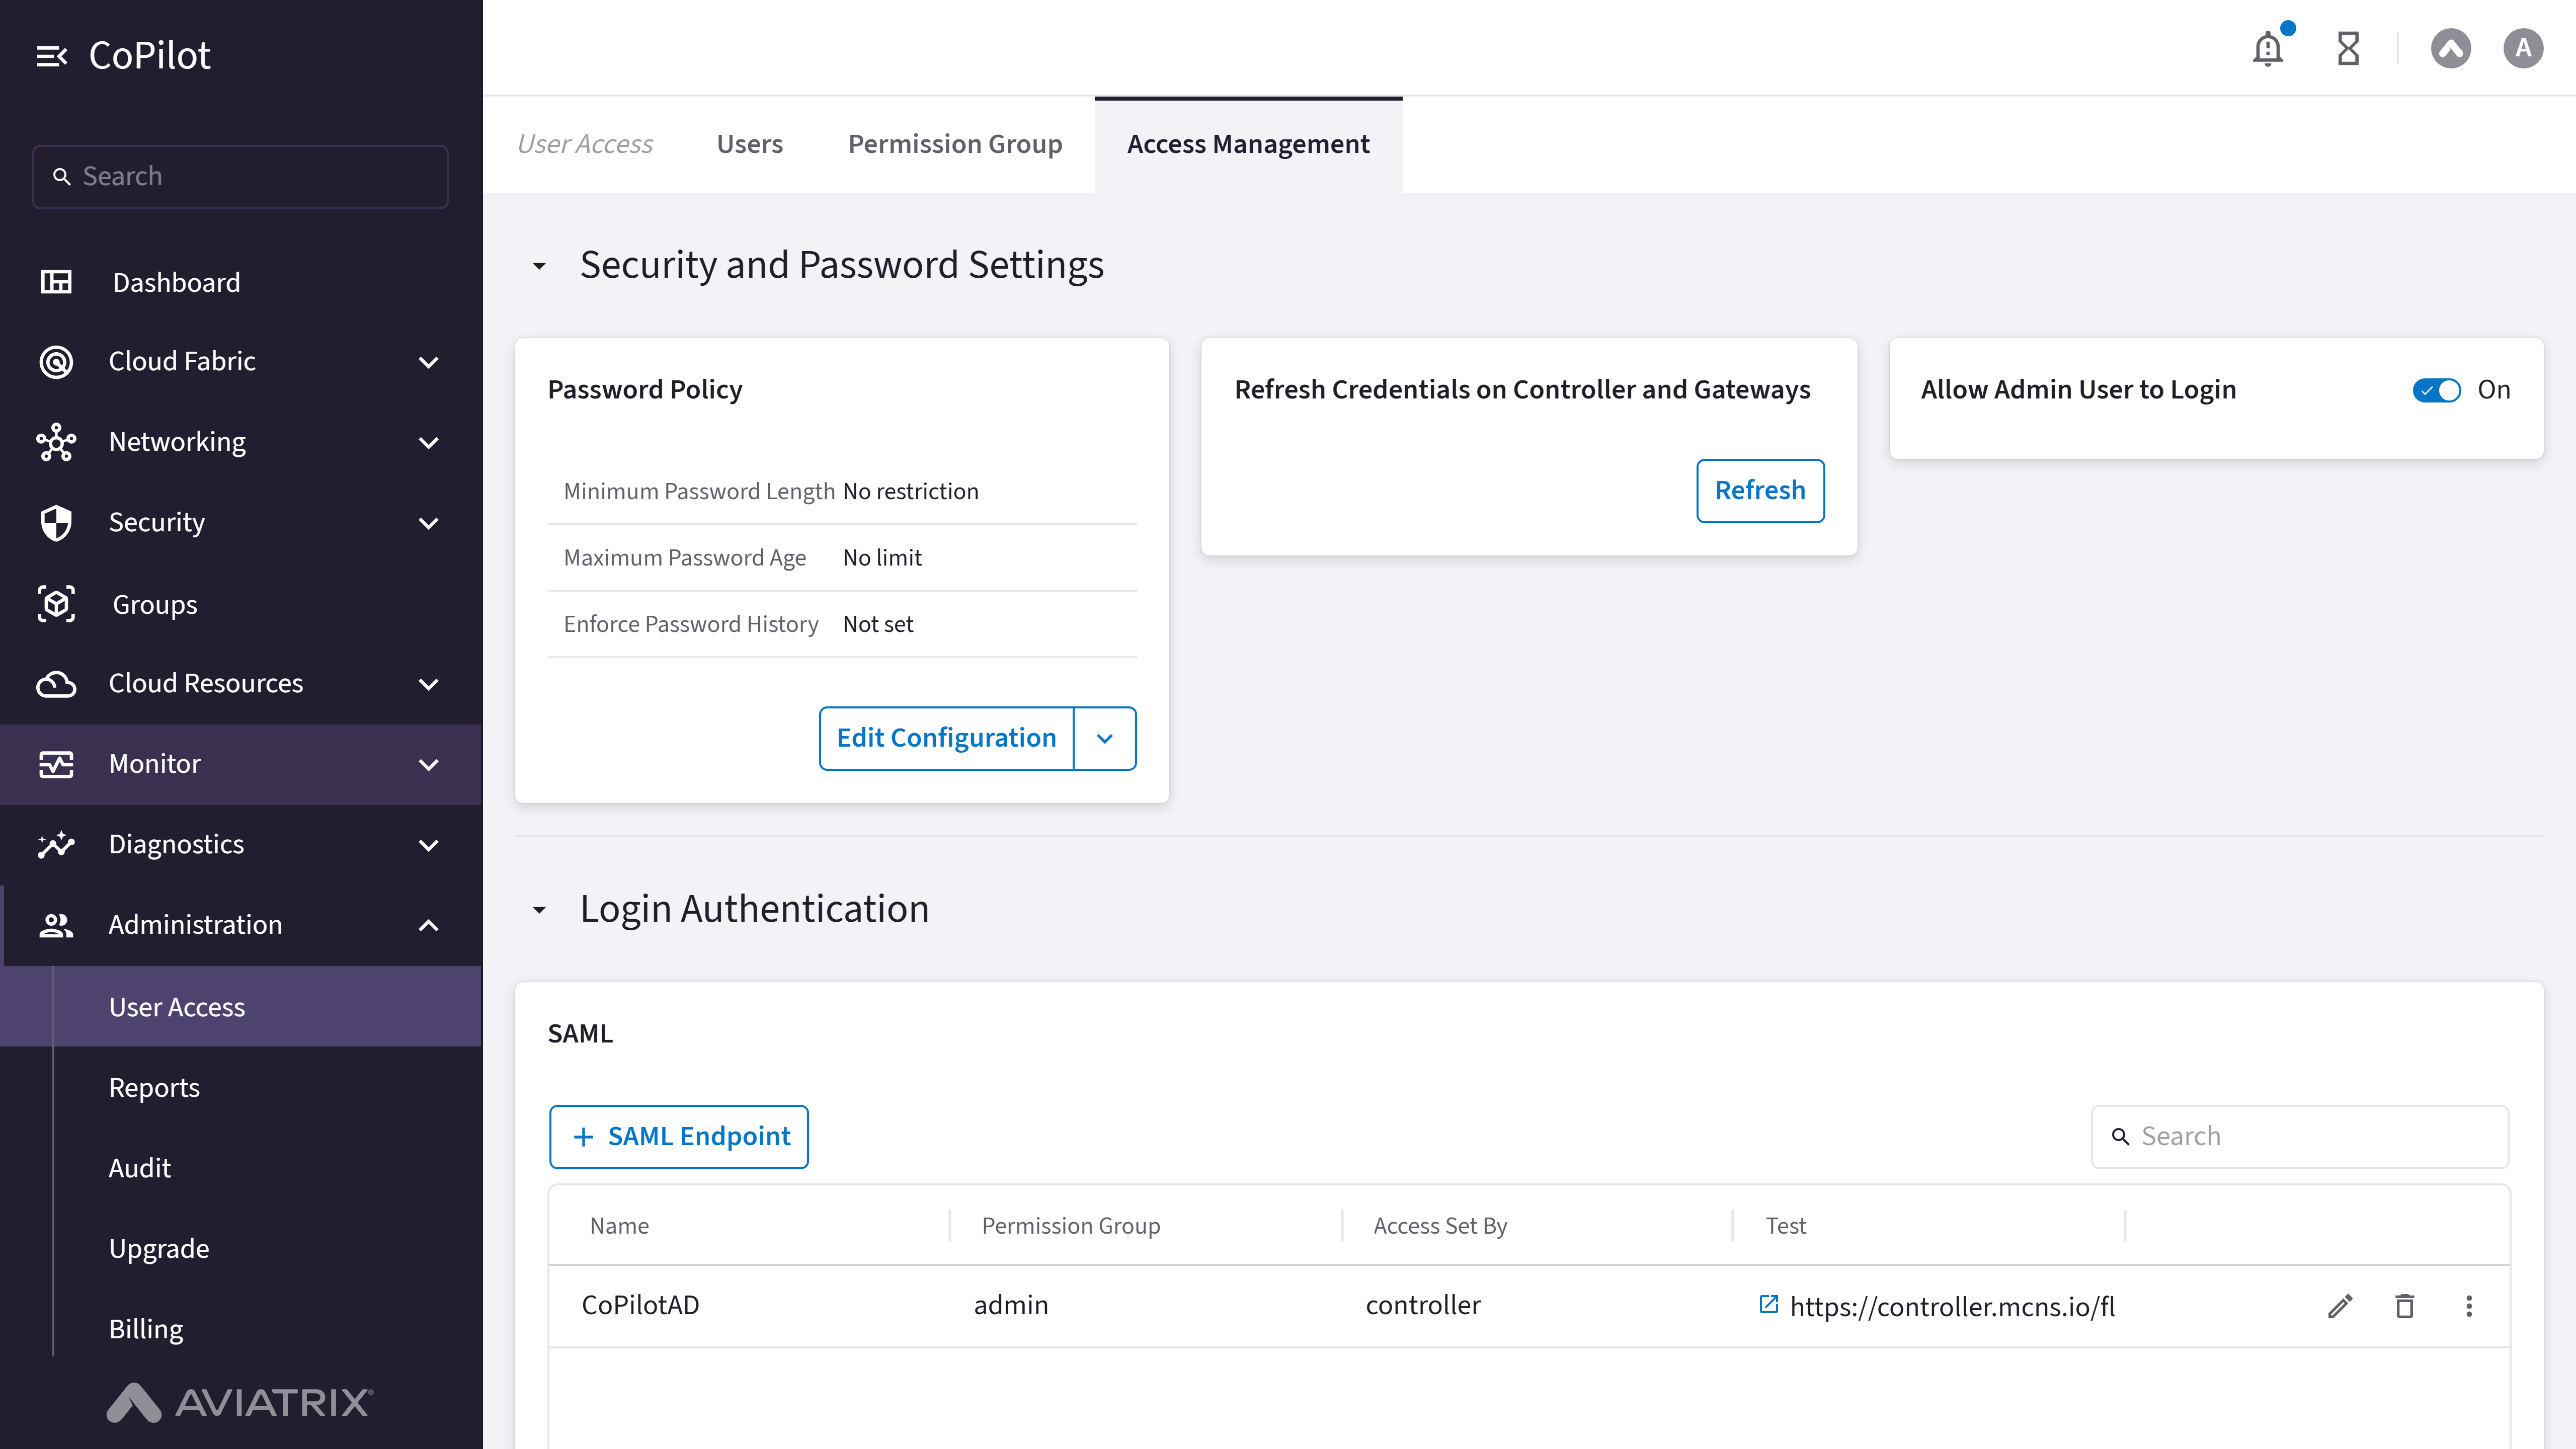
- Password Policy card: Shows the current password policy — Minimum Password Length, Maximum Password Age, and Enforce Password History.
- Edit Configuration button: Opens the Manage Password Policy dialog to set the password policy.
- More Options button: Opens a menu with Remove Policy, to remove the configured password policy.
- Refresh Credentials on Controller and Gateways card: Card with a Refresh button to refresh credentials on the Controller and gateways.
- Allow Admin User to Login toggle: Toggle switch to allow or restrict the admin user from logging in.
Actions
View Security and Password Settings
View Security and Password Settings
To view security and password settings:
- Go to Administration > User Access > Access Management.
Select the Security and Password Settings section. - The section appears with the Password Policy card, Refresh Credentials on Controller and Gateways card, and Allow Admin User to Login toggle.
Parameter Details
| CoPilot Parameter Name | Description |
|---|---|
| Minimum Password Length | Shows the configured minimum password length, or No restriction if not set. |
| Maximum Password Age | Shows the configured maximum password age, or No limit if not set. |
| Enforce Password History | Shows the configured password history enforcement, or Not set if not configured. |
Edit Password Policy Configuration
Edit Password Policy Configuration
To set or change the password policy:
- Go to Administration > User Access > Access Management.
Select the Security and Password Settings section. - In the Password Policy card, click Edit Configuration.
The Manage Password Policy dialog appears. - Set Minimum Password Length, Maximum Password Age, and Enforce Password History.
- Click Save.
Parameter Details
| CoPilot Parameter Name | Description |
|---|---|
| Minimum Password Length | Set the minimum password length. Range: 8-32. |
| Maximum Password Age | Set the maximum number of days a password is valid. Range: 1-365 days. |
| Enforce Password History | Set how many previous passwords a user cannot reuse. Range: 1-12. |
Remove Password Policy
Remove Password Policy
To remove the configured password policy:
- Go to Administration > User Access > Access Management.
Select the Security and Password Settings section. - In the Password Policy card, click More Options > Remove Policy.
Refresh Credentials on Controller and Gateways
Refresh Credentials on Controller and Gateways
To refresh credentials on the Controller and gateways:
- Go to Administration > User Access > Access Management.
Select the Security and Password Settings section. - In the Refresh Credentials on Controller and Gateways card, click Refresh.
Allow or Restrict Admin User Login
Allow or Restrict Admin User Login
To allow or restrict the admin user from logging in:
- Go to Administration > User Access > Access Management.
Select the Security and Password Settings section. - Turn the Allow Admin User to Login toggle On or Off.
Login Authentication
Login Authentication
Purpose
The Login Authentication section configures external authentication methods (SAML, LDAP, Duo) and controls which permission groups can log in locally.Elements
- SAML card: Shows configured SAML endpoints in a table with columns for Name, Permission Group, Access Set By, and Test, plus per-row Edit, Delete, and Actions menu.
- + SAML Endpoint button: Opens the Create SAML Endpoint dialog to add a new SAML endpoint.
- Search box: Filters the SAML endpoints table.
- Total SAML Endpoints count / Refresh: Footer showing the total number of SAML endpoints, when the list was last refreshed, and a refresh button.
- LDAP card: Shows whether LDAP authentication is Enabled or Disabled, with an Enable button.
- Duo card: Shows whether Duo authentication is Enabled or Disabled, with an Enable button.
- Allow Local Login card: Permission Groups dropdown to select which permission groups can log in locally.
Actions
View Login Authentication Settings
View Login Authentication Settings
To view login authentication settings:
- Go to Administration > User Access > Access Management.
Select the Login Authentication section. - The section appears with the SAML, LDAP, Duo, and Allow Local Login cards.
- Optionally, use Search to filter the SAML endpoints table.
Parameter Details
| CoPilot Parameter Name | Description |
|---|---|
| Name | Shows the SAML endpoint name. |
| Permission Group | Shows the permission group assigned to the SAML endpoint. |
| Access Set By | Shows how access is set for the SAML endpoint (Controller or SAML Identity Provider Attribute). |
| Test | Link to the SAML endpoint’s login test URL. |
Add a SAML Endpoint
Add a SAML Endpoint
To add a new SAML endpoint:
- Go to Administration > User Access > Access Management.
Select the Login Authentication section. - In the SAML card, click + SAML Endpoint.
The Create SAML Endpoint dialog appears. - Enter a Name. Choose the Identity Provider Metadata Type (URL or Text) and provide the metadata.
- Choose how the Entity ID is set (Hostname or Custom).
- Choose how Access Set By is determined (Controller or SAML Identity Provider Attribute); if Controller, select the Permission Group.
- Optionally, turn on Sign Auth Requests or configure a Custom SAML Request Template.
- Click Save.
Parameter Details
| CoPilot Parameter Name | Description |
|---|---|
| Name | Enter a name for the SAML endpoint. |
| Identity Provider Metadata Type | Choose whether the identity provider metadata is provided as a URL or pasted as Text. |
| Entity ID | Choose whether the Entity ID is derived from the Hostname or set to a Custom value. |
| Access Set By | Choose whether permission group access is set by the Controller or by a SAML Identity Provider Attribute. |
| Permission Group | Select the permission group for this SAML endpoint (when Access Set By is Controller). |
| Sign Auth Requests | Turn on to sign SAML authentication requests. |
| Custom SAML Request Template | Turn on to provide a custom SAML request template. |
Enable LDAP Authentication
Enable LDAP Authentication
To enable LDAP login authentication:
- Go to Administration > User Access > Access Management.
Select the Login Authentication section. - In the LDAP card, click Enable.
The Enable LDAP Login Authentication dialog appears. - Enter LDAP Server, Server Port, Bind DN, Password, Base DN, Username Attribute, and LDAP User. Optionally, turn on Use TLS to Connect to Server.
- Optionally, click Test LDAP Configuration to verify the settings.
- Click Save.
Parameter Details
| CoPilot Parameter Name | Description |
|---|---|
| LDAP Server | Enter the LDAP server address. |
| Server Port | Enter the LDAP server port. |
| Bind DN | Enter the Bind DN used to authenticate to the LDAP server. |
| Password | Enter the password for the Bind DN. |
| Base DN | Enter the Base DN to search for users. |
| Username Attribute | Enter the LDAP attribute that maps to the username. |
| LDAP User | Enter an LDAP username to use for testing the configuration. |
| Use TLS to Connect to Server | Turn on to connect to the LDAP server over TLS. |
Enable Duo Authentication
Enable Duo Authentication
To enable Duo login authentication:
- Go to Administration > User Access > Access Management.
Select the Login Authentication section. - In the Duo card, click Enable.
The Enable Duo Login Authentication dialog appears. - Enter Duo Integration Key, Duo Secret Key, and Duo API Hostname.
- Click Save.
Parameter Details
| CoPilot Parameter Name | Description |
|---|---|
| Duo Integration Key | Enter the Duo application’s integration key. |
| Duo Secret Key | Enter the Duo application’s secret key. |
| Duo API Hostname | Enter the Duo API hostname for the application. |
Configure Allow Local Login
Configure Allow Local Login
To control which permission groups can log in locally (with a CoPilot username and password, instead of SAML, LDAP, or Duo):
- Go to Administration > User Access > Access Management.
Select the Login Authentication section. - In the Allow Local Login card, use the Permission Groups dropdown to select the permission groups allowed to log in locally.