

You must use a valid corporate Azure account to sign up.

Subscribe to Azure Secure NAT Gateway
Subscribe to the Aviatrix Secure NAT Gateway offer on the Azure Marketplace.
- Go to the Aviatrix Secure NAT Gateway listing on Azure Marketplace and click Get it now.
- Accept the Azure terms of use and privacy policy and click Continue.
-
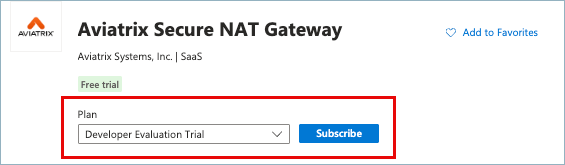
On the Aviatrix Secure NAT Gateway page, do one of the following.
Both options open a subscription page.
-
From the Plan field, select the plan suitable to your needs and click
Subscribe.
-
Click Plans + Pricing, review the details of each plan, and then click
Subscribe for the plan suitable to your needs.
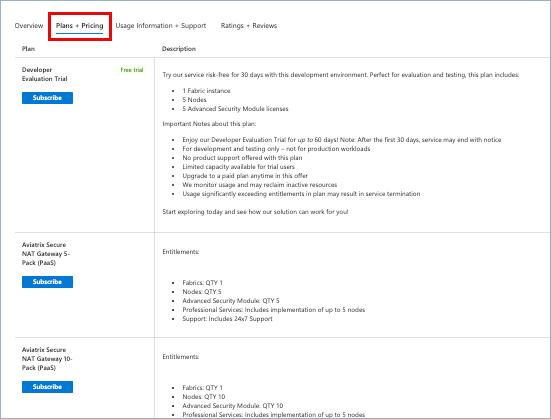
If you select the Developer Evaluation Trial plan, you can upgrade to a paid plan at any time. -
From the Plan field, select the plan suitable to your needs and click
Subscribe.
-
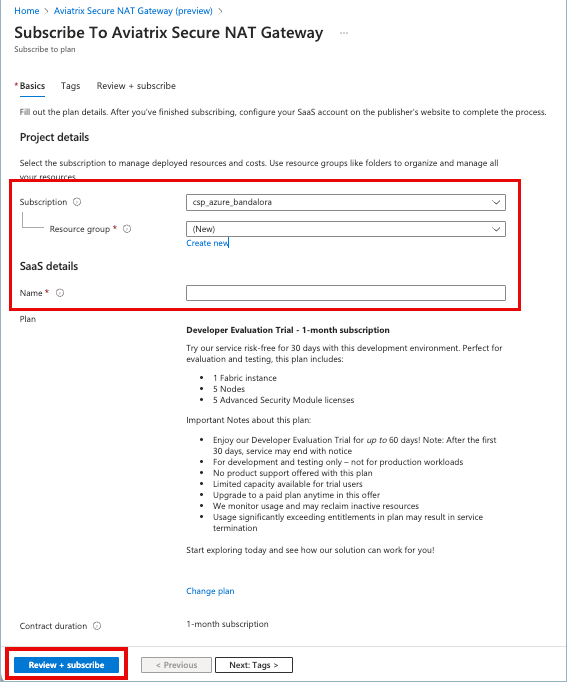
On the Subscribe to Aviatrix Secure NAT Gateway page, do the following:
- Under Project details > Resource group, click Create New and enter a name for the group. Microsoft requires a resource group to contain the resource metadata.
- Select a Resource group location.
- Under SaaS details, enter a descriptive Name for the subscription. You can leave other fields with their defaults.
-
Click Review + Subscribe, and then click Subscribe on the next page.
-
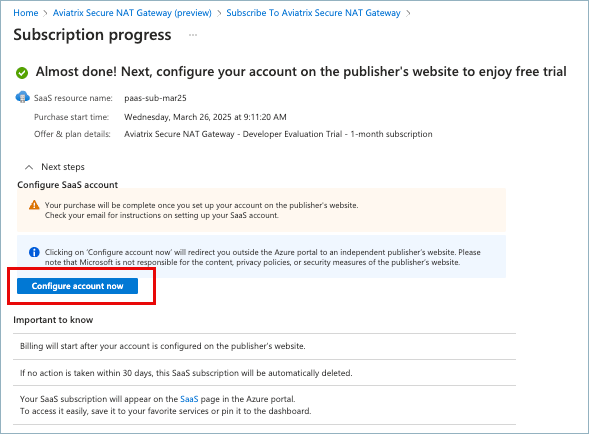
On the Subscription progress page, click Configure account now when the
process completes.
-
On the Sign Up screen that displays, enter your name.
The email address you used for your Azure account is auto-populated.
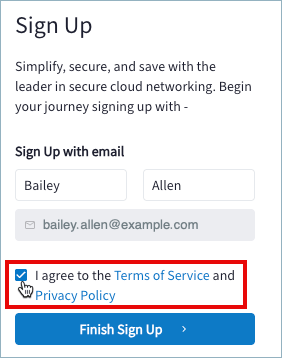
- Agree to the Aviatrix Terms of Service and Privacy Policy and click Finish Sign Up. You are signed in to the Aviatrix Platform UI and a Welcome screen displays, from which you can onboard your Azure cloud account.
To access an existing Aviatrix PaaS account, you must ask an administrator on
that account to invite you as a user.
Next Steps
After subscribing to Aviatrix Secure NAT Gateway, onboard your cloud account and VNets.Onboard Cloud Account
Onboarding connects your cloud account to Aviatrix Platform and allows the platform to discover your cloud resources, such as VNets, subnets, and VMs.
Onboard Your Azure Cloud Account
Onboard Your Azure Cloud Account
After signing up with Aviatrix PaaS, the Aviatrix Platform opens to a Welcome
page. From this page you can connect your cloud accounts with the Aviatrix
Platform. After you have onboarded a cloud account, the Welcome page no longer
displays when you sign in.The onboarding process creates the Azure roles and resources required for
Aviatrix Platform to monitor and manage your Azure network. It also allows
Aviatrix PaaS to discover the resources in your cloud account.
- On Welcome to Aviatrix PaaS, click Begin.
-
In Begin Aviatrix Journey Step 1, click Onboard Cloud Account and select
Azure.
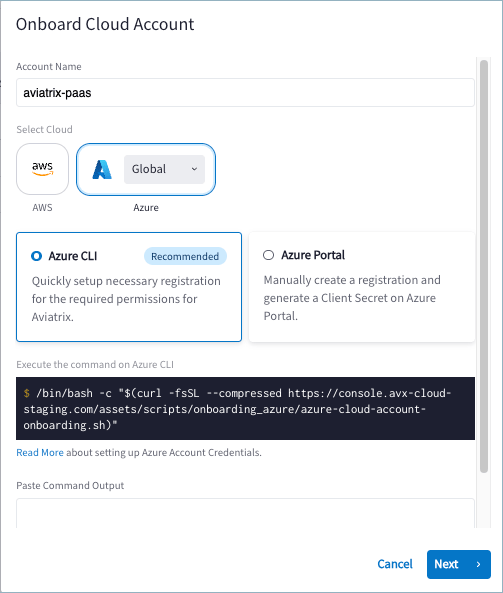
- Select one of the following methods and complete the related tasks:
Use Azure CLI to Onboard Azure Cloud
Use Azure CLI to Onboard Azure Cloud
The CLI method automates creation of and connection to an application in Azure,
so it is easy and quick.Prerequisite: The Azure CLI and the jq command-line processor must already be
installed on your system.Perform the following steps to onboard Azure.
-
In a terminal window, log in to the Azure CLI.
Example:
az login - Copy the command provided in the Onboard dialog, paste it into the terminal, and press Enter to run the script.
- When prompted, enter unique names for the custom role and for the Aviatrix Service Principal. If the custom role already exists, it will use the existing role.
-
Copy and save the client secret from the decoded JSON output.
Example of the command and the command output:
- Use this command to run the script to onboard your Azure cloud account.
- Verify your Azure subscription ID, which the script detects.
- Enter a name for the custom role. If the custom role already exists, it will use the existing role.
- Provide a user-friendly name for the Aviatrix Service Principal.
- The script creates a ‘contributor’ role assignment under the specified subscription scope with your unique ID. Note the associated warning about protecting credentials.
- The Service Principal details are saved to a JSON file for future reference, with a unique file name.
- The script assigns the custom role to the Service Principal, displaying the principal’s unique ID. Note the important warning about keeping the JSON file safe.
- Copy and save the client secret.
- Copy the value and paste it into the Aviatrix PaaS console.
- Copy the base64-encoded value from the terminal output and paste it into the Command Output field in the Onboard dialog box.
- Click Next. You will see a Discovering Cloud Resources message that changes to a success message after resources are discovered.
- Click Close.
- Verify that the new cloud account displays in the list on Cloud Accounts > Overview.
Use Azure Portal to Onboard Azure Cloud
Use Azure Portal to Onboard Azure Cloud
The Aviatrix Console method requires manually collecting several IDs from Azure
Portal and entering them in Aviatrix Platform to create the connection.Have the following information available for the Azure application you will
associate with Aviatrix PaaS:Perform the following steps to onboard Azure.
- Subscription ID
- Directory ID
- Application ID
- Client Secret
If you are uncertain how to collect this information, see Gather Information
for Azure
Onboarding.
-
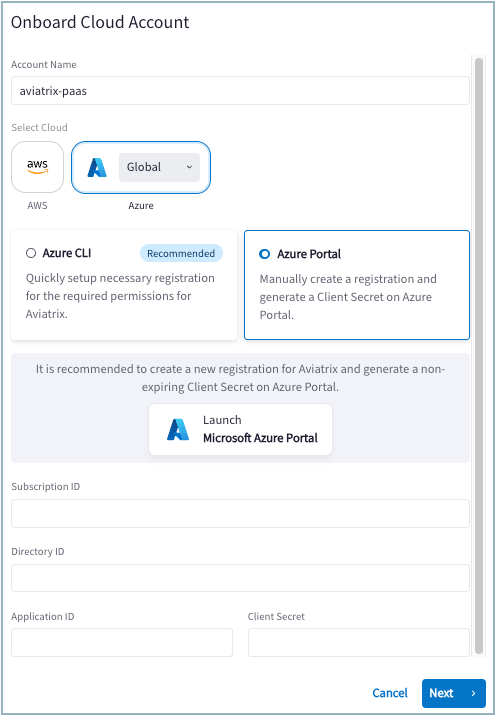
If you have not already created an Azure application and gathered the
necessary IDs, click Launch Microsoft Azure Portal and create an
application.
See Create a New Application in Azure, if you need more information.
-
Enter the following IDs from your Azure account.
- Subscription ID
- Directory ID
- Application ID
- Client Secret
- Click Next. As your account is onboarded, the cloud assets in your account are discovered. When the discovery process completes, a success message displays.
- Click Close. Your onboarded account is named aviatrix-account and displays on the Cloud Resources pages and in the Dashboard. It can take a couple of minutes before your VNets display under Cloud Resources > Cloud Assets. Your onboarded regions will also display in the Dashboard geographic map.
Onboard VNets
Onboarding VNets allows Aviatrix Platform to manage the cloud resources you select.
Onboard VNets
Onboard VNets
After onboarding your cloud account in Aviatrix, the VPCs or VNets associated
with the account display as unmanaged resources in the Aviatrix PaaS console.
You can see a list of VPCs and VNets, and associated VM resources, on the Cloud
Assets page.To bring the resources under Aviatrix management, you must onboard the VPCs or
VNets. The recommended (default) performance size for VPCs and VNets is Medium.It is recommended that you deploy each VPC or VNet with at least two subnets in
two different zones to provide high availability. You can select one subnet per
availability zone.During onboarding, an Aviatrix Spoke Gateway is created on each subnet in the
managed VPC or VNet. This gateway is displayed on the Topology map, along with
other network resources.You can also onboard, monitor, and protect VPCs and VNets from Security >
Egress > Protected VPC/VNets.To view the status of individual subnets, expand the VPC or VNet listing.To display related route tables, click the Name of a VPC or VNet.To onboard your VPCs or VNets, do the following.
For information about Kubernetes clusters, see Onboard Kubernetes
Clusters.
- Go to Cloud Resources > Cloud Assets > VPC/VNets & Subnets.
- Click the Onboard link for a VPC or VNet you want Aviatrix to manage. You can only onboard resources that have public IPs. By default, the 10.0.0.0/16 CIDRs are private.
-
On Onboard a VPC/VNet you can do the following:
- From Performance Size, select the instance size for your VPC or VNet. The recommended default size is Medium.
- Remove a subnet from the onboarding list by clicking the “x” next to the subnet IP address. This action only removes the subnet from being managed, it does not remove the subnet from the VPC or VNet.
- Add a subnet to the list by clicking the down arrow and selecting the subnet IP address.
- Click Onboard. The Aviatrix Managed column changes status to In Progress. When onboarding of all subnets for the VPC or VNet is complete, status changes to Yes.
- Expand the VPC or VNet listing to see the status of individual subnets in the VPC or VNet.
- Click the Name of the VPC or VNet to display related route tables.
Secure Your Network
Use either the Distributed Cloud Firewall (DCF) or Egress Security workflow.
- About Distributed Cloud Firewall Security DCF provides granular network security rules for distributed applications in the cloud.
- About Egress Security Egress Security involves monitoring network traffic to the Internet and protecting the traffic using DCF Rules, SmartGroups, and WebGroups.