

- Use the CLI to Onboard Azure (Recommended)
- Use the Console to Onboard Azure
Use the CLI to Onboard Azure
The CLI method automates creation of and connection to an application (service principal) in Azure, so it is quick and straightforward. This is the recommended onboarding method.The Aviatrix Platform-as-a-Service (PaaS) onboarding script performs the following tasks: (click to expand)
The Aviatrix Platform-as-a-Service (PaaS) onboarding script performs the following tasks: (click to expand)
- Creates a service principal/application Requires Application Administrator, Cloud Application Administrator, or Global Administrator role.
- Assigns the Contributor role at the subscription level Requires User Access Administrator or Owner role at subscription level.
- Generates a client secret Requires Application Administrator, Cloud Application Administrator, or Global Administrator role.
The script includes a validator that does the following: (click to expand)
The script includes a validator that does the following: (click to expand)
- Confirms you are logged in to Azure
- Retrieves your user ID and subscription details
- Verifies that Azure CLI and jq are installed
- Verifies you have the permissions required to perform the onboarding tasks The validator does not make any actual changes to your Azure environment. If required permissions are not available, you must manually set the missing permissions before onboarding your account.
-
Do one of the following:
- At first-time login, click Begin in the Welcome page and then click Onboard Cloud Account.
- To onboard after first-time login, go to Cloud Resources > Cloud Accounts, click + Cloud Account, and enter a unique Account Name.
-
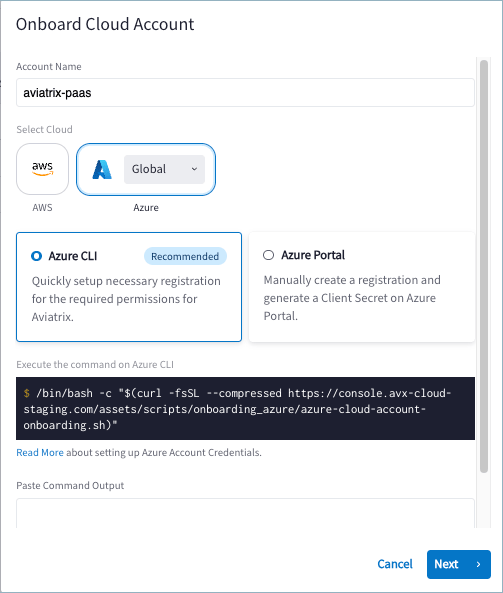
Click Azure and select Azure CLI.
-
In a terminal window, log in to the Azure CLI.
Example:
az login -
Copy the command provided in the Onboard dialog, paste it into the terminal,
and press Enter to run the script.
If using Cloud Shell, you might need to use this alternative command:
- When prompted, enter unique names for the custom role and for the Aviatrix Service Principal. If the custom role already exists, it will use the existing role.
-
Copy and save the client secret from the decoded JSON output.
Example of the command and the command output:
- Use this command to run the script to onboard your Azure cloud account.
- Verify your Azure subscription ID, which the script detects.
- Enter a name for the custom role. If the custom role already exists, it will use the existing role.
- Provide a user-friendly name for the Aviatrix Service Principal.
- The script creates a ‘contributor’ role assignment under the specified subscription scope with your unique ID. Note the associated warning about protecting credentials.
- The Service Principal details are saved to a JSON file for future reference, with a unique file name.
- The script assigns the custom role to the Service Principal, displaying the principal’s unique ID. Note the important warning about keeping the JSON file safe.
- Copy and save the client secret.
- Copy the value and paste it into the Aviatrix Platform-as-a-Service (PaaS) console.
- Copy the base64-encoded value from the terminal output and paste it into the Command Output field in the Onboard dialog box.
- Click Next. You will see a Discovering Cloud Resources message that changes to a success message after resources are discovered.
- Click Close.
- Verify that the new cloud account displays in the list on Cloud Accounts > Overview.
Use the Console to Onboard Azure
The Aviatrix console method requires manually collecting several IDs from Azure Portal and entering the IDs in the Aviatrix Platform-as-a-Service (PaaS) console to create the connection. Prerequisite The account onboarding process requires you to copy some information from your Azure account to the Aviatrix Platform-as-a-Service (PaaS) console. Have the following information available for the Azure application you will associate with Aviatrix Platform-as-a-Service (PaaS):- Subscription ID
- Directory ID
- Application ID
- Client Secret
If you are uncertain how to collect this information, see Gather Information
for Azure
Onboarding.
- In Aviatrix Platform-as-a-Service (PaaS), go to Cloud Resources > Cloud Accounts and click + Cloud Account.
-
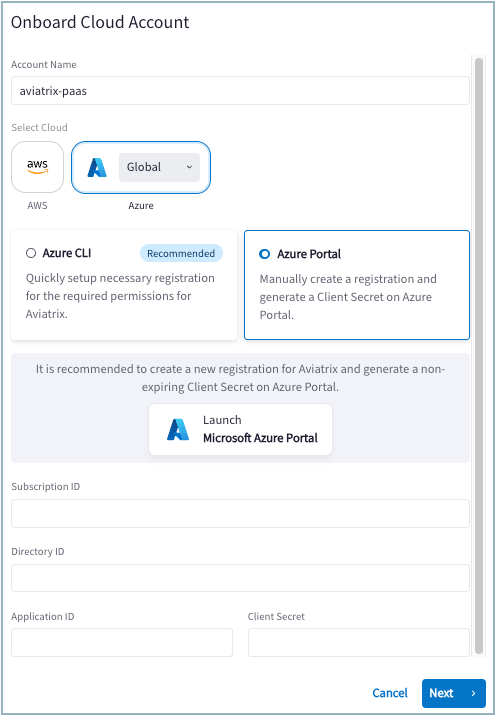
Enter a unique Account Name and click Azure.
-
Enter the following required IDs from your Azure account.
If you are uncertain how to collect this information, see Gather Information for Azure Onboarding.
- Subscription ID * Directory ID * Application ID * Client Secret
- Click Next. You will see a Discovering Cloud Resources message that changes to a success message after resources are discovered.
- Click Close.
- Verify that the new cloud account displays in the list on Cloud Accounts > Overview.