

Currently, Microsoft Azure Entra ID (OpenID Connect) is the only supported
Identity Provider (IdP).
- Get the Aviatrix PaaS OAuth callback URL
- Create an OAuth application in Azure using the callback URL
- Verify the Token Configuration in Azure
- Configure SSO in Aviatrix Console
Get the Aviatrix PaaS OAuth Callback URL
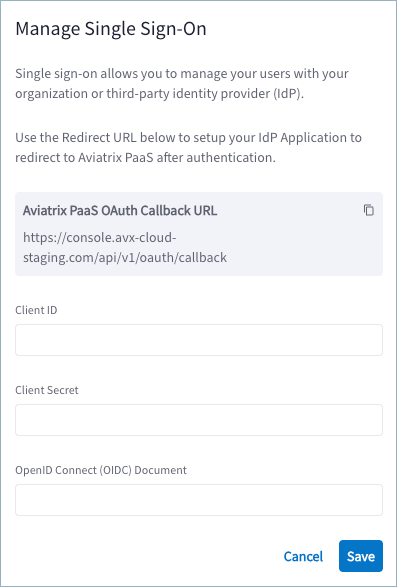
You need the Aviatrix PaaS OAuth callback (redirect) URL to set up the OAuth application in your IdP. This URL is the address for the Aviatrix console, to which you will be redirected after you are successfully authenticated. To get the callback URL:- Log in to Aviatrix PaaS console.
- Go to Settings > Single Sign-On and click Manage.
- In Manage Single Sign-On, go to Aviatrix PaaS OAuth Callback URL, click the copy icon, and then save the URL.
Create an OAuth Application in Azure
You must have admin privileges for Microsoft Azure portal to complete this task. If you do not yet have an Aviatrix PaaS application and client secret, you need to create them. To create an application in Azure, you need the callback (redirect) URL from the Aviatrix PaaS console. For the OAuth application in Azure, you must copy the application (client) ID, client secret value, and the URI for the OpenID Connect (OIDC) metadata specification document. You will use this information to configure SSO in the Aviatrix PaaS console. To create an OAuth application:- Log in to your Azure account.
- Go to App registrations.
- Click + New registration and enter the following:
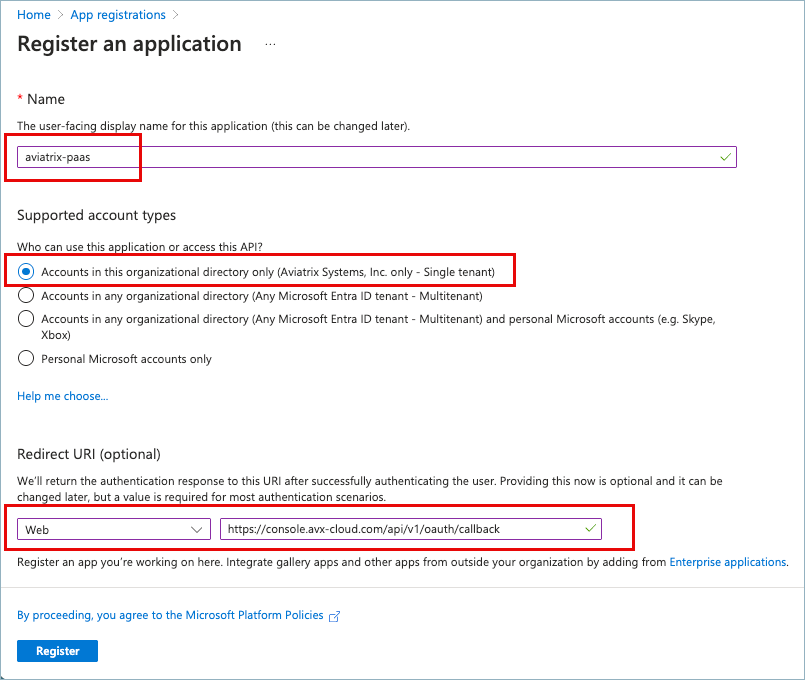
- Click Register.
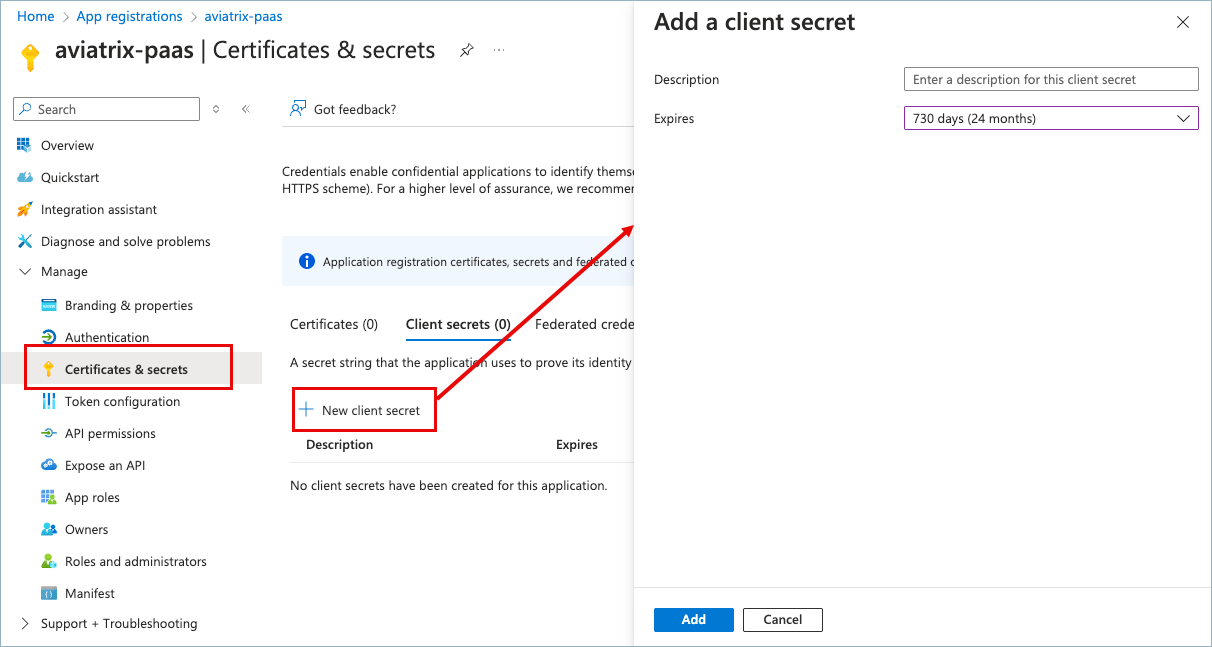
- In the left navigation, click Certificates & secrets > Client secrets.
- Click + New client secret, enter a description and expiration date, and click Add.
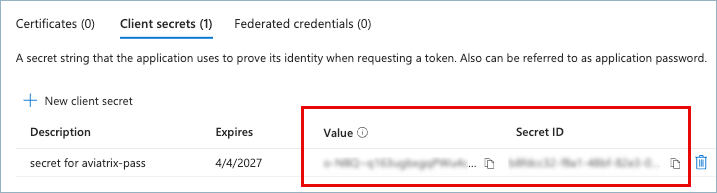
- Copy the Value and Secret ID you just created and save them to a safe place.
- Go to App registrations > Owned applications.
- Click on the Aviatrix PaaS application you created.
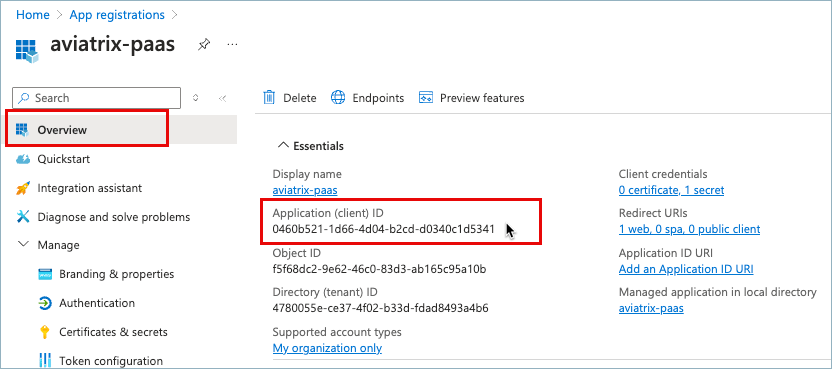
- On the application Overview page, copy and save the Application (client) ID.
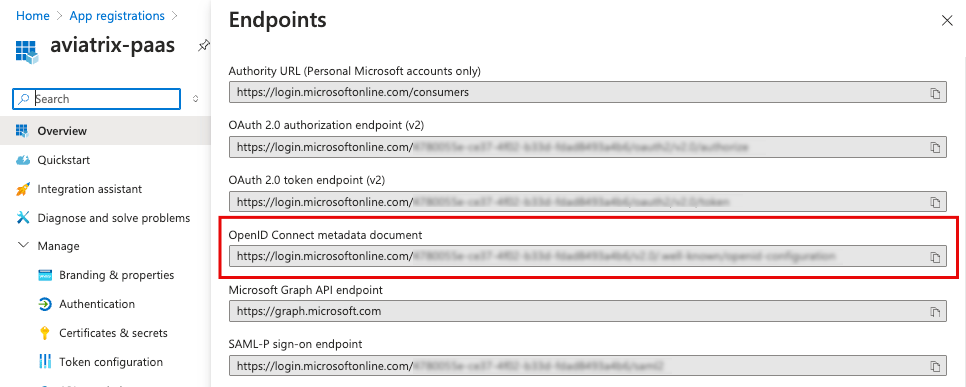
- Click the Endpoints tab.
- Scroll through the list, locate OpenID Connect metadata document, and then copy and save the URL.
Verify the Token Configuration
For SSO to work properly with Aviatrix PaaS, Group claim and several Optional claims must be set in Azure for the Aviatrix PaaS application. For more details about configuring optional claims in tokens, see the Microsoft documentation.- In Azure, go to App Registrations and select the Aviatrix PaaS application.
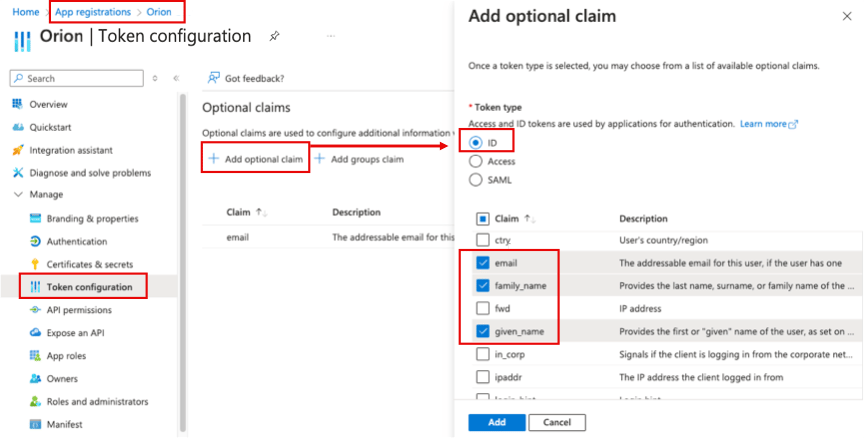
- In the navigation pane, click Token configuration.
-
Verify that the following Claims are listed:
emailfamily_namegiven_name
-
If the Optional claims are not listed, do the following:
- Click + Add optional claim.
- Under Token type, select ID.
- Select
email,family_name, andgiven_name, and then click Add. - If an option displays to “Turn on the Microsoft Graph email, profile permission”, click the checkbox and then click Add.
Configure SSO in Aviatrix PaaS
Before configuring single sign-on (SSO) in the Aviatrix PaaS console, be sure you have collected the required information. For more information, see Create an OAuth Application in Azure. You must have admin privileges in the Aviatrix PaaS console to configure SSO. To configure SSO:- Log in to the Aviatrix PaaS console.
- Go to Settings.
- On the Single Sign-On card, click Manage.
- Select your OAuth identity provider (IdP) and enter the information you
copied from your IdP:
- Client (Application) ID
- Client Secret value
- OpenID Connect (OIDC) Document URL
- Click Save.