


1. Subscribe to Aviatrix PaaS Free Trial Offer
You can subscribe to a free trial offer for Aviatrix Cloud Network Security Platform-as-a-Service (Aviatrix PaaS) on the AWS Marketplace. If you subscribe to the free trial, you can upgrade anytime to a paid subscription.
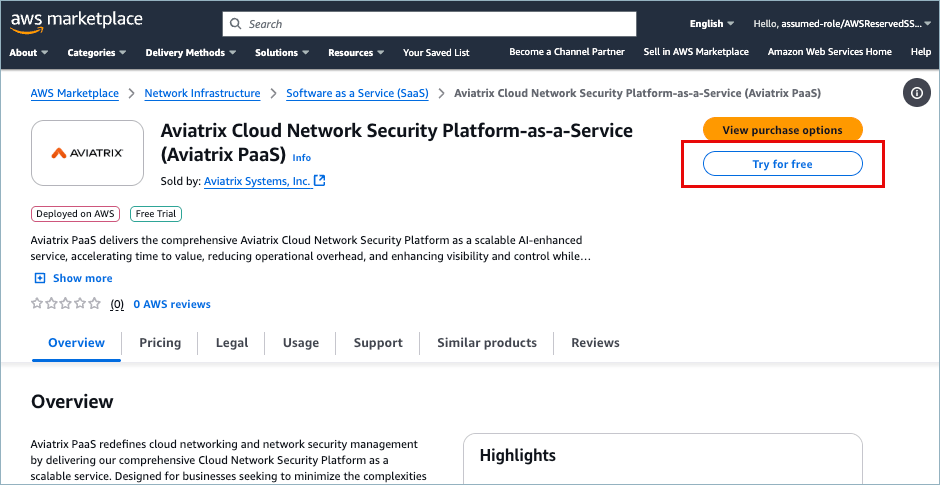
- Go to the Aviatrix PaaS listing on AWS Marketplace and select Aviatrix Cloud Network Security PaaS: Managed Firewall & Security offer.
-
On the Aviatrix PaaS description page, click Try for Free.
-
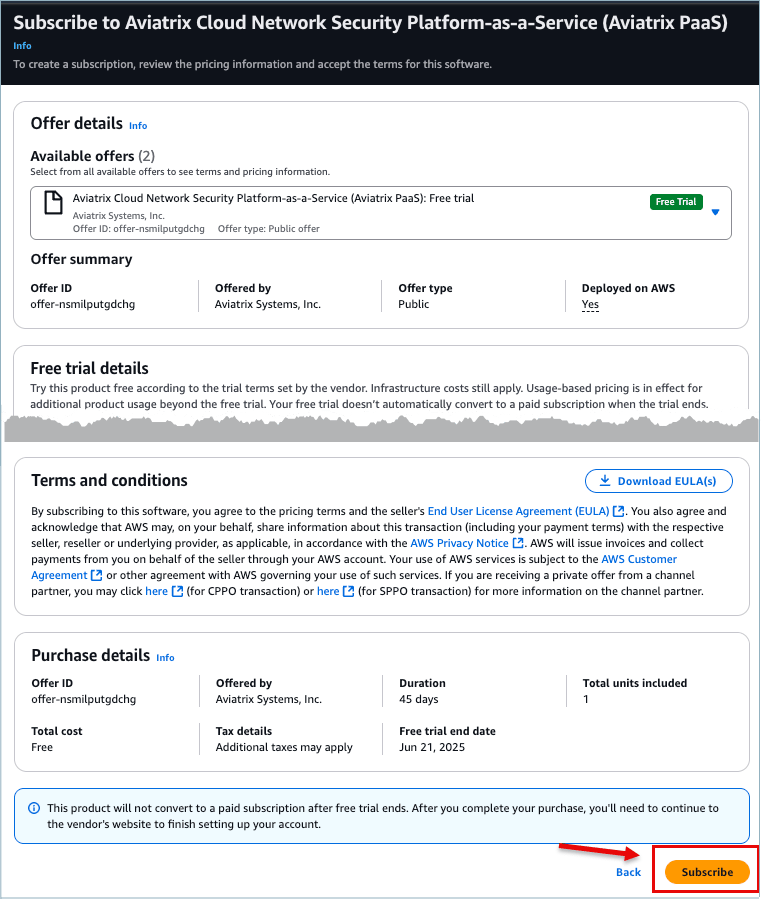
On the Subscribe page, review the information about the offer and click
Subscribe.
-
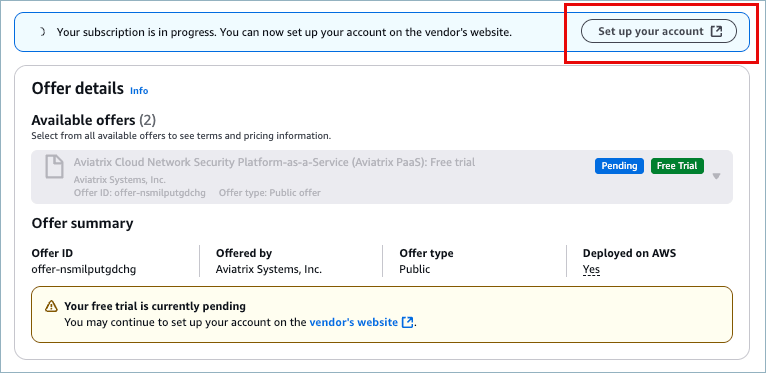
In the notification that displays at the top of the page, click Set up your
account.
-
On Aviatrix Sign Up, enter your name and a valid corporate email address.
Personal email addresses are not accepted.
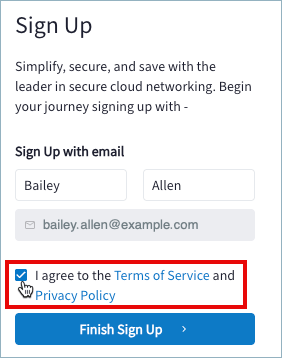
- Agree to the Aviatrix Terms of Service and Privacy Policy and click Finish Sign Up. An email is sent to your corporate address.
- In the email, click the link to Complete Sign Up and Begin Trial. You are redirected to the Aviatrix PaaS console. After several seconds, a Welcome screen displays, from which you can onboard your AWS cloud account.
2. Onboard a Cloud Account
After subscribing to Aviatrix Cloud Network Security Platform-as-a-Service (Aviatrix PaaS), onboard your cloud account. Onboarding connects your cloud account to Aviatrix Platform and allows the platform to discover your cloud resources, such as VPCs, subnets, and VMs.
Onboard Your AWS Cloud Account (click to expand)
Onboard Your AWS Cloud Account (click to expand)
After signing up with Aviatrix PaaS, the Aviatrix Platform opens to a Welcome
page. From this page you can connect your cloud accounts with the Aviatrix
Platform. The onboarding process creates the AWS roles and resources required
for Aviatrix Platform to monitor and manage your AWS network.
- On Welcome to Aviatrix PaaS, click Begin.
- In Begin Aviatrix Journey, select AWS and then click Launch CloudFormation. The AWS CloudFormation quick create stack template opens.
-
In the template, you can optionally modify the stack name and IAM role or
leave them with their default settings.
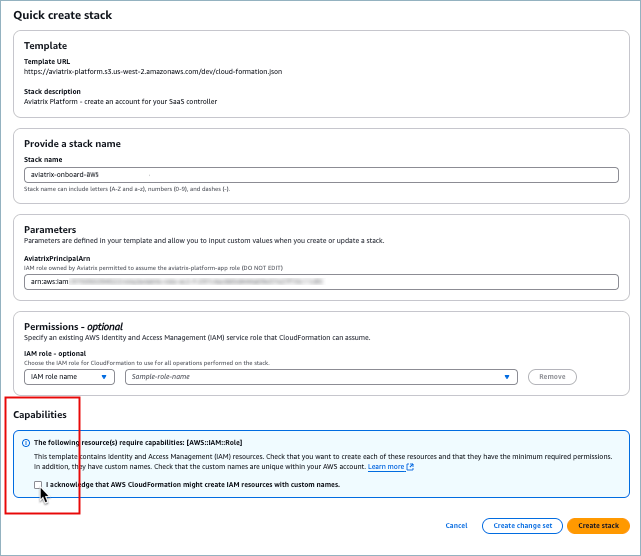
- Under Capabilities, click the acknowledgment and then click Create stack.
-
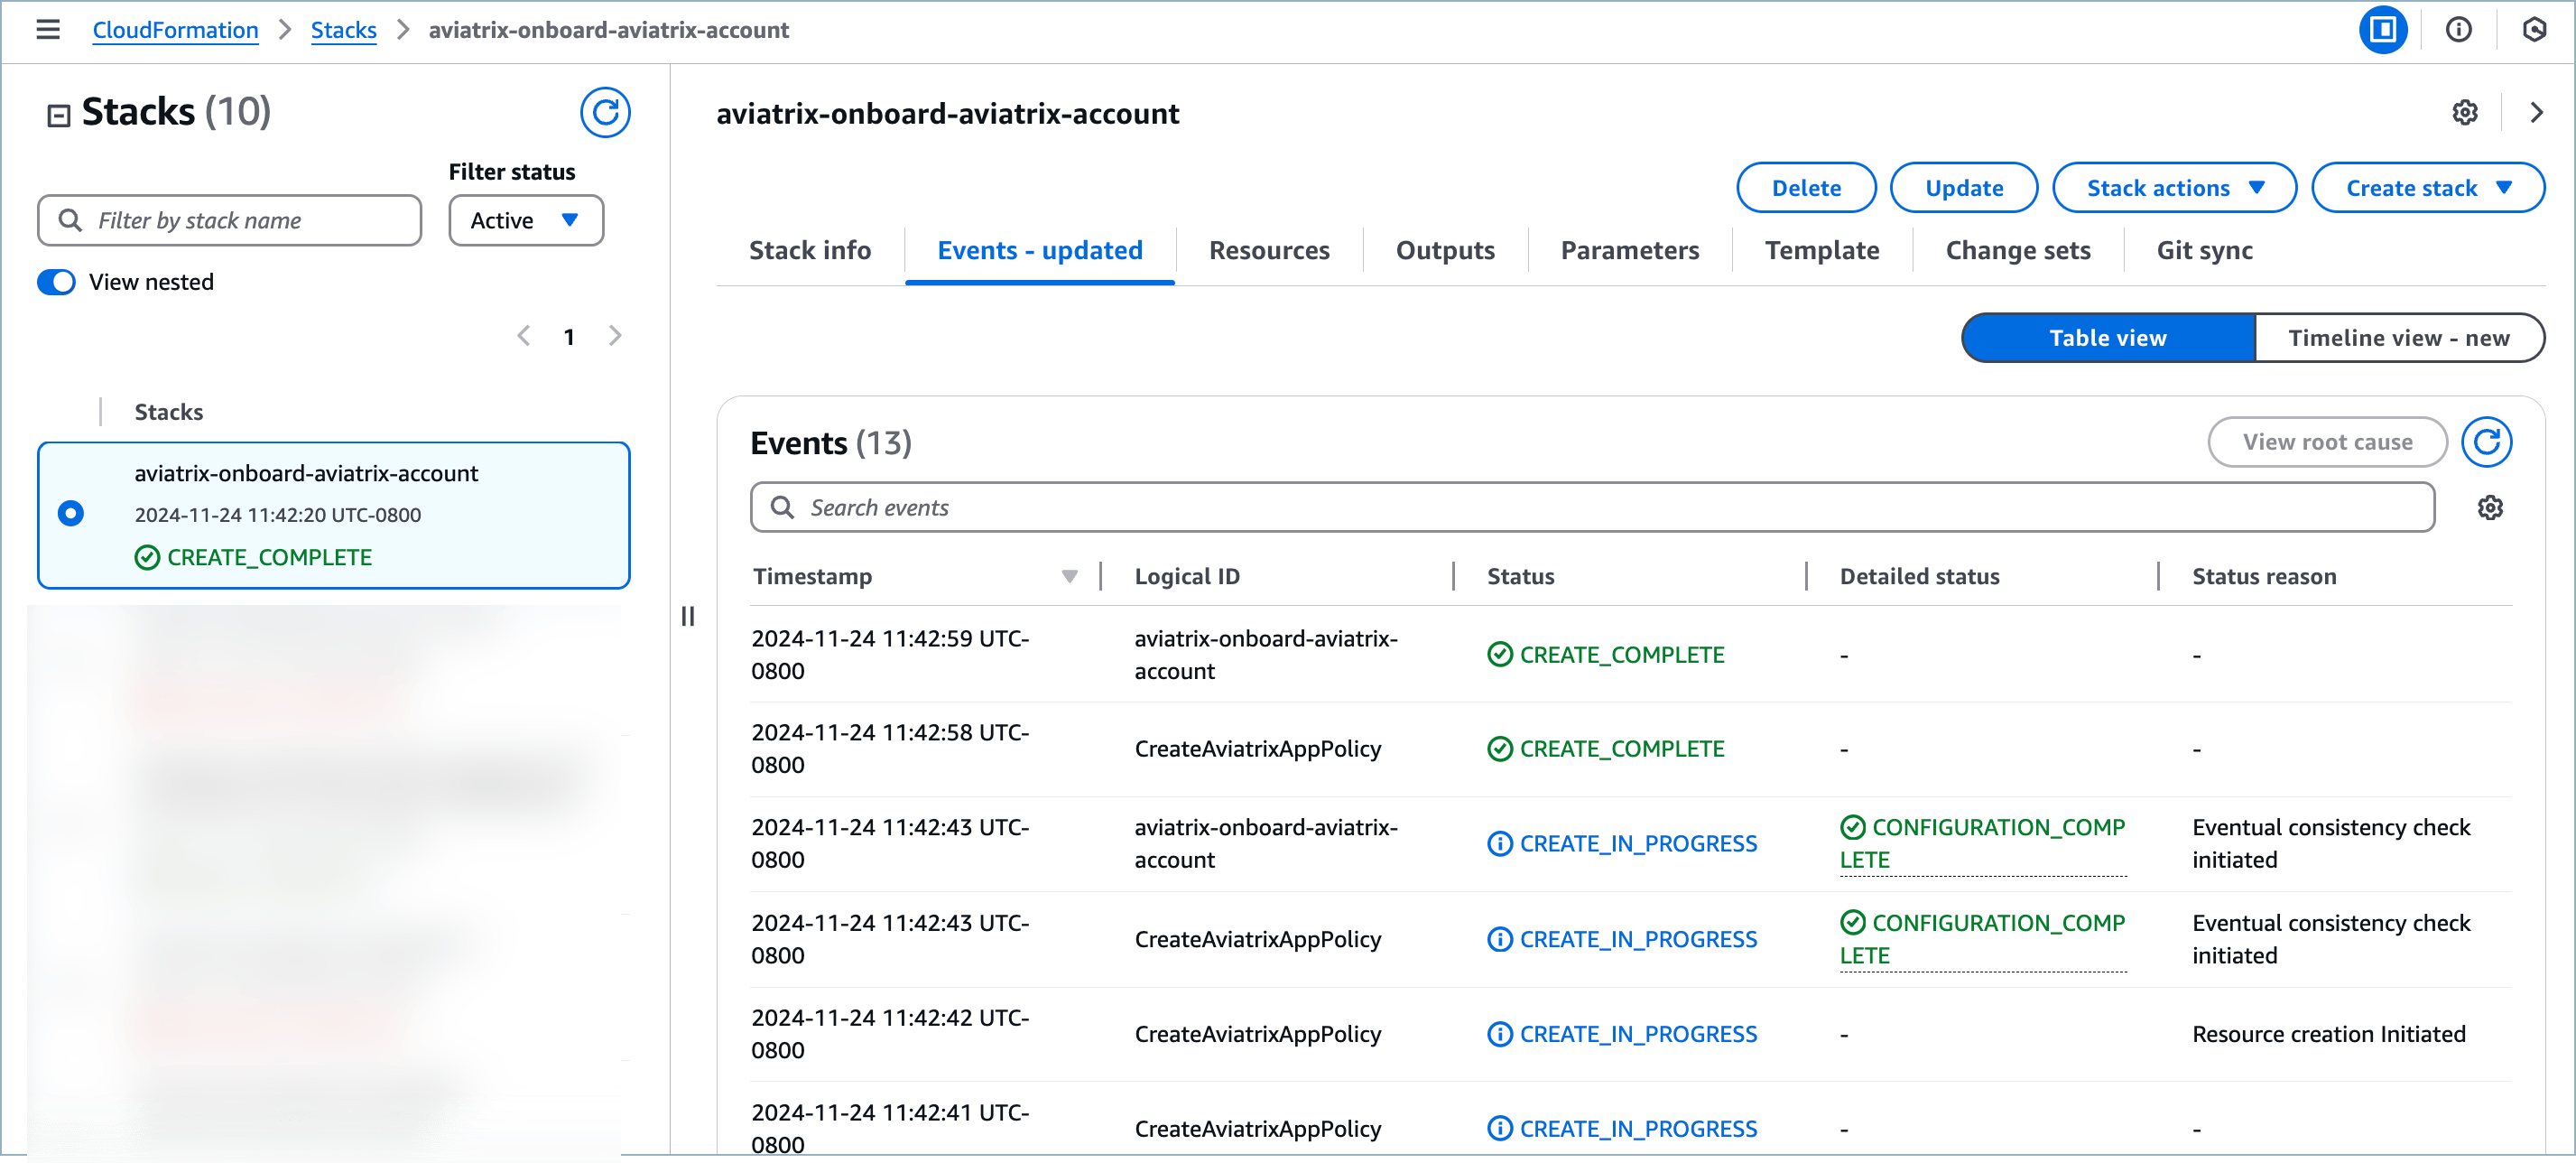
On AWS CloudFormation > Stacks > Events, watch the Status column for
CREATE_COMPLETE to display.
-
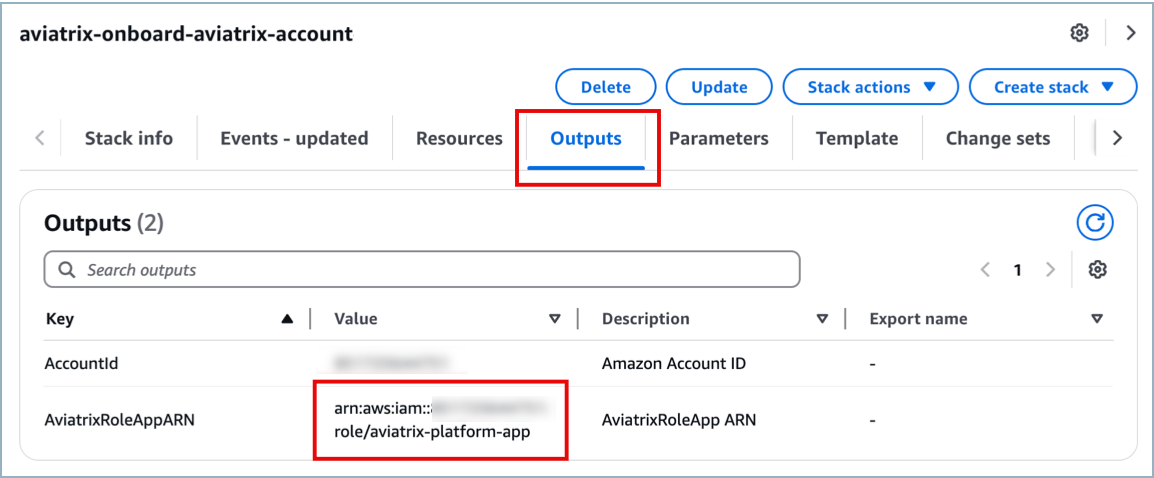
When creation completes, click the Outputs tab and copy the Value for
AviatrixRoleAppARN.
This is the ARN in the format
arn:aws:iam::<account-id>:role/aviatrix-platform-app.
- Return to the Aviatrix Onboard Cloud Account dialog box, paste the value into the field AWS Role ARN, and click Next. As your account is onboarded, the cloud assets in your account are discovered. When the discovery process completes, a success message displays.
- Click Close. It can take a couple of minutes before your VPCs display under Cloud Resources > Cloud Assets. Your onboarded regions will also display in the Dashboard geographic map.
3. Onboard VPCs
Onboarding VPCs allows Aviatrix Platform to manage the cloud resources you select.
Onboard VPCs (click to expand)
Onboard VPCs (click to expand)
After onboarding your cloud account in Aviatrix, the VPCs or VNets associated
with the account display as unmanaged resources in the Aviatrix PaaS console.
You can see a list of VPCs and VNets, and associated VM resources, on the Cloud
Assets page.To bring the resources under Aviatrix management, you must onboard the VPCs or
VNets. The recommended (default) performance size for VPCs and VNets is Medium.It is recommended that you deploy each VPC or VNet with at least two subnets in
two different zones to provide high availability. You can select one subnet per
availability zone.During onboarding, an Aviatrix Spoke Gateway is created on each subnet in the
managed VPC or VNet. This gateway is displayed on the Topology map, along with
other network resources.You can also onboard, monitor, and protect VPCs and VNets from Security >
Egress > Protected VPC/VNets.To view the status of individual subnets, expand the VPC or VNet listing.To display related route tables, click the Name of a VPC or VNet.To onboard your VPCs or VNets, do the following.
For information about Kubernetes clusters, see Onboard Kubernetes
Clusters.
- Go to Cloud Resources > Cloud Assets > VPC/VNets & Subnets.
- Click the Onboard link for a VPC or VNet you want Aviatrix to manage. You can only onboard resources that have public IPs. By default, the 10.0.0.0/16 CIDRs are private.
- On Onboard a VPC/VNet you can do the following: a. From Performance Size, select the instance size for your VPC or VNet. The recommended default size is Medium. b. Remove a subnet from the onboarding list by clicking the “x” next to the subnet IP address. This action only removes the subnet from being managed, it does not remove the subnet from the VPC or VNet. c. Add a subnet to the list by clicking the down arrow and selecting the subnet IP address. d. Click Onboard. The Aviatrix Managed column changes status to In Progress. When onboarding of all subnets for the VPC or VNet is complete, status changes to Yes.
- Expand the VPC or VNet listing to see the status of individual subnets in the VPC or VNet.
- Click the Name of the VPC or VNet to display related route tables.
4. Secure Your Network
Use either the Distributed Cloud Firewall (DCF) or Egress Security workflow.
- Protect Your Traffic with Distributed Cloud Firewall DCF provides granular network security rules for distributed applications in the cloud.
- Protect Your Traffic with Egress Security Egress Security involves monitoring network traffic to the Internet and protecting the traffic using DCF Rules, SmartGroups, and WebGroups.