

Prerequisites
- If you have not launched an Aviatrix Controller, refer to the following Guides for your Cloud Service Provider:
If this is your first time using Aviatrix, make sure to go through the
Controller onboarding process and create an Aviatrix account that corresponds
to an IAM role.
- Identify a VPC or VNet in a region where you want to launch the Transit Gateway, and name it Transit VPC or VNet.
- Create a VGW or reuse an existing VGW.
Configuration Workflow
While the instructions below reference AWS, the workflow applies to any public cloud in which Aviatrix Transit Network is supported.- CoPilot UI
- Terraform
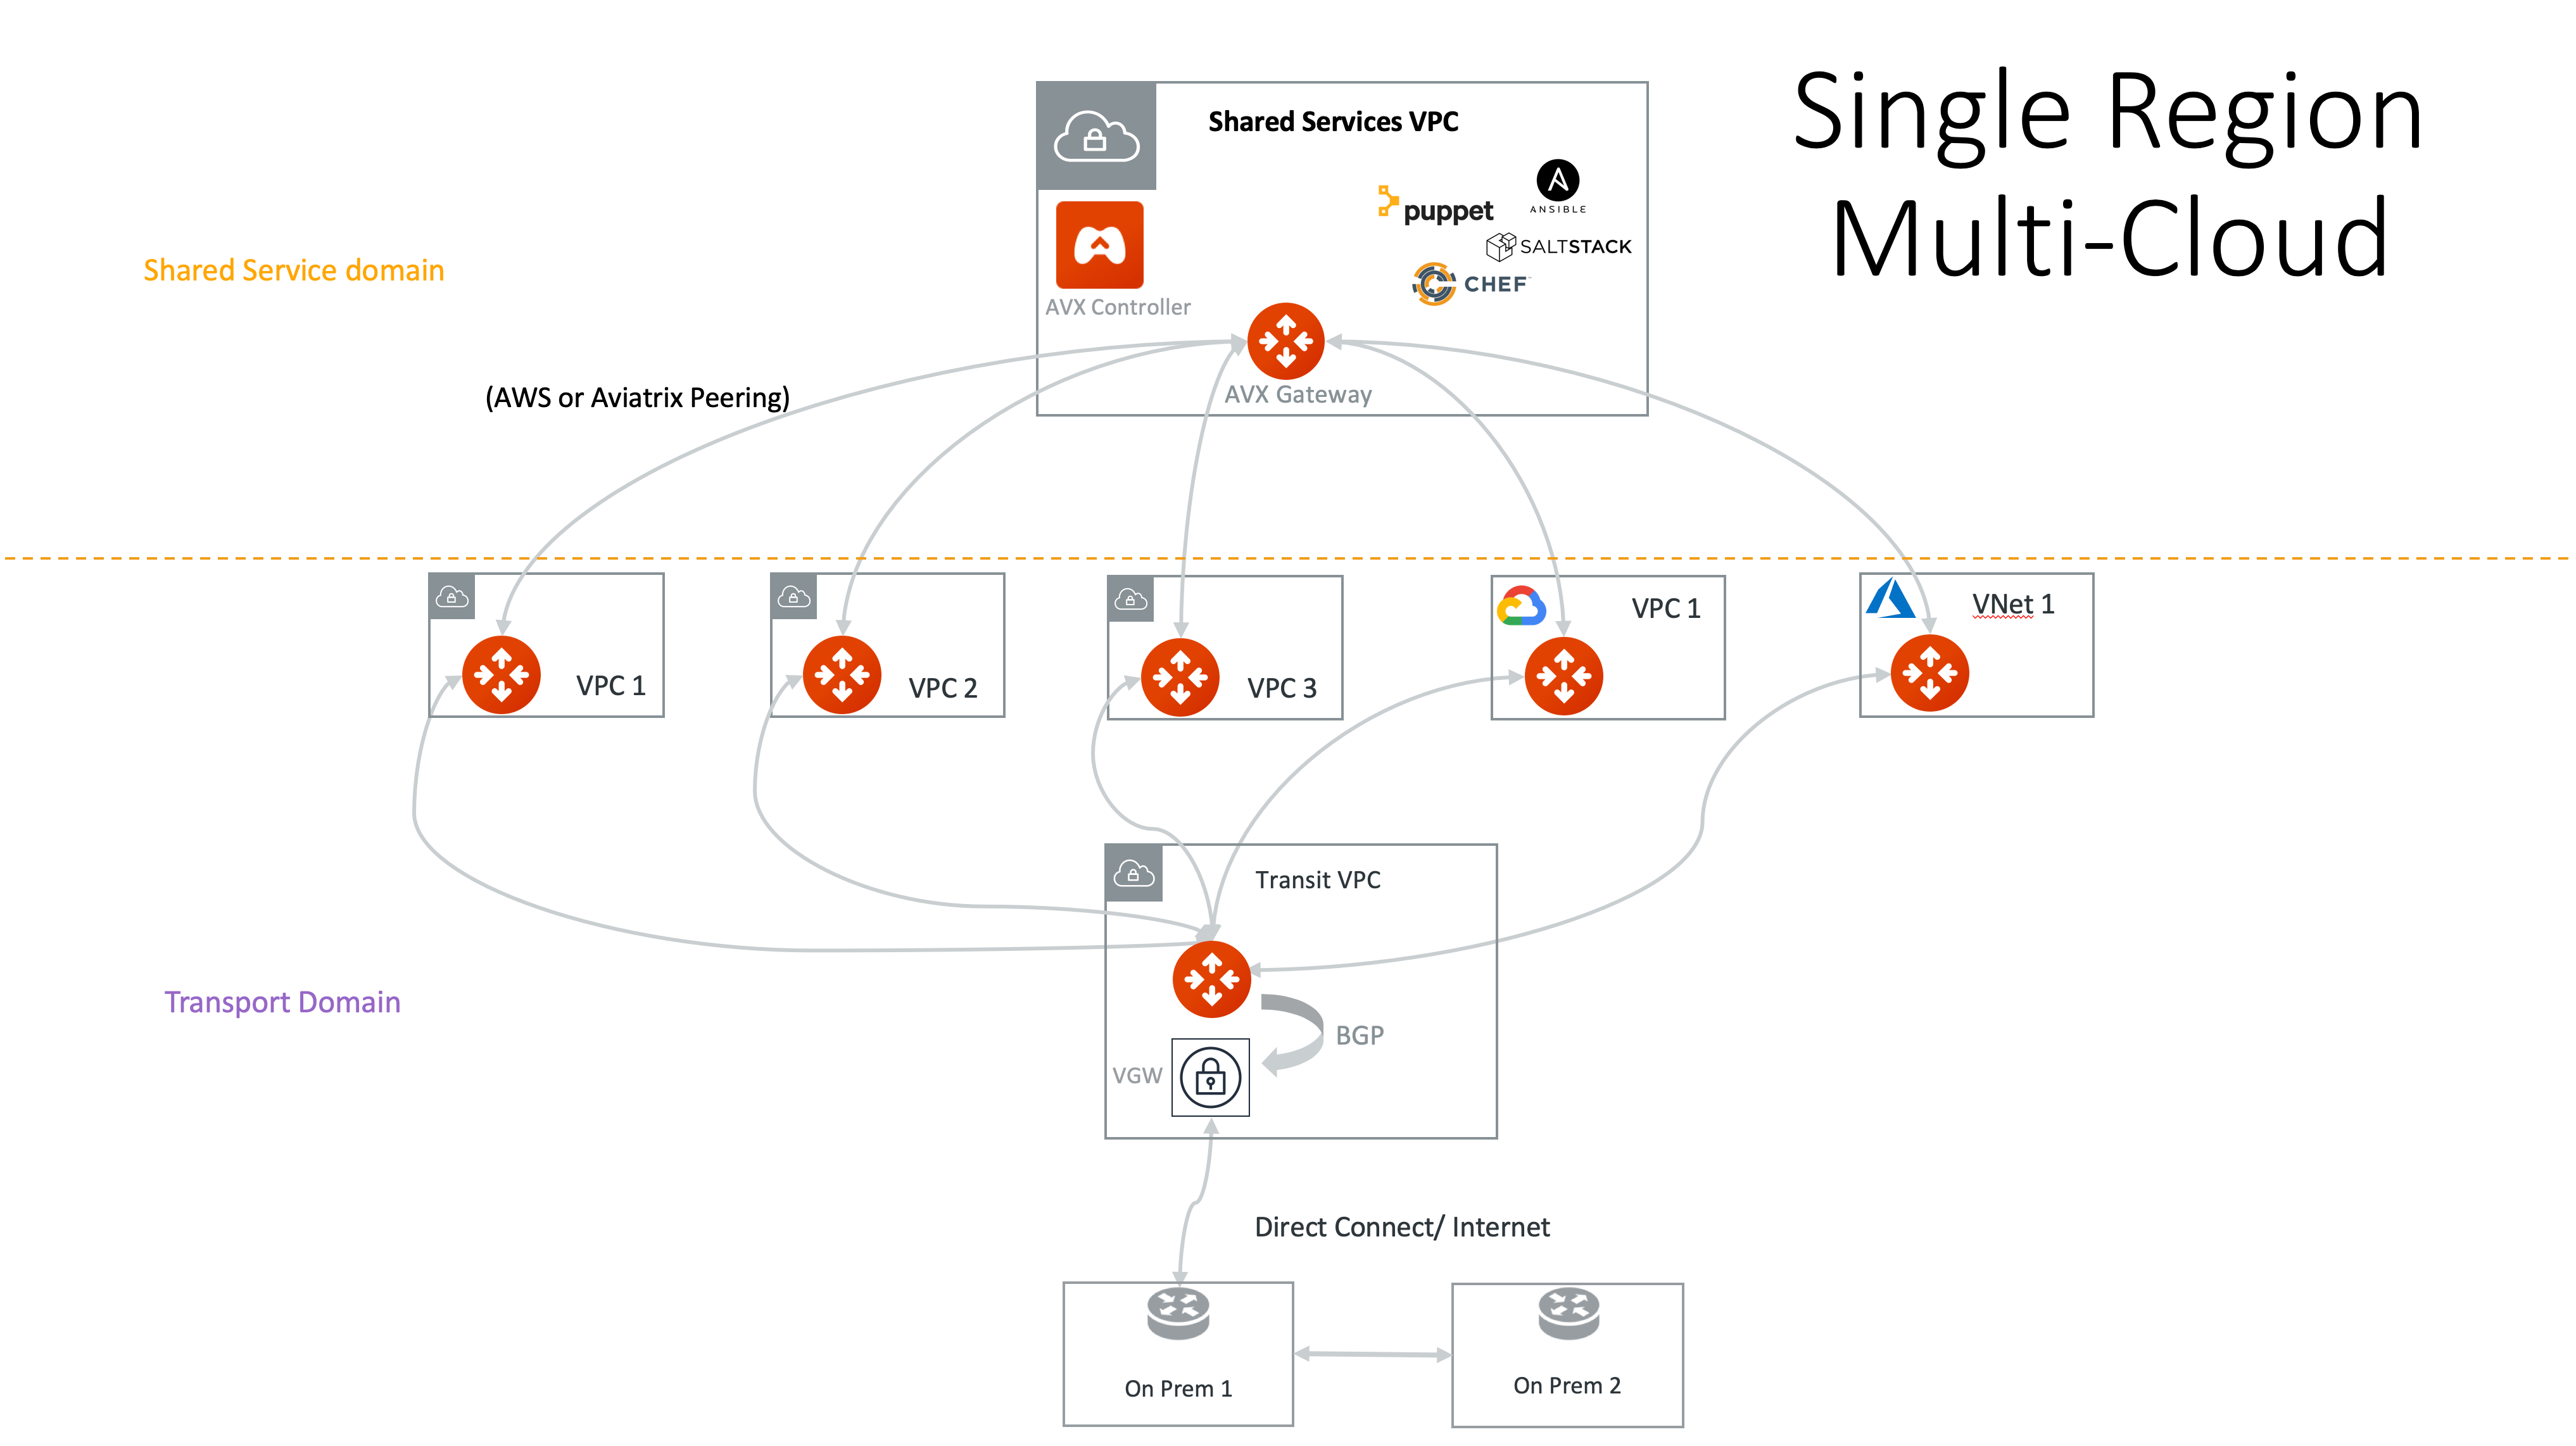
Follow these steps to build a single-region multicloud Transit Network:You can monitor the progress of the gateway creation by going to CoPilot > Monitor > Notifications > Tasks tab. Click the expand arrow next to the gateway name to see the progress.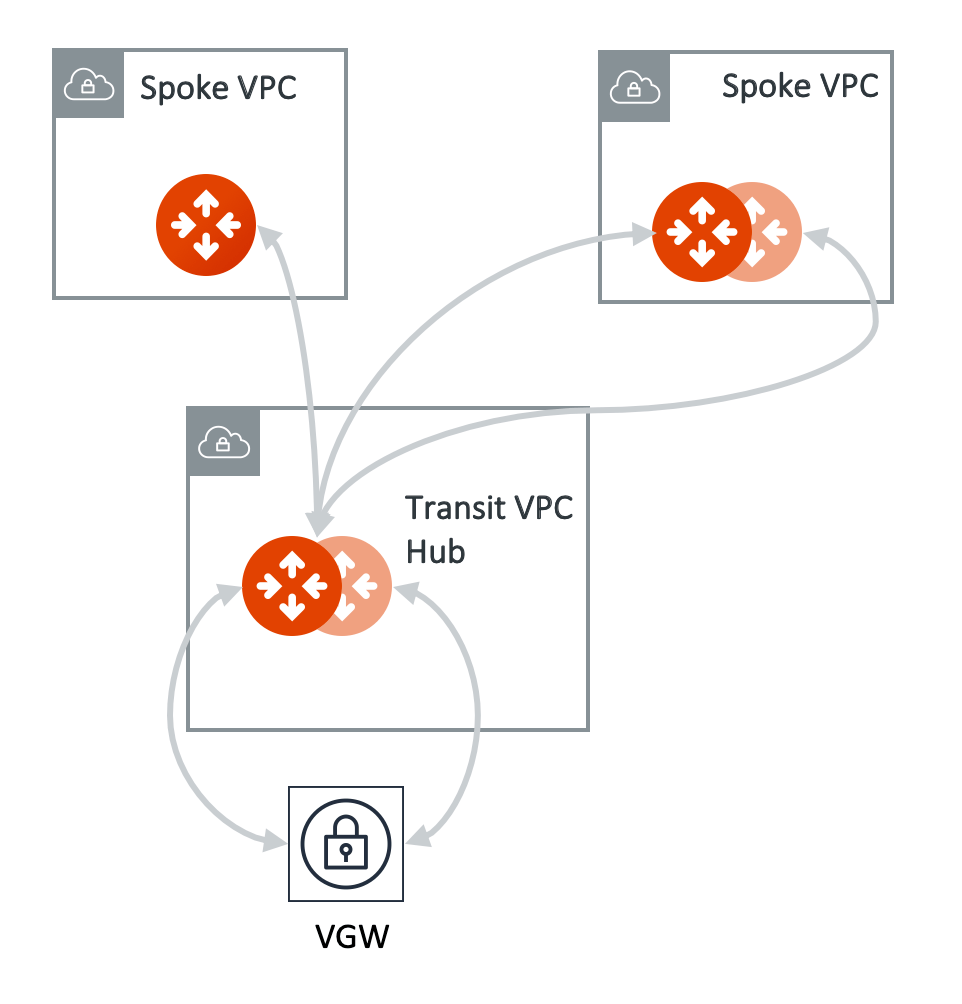
- Create a Primary and Highly Available (HA) Transit Gateway.
- Create a Primary and Highly Available (HA) Spoke Gateway.
- Attach the Spoke Gateway to the Transit Gateway.
1. Creating a Transit Gateway
To create primary and Highly Available (HA) Transit Gateway instances, provide the Transit Gateway general details, then assign the subnet and IP addresses for the gateway instances.1
Navigate to the Transit Gateways
In Aviatrix CoPilot, go to Cloud Fabric > Gateways > Transit Gateways.For quick access, at the top of the navigation panel, type Transit Gateways in the search bar.
2
Create a Transit Gateway
Click + Transit Gateway and provide the following general information.
3
Advanced Settings
In the Advanced Settings section, set the advanced gateway settings that may apply.
4
High Availability Instances
In the Instances section, assign the subnets and IP addresses for the Transit Gateway instances.To create a highly available (HA) gateway instance, click + Instance and assign the subnet and IP address.A Transit gateway supports up to 15 HA gateway instances.The gateway instances are created in active-active mode.
5
Resource Tags
In the Resource Tags section, you can add custom resource tags for the Transit Gateway.
- Click + Resource Tag.
- Enter a key to identify the resource and a value for the Key. The Key must be unique.
- Click the checkmark icon to add the key:value pair to the resource tags.
- Click the Tick button to save it.
6
Save the Transit Gateway
Click Save.
2. Creating a Spoke Gateway
To create primary and Highly Available (HA) Spoke Gateway instances, provide the Spoke Gateway general details, then assign the subnet and IP addresses for the gateway instances.1
Navigate to the Spoke Gateways
In Aviatrix CoPilot, go to Cloud Fabric > Gateways > Spoke Gateways.For quick access, at the top of the navigation panel, type Spoke Gateways in the search bar.
2
Create a Spoke Gateway
Click + Spoke Gateway and provide the following general information.
3
Advanced Settings
In the Advanced Settings section, set the advanced gateway settings that may apply.
4
High Availability Instances
In the Instances section, assign the subnet and IP address for the Spoke Gateway instances.To create a highly available (HA) gateway instance, click + Instance and
designate the subnet and IP address of the gateway instance.A Spoke Gateway can have up to 15 HA gateway instances.All gateway instances are created in active-active mode.A BGP-enabled Spoke Gateway can have only two HA gateway instances.A Spoke Gateway with Site2Cloud or customized SNAT and DNAT enabled can have
only two HA gateway instances.
5
Resource Tags
In the Resource Tags section, you can add custom resource tags for the Spoke Gateway.
- Click + Resource Tag.
- Enter a key to identify the resource and a value for the Key. The Key must be unique.
- Click the checkmark icon to add the key:value pair to the resource tags.
- Click Save.
6
Save the Spoke Gateway
Click Save.
3. Creating a Spoke to Transit Attachment
To attach a Spoke Gateway to a Transit Gateway:1
Navigate to the Spoke Gateways
In Aviatrix CoPilot, go to Cloud Fabric > Gateways > Spoke Gateways.
2
Manage Gateway Attachment Dialog
In the table, locate the Spoke Gateway you want to attach and click the Manage Gateway Attachment icon on the right side of its row.
3
Create a Spoke to Transit Attachment
In the Manage Gateway Attachment dialog, click the Transit Gateway tab and
then click + Attachment and provide the following information.To attach this Spoke Gateway to another Transit Gateway, click + Attachment
again and provide the attachment details.
4
Save the Spoke to Transit Attachment
Click Save.
View the Network Topology
You can view the network topology in CoPilot by going to Cloud Fabric > Topology. For more information about using the topology map, see Gaining Visibility into Your Network Topology.View the Gateway’s Connections and Route Tables
You can view the Spoke and Transit Gateway connections and route table information.1
Navigate to the Gateways
In Aviatrix CoPilot, go to Cloud Fabric > Gateways, and select the Spoke or Transit Gateway to open the gateway’s page.
2
View the Connections of the Gateway
Click the Attachments tab to view the gateway’s connections.
3
View the Route Tables of the Gateway
Click the VPC/VNet Route Tables tab, then from the Route Table dropdown menu, select a route table to view the routes.
Related Topics
- You can peer Transit Gateways to expand your Aviatrix Transit Network across multiple regions and clouds. See Multi-Region Multicloud Transit Gateway Peering Workflow.
- You can segment your Aviatrix Transit Network to create network isolation and enhance security. To learn more, see Network Segmentation Secured.
- You can connect the Transit Gateway to external devices such as on-premises firewalls and routers to connect to your datacenter. See Connecting the Transit Network to On-Premises.
- You can connect the Transit Gateway to an Edge Gateway to extend your Aviatrix Transit Network to the network edge. See Hybrid Cloud Connectivity.
- You can automate your multicloud Transit Network configuration by using Terraform. To learn more, see Aviatrix Terraform Namespace.
- You can add your cloud accounts to your CoPilot. To learn more, see Cloud Account.