

Azure Active Directory (AD) is now Microsoft Entra ID.
Pre-Deployment Checklist
Before configuring SAML integration between Aviatrix and Entra ID, make sure the following is completed:- The Aviatrix Controller and CoPilot are deployed.
- You have an Azure account.
- You have downloaded and installed the Aviatrix SAML VPN client (if you are configuring access to the cloud environment using Aviatrix UserVPN).
Aviatrix VPN Client
If configuring Aviatrix VPN access, download the client for your OS here.Custom SAML Request Template
This can be used in either the Controller/CoPilot or the UserVPN SAML setup.Configuration Steps
Follow these steps to configure Aviatrix to authenticate against your Entra ID IdP:-
Create a SAML Endpoint in Aviatrix CoPilot:
- For controlling user access to Controller and CoPilot: Administration > User Access > Access Management
- For controlling user access to the cloud environment using UserVPN: Cloud Fabric > UserVPN > Settings
- Create an Entra ID SAML Application for Aviatrix in the Azure Console.
Entra ID Custom SAML Application
Before you start, pick a short name to be used for the SAML application name. In the notes below we will refer to this as aviatrix_EntraID. The string you select for the SAML application name is used to generate a URL for Azure AD to connect with Aviatrix. This URL is defined below as SP_ACS_URL. This URL should be constructed as:“https://<your Controller IP or host name>/flask/saml/sso/<aviatrix_EntraID>”
Creating the SAML Endpoint
In CoPilot, go to one of the following locations, depending on your objective:- Controller/CoPilot access: Cloud Fabric > Administration > User Access > Access Management
- User cloud environment access: Cloud Fabric > UserVPN > Settings
Access Management (Controller/CoPilot)
-
At Administration > User Access > Access Management, click +SAML Endpoint
and populate the Create SAML Endpoint dialog as follows.
- Click Save.
-
After saving your configuration, click the
 icon and select Copy
Assertion Consumer Service URL. This is the endpoint that needs to be
configured in the IdP.
icon and select Copy
Assertion Consumer Service URL. This is the endpoint that needs to be
configured in the IdP.
User Cloud Environment Access (UserVPN)
-
At Cloud Fabric > UserVPN > Settings, click +SAML Endpoint and populate
the Create SAML Endpoint dialog as follows.
- Click Save.
-
After saving your configuration, click the
icon next to the SAML
endpoint and select Copy Assertion Consumer Service URL. This is the
endpoint that must be configured in the IdP.
Configuring an Enterprise Application in Entra ID (Azure AD) for Aviatrix SAML Authentication
This procedure is the same regardless of whether you are configuring for CoPilot/Controller or for cloud environment access.You must be an administrator to add new Enterprise Applications.Creating your own application (custom applications) requires an Azure AD Premium
subscription.
- Log into your Azure portal and search for ‘Entra ID’ (formerly Azure AD).
- On the Microsoft Entra ID page, select Enterprise Applications from the left-hand menu.
- Click +New application.
- Click Create your own application.
- Enter a name for the application.
- Select the Integrate any other application you don’t find in the gallery (Non-gallery) option and click Create.
- On the application Overview page, click Get started under “Set up single sign on”.
- Select the SAML single sign-on method.
-
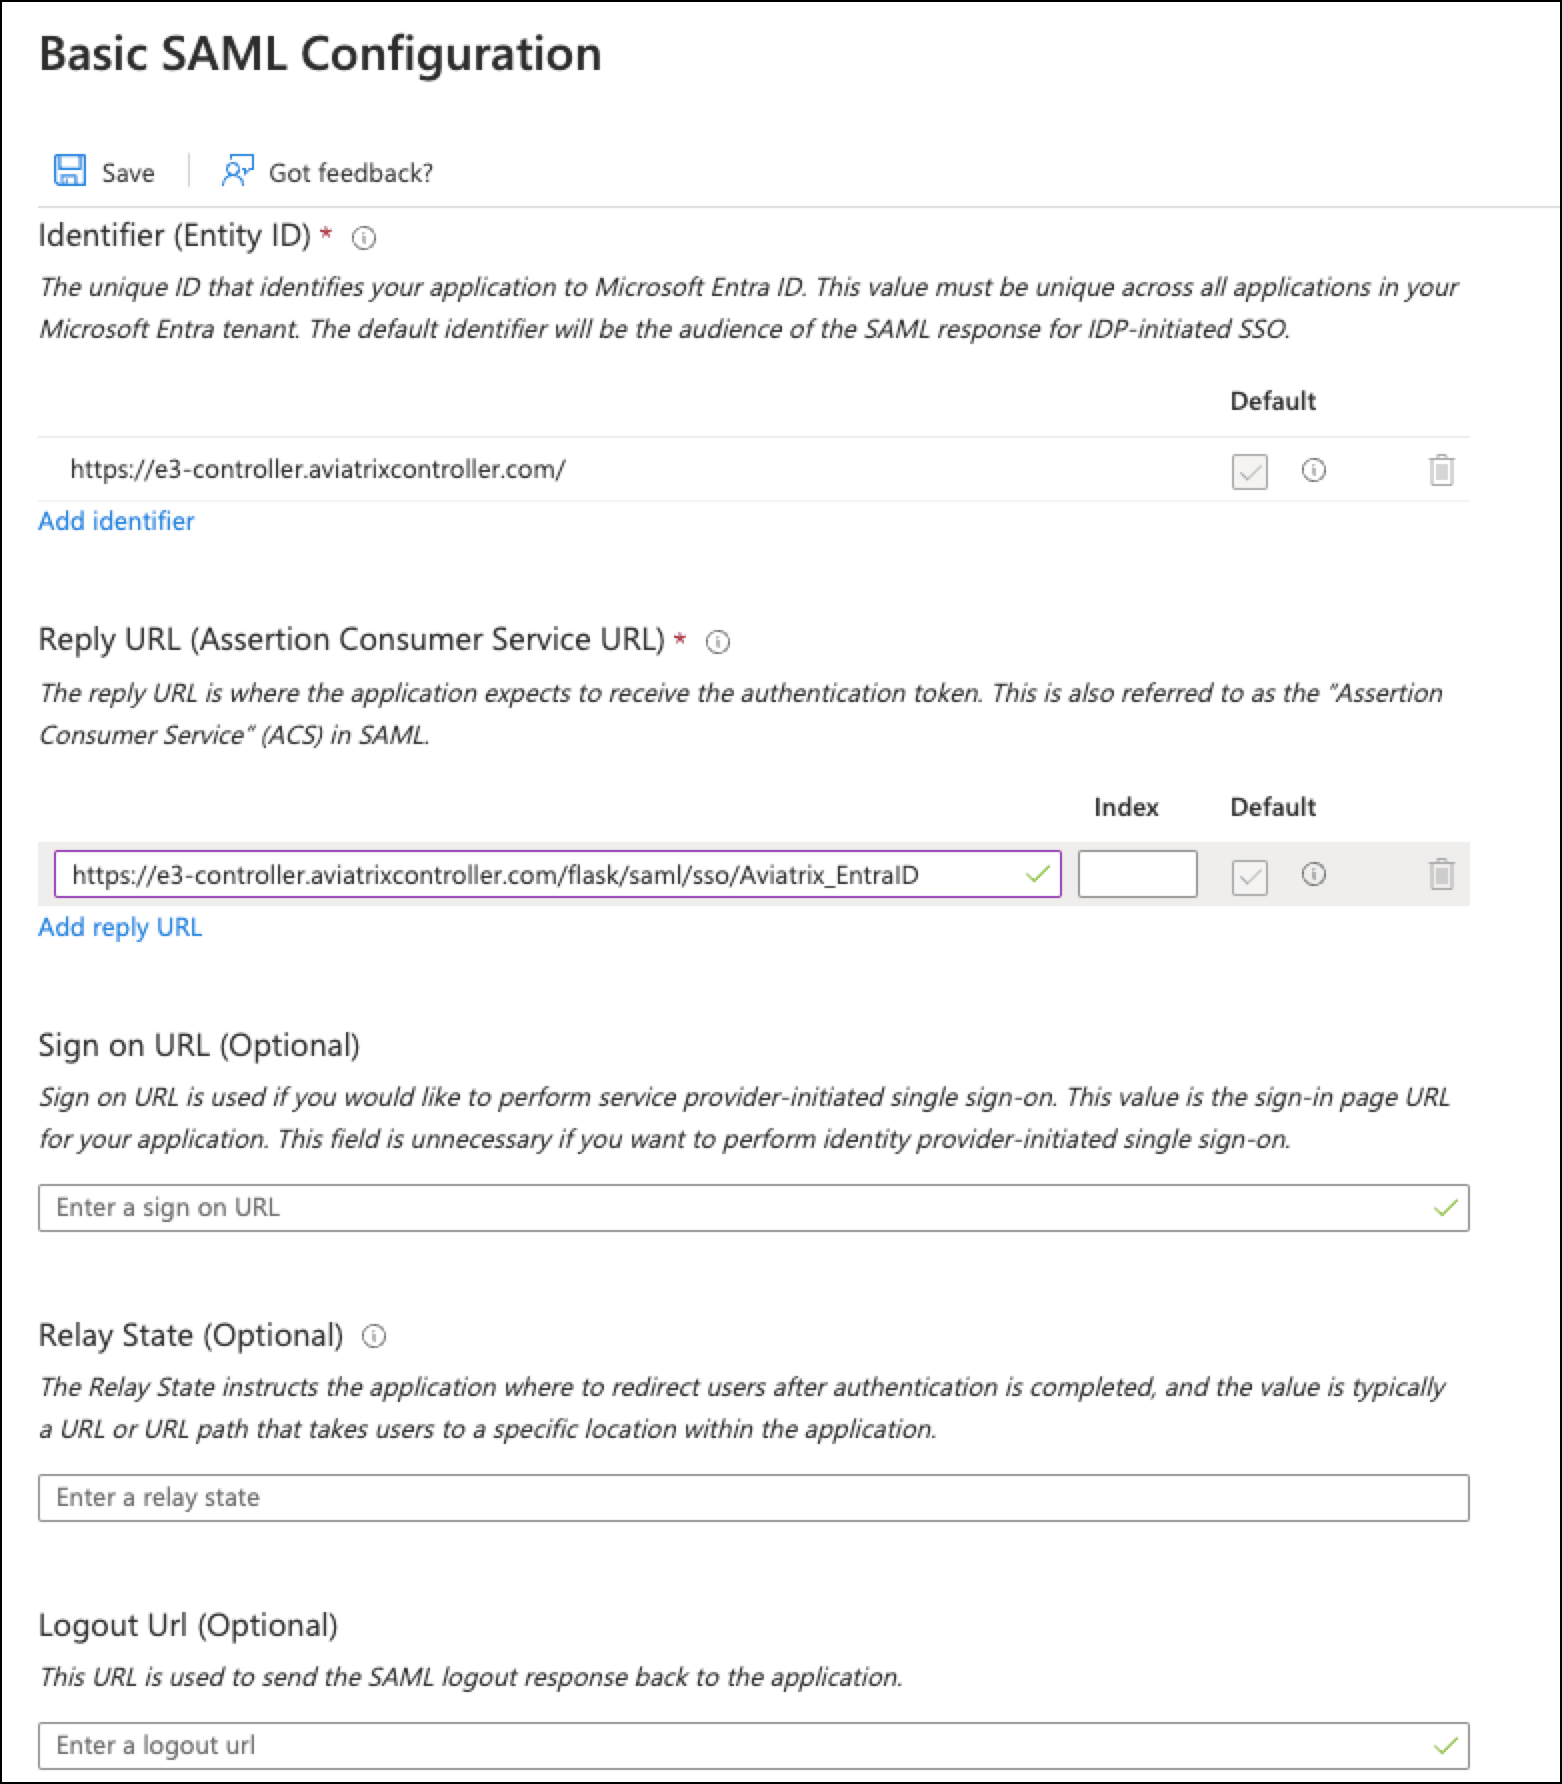
On the SAML-based Sign-on page, click Edit next to Basic SAML
Configuration. The Basic SAML Configuration page displays.
-
Enter the following information:
- Identifer (Entity ID): paste the URL of your Controller. If you have additional Controllers, you can add additional identifiers (and configure SAML on the associated CoPilot instance).
- Reply URL (Assertion Consumer Service URL) field: paste the recently copied Assertion Consumer Service URL that became available after creating the SAML endpoint in CoPilot.
- The other fields are optional.
For the Entity ID and the Reply URL, enter both the hostname and the IP
address.
- Save the configuration.
Adding Users and Groups
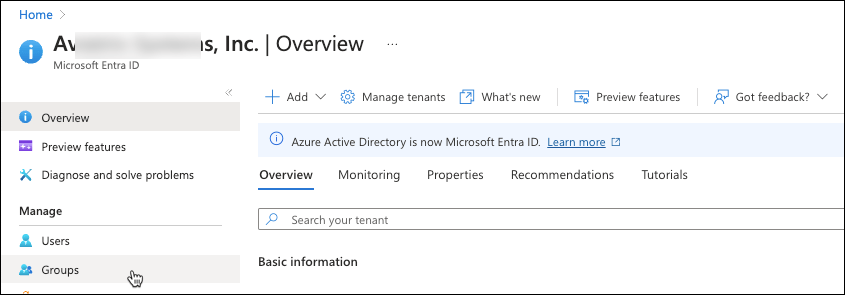
If you have not already done so, create the necessary groups and users for SAML access. Aviatrix recommends creating the following groups: AviatrixAdmins, AviatrixUsers, AviatrixReadOnlyUsers, and AviatrixSecOPs.-
Add groups from the Entra ID main menu by selecting Groups (as shown
below).
-
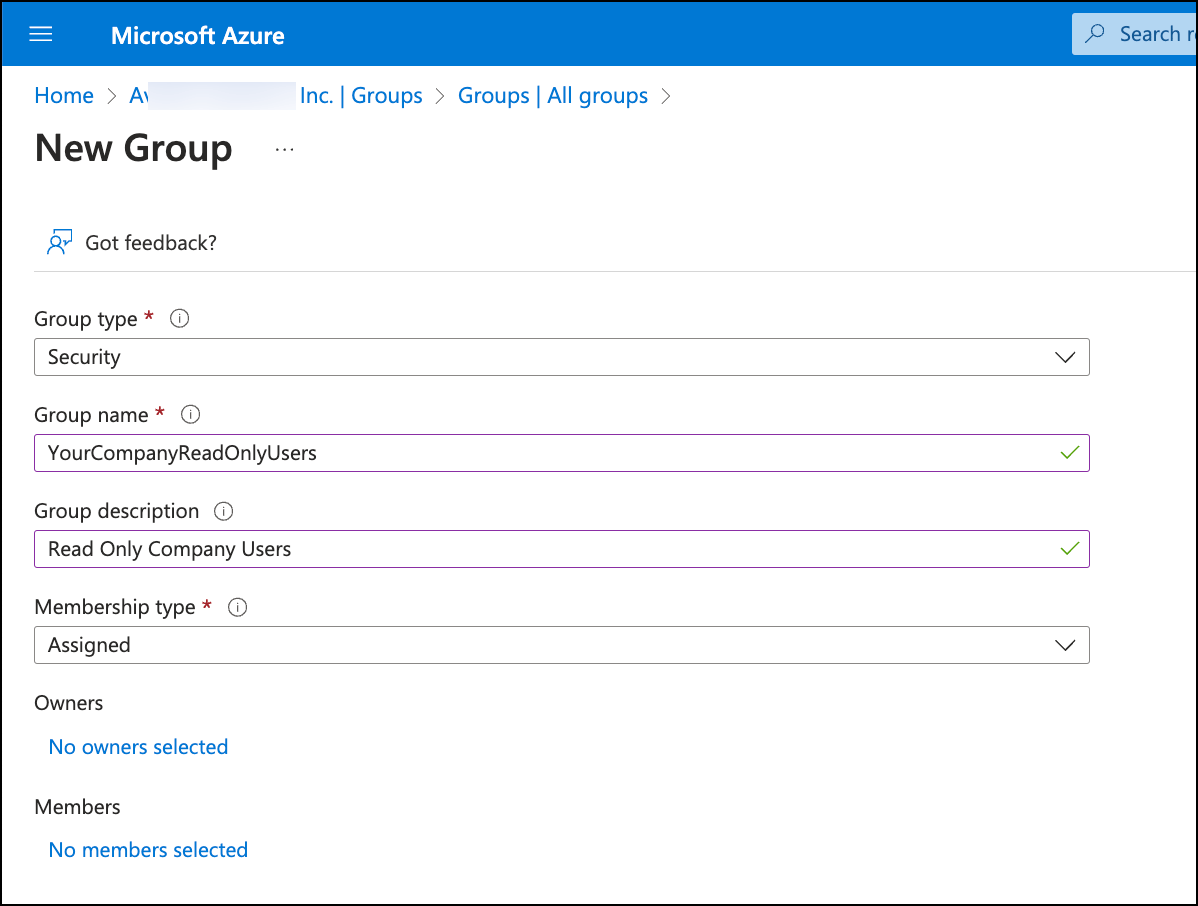
On the All groups page, click New Group to create groups that meet your
access requirements.
-
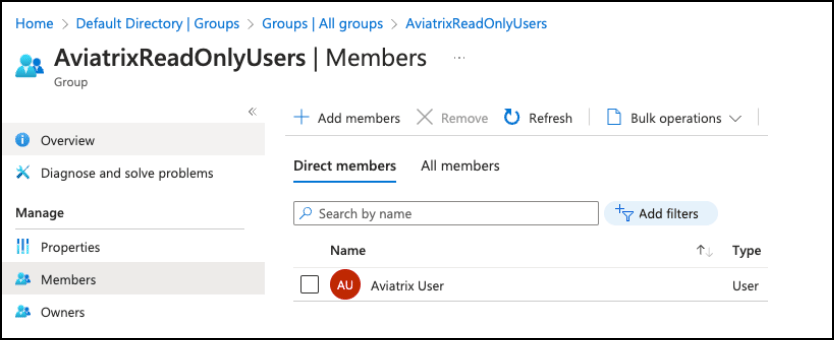
After the groups are created, add users to the groups.
- After the groups and group memberships are created, return to the recently created Enterprise application and assign users to the enterprise application?
Adding a Claim for Single Sign On
- Next, on the Enterprise application Overview page, click Set up single sign-on and configure Attributes & Claims.
-
Click Add new claim.
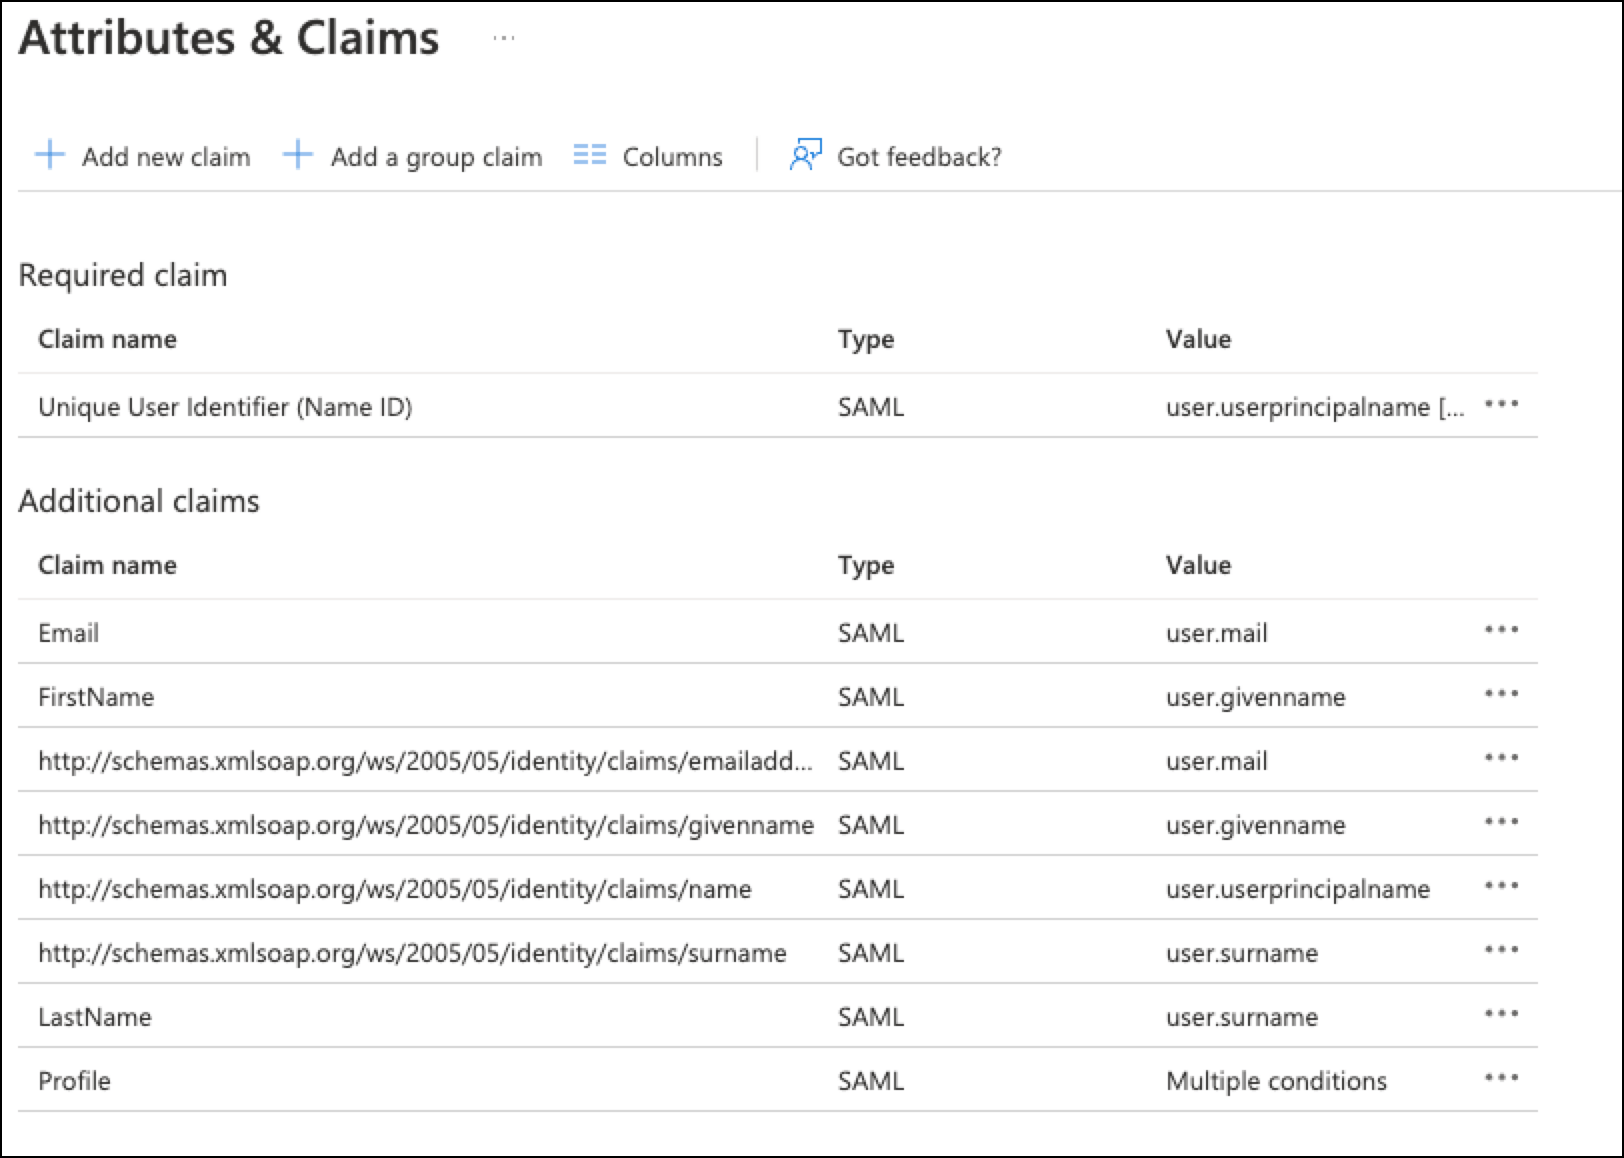
-
Add new claims for the following as per the above screenshot (using the
values shown above):
- First Name
- Last Name
- Profile
-
In the Profile claim, add conditions similar to the folloiwng for the user
groups you created (the below is for example purposes only).
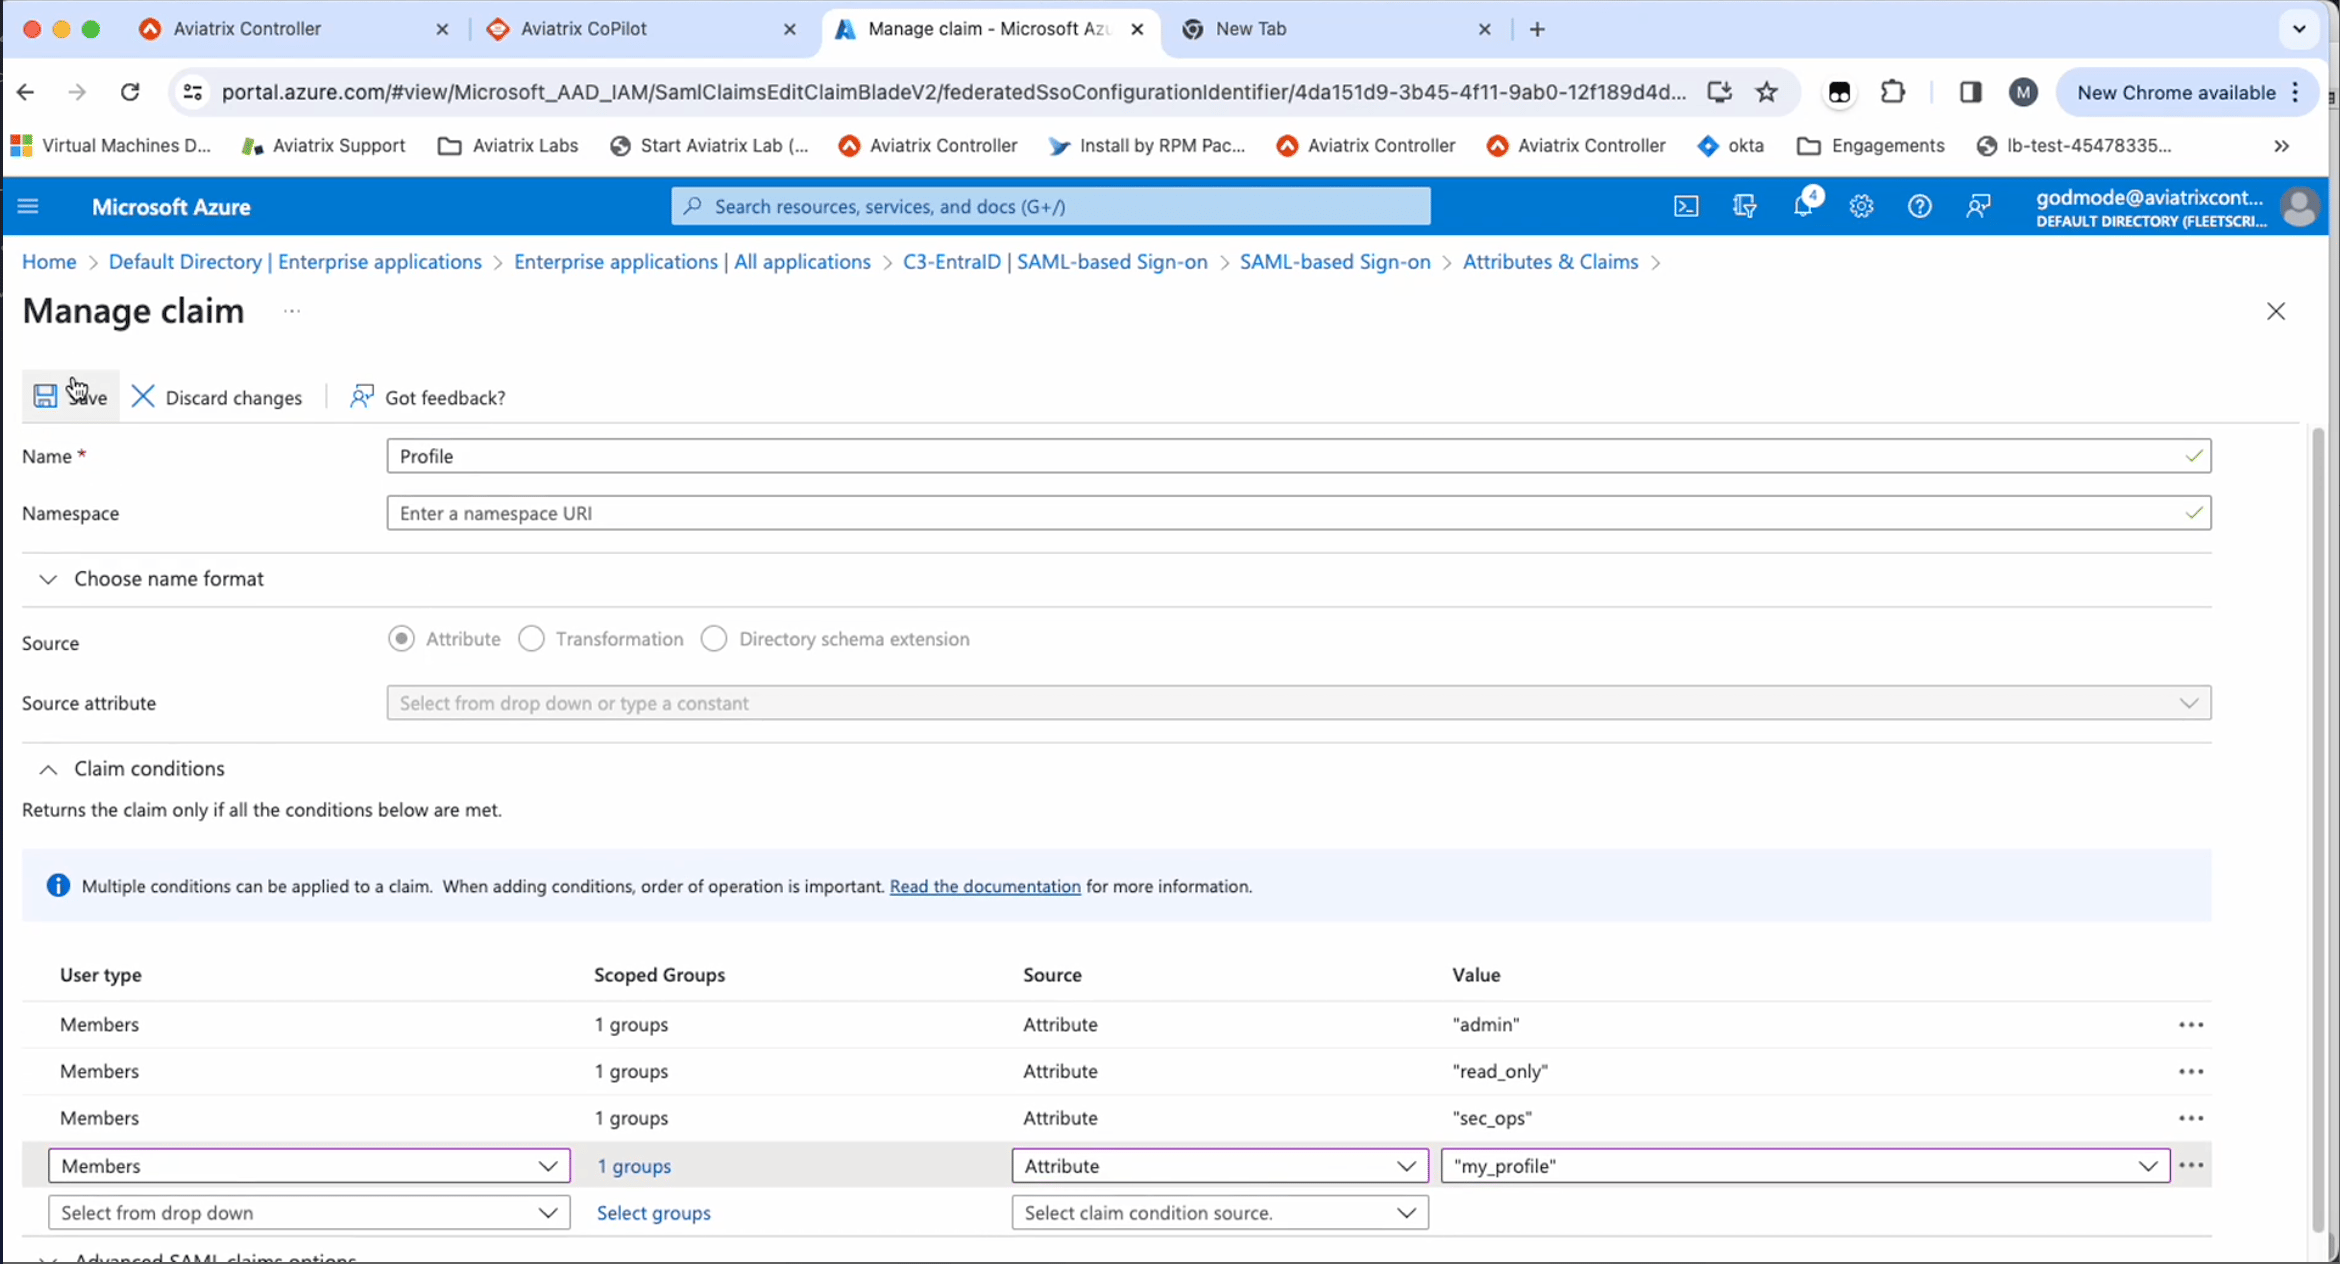
- Once you have configured all necessary groups, save the claim configuration.
Finishing the Configuration
-
Return to the Entra ID Overview page and copy the App Federation Metadata
URL.
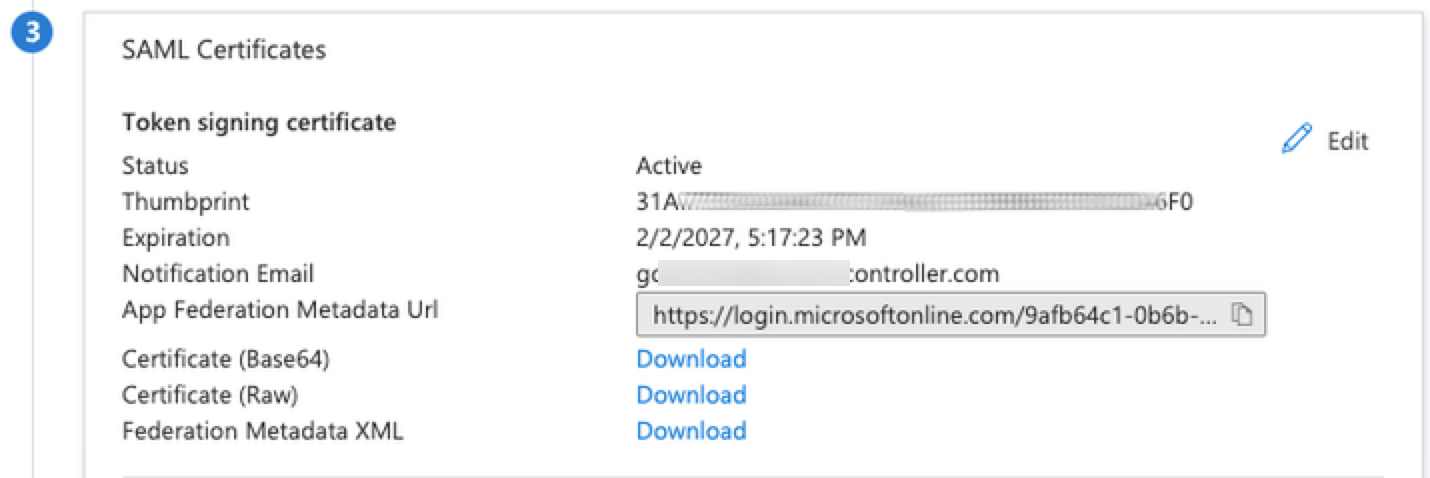
-
In CoPilot, click the Edit
 icon for the SAML endpoint you created.
- Paste the copied metadata into the URL field.
- Click Save.
- To validate, click the Test link for the SAML endpoint.