Both “Firewall” and “Security Gateway” will be used interchangeably in this
document. Both refer to the Check Point Security Gateway product.
Prerequisites for Check Point in AWS Firewall
Before you start setting up your Check Point Security Gateway with AWS example to verify that packets are sent to the gateway for traffic inspection, make sure you meet the basic requirements:- Basic Check Point Architecture understanding
- Check Point CloudGuard IaaS product is subscribed to in the AWS Marketplace
The basic Check Point architecture is shown below:
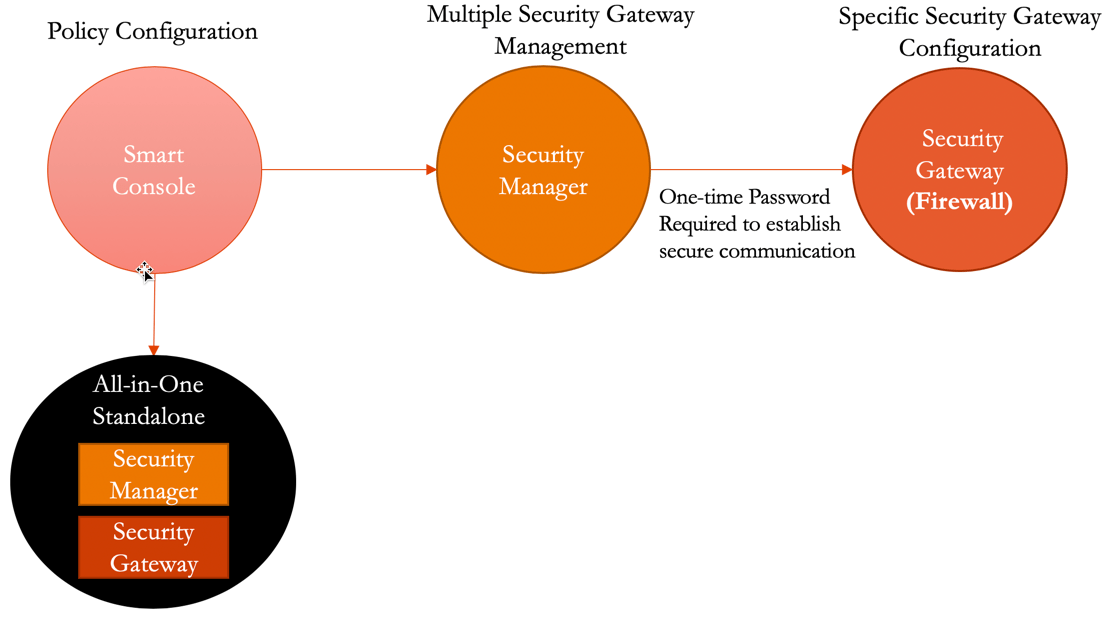
You must first
create a Transit FireNet in AWS
, and
deploy a Check Point firewall
in that Transit FireNet.
Launching Check Point Firewall from Aviatrix CoPilot (AWS)
You must first
create a Transit FireNet in AWS
, and
deploy a Check Point firewall
in that Transit FireNet.
Make note of the SIC (Secure Inter-communication) Key; it is required to add the
Security Gateway inside the Security Manager.
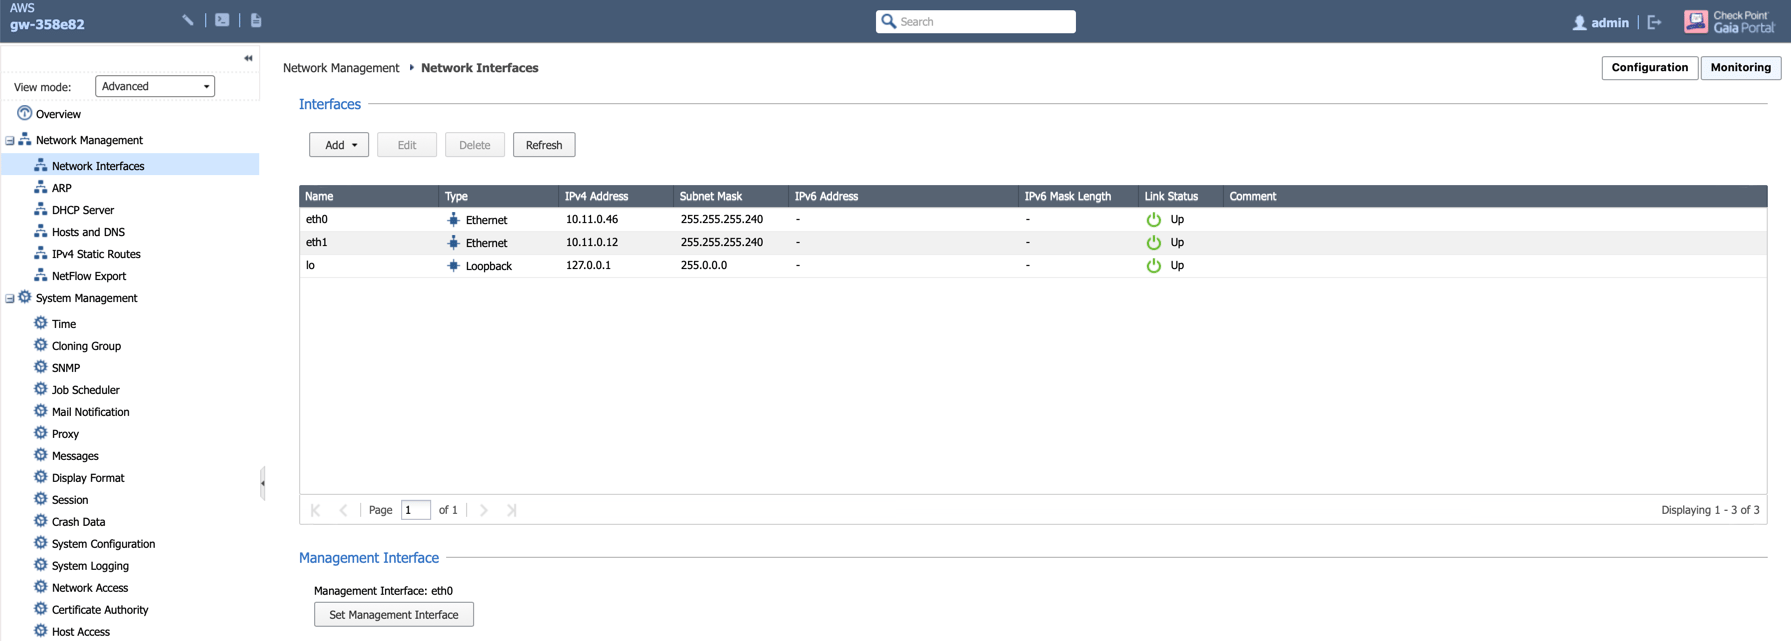
The Check Point Firewall instance has two interfaces as described below.
Additionally, firewall instance eth1 is on the same subnet as FireNet Gateway
eth2 interface.
Below are the steps for initial setup.
Setting up Check Point Gateway (Firewall) SSH login Using Password
For Metered AMI, open a terminal and run the following command. After you download the access key (.pem file), change the file permission to 600. It usually takes 5-10 minutes for the Check Point Gateway to be ready.Logging in to the Check Point Firewall Gaia Portal
After the firewall launch is completed in Aviatrix CoPilot, go to Security > FireNet > Firewall and click on the firewall link in the Management UI column. This step applies to AWS and Azure.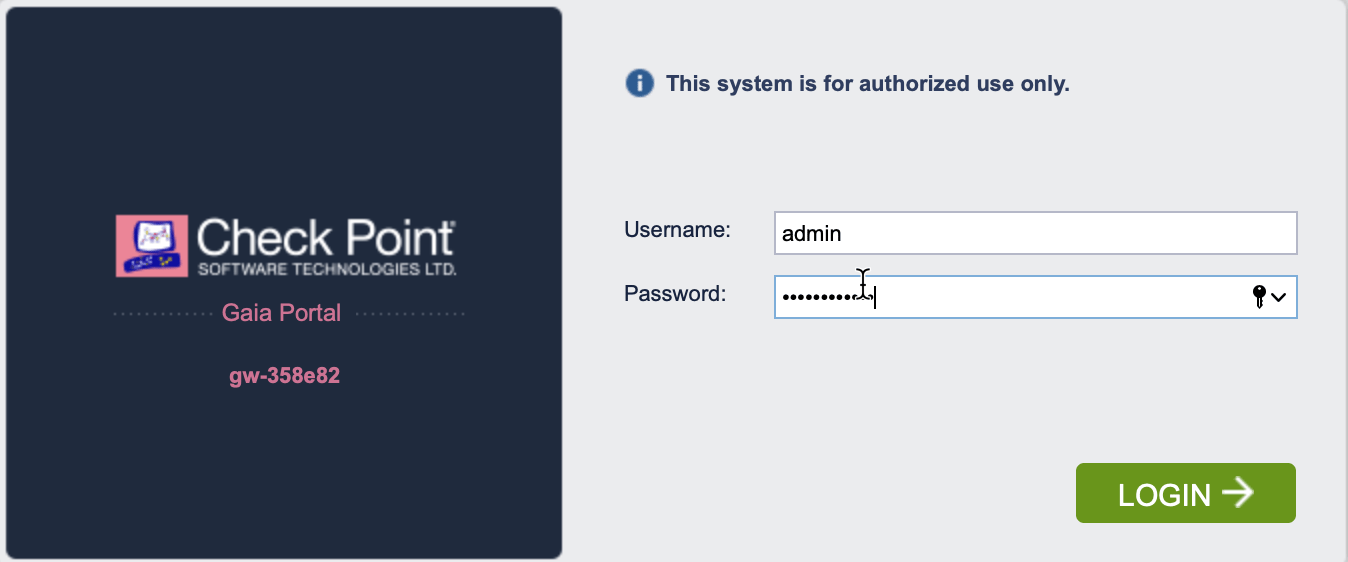
Initializing and Logging in to the Check Point Firewall via Gaia Portal
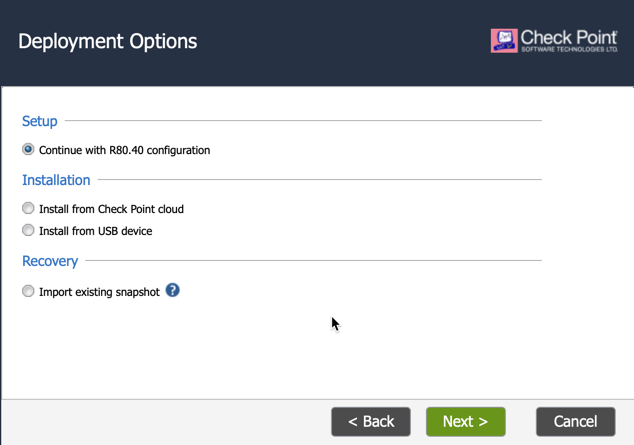
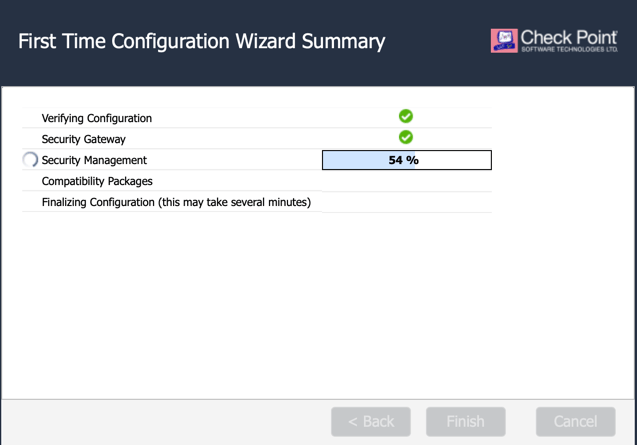
When you log in for the first time you see the Check Point First Time Configuration Wizard screen as shown below.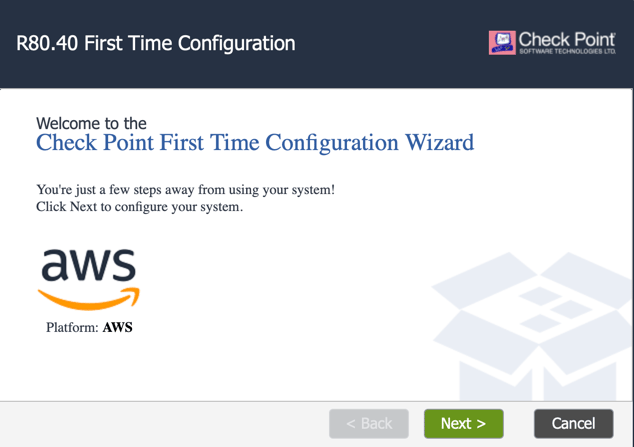
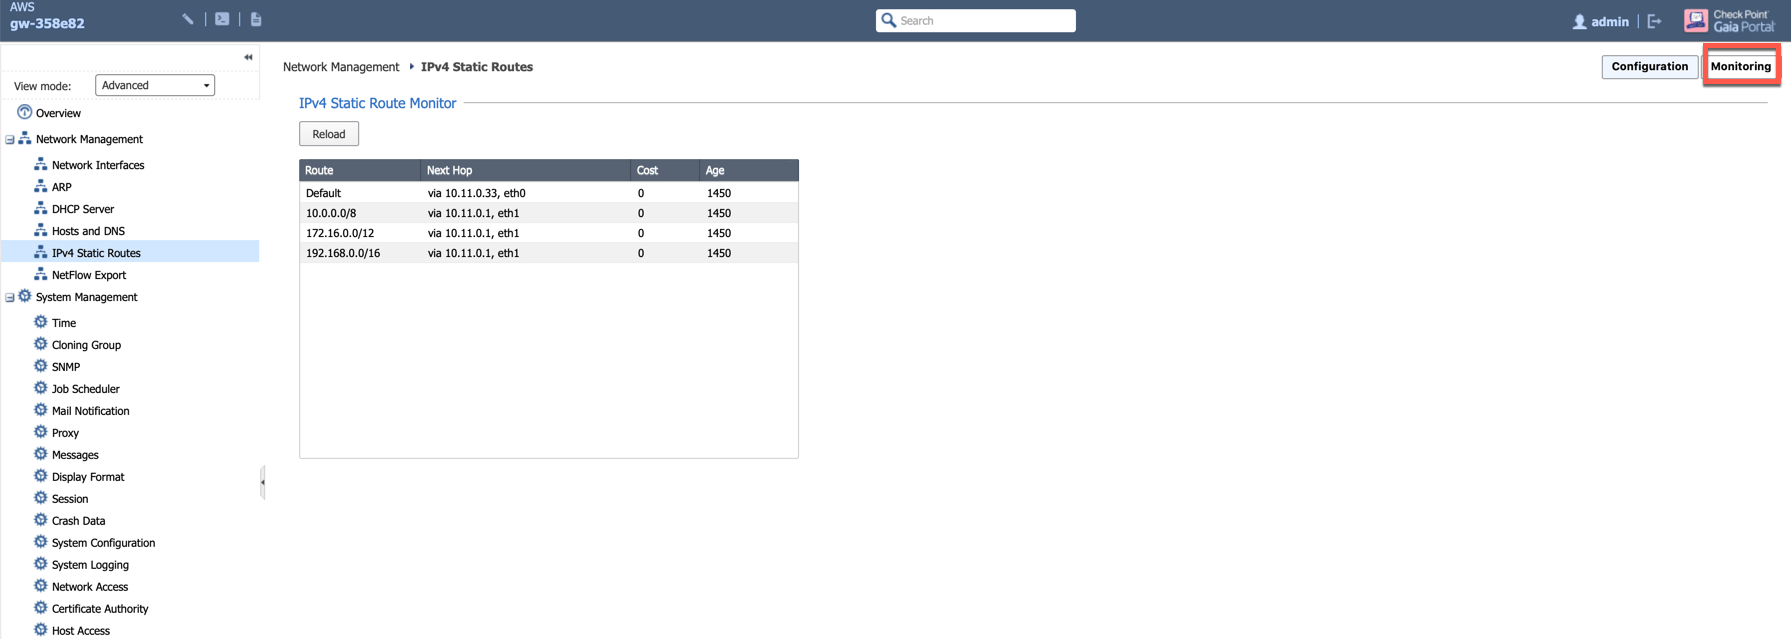
Vendor Integration
Click here for information on vendor integration.Downloading and Installing the SmartConsole
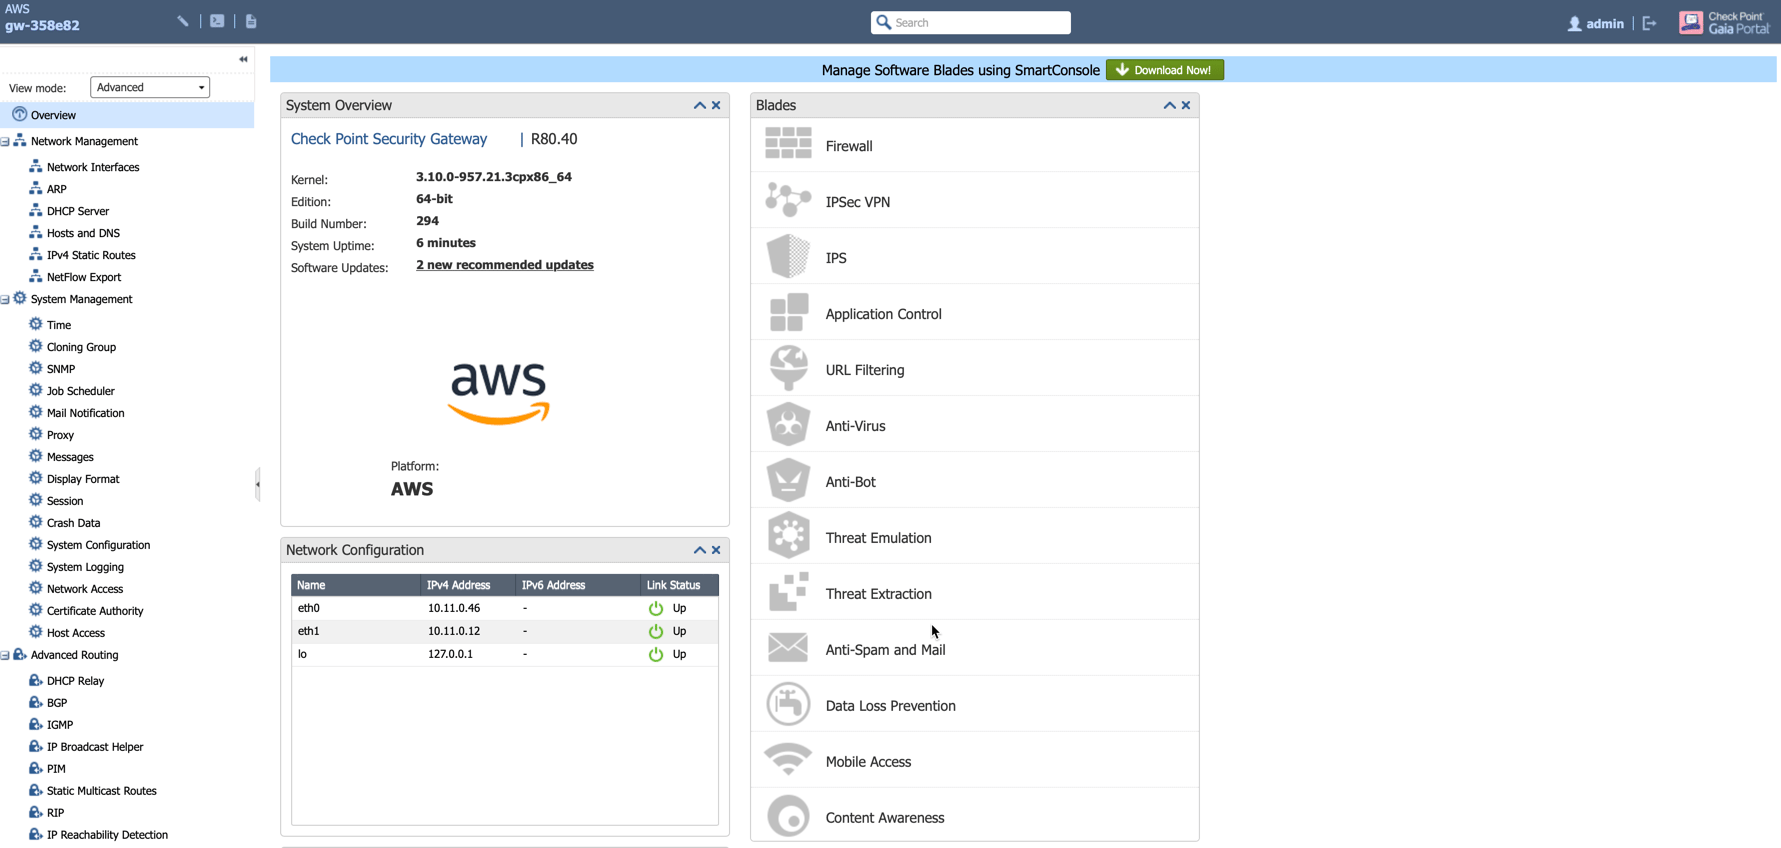
The Check Point Single Gateway ‘All-In-One’ image is used in this example and does not require Check Point Security Manager. All other Gateway images require Check Point Security Manager. If you are not using the ‘All-In-One’ image, skip this step and follow the Deploying and Installing the SmartConsole steps. The SmartConsole must be downloaded on a Windows-based computer. Log in to the Check Point Gateway and download the SmartConsole on a Windows-based computer. Option 1: click Download Now! with the message “Manage Software Blades using SmartConsole” on the Overview page as shown below.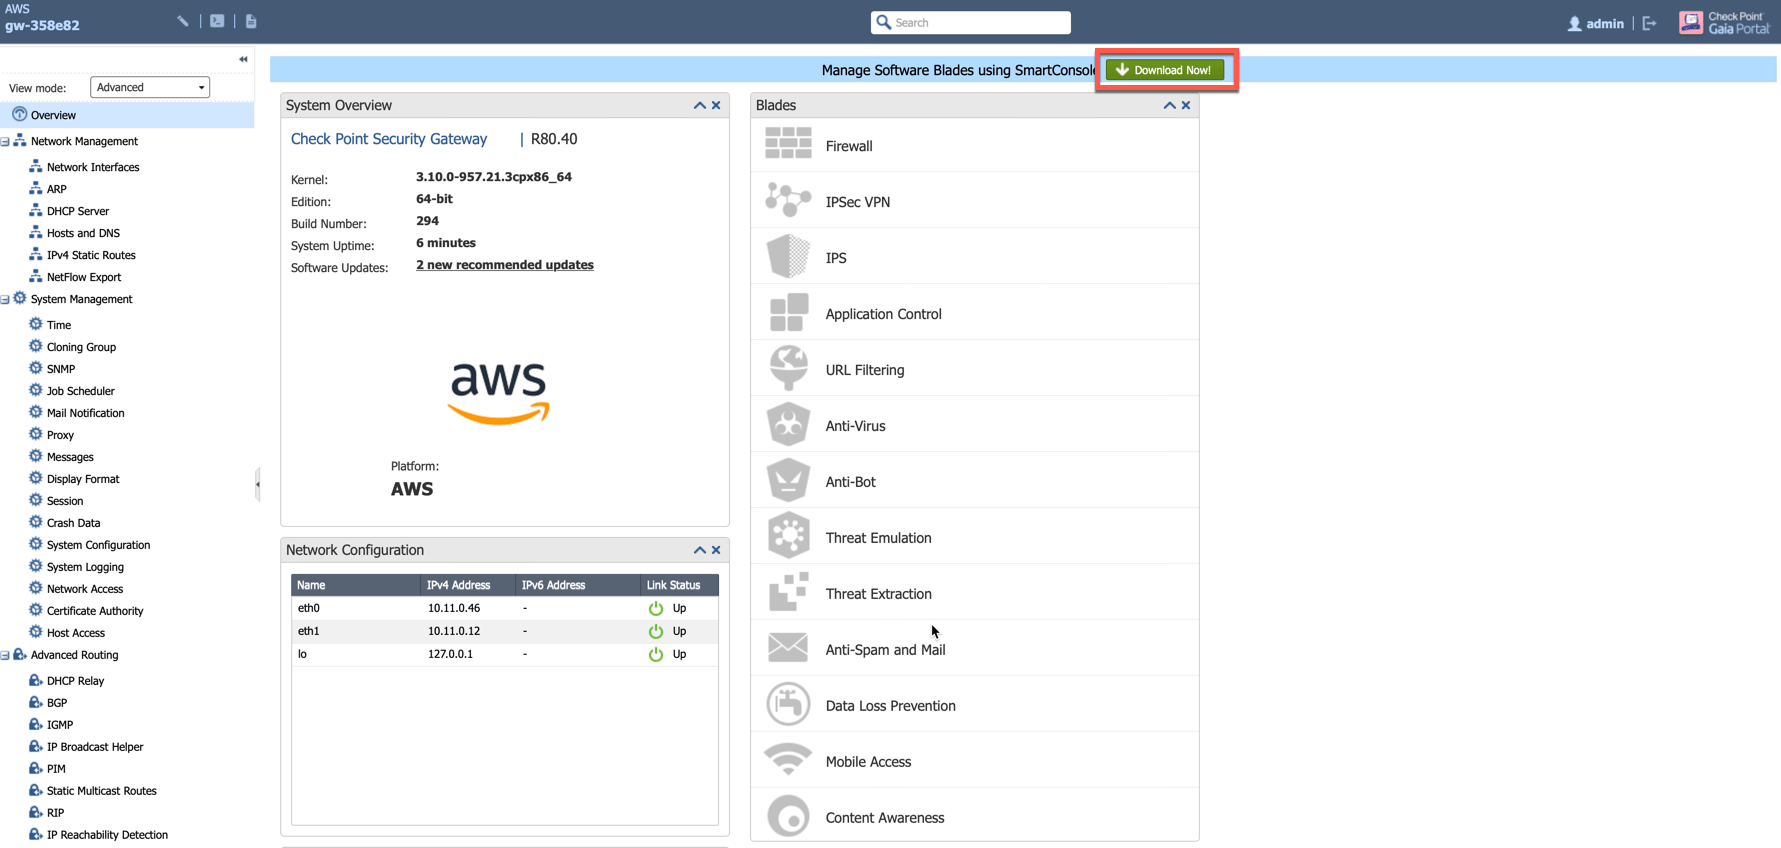
Installing and Logging into the SmartConsole
The Check Point SmartConsole is a Windows-based application used to configure and manage polices. These policies can be applied to one or more Security Gateways. Install the SmartConsole and log in with the Gaia Portal username, password and IP Address of the Check Point Gateway.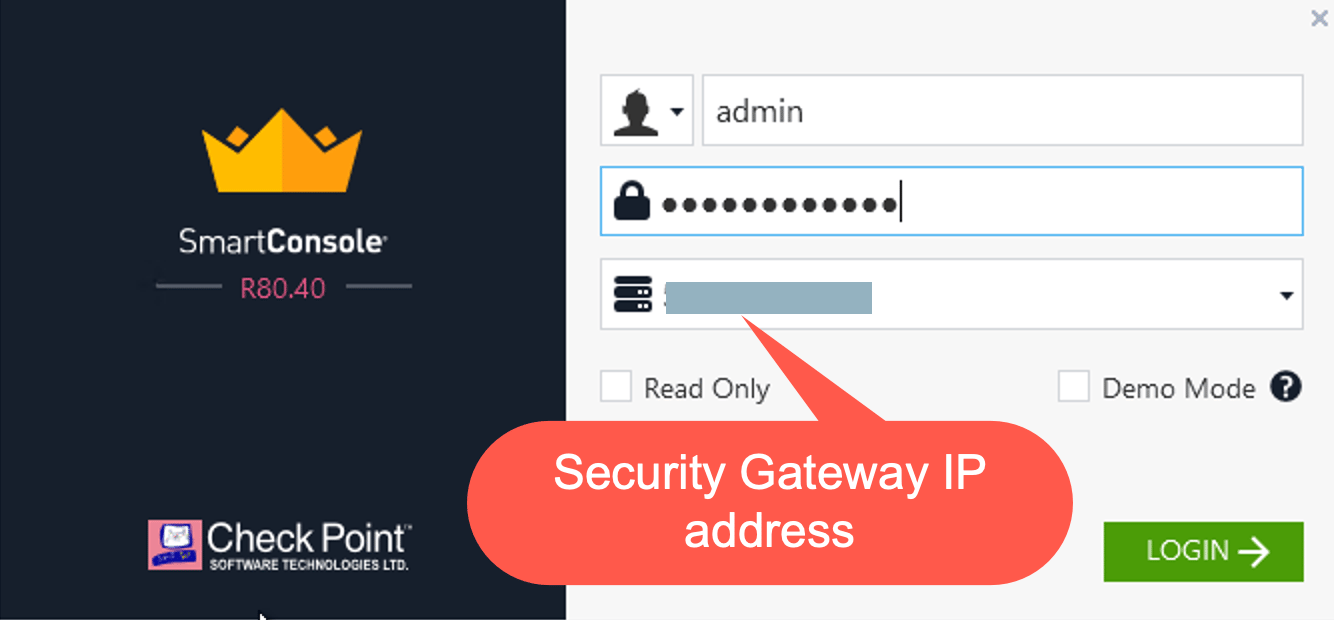
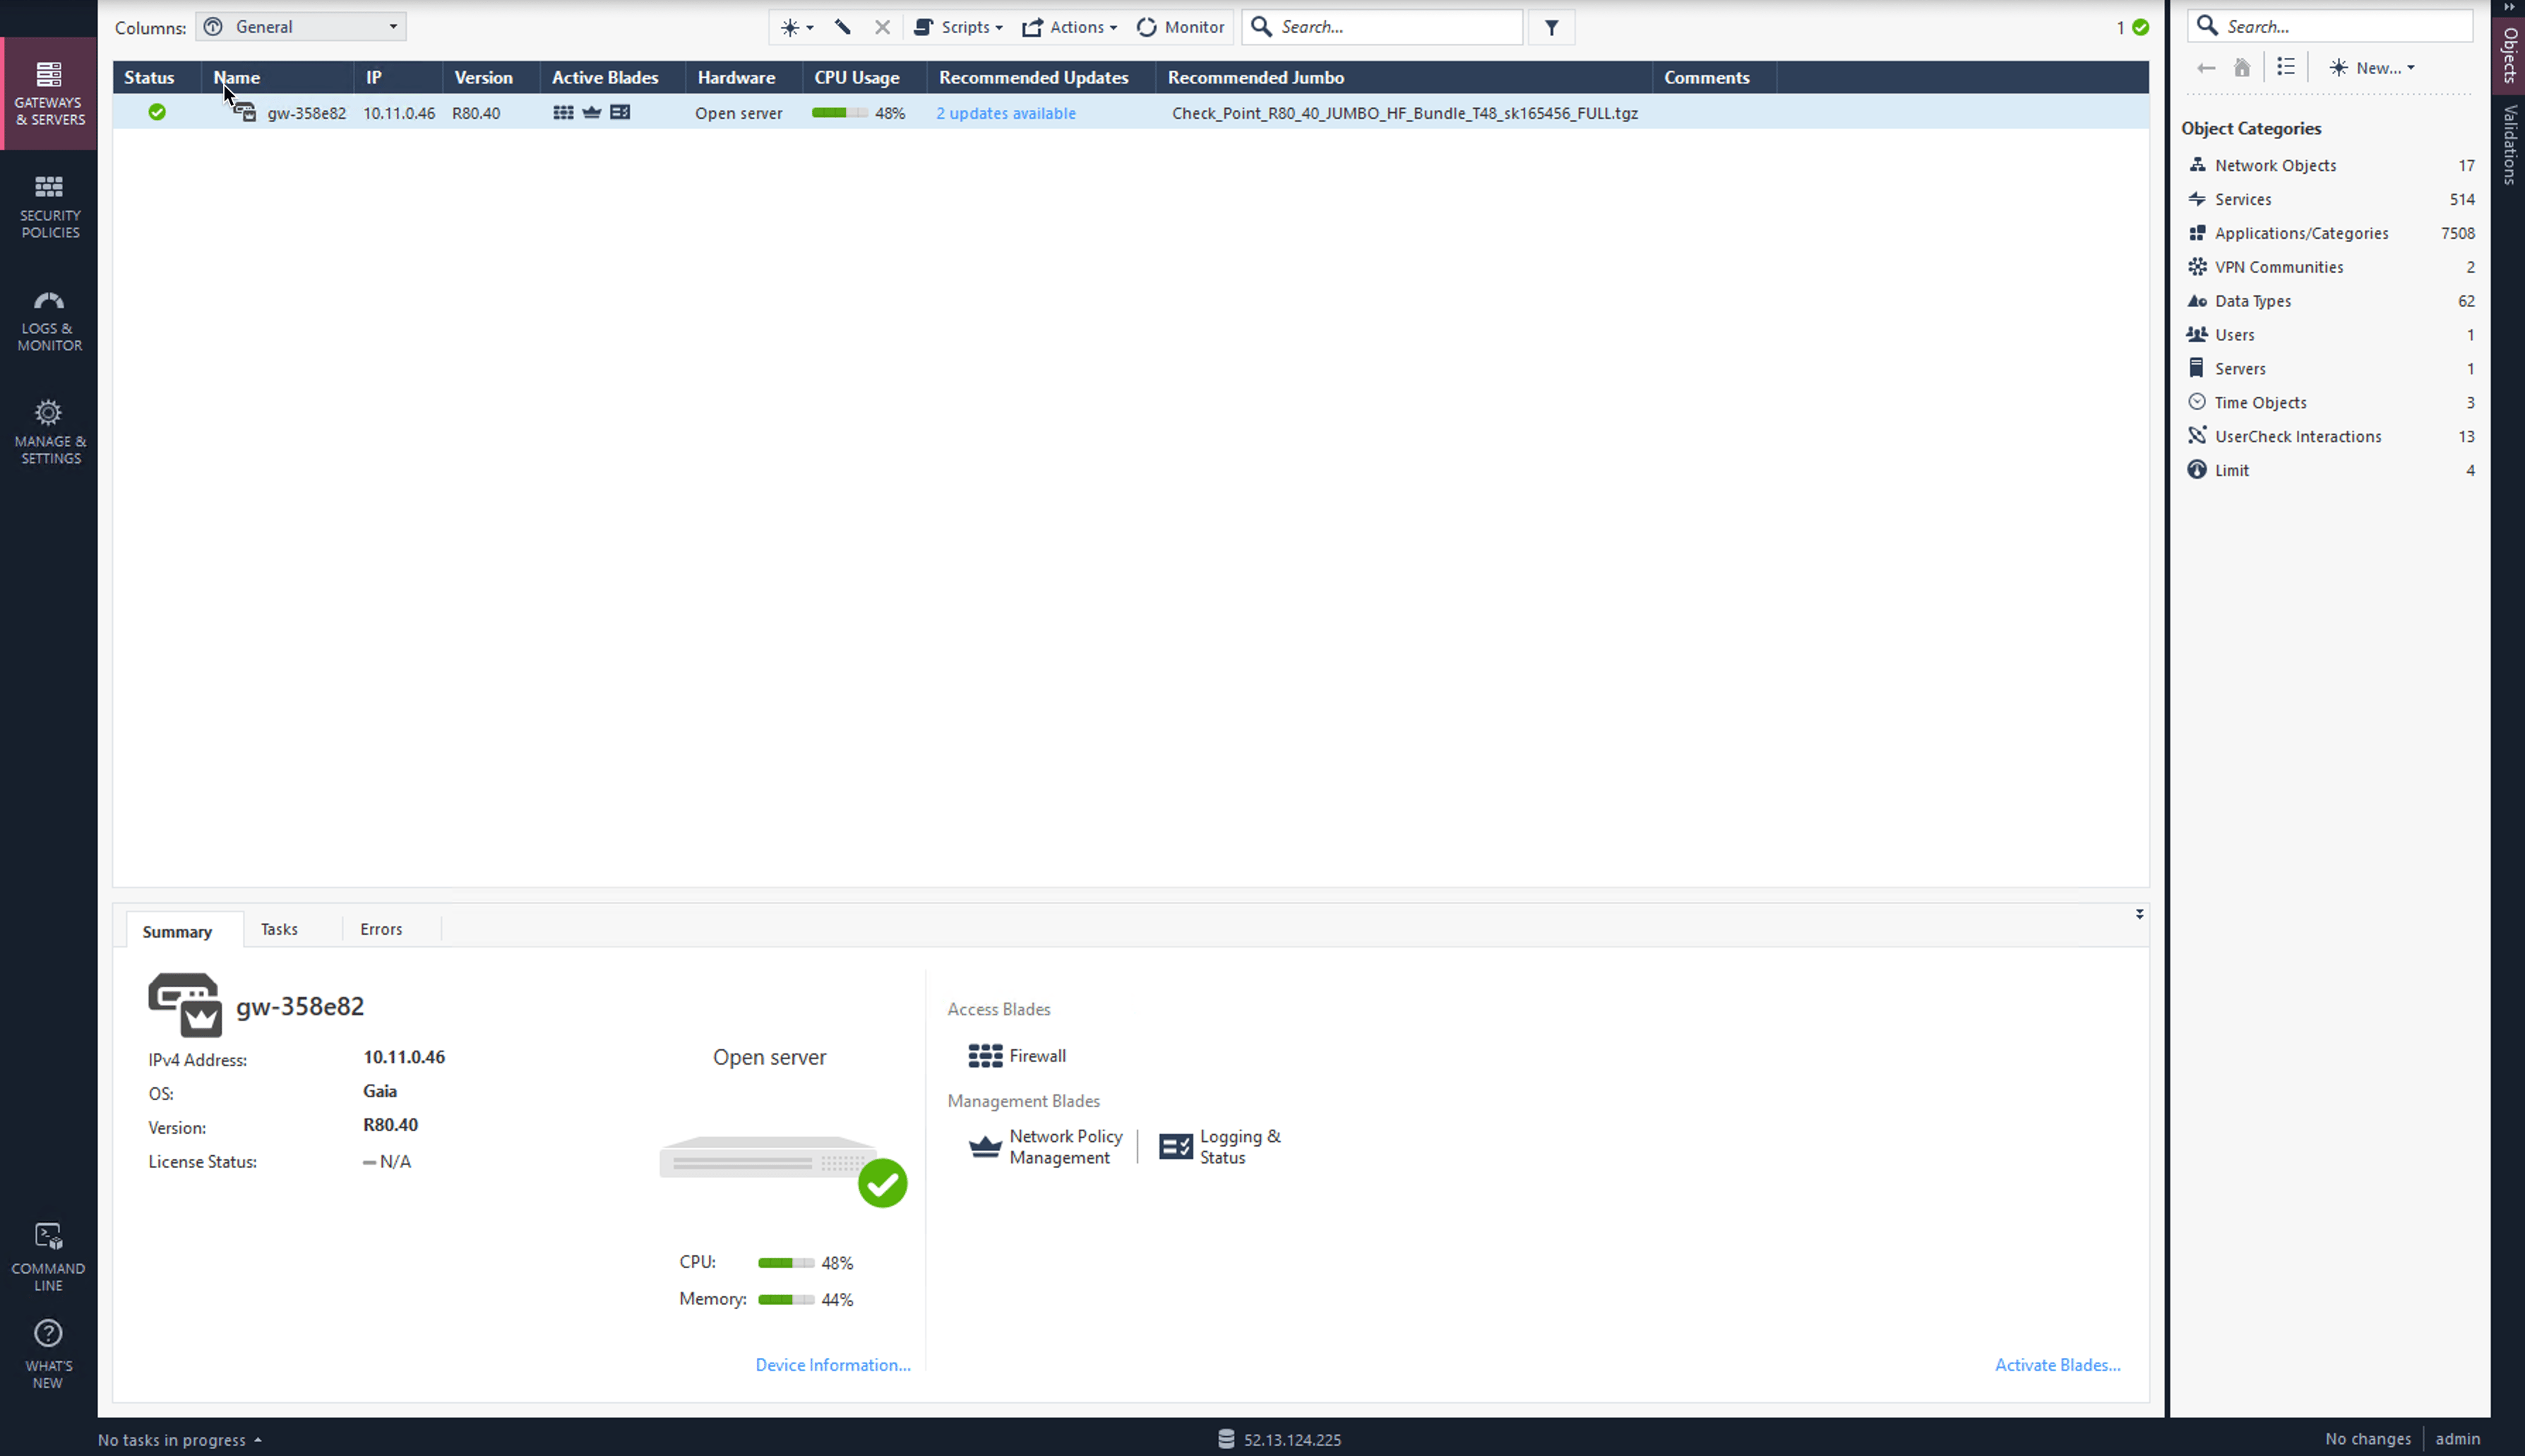
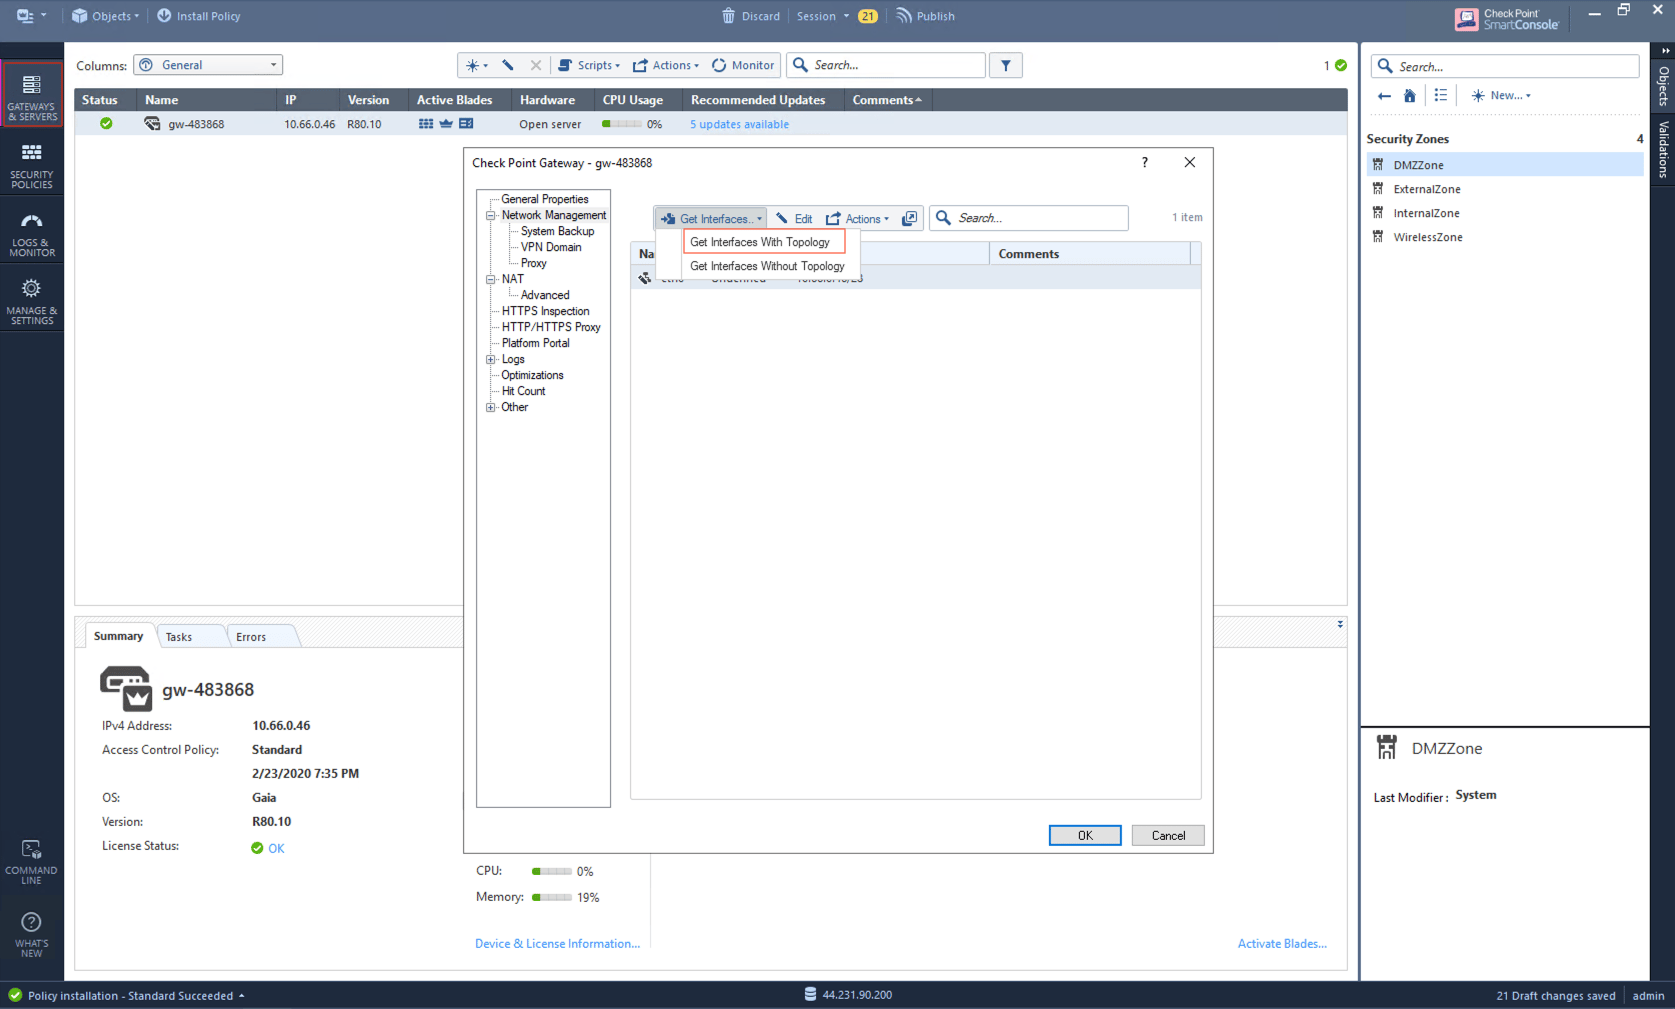
- Select Gateways & Servers on the left.
- Double-click on the Check Point Firewall.
- Select Network Management on the left.
- Click Get Interfaces to expand options.
- Click Get Interfaces With Topology.
- Click Yes.
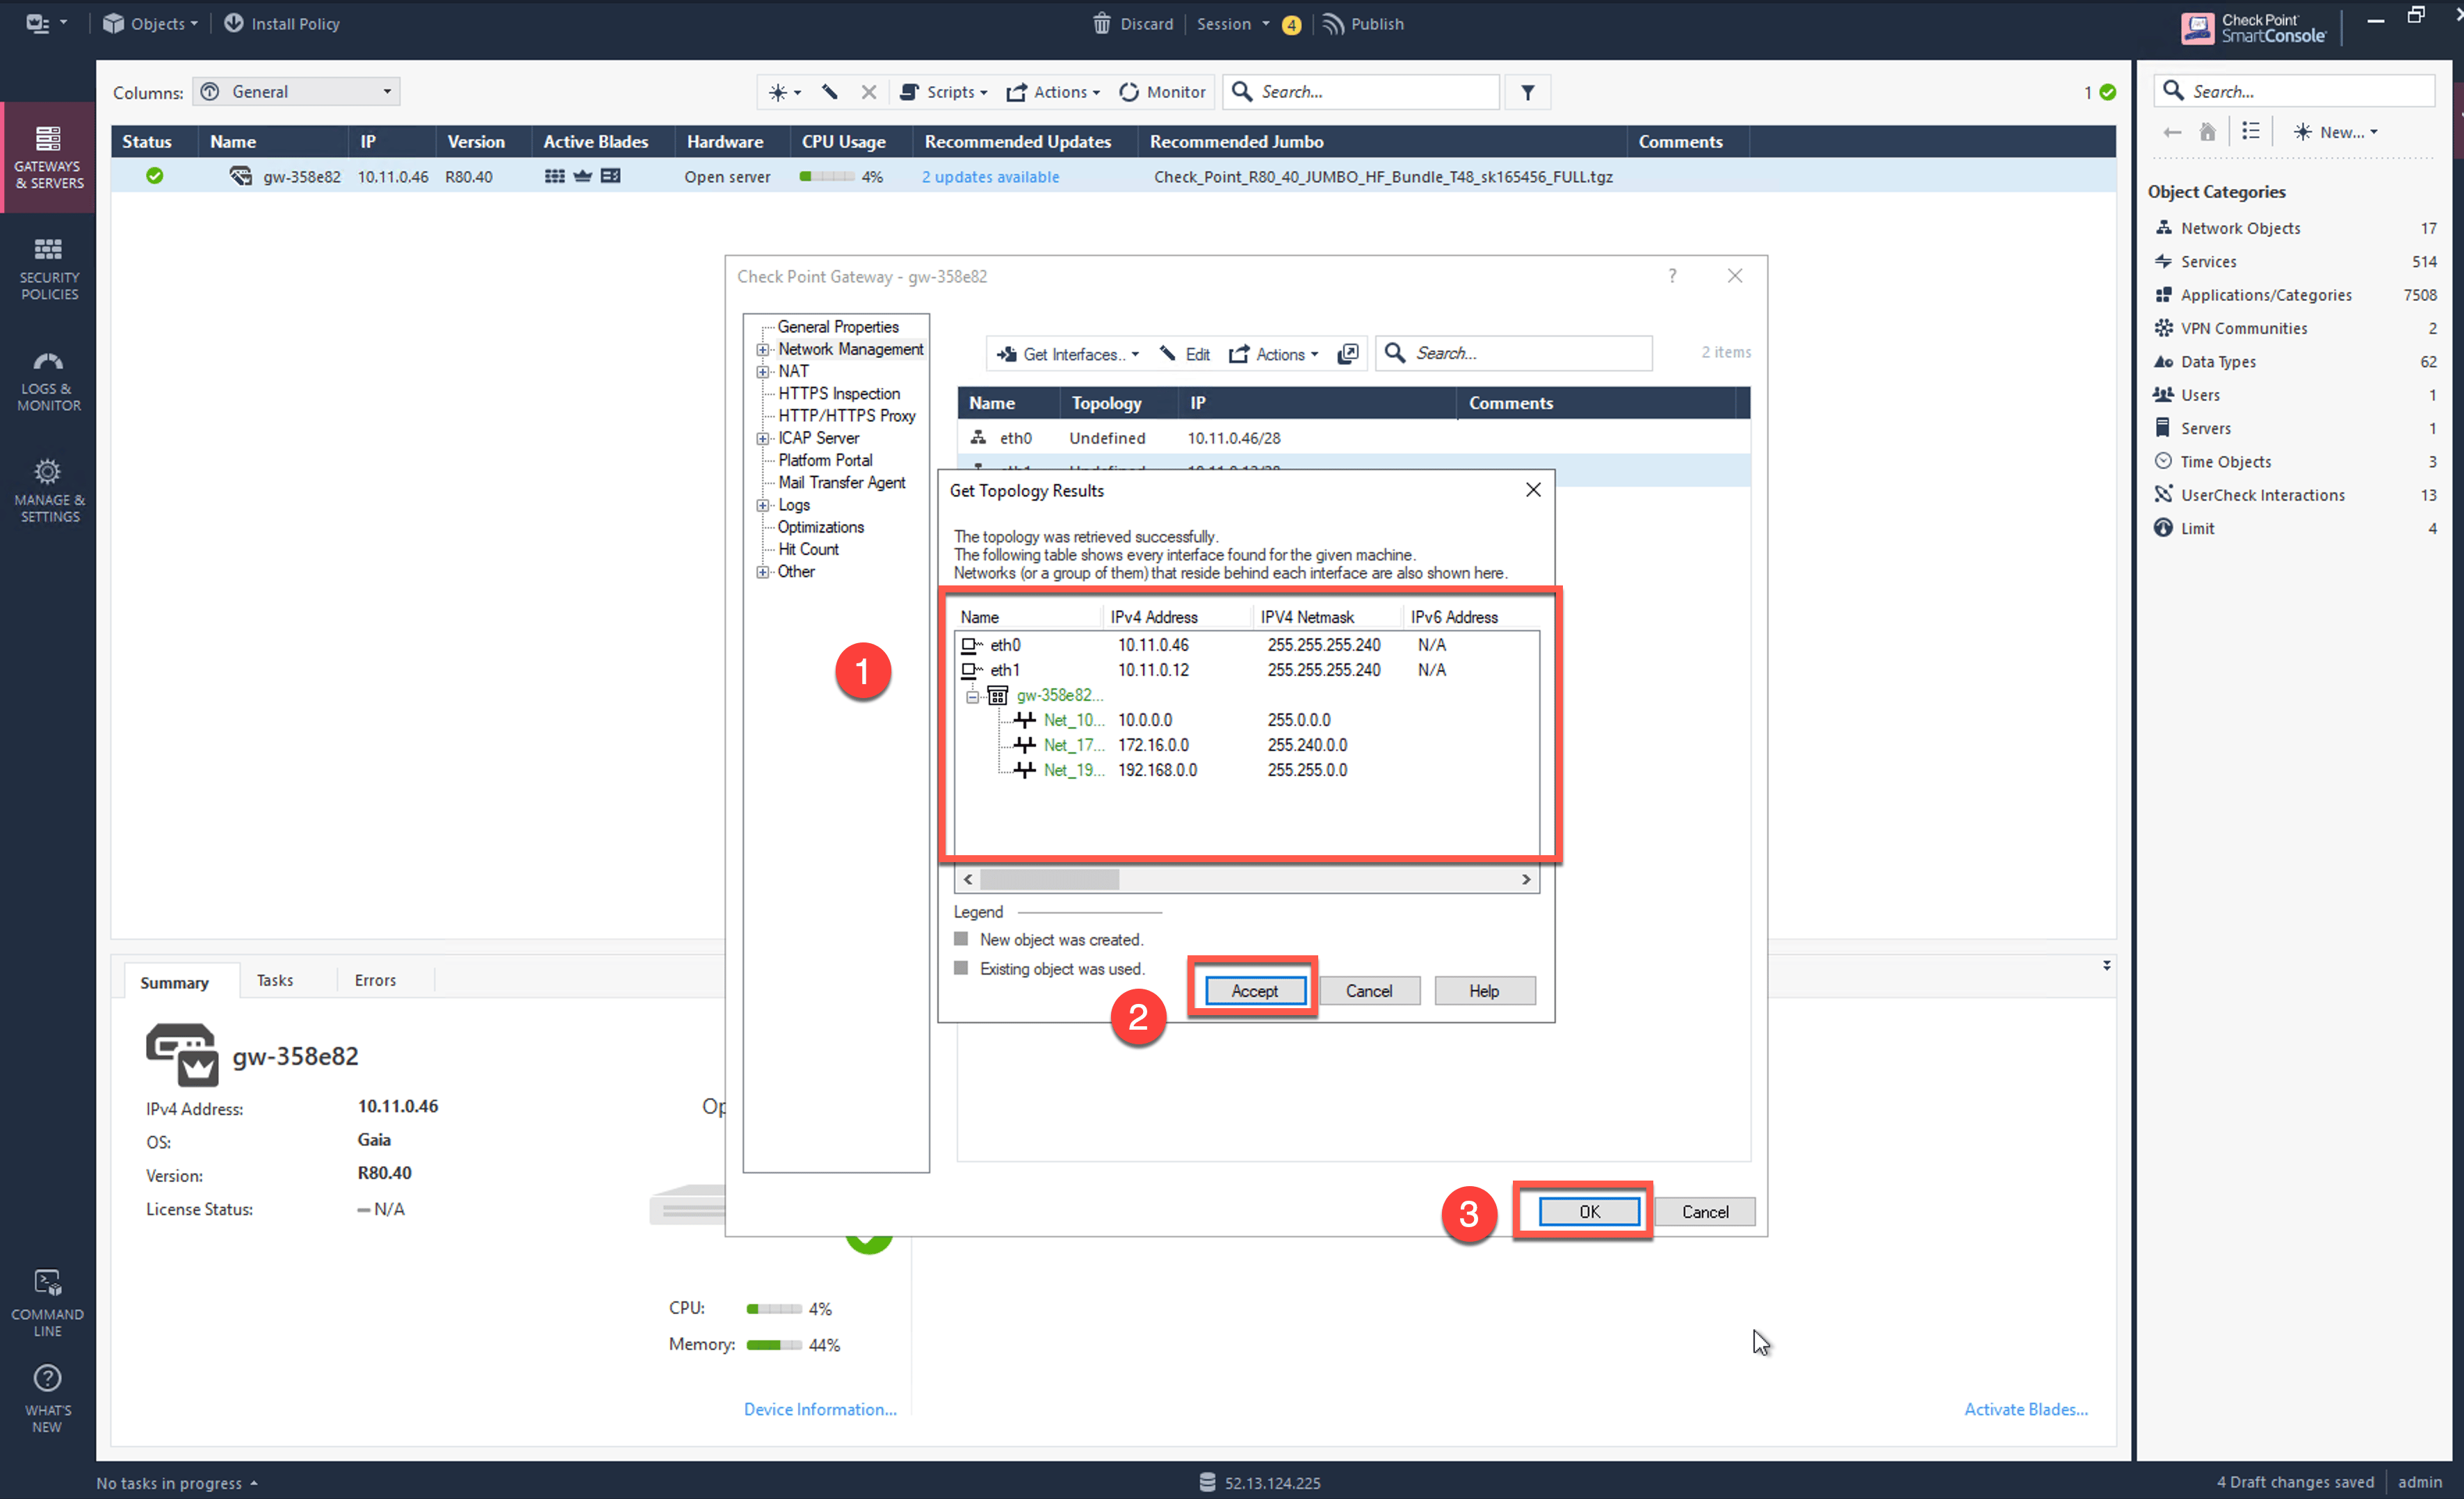
- Click Accept.
Configuring the Basic Traffic Policy to Allow Traffic VPC-to-VPC
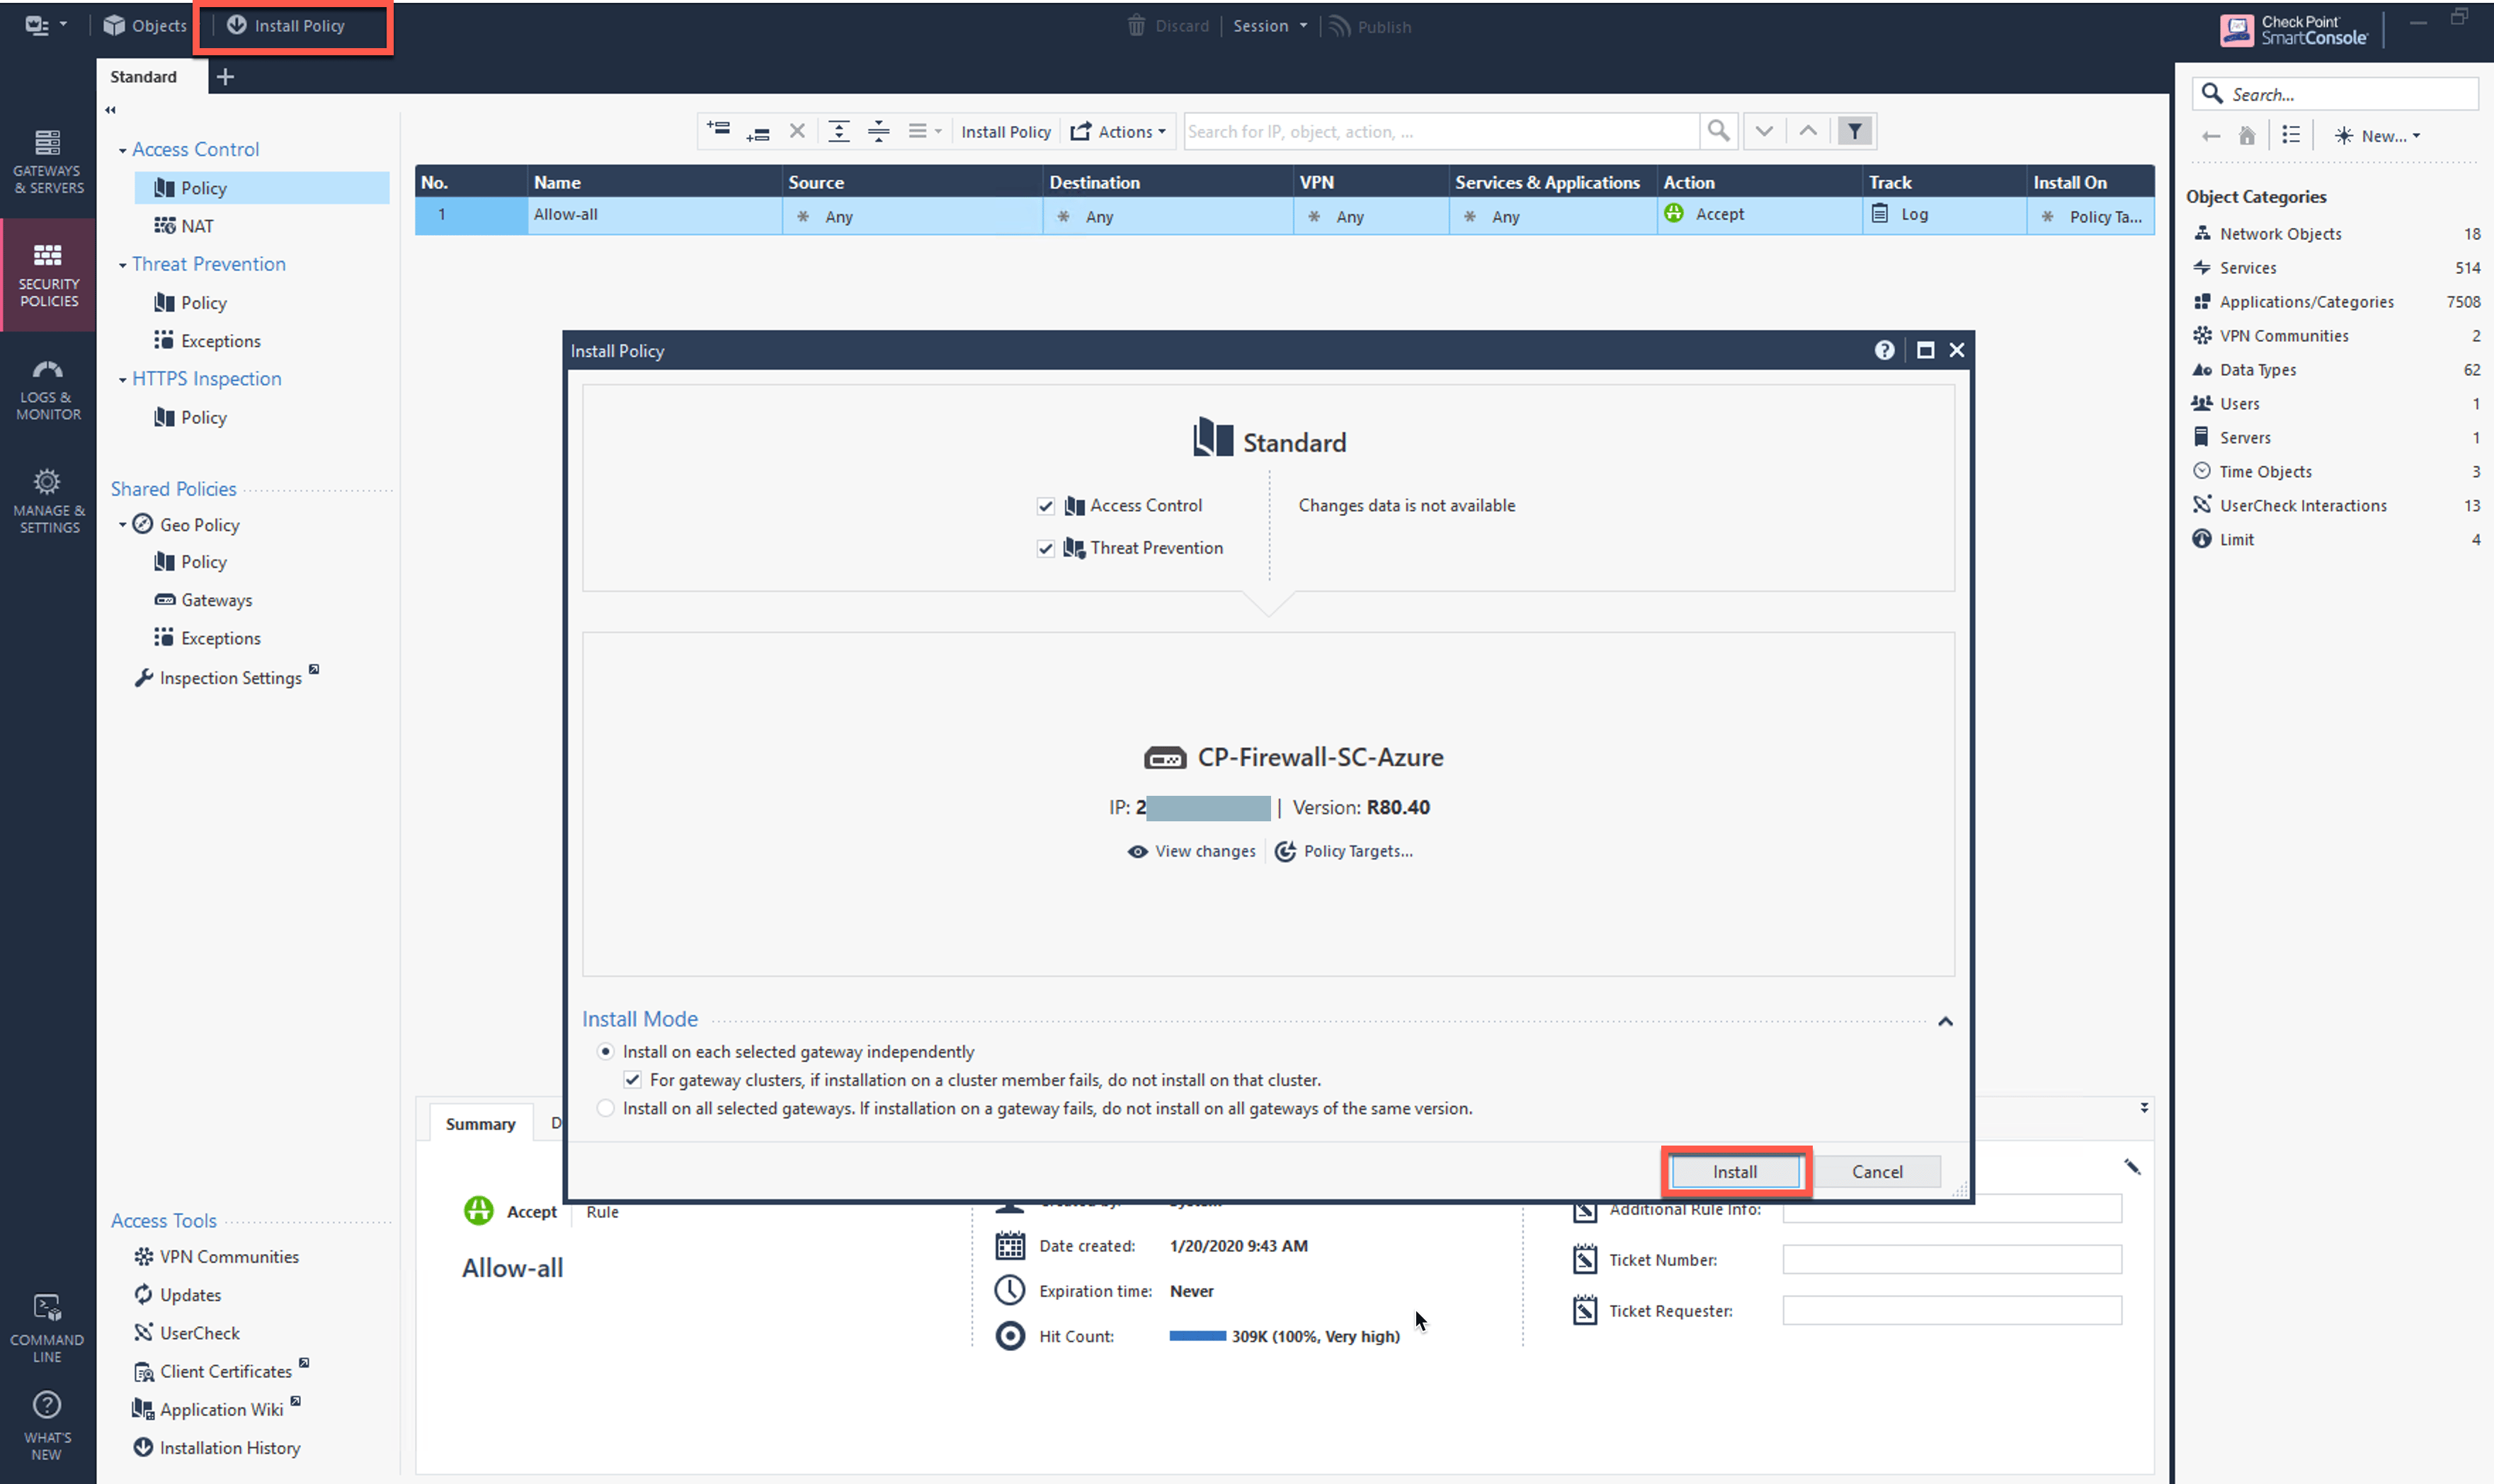
In this step, you will configure a basic traffic security policy that allows traffic to pass through the firewall. In the Check Point UI, from Security Policies > Access Control > Policy, configure a policy by either modifying the default Cleanup rule or adding a new rule above the default rule.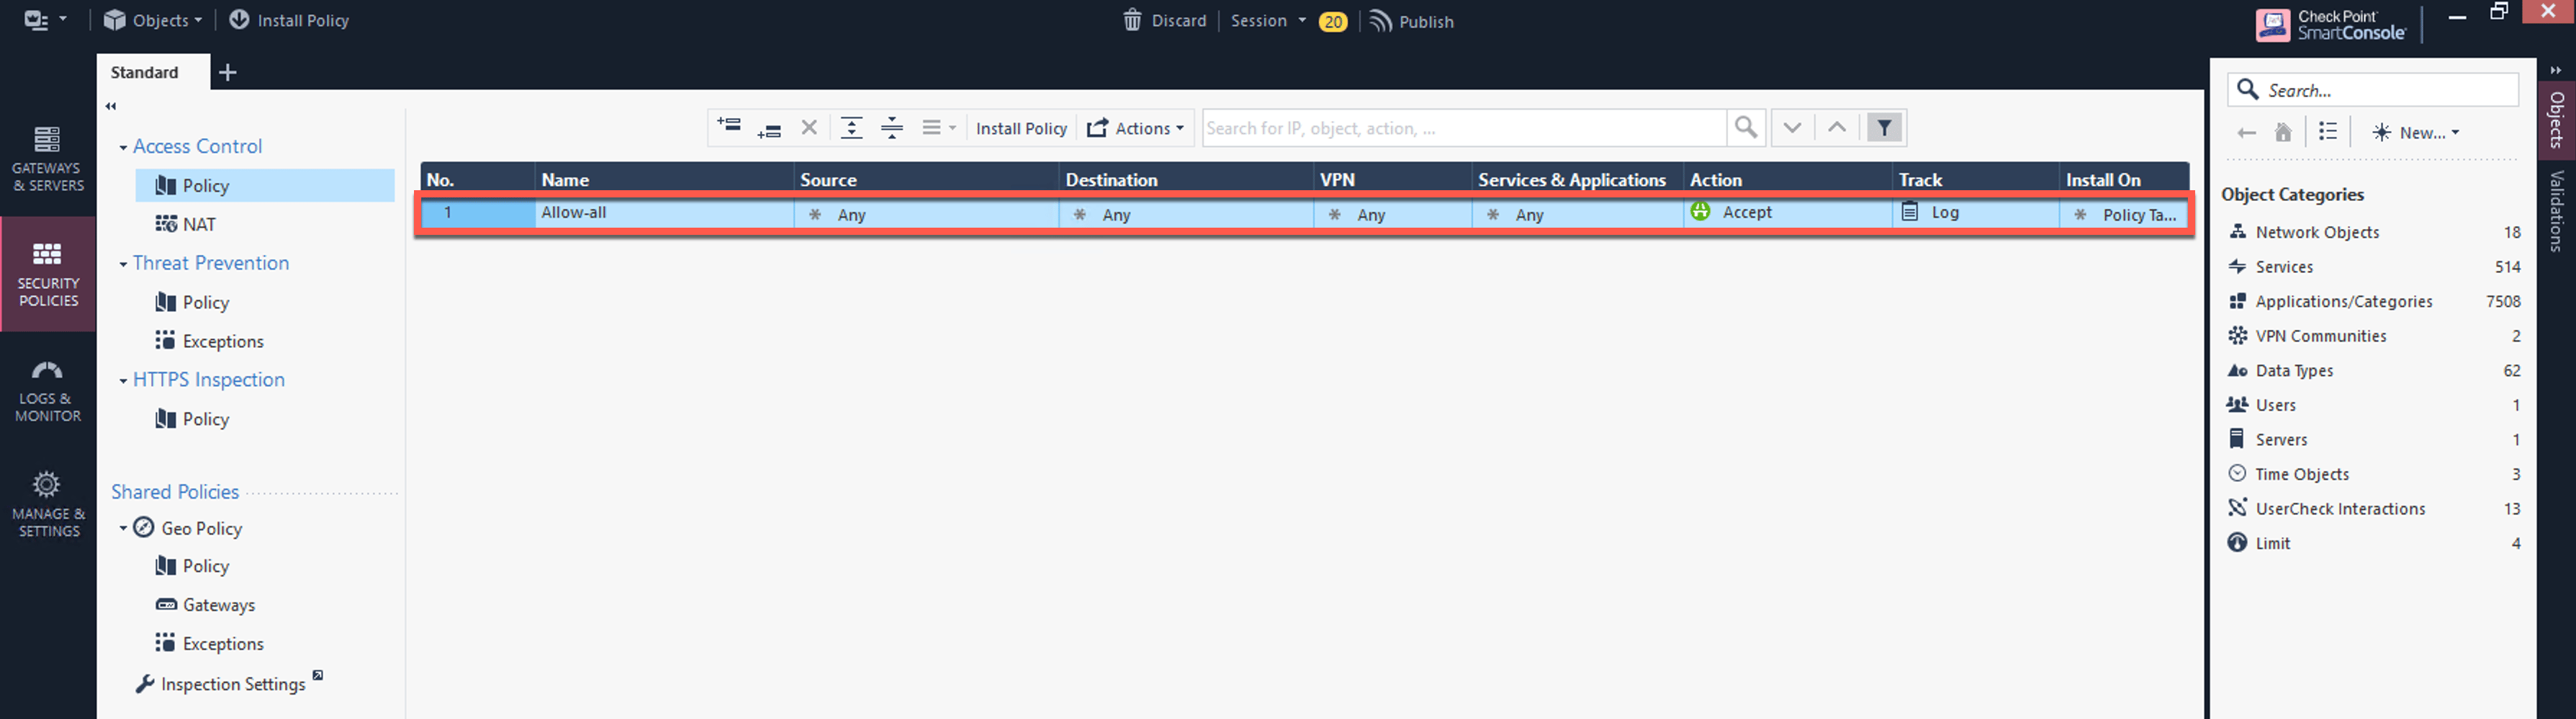
(Optional) Configuring the Basic Traffic Policy to Allow Traffic VPC to Internet
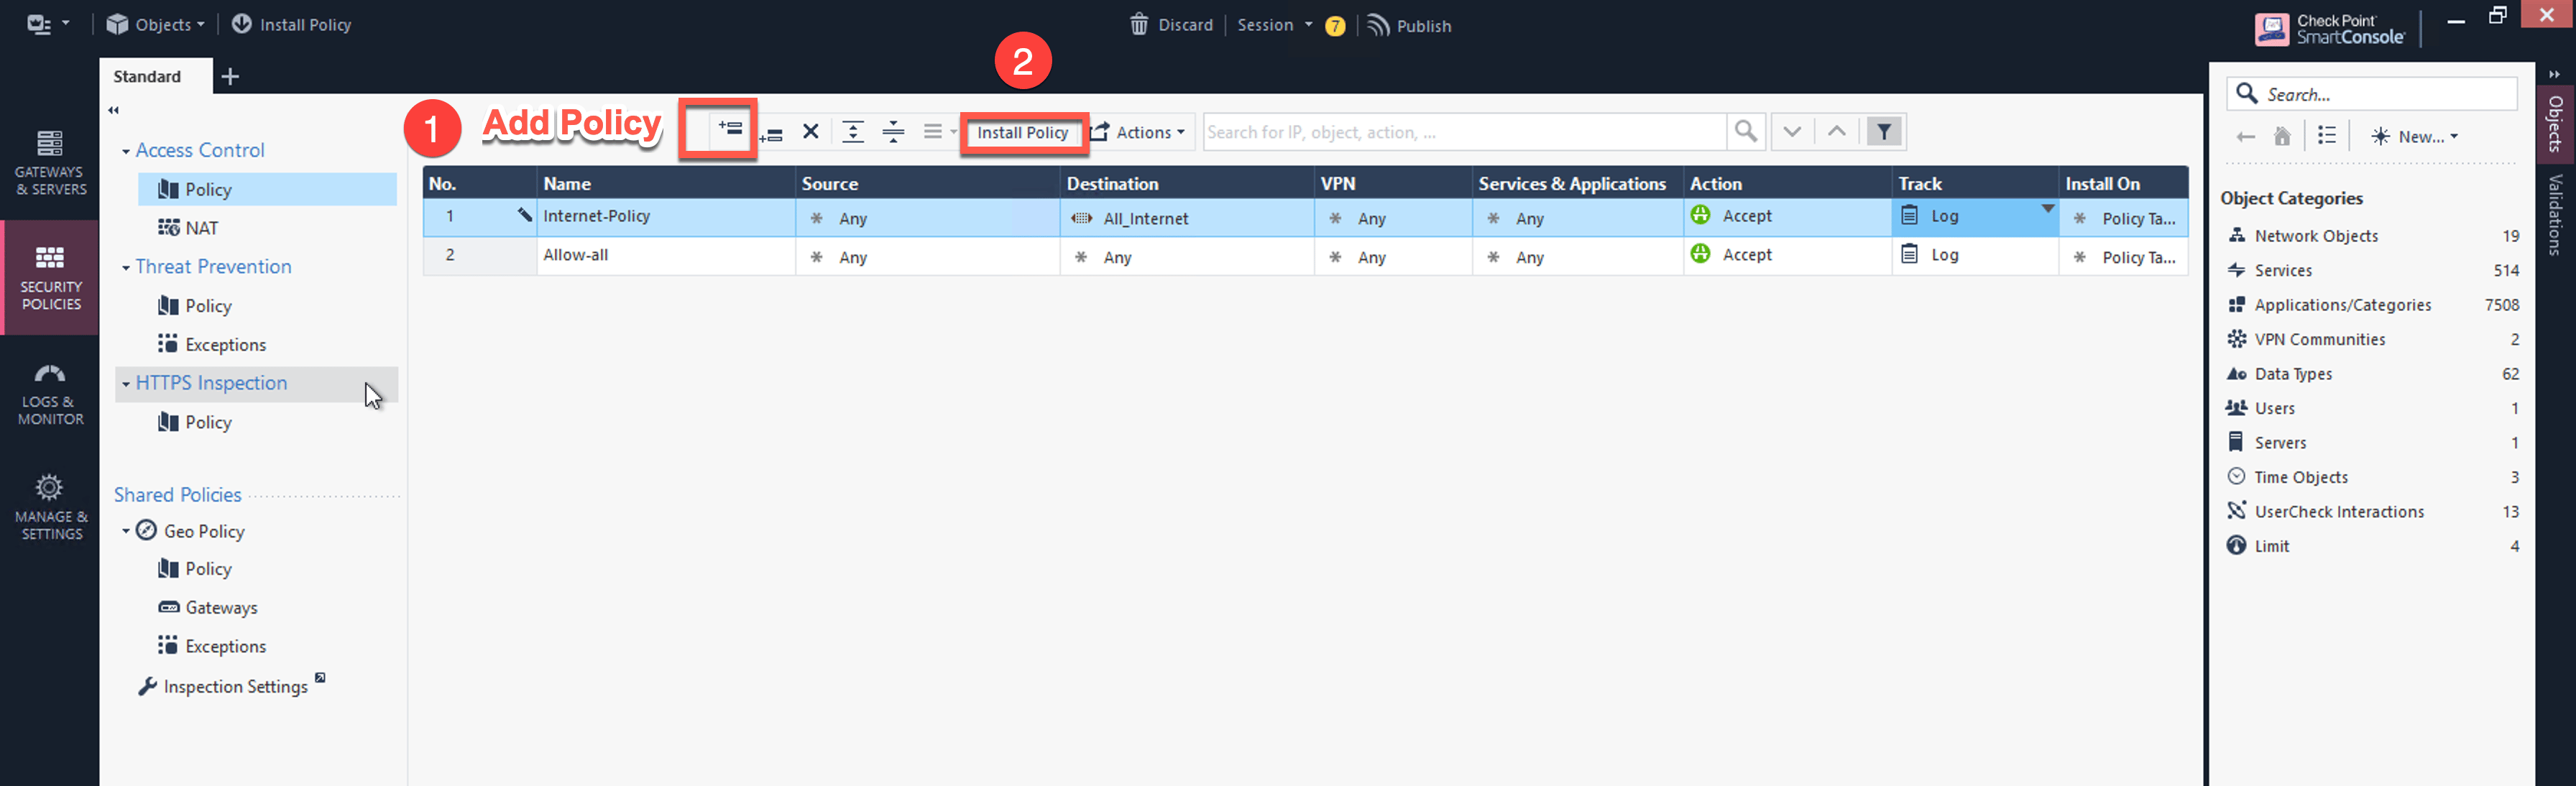
In this step, you will configure a basic traffic security policy that allows Internet traffic to pass through the firewall. Given that Aviatrix Gateways will only forward traffic from the TGW to the LAN port of the firewall, we can just set our policy condition to match any packet that is going into the LAN interface and out of the WAN interface. You must enable the Egress inspection feature on FireNet if it is not already enabled. To enable it:- In Aviatrix CoPilot, navigate to Security > FireNet > FireNet Gateways on the left navigation menu.
- Click the Edit icon
 next
to a FireNet Gateway.
next
to a FireNet Gateway. - Scroll down to the Egress toggle switch and turn it On.
- Click Save.
- Verify the Egress status on the FireNet Gateways tab.
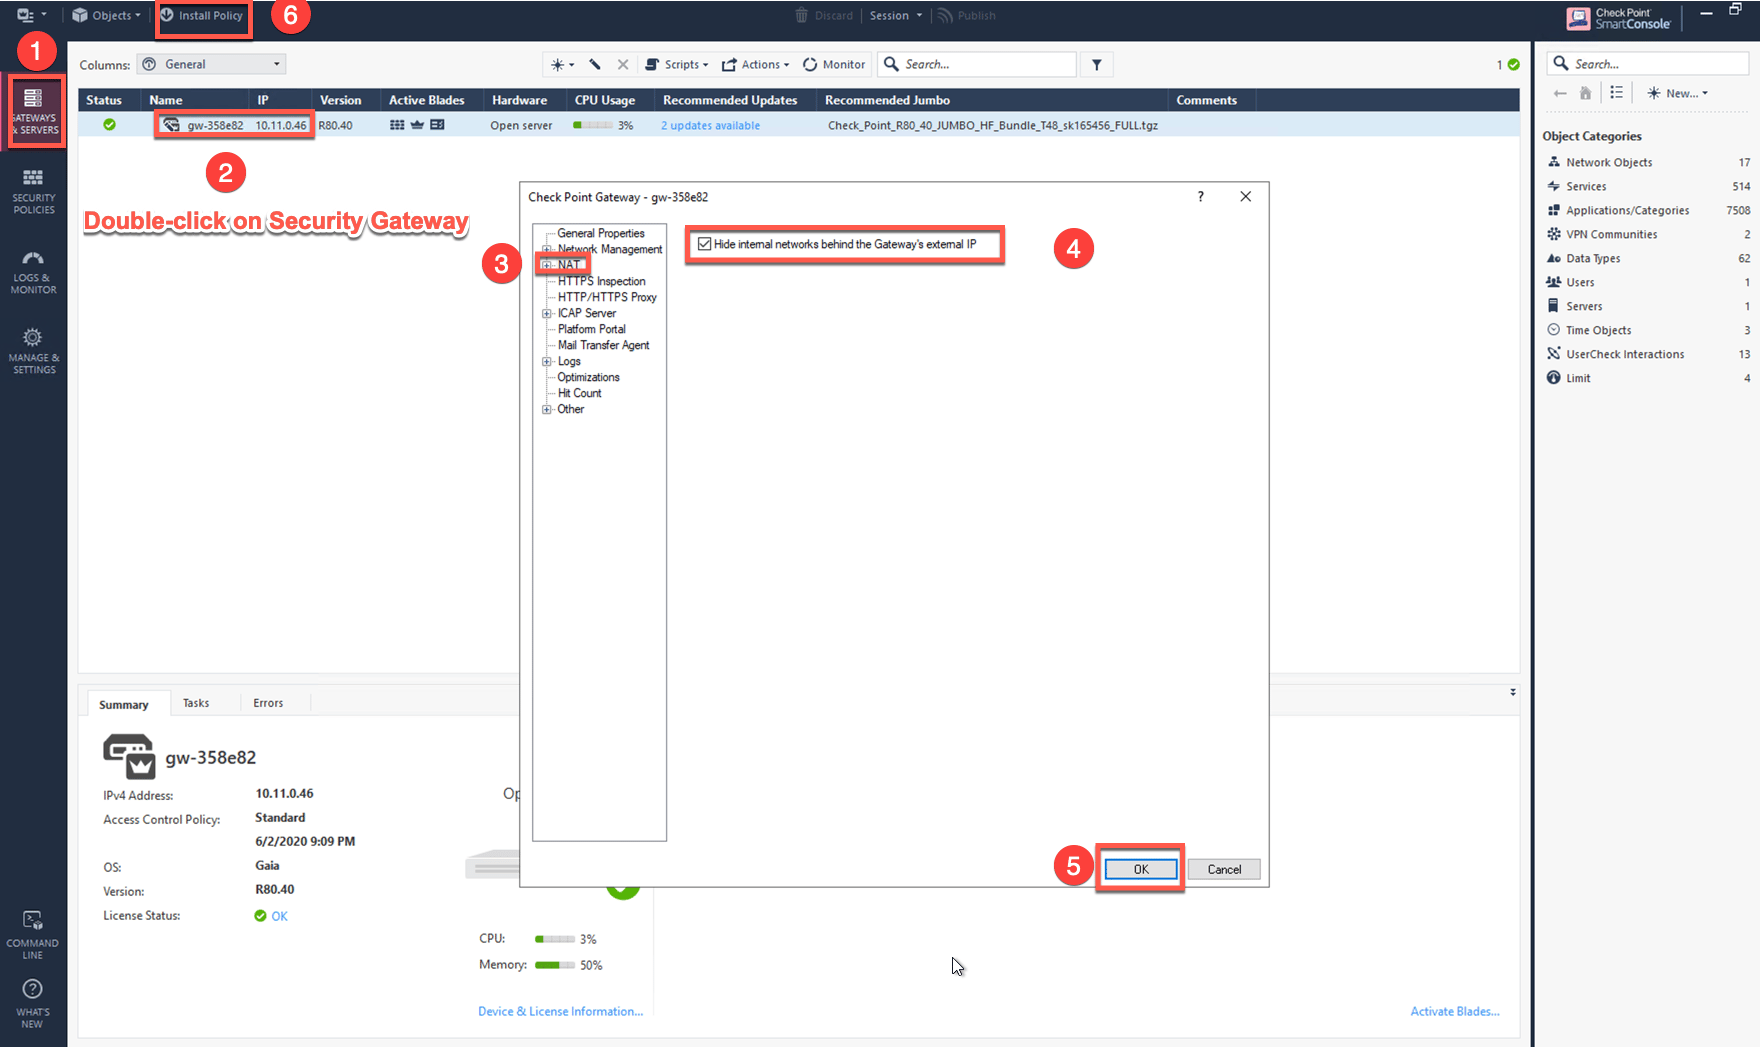
- Click NAT.
- Select the Hide internal networks behind the Gateway’s external IP checkbox.
- Click OK.
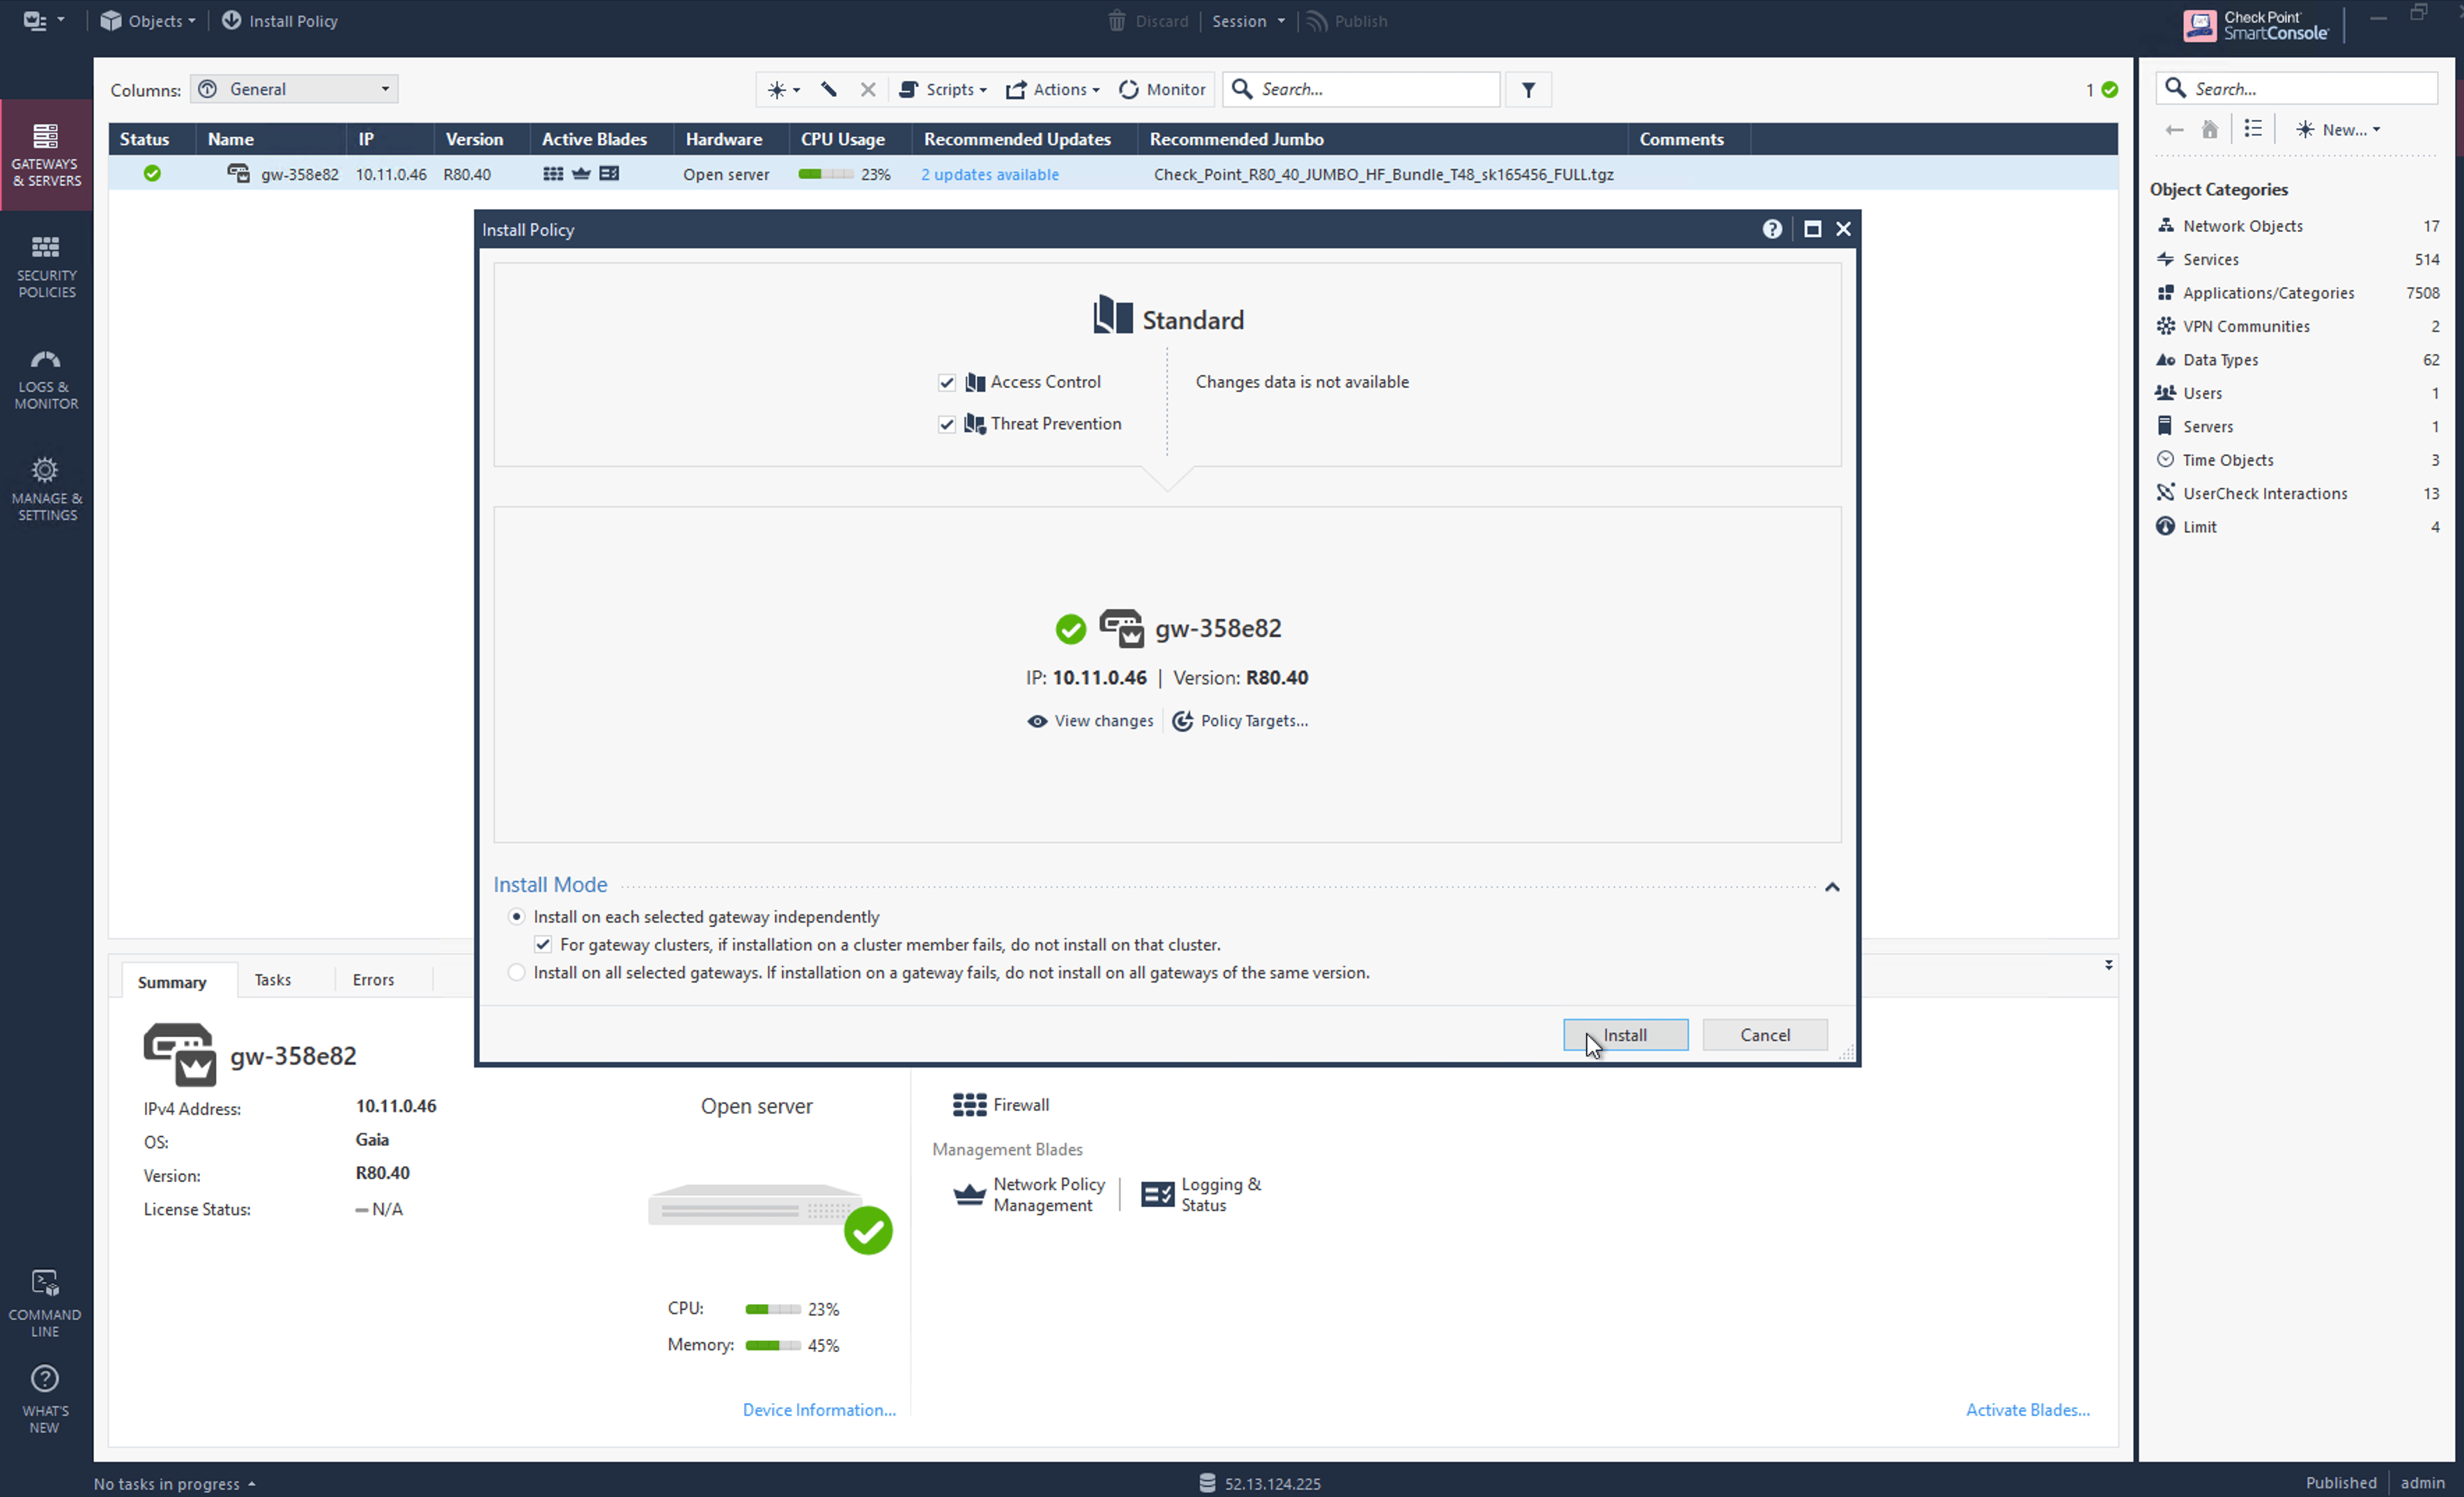
- Click Install Policy.
Validate Check Point in AWS firewall Instance
Now your firewall instance is configured and ready to receive packets. The next step is to validate your configurations and polices using FlightPath and Diagnostic Tools (ping, traceroute, etc.).Viewing Traffic Log for Check Point in AWS/Azure
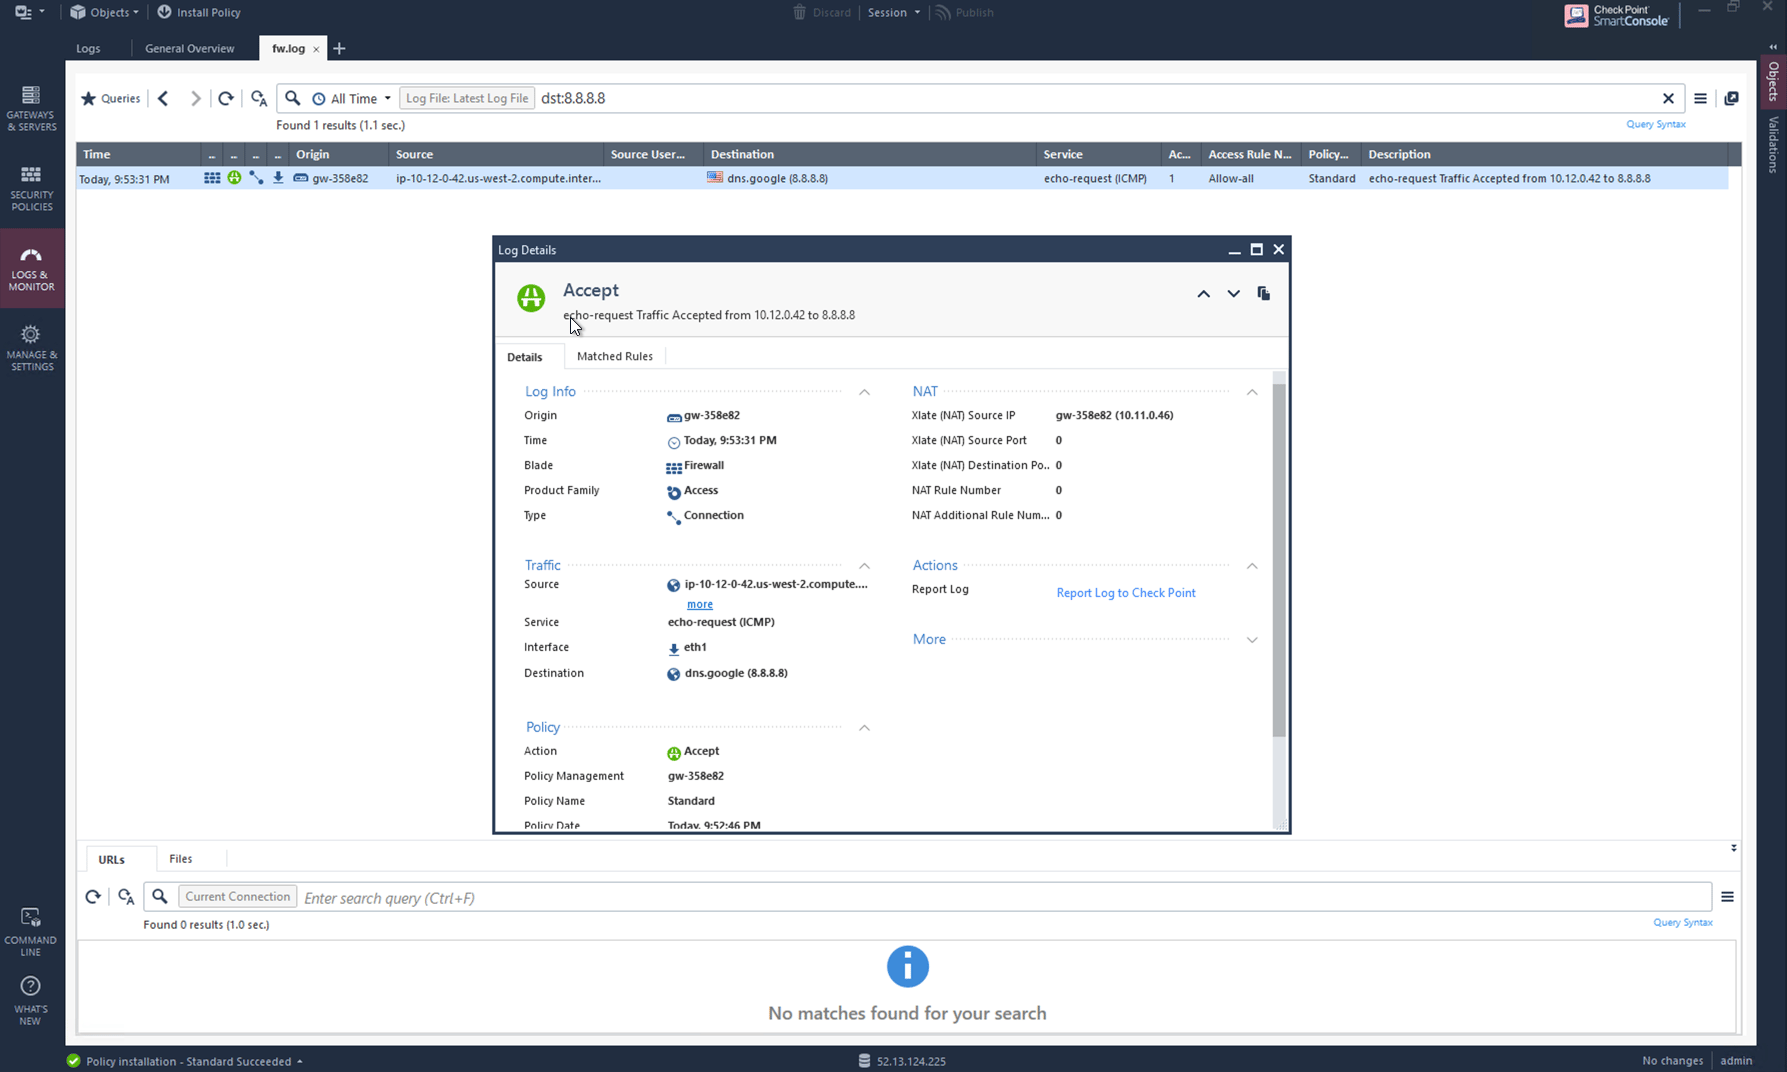
You can view if traffic is forwarded to the firewall instance by logging in to the Check Point Firewall SmartConsole and navigating to the Logs & Monitor page.Verifying VPC-to-VPC traffic
Launch one instance in PROD Spoke VPC and another in DEV Spoke VPC. Start pinging packets from a instance in DEV Spoke VPC to the private IP of another instance in PROD Spoke VPC. The ICMP traffic should go through and be inspected in the firewall.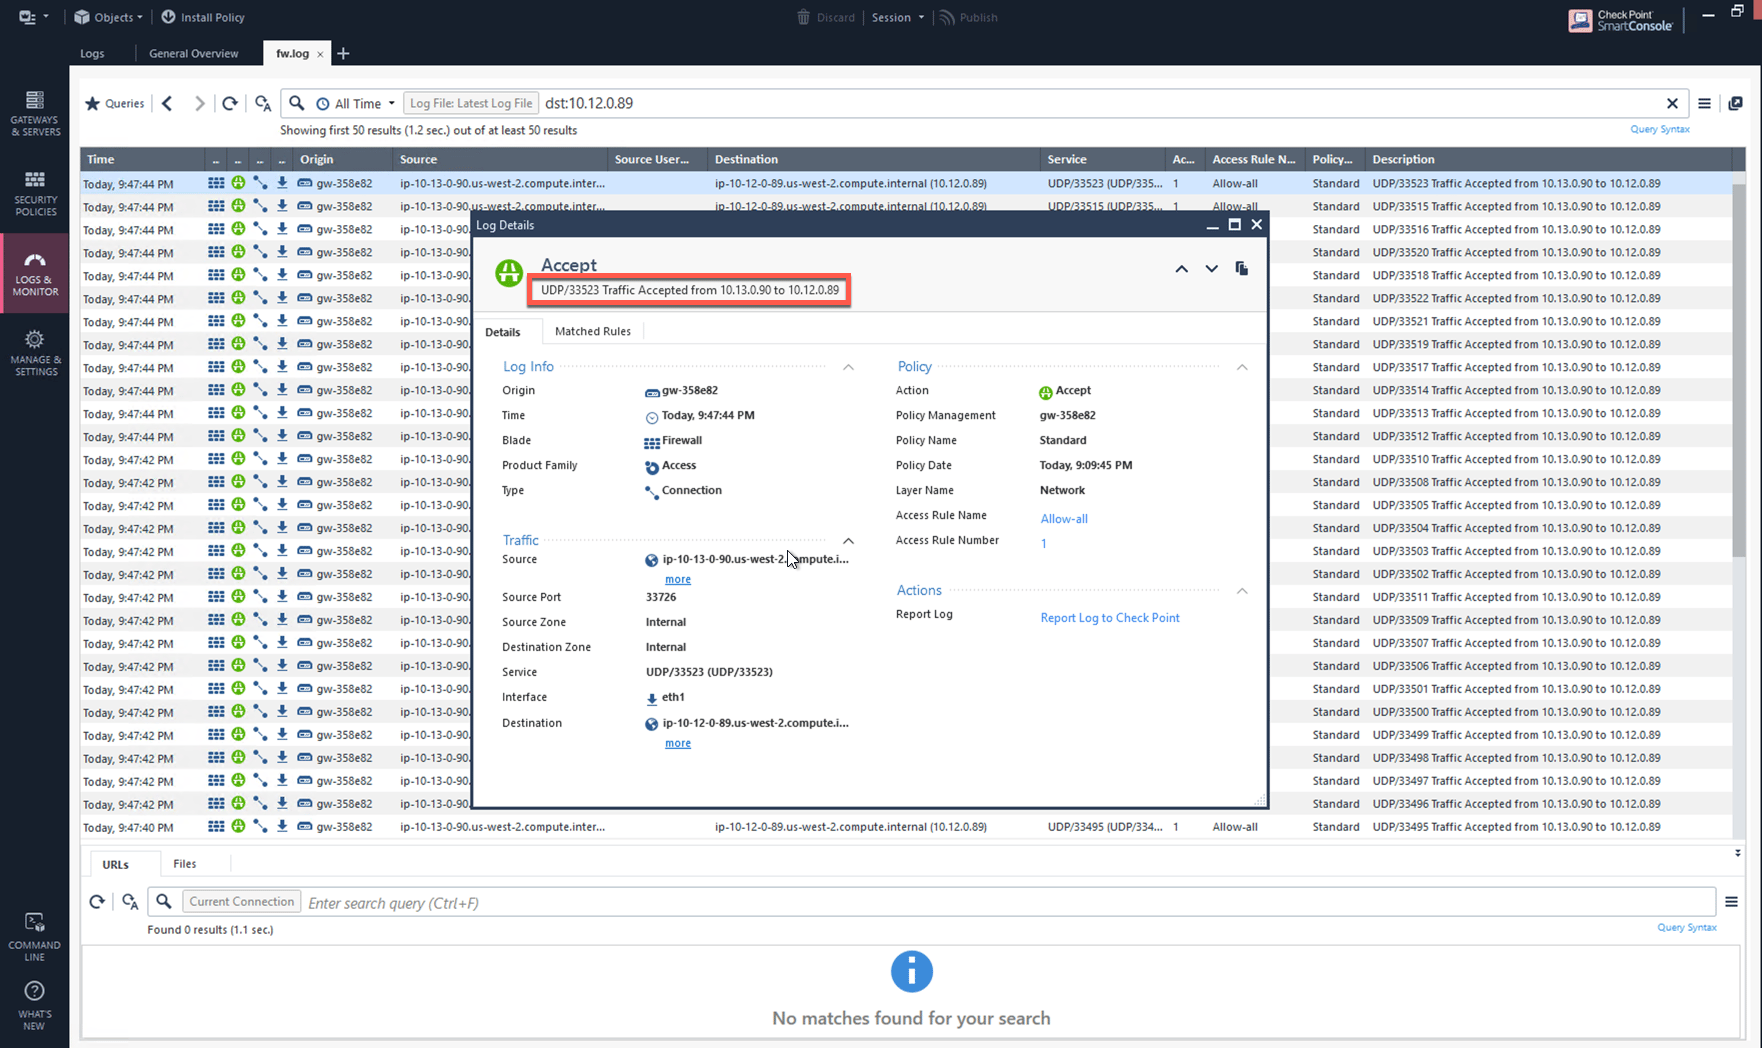
(Optional) Verifying VPC to Internet traffic
To verify VPC to internet traffic for your Check Point in AWS firewall, launch a private instance in the Spoke VPC (i.e. PROD Spoke VPC) and start pinging packets from the private instance towards Internet (e.g 8.8.8.8) to verify the egress function. The ICMP traffic should go through, and be inspected on the firewall.