

Overview
This guide explains how to use Aviatrix CoPilot to configure your Aviatrix Controller to authenticate to an IdP. When SAML is used for Controller access authentication, the Controller acts as the Identity Service Provider (ISP) that redirects browser traffic from the client to the IdP (e.g., Okta) for authentication. CoPilot redirects to the Controller, which performs the SAML integration with the IdP. All CoPilot user logins are directed to the Controller, which handles all accounts and users. The Aviatrix CoPilot SAML login supports multiple SAML endpoints with varying access and different IdPs. Links to each IdP integration are provided below.Setting up SAML authentication for the VPN client
is something separate, although the interfaces are similar.
SAML Configuration Checklist
Before configuring SAML integration between Aviatrix and an IdP, make sure the following is completed:- The Aviatrix CoPilot associated with your Controller is up and running
- You have a valid IdP account with admin access
Configuring SAML Authentication
Follow these steps to configure Aviatrix to authenticate against an IdP:- Creating a Temporary Aviatrix SAML Endpoint.
- Creating a SAML App for Aviatrix CoPilot with the IdP.
- Retrieving IdP Metadata.
- Updating the Aviatrix SAML Endpoint with IdP metadata.
- Validating the integration setup.
Creating a Temporary Aviatrix SAML Endpoint
This creates the SAML endpoint on the Controller.This step is usually completed by the Aviatrix administrator. This endpoint
will be updated later on in the guide. At this step, this guide uses
placeholder values.
aviatrix_saml_copilot as an example
for the endpoint name.
- CoPilot UI
- Terraform
- Log in to Aviatrix CoPilot.
- Go to Administration > User Access > Access Management.
-
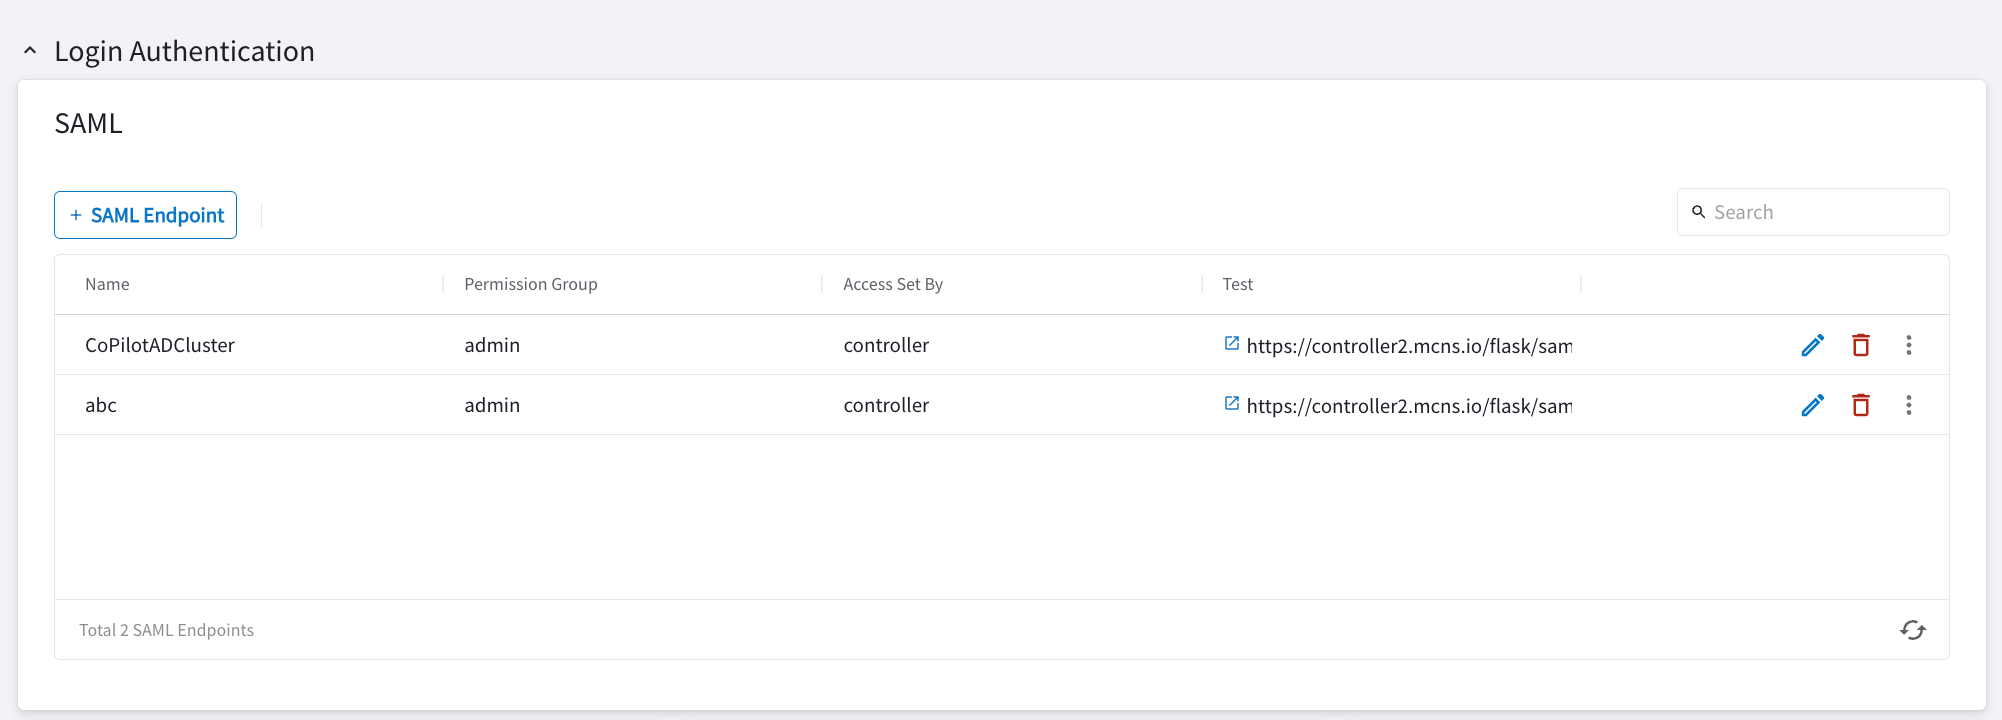
Under Login Authentication, click +SAML Endpoint.
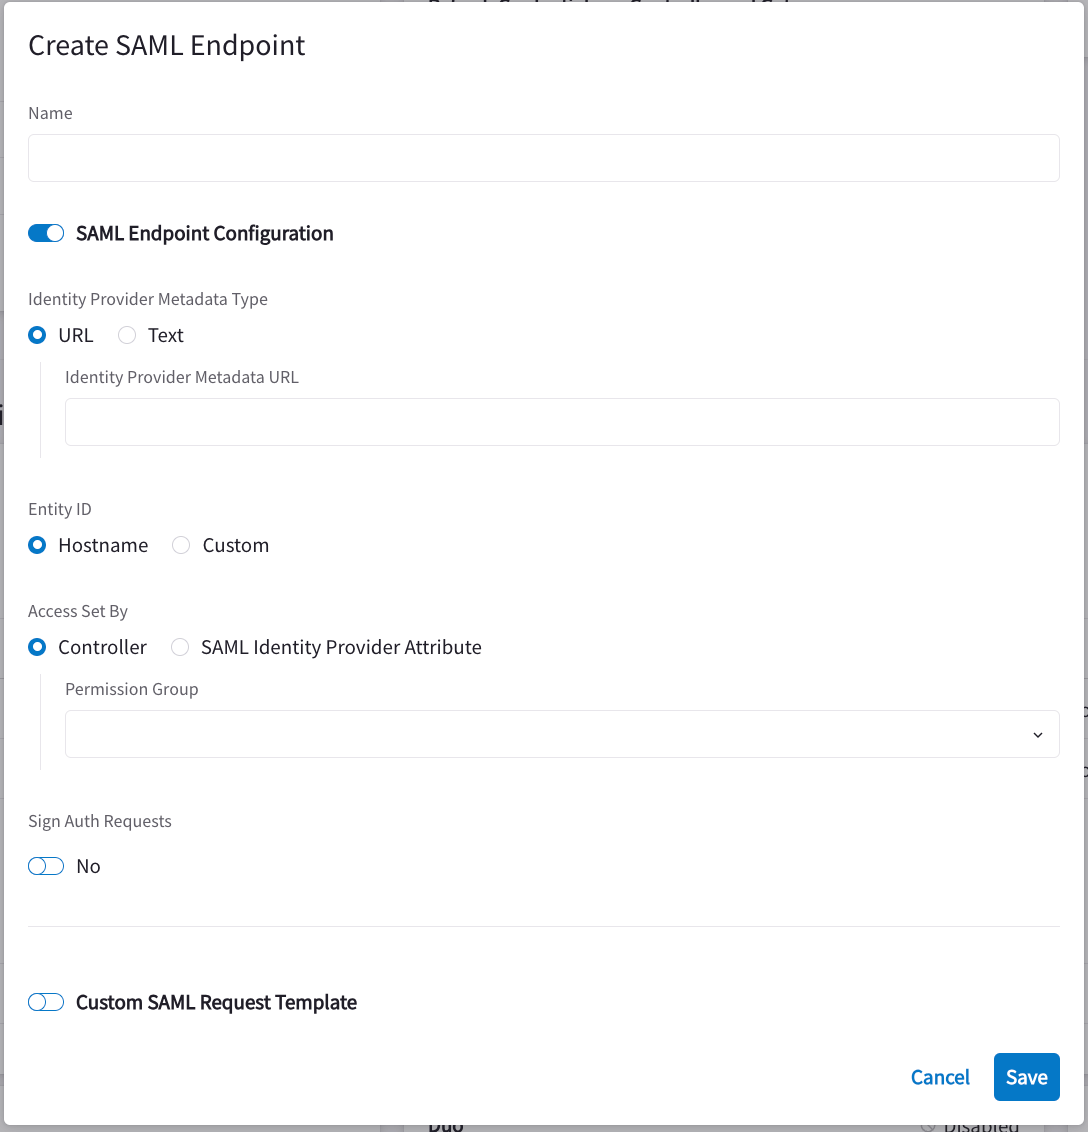
- Enter the following information:
You can create the Aviatrix SAML endpoint using a placeholder or invalid IdP Metadata URL as the Identity Provider Metadata type, and the system will accept it. However, when authentication is attempted, an error message will appear because the metadata cannot be parsed.To avoid this, make sure to update the SAML endpoint with a valid IdP Metadata
URL or XML from your Identity Provider before testing or enabling SAML login.Placeholder values such as
https://www.google.com are intended for initial
setup or demonstration purposes only.Each endpoint only supports one type of access. If you need admin and
read-only access, create two separate SAML apps.
- Click Save.
- Depending on your IdP provider, you may need to upload SP metadata.
- After the temporary SAML endpoint is created, click the vertical ellipsis
 icon and
select Download SP Metadata next to the SAML endpoint.
icon and
select Download SP Metadata next to the SAML endpoint. - Copy the SP metadata as text.
- After the temporary SAML endpoint is created, click the vertical ellipsis
Creating a SAML App for Aviatrix CoPilot with the IdP
This step is usually done by the IdP administrator. This section shows only a
generalized process for creating a SAML application.
- Assertion Consumer Service URL: to obtain this, in Aviatrix CoPilot go to
Administration > User Access > Access Management, click the vertical ellipsis
next to the
SAML endpoint, and click Copy Assertion Consumer Service URL.
- Audience URI (Entity ID)
- SP Metadata URL
- SP Login URL
- Default RelayState =
<empty>
- FirstName
- LastName
- Email (unique identifier for SAML)
These values are case-sensitive.
You require administrator access to create IdP endpoints for SAML.
Retrieving IdP Metadata
After creating the SAML app in the IdP as per the previous procedure, you need to retrieve IdP Metadata either in URL or text form from this SAML application.- Azure AD - provides IdP metadata URL and needs a custom SAML request template
- Okta - provides IdP metadata URL
- OneLogin - provides IdP metadata URL
Updating the Aviatrix SAML Endpoint
This step is usually completed by the Aviatrix administrator. Take note of the
IdP Metadata type along with Text/URL your IdP provides, and if you need a
custom SAML request template in the previous section.
- In Aviatrix CoPilot go to Administration > User Access > Access Management.
- Under SAML, click the Edit icon
 next
to the SAML endpoint you created earlier.
next
to the SAML endpoint you created earlier. - Paste the IdP Metadata URL derived from the SAML provider application into the Identity Provider Metadata URL field.
- Click Save.
Validating the Integration
- Log out of Aviatrix CoPilot.
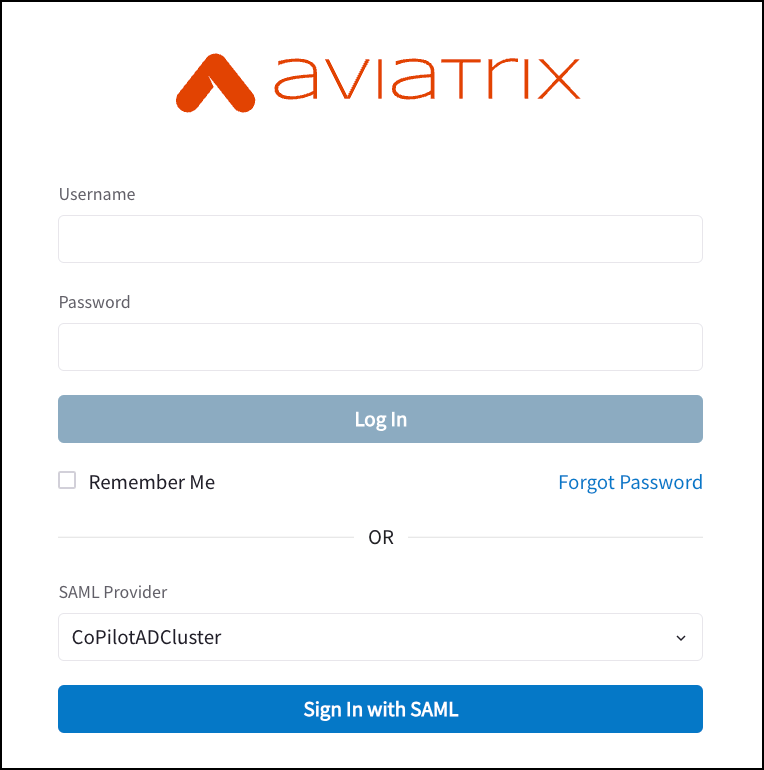
- Choose your SAML endpoint name from the dropdown box.
- Log in to Aviatrix CoPilot by selecting the SAML Provider and clicking Sign In with SAML.
- You should be redirected to the IdP. Log in with your test user credentials.
If everything is configured correctly, after you have authenticated, you will
be redirected to the CoPilot dashboard.