

This is not a common scenario. You would only set up this type of connection
if you want to connect an Aviatrix Transit gateway to a firewall that is
outside your Cloud service provider (for example, in a branch office or
warehouse).
- In CoPilot, navigate to Cloud Fabric > Gateways > Transit Gateways.
- Create a Transit gateway that will connect to your FortiGate firewall.
- To connect the transit VPC gateway to FortiGate, navigate to Networking > Connectivity > External Connections (S2C).
- Click +External Connection.
- In the Add External Connection dialog, configure the following:
Ensure that the Local/Remote ASN and the Remote Device IP are correct before
saving.
- Click Save.
-
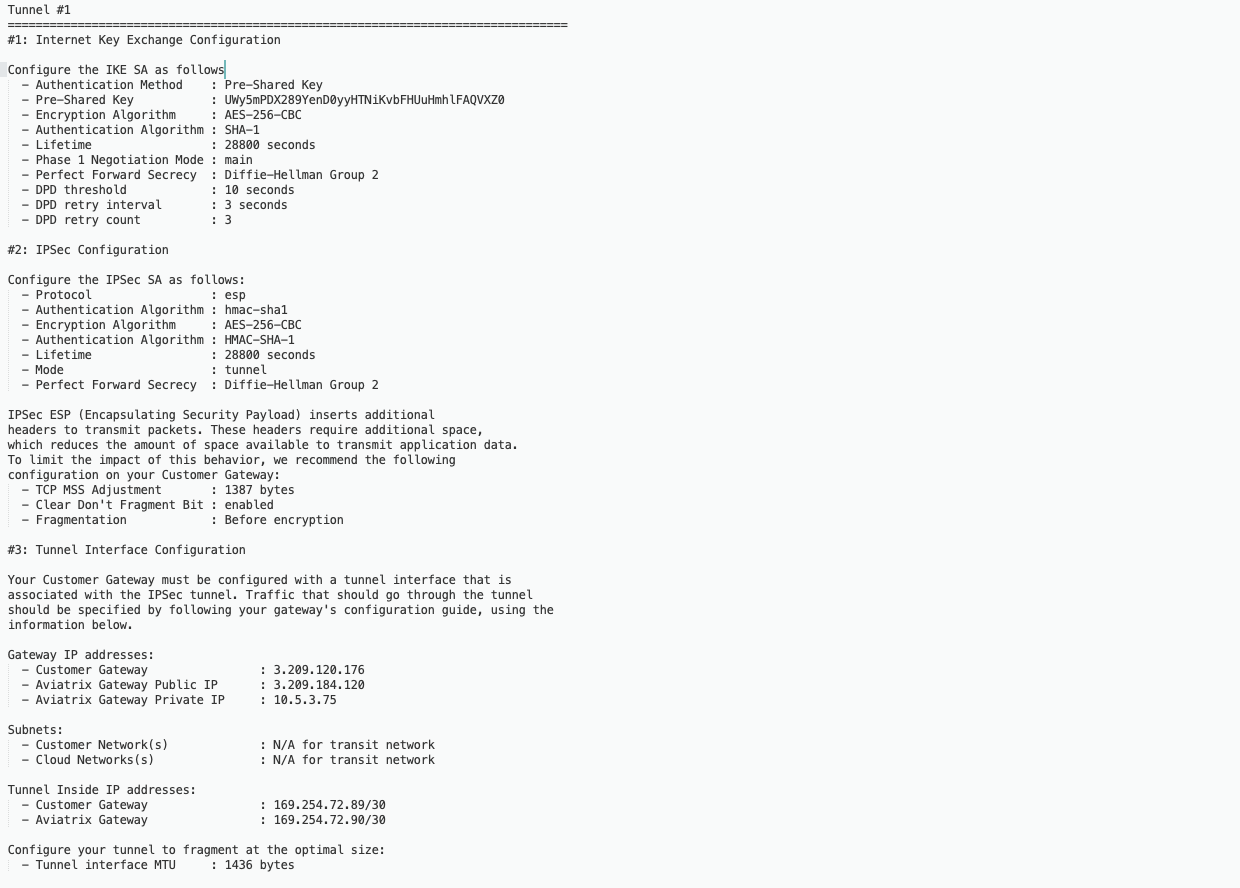
Download the configuration.
The following is a sample configuration based on the Site2Cloud configuration
above.
Configuring the Fortinet FortiGate Firewall
- Login into FortiGate and configure it as follows:
- Navigate to VPN > IPsec Tunnels.
- Click +Create New, and select IPsec Tunnel.
- In the VPN Creation Wizard, select the Custom template type.
- Populate the fields according to your preferences.
- Click Next.
VPN Setup
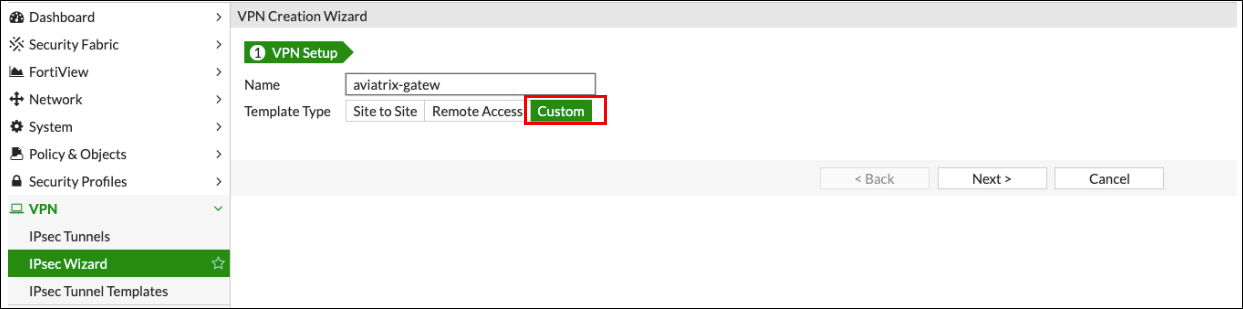
New VPN Tunnel Tab
- Complete the Network fields on the New VPN Tunnel tab as follows:
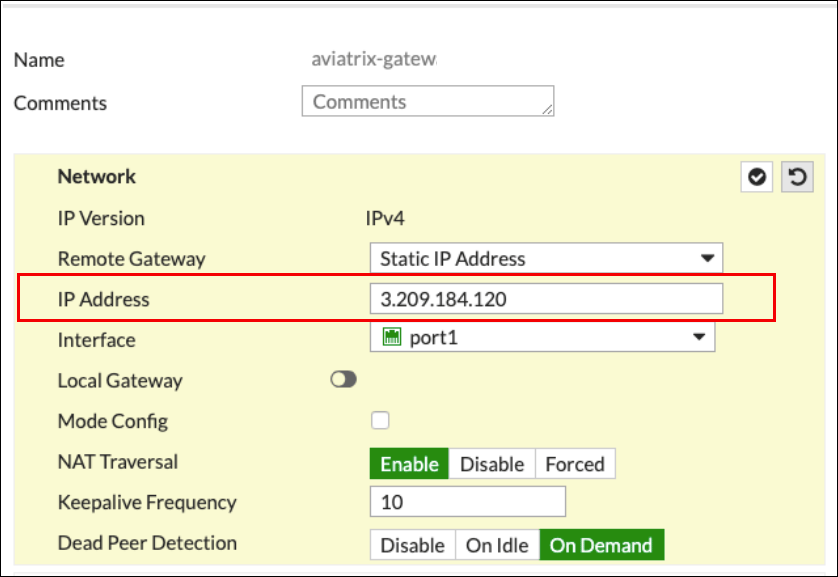
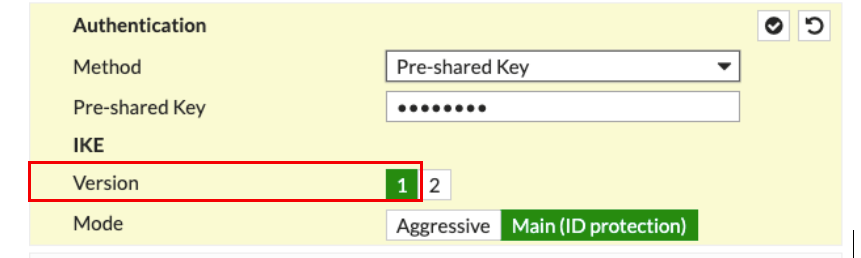
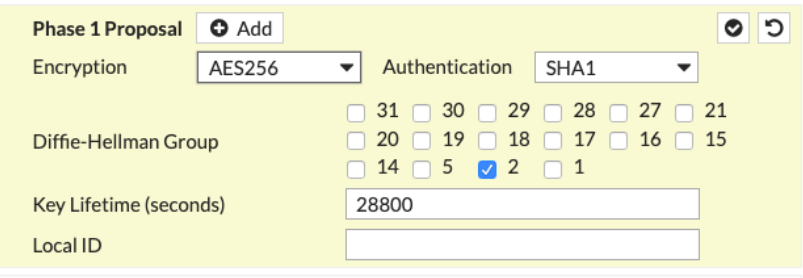

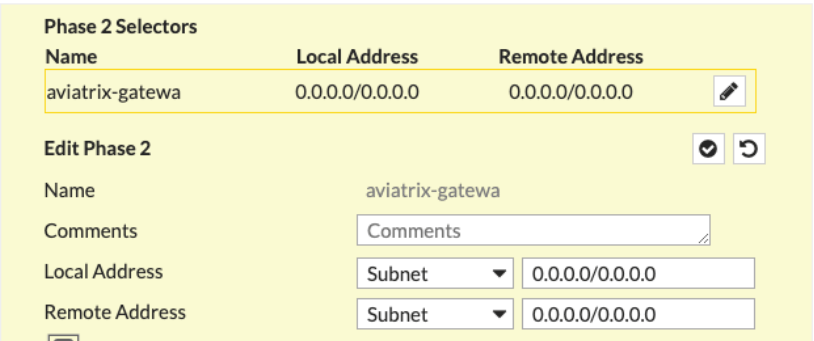
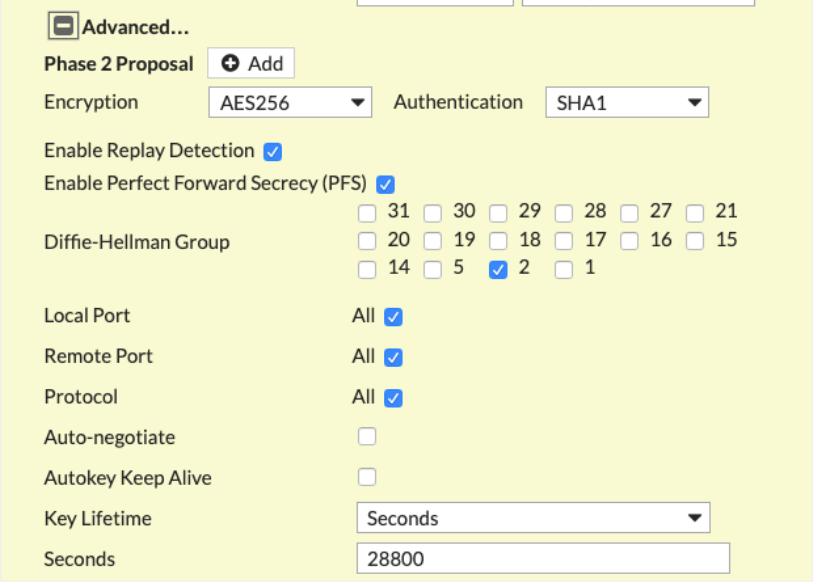
- Click OK.
- Navigate to Network > Interfaces.
-
Click on the Tunnel created above (e.g. aviatrix-gatew) and assign the IP
address from the downloaded configuration file.
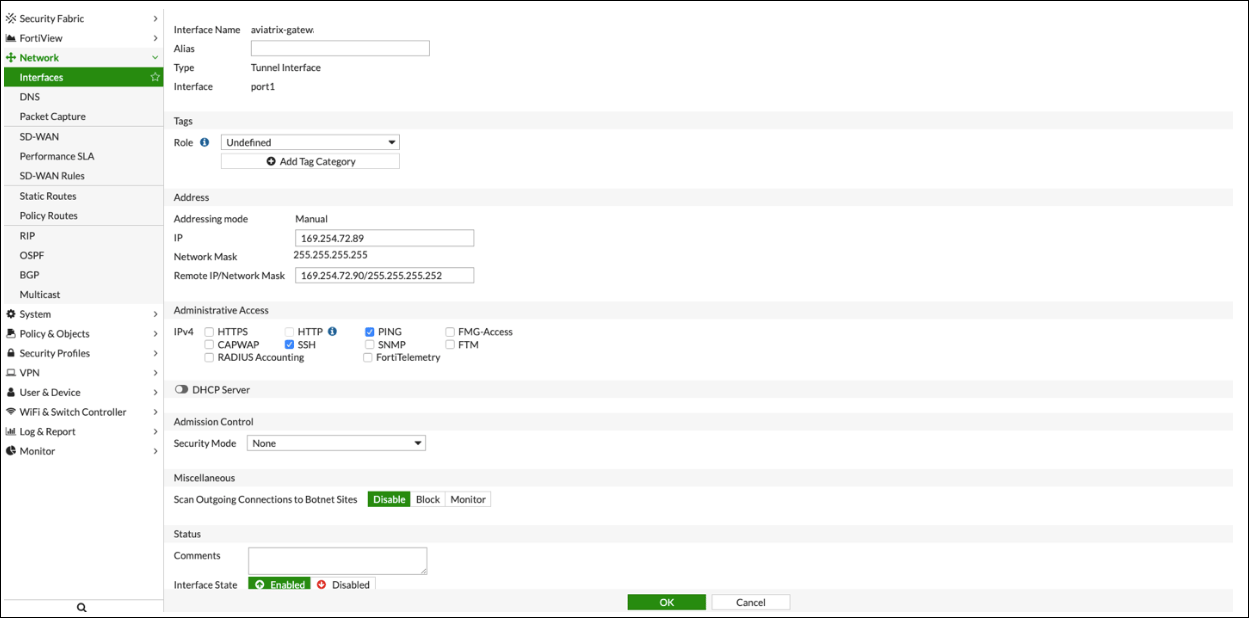
- Click OK.
Configure IPv4 Policy
- Navigate to Policy & Objects > IPv4 DoS Policy.
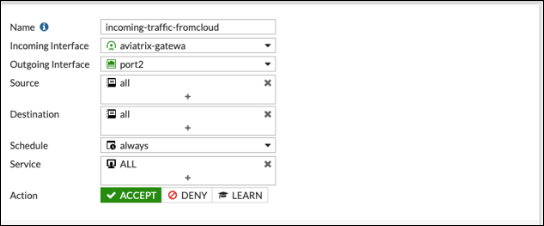
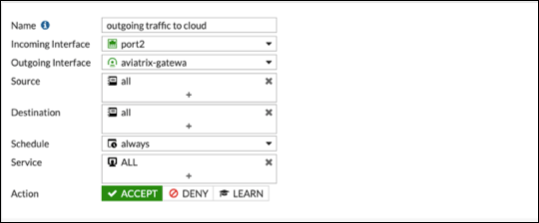
- Create two new IPv4 policies:
-
Outbound traffic
-
Inbound traffic
-
Outbound traffic
The reference to port2 in the screenshots should be replaced with your own
interface name that represents the internal facing interface.
Be sure to select ACCEPT for Action and select ALL for Service.
IPSec Monitor
- In the Fortigate UI, navigate to Dashboard > Network and click the IPsec widget.
- Select the Aviatrix tunnel, and click Bring Up.
- You can then check the tunnel status in CoPilot under Diagnostics > Cloud Routes.
BGP
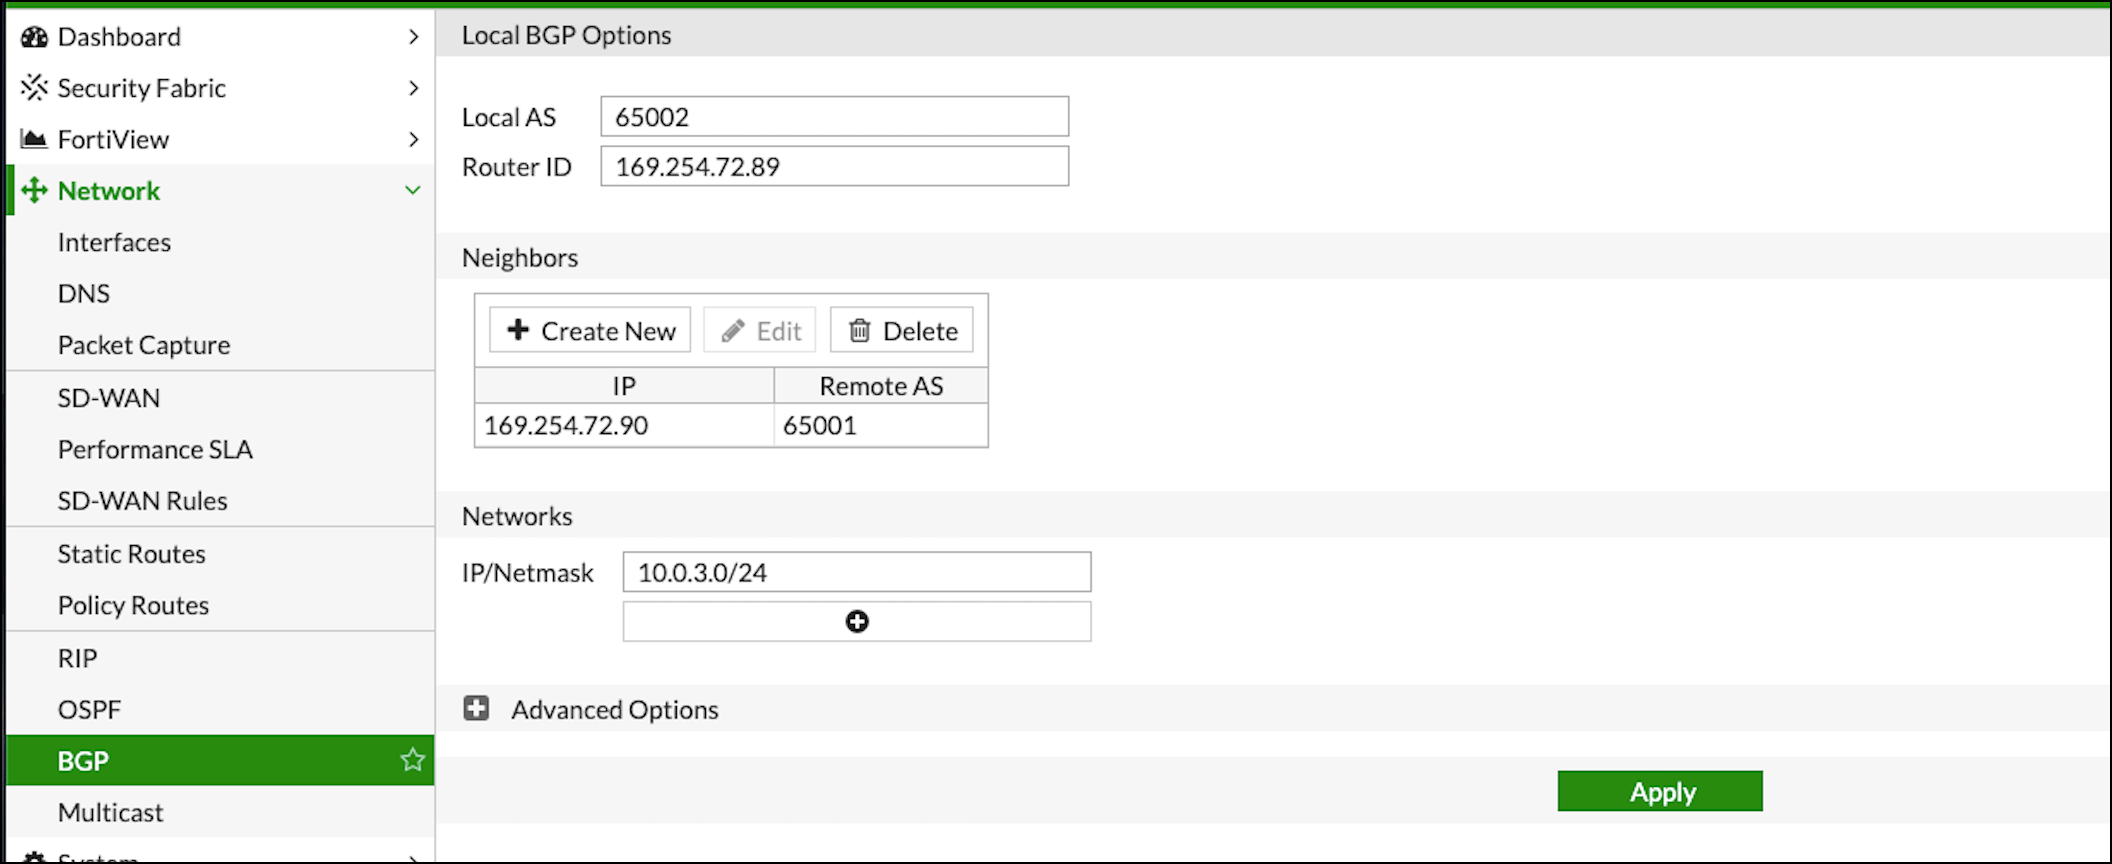
- In the FortiGate UI, navigate to Network > BGP.
-
Configure the Local BGP Options as below:
- RouterID: Tunnel IP address taken from the configuration file downloaded at step3
- Neighbors: Remote tunnel IP address and ASN
- Networks: All the networks needs to be advertised via BGP (here 10.0.3.0 is the local network of FortiGate)
- In CoPilot, go to Diagnostics > Cloud Routes > BGP Info to verify the BGP Routes. The Status should be Established. If some external connections for the selected Transit Gateway are Not Established, the overall BGP Status for the Transit Gateway is Partially Established.