Allocate Mapped Virtual Address Spaces
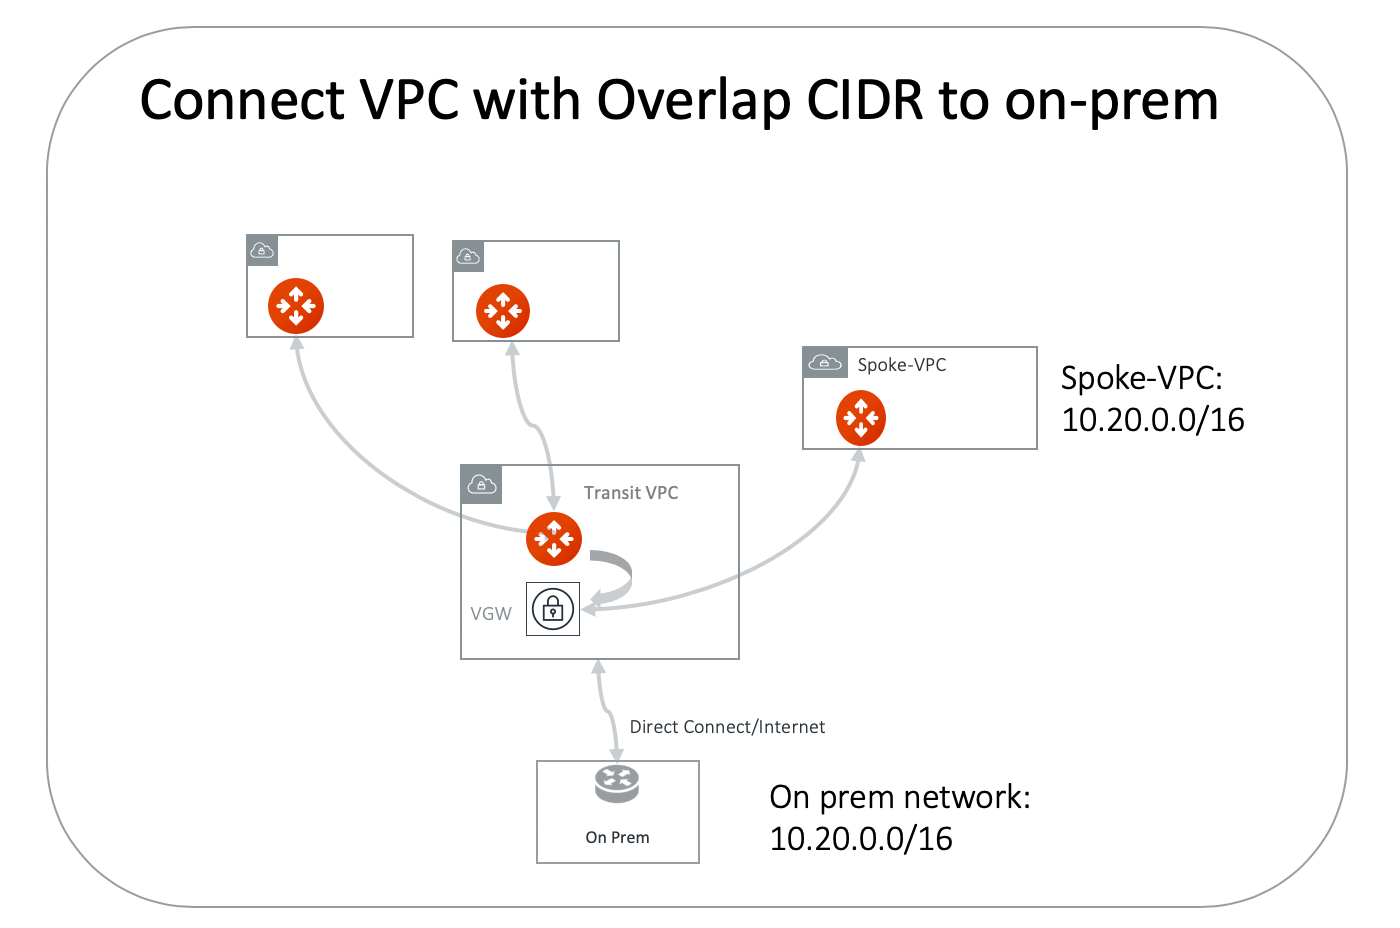
Allocate two 1-1 mapped corresponding virtual address spaces for the on-prem network and spoke-vpc/vnet. For example, allocate the virtual network 100.105.0.0/16 for the on-prem network, and 100.101.0.0/16 for the spoke-vpc/vnet virtual VPC/VNet CIDR. These two virtual address spaces must not overlap with any on-prem or cloud address spaces.Launch an Aviatrix Gateway
Launch an Aviatrix Gateway in the spoke-vpc/vnet.Build an IPsec Tunnel
Build an IPsec tunnel between spoke-vpc/vnet and the VPN Gateway (VGW/VPN Connect).-
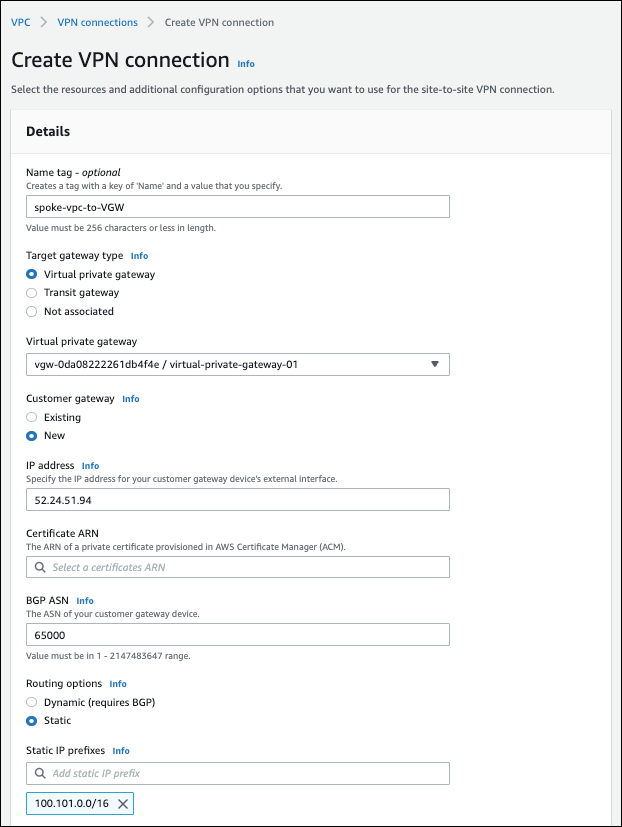
In the CSP Console (AWS, Azure, GCP, or OCI) for the VPC/VNet service, create
a VPN connection. Use the same VGW that is used for the Aviatrix Transit
solution to create an IPsec tunnel to spoke-vpc/vnet with static routes
100.101.0.0/16 configured, as shown below (AWS Console example).
- Save the VPN connection.
- Download the VPN configuration file. You will use some of this information when creating the external connection.
Create External Connection
- In Aviatrix CoPilot, go to Networking > Connectivity > External Connections (S2C).
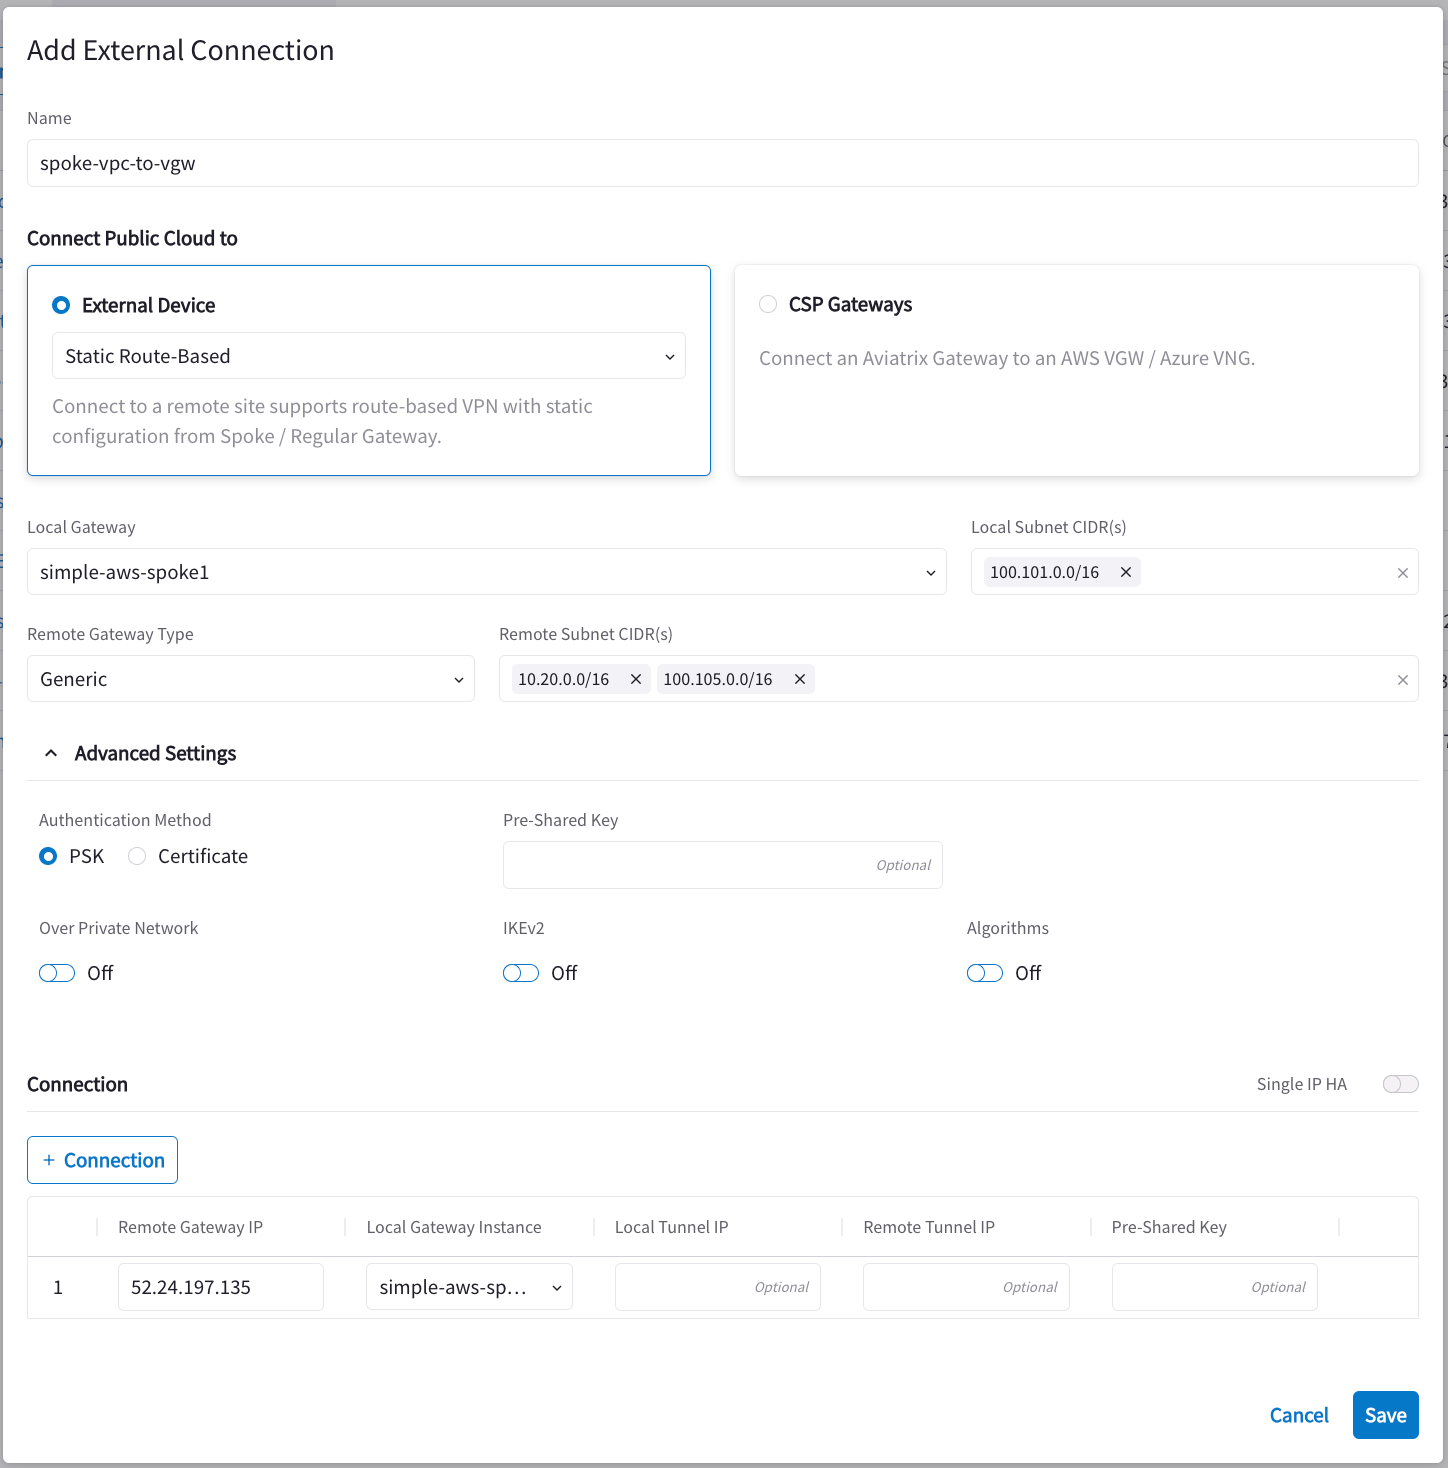
- Create an Unmapped external connection for VPC/VNet-2 Gateway-2 using one of these options:
-
Use these values:
Perform both SNAT and DNAT Functions on the Aviatrix Gateway
- In Aviatrix CoPilot, go to Cloud Fabric > Gateways > Spoke Gateways and select the ‘spoke-vpc/vnet’ gateway you created.
- Click the Settings tab.
- Expand the Network Address Translation area.
- Turn On Source NAT.
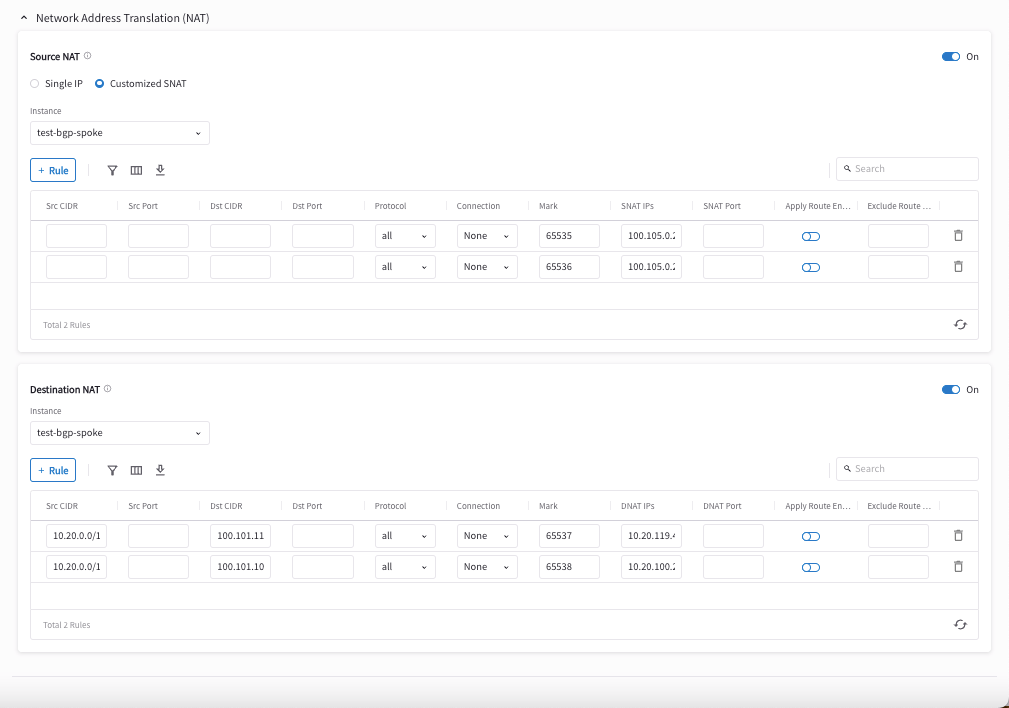
- Create a rule that matches the criteria in the following screenshot.
- Turn On Destination NAT.
-
Create a rule that matches the criteria in the following screenshot.
You are translating the cloud virtual destination address to its real address
for each instance in the VPC/VNet.
- Mark the session with a number that is easy to remember. In this example, it is 119.
-
Scroll up to find Source NAT. Translate the marked session to any on-prem
virtual source address, as shown in the screenshot below.