

- Configure a Site2Cloud tunnel in Aviatrix CoPilot.
- Configure a VPN tunnel and related components in the FortiGate Firewall.
Setting up External (S2C) Connection
- In Aviatrix CoPilot, launch an Aviatrix Transit Gateway .
- Navigate to Networking > Connectivity > External Connections (S2C) and click Add New to create a Site2Cloud connection using the values for one of the below options (for either you can select either PSK or certificate-based authentication).
- After the connection is created, select the vertical ellipsis
 menu for
that connection and select Download Configuration.
menu for
that connection and select Download Configuration. - Select Generic from the Vendor dropdown list and click the Download to download the external (S2C) configuration. Use this configuration file to configure the tunnels and interfaces in your Fortinet FortiGate firewall.
FortiGate Configuration
The configuration and screenshots below make the following three assumptions:- There are two interfaces on the FortiGate:
- Interface port1 is an externally facing interface.
- Interface port2 is an internally facing interface.
- You have a subnet in AWS, Azure, or GCP in a VPC/VNet that has an Aviatrix
Gateway. This subnet is defined as “10.0.0.0/16” for the examples below but it
can be any valid CIDR range.
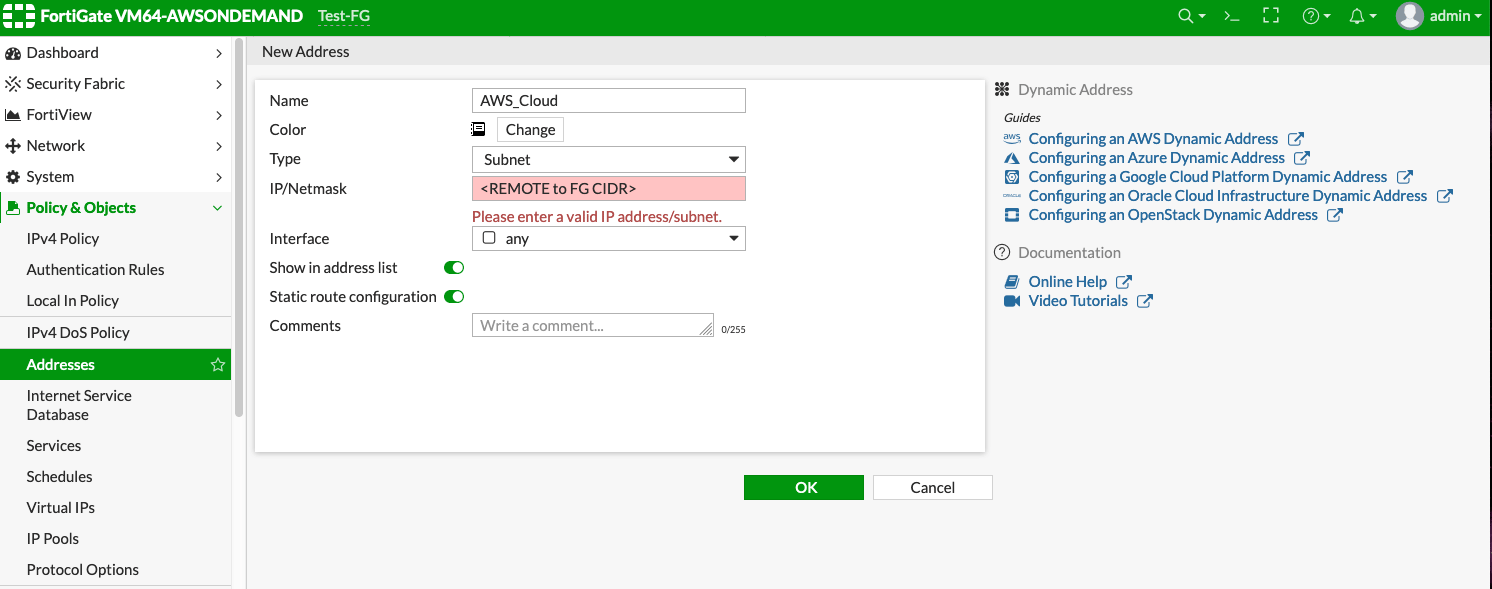
In the examples below this range is referred to as AWS_Cloud.
- You have a subnet behind your FortiGate firewall that will be accessible in
the cloud. This subnet is defined as “172.16.0.0/20” in the examples below but
it can be any valid CIDR range.
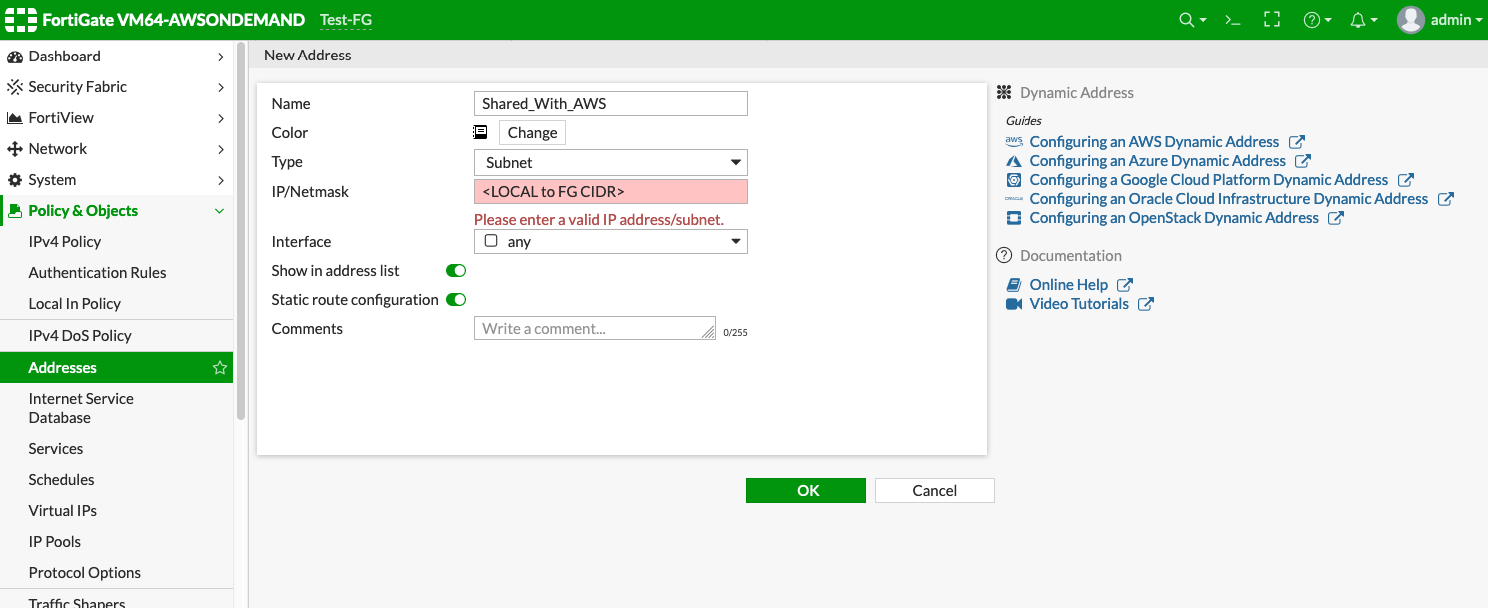
In the examples below, this range is referred to as Shared_With_AWS.
Configuring Named Address Ranges in FortiGate
Access the FortiGate Dashboard. Under Policy & Objects > Addresses, create two new addresses: AWS_Cloud and Shared_With_AWS.AWS_Cloud
Shared_With_AWS
Creating an IPsec Tunnel on FortiGate
- Log in to the FortiGate and access the Dashboard.
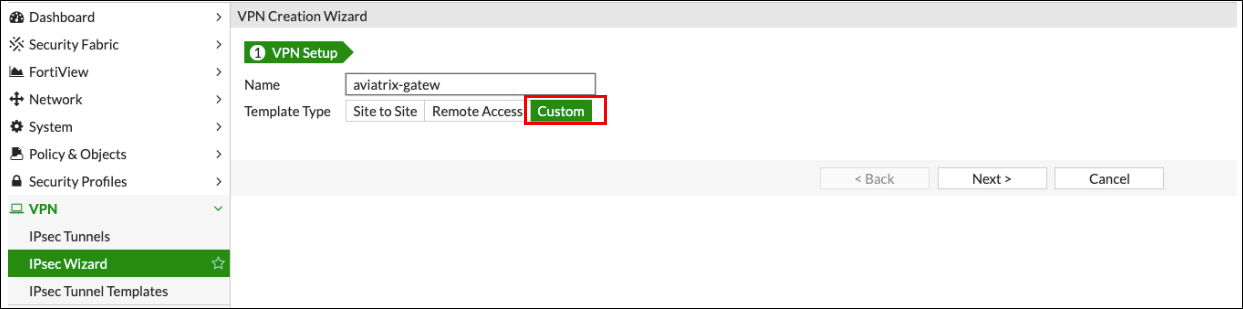
- In the VPN menu, select IPsec Wizard.
- Change the Template Type to “Custom.”
- Enter any value as the Name. For this example, we are using “aviatrix-gatew.”
- Click Next >.
-
Fill out the Network fields as recommended below:
New VPN Tunnel Tab
Complete the Network fields on the New VPN Tunnel tab as follows: Network section of New VPN Tunnel Tab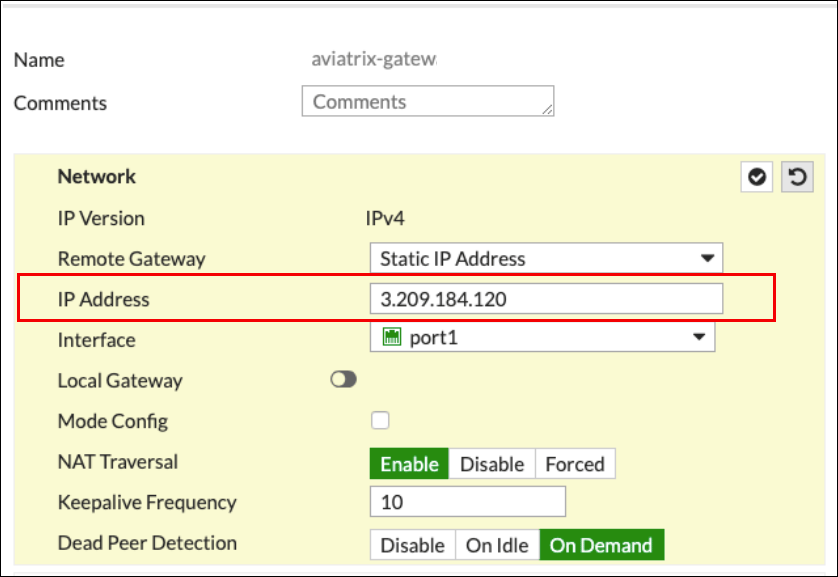
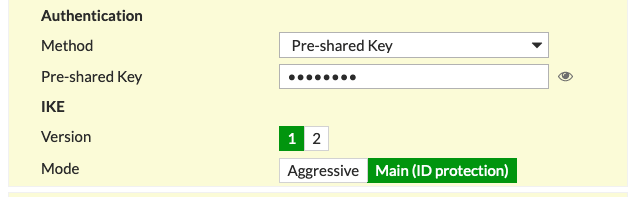
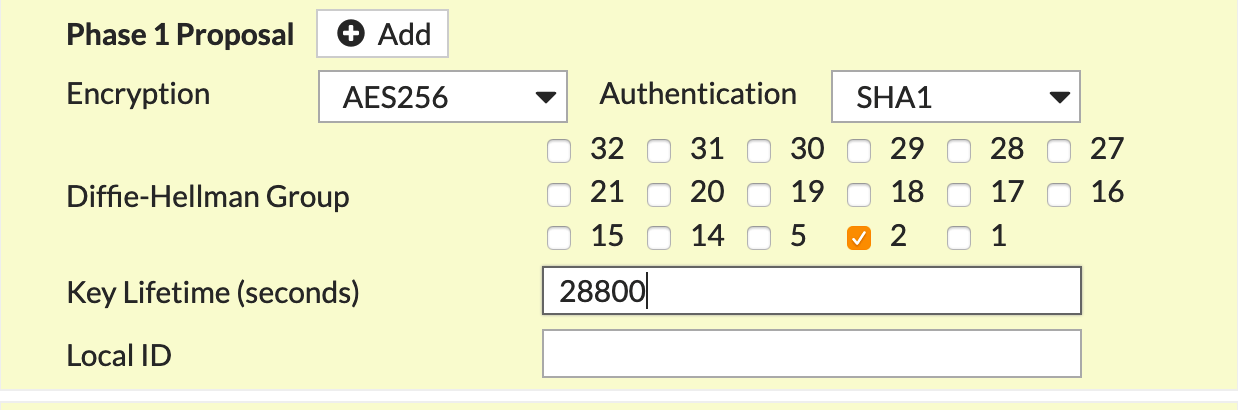

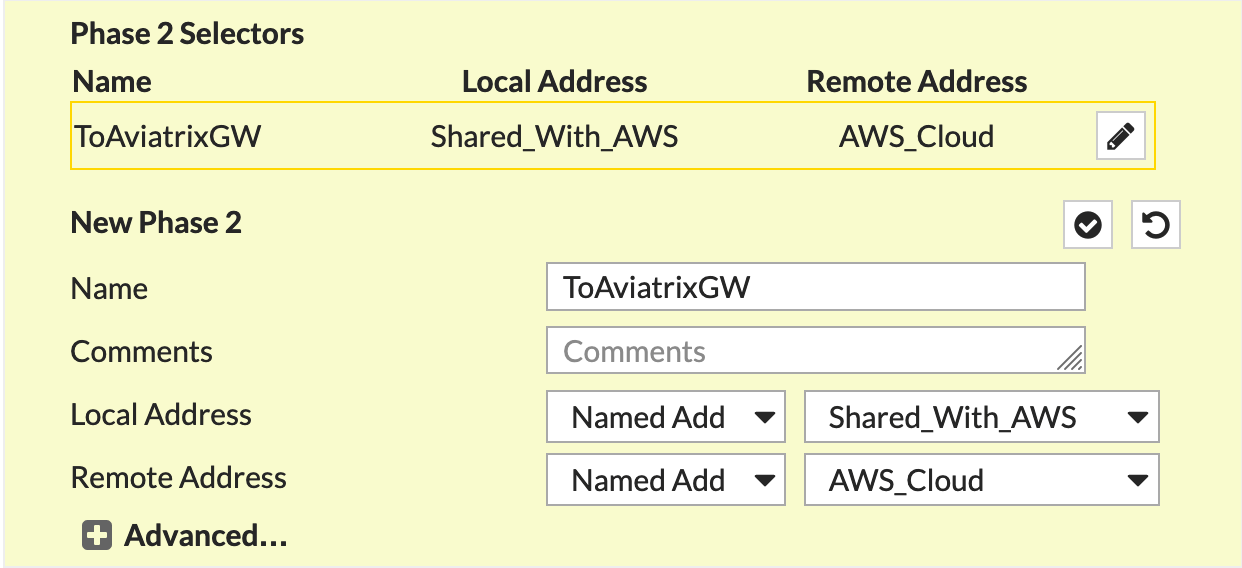
Obtain the values from the downloaded configuration file.
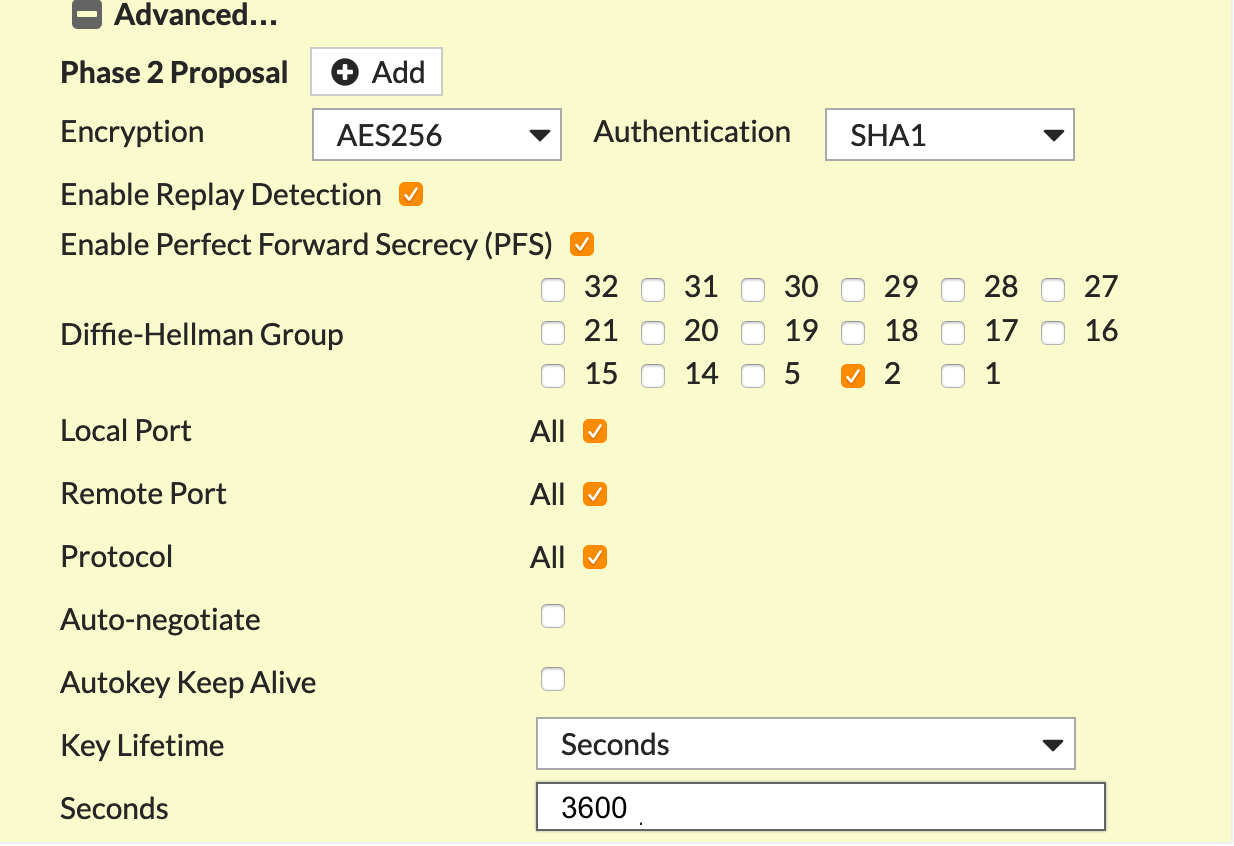
- Click OK.
- Navigate to Network > Interfaces.
-
Click on the Tunnel created above (e.g. aviatrix-gatew) and assign the IP
address from the downloaded configuration file.
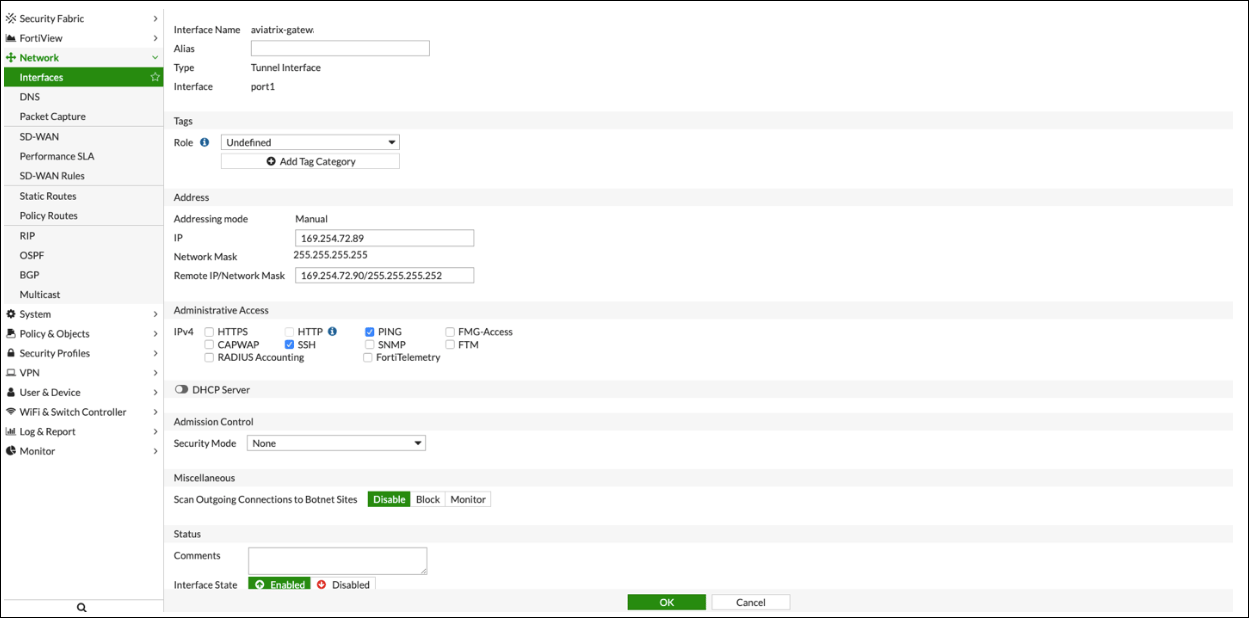
Configure IPv4 Policy
- Go to Policy & Objects > IPv4 DoS Policy.
- Create two new IPv4 policies:
- Outbound traffic from FortiGate (Shared_With_AWS) to Aviatrix (AWS_Cloud)
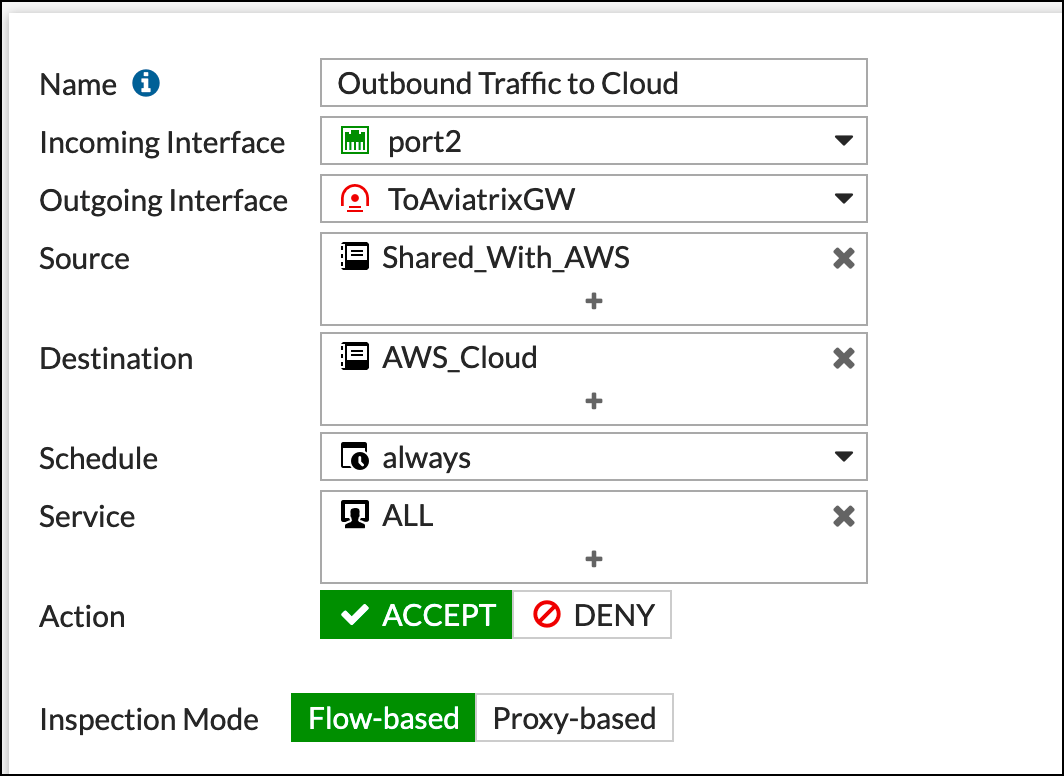
- Inbound traffic from Aviatrix (AWS_Cloud) to FortiGate (Shared_With_AWS)
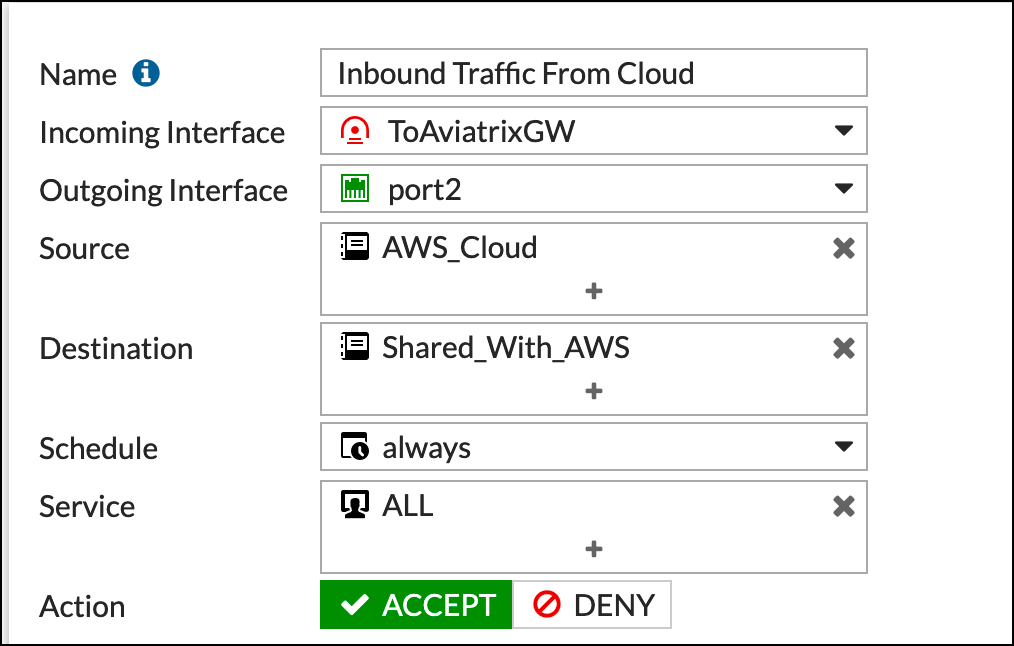
The reference to port2 in the screenshots should be replaced with your own
interface name that represents the internal facing interface.
Be sure to select ACCEPT for “action” and select ALL for “service.”
Adding a Static Route
In the FortiGate UI, go to Network > Static Routes and add a new static route for traffic destined to “AWS_Cloud” to use the VPN tunnel.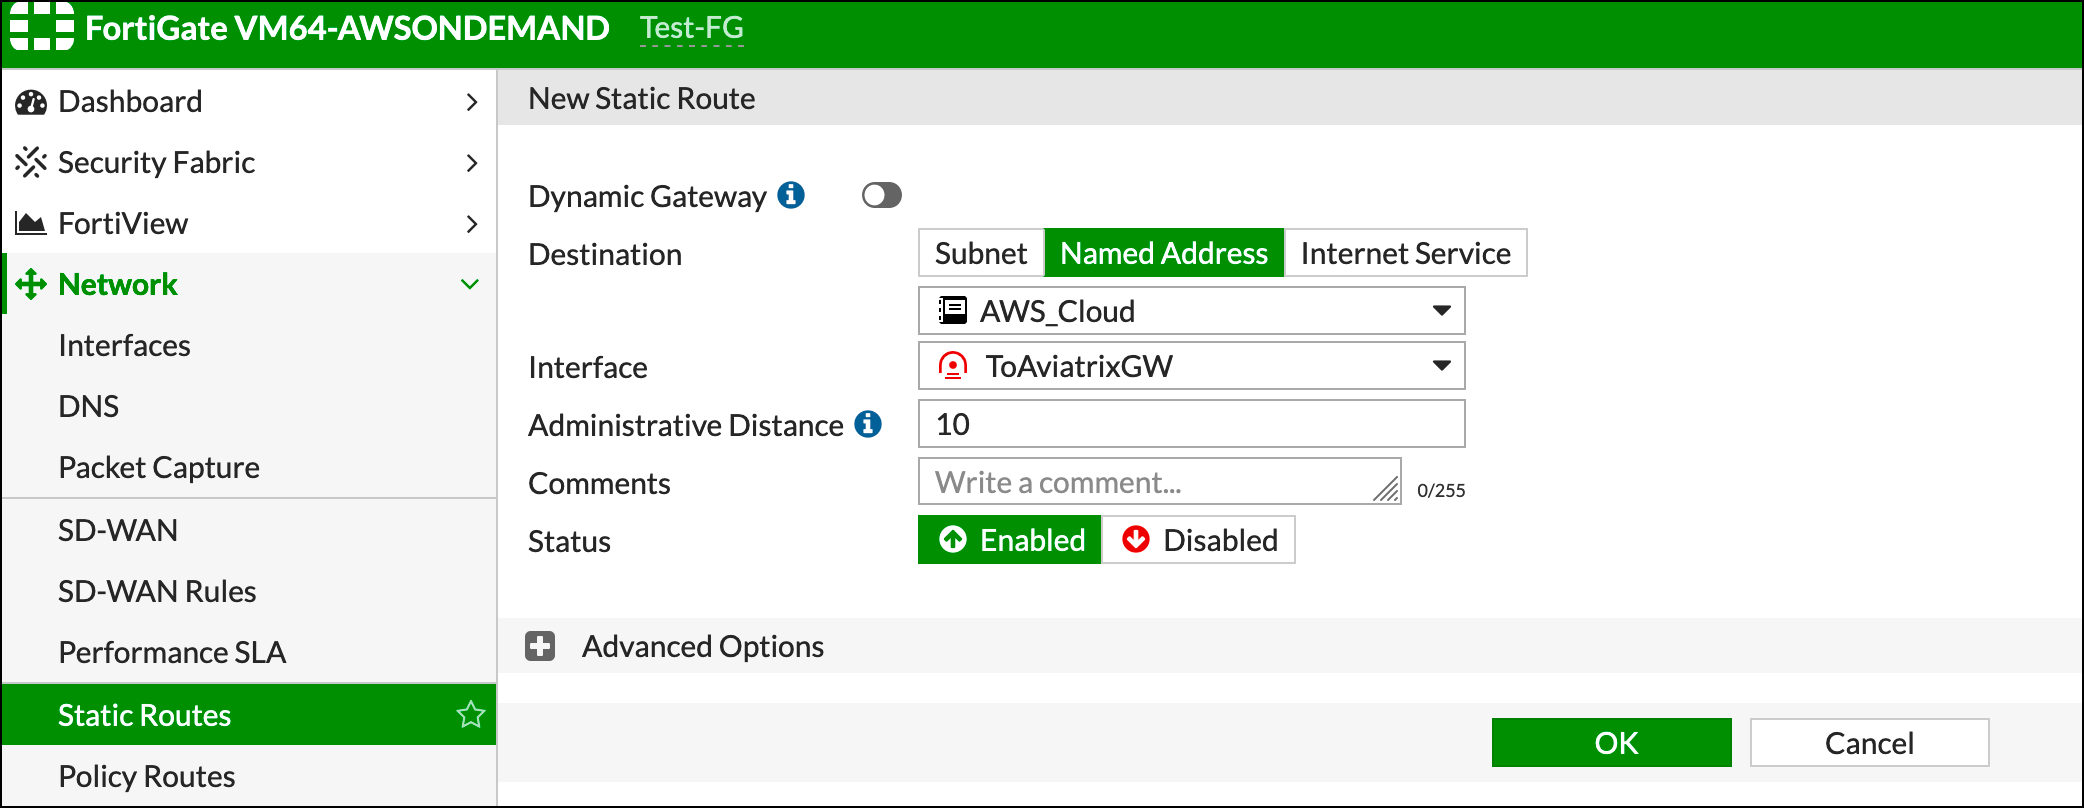
If Named Address is disabled, be sure that you enabled Static Route
Configuration on the Address configuration.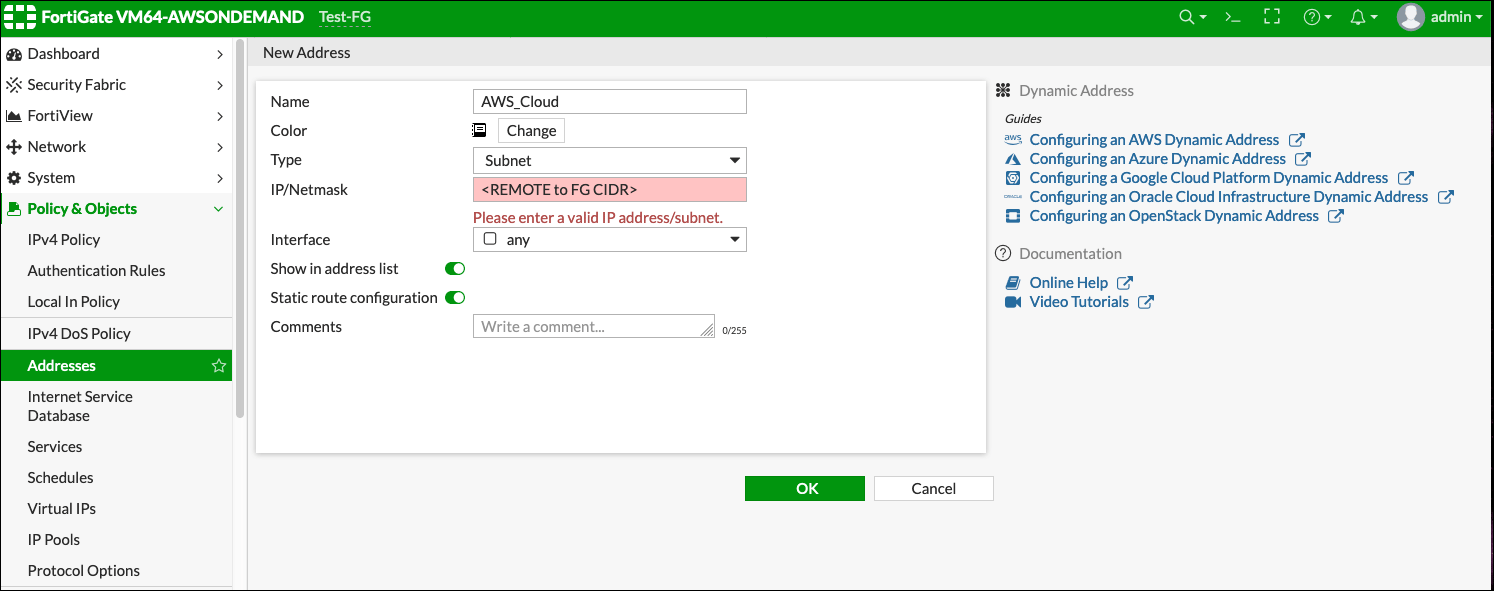
IPsec Monitor
- In the Fortigate UI, navigate to Dashboard > Network and click the IPsec widget.
- Select the Aviatrix tunnel, and click Bring Up.
- You can then check the tunnel status in CoPilot under Diagnostics > Cloud Routes.
Troubleshoot
Error Messagefailed to get valid proposal
no suitable proposal found
Solution
Check that the Phase 1 authentication, encryption, and Diffie-Hellman groups
match on both sides.
If you are experiencing low IPsec throughput, you may want to configure two
commands on the Fortigate.