If you do not have access to AWS, you can simulate an on-prem Firewall by
deploying the Palo Alto Firewall in any other cloud (such as Microsoft Azure,
Google Cloud Platform, or Oracle Cloud Infrastructure).
Launching Check Point Security Gateway VM
Refer to the Check Point vSEC for AWS Lab Setup Guide to launch a CheckPoint VM with at least two network interfaces. One interface serves as a WAN port and is in VPC2’s public subnet. The other interface serves as a LAN port and is in VPC2’s private subnet. Collect the public IP address of the WAN port.Creating an External Connection
- In Aviatrix CoPilot, launch an Aviatrix Transit Gateway in VPC1’s public subnet. Collect both the public and private IP address of the Gateway.
- Navigate to Networking > Connectivity > External Connections (S2C) and click Add New to create a Site2Cloud connection (selecting Pre-Shared Key) using the values for one of the below options:
- Remote Device Type: Generic
- Algorithms: turn Off
- Remote Device IP: Public IP of the Check Point VM WAN port
- Remote Subnet CIDR(s): 10.10.1.0/24 (VPC2 private subnet)
- Local Subnet CIDR(s): 10.0.2.0/24 (VPC1 private subnet)
- After the connection is created, select the vertical ellipsis
 menu for that
connection and select Download Configuration.
menu for that
connection and select Download Configuration. - Select Generic from the Vendor dropdown list and click the Download to download the external (S2C) configuration. Use this configuration file to configure the tunnels and interfaces in your Check Point VM firewall.
Downloading and Installing SmartConsole
- Using a browser, connect to the Gaia Portal of the CheckPoint-VM at
https:/CheckPoint-VM_Public-IP:
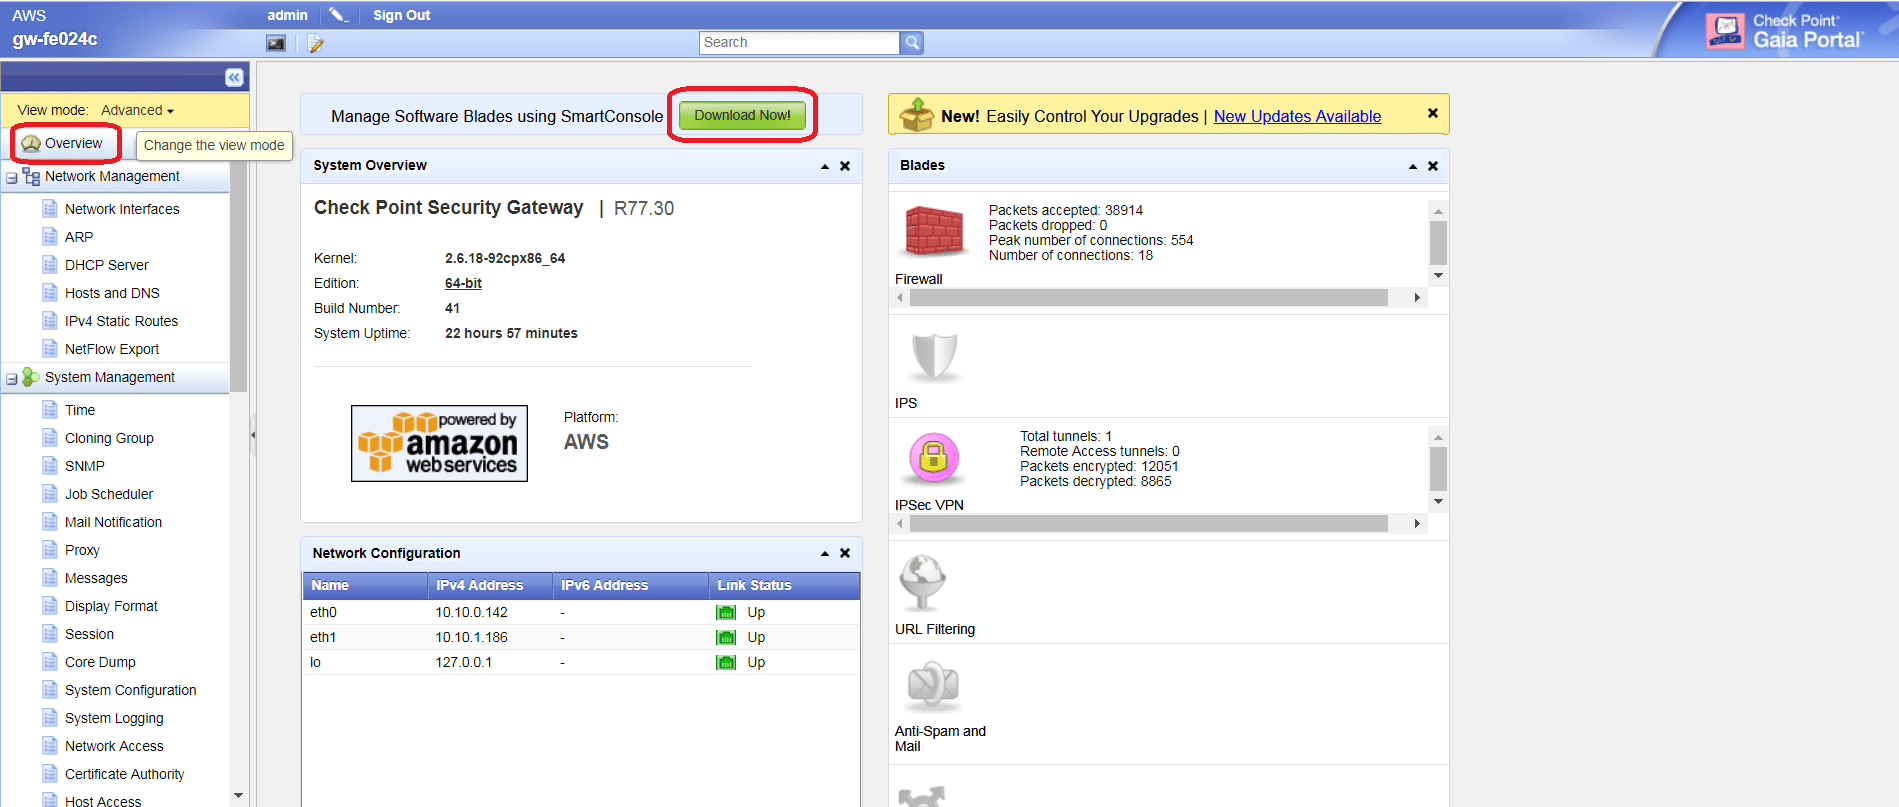
- Click Overview at the left navigation bar, and then click Download Now! to download SmartConsole.
- Install SmartConsole at your local machine and launch SmartDashboard.
Creating Network Objects at SmartConsole
- At the Check Point SmartDashboard window, select the Desktop tab. Right click the Networks folder at the left navigation bar and select Network.
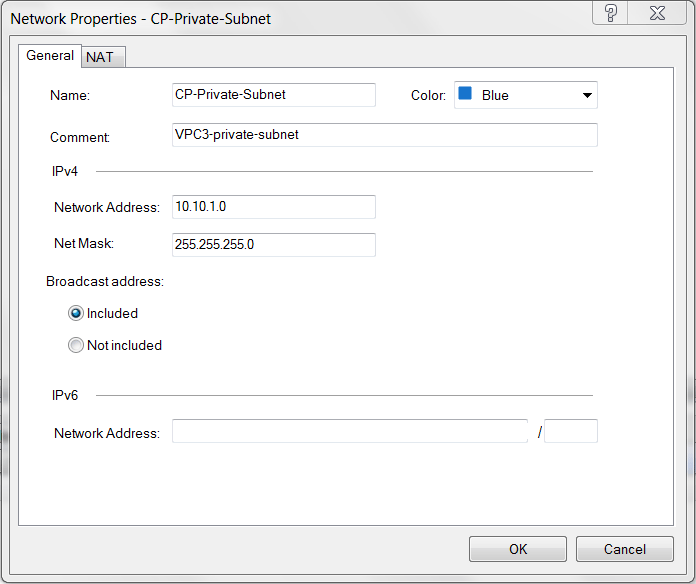
- Create one network for private subnet of VPC2 (Check Point VPC).
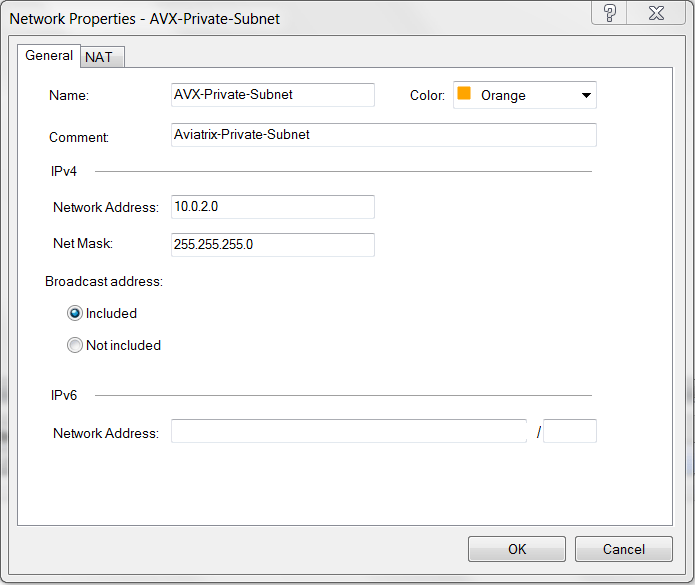
- Create one network for private subnet of VPC1 (Aviatrix Gateway VPC).
Configuring Check Point Security Gateway with VPN
- At the SmartDashboard window, select the Desktop tab and expand the Check Point folder at the left navigation bar. Note that your gateway VM with the name format “gw-xxxxxx” is automatically created.
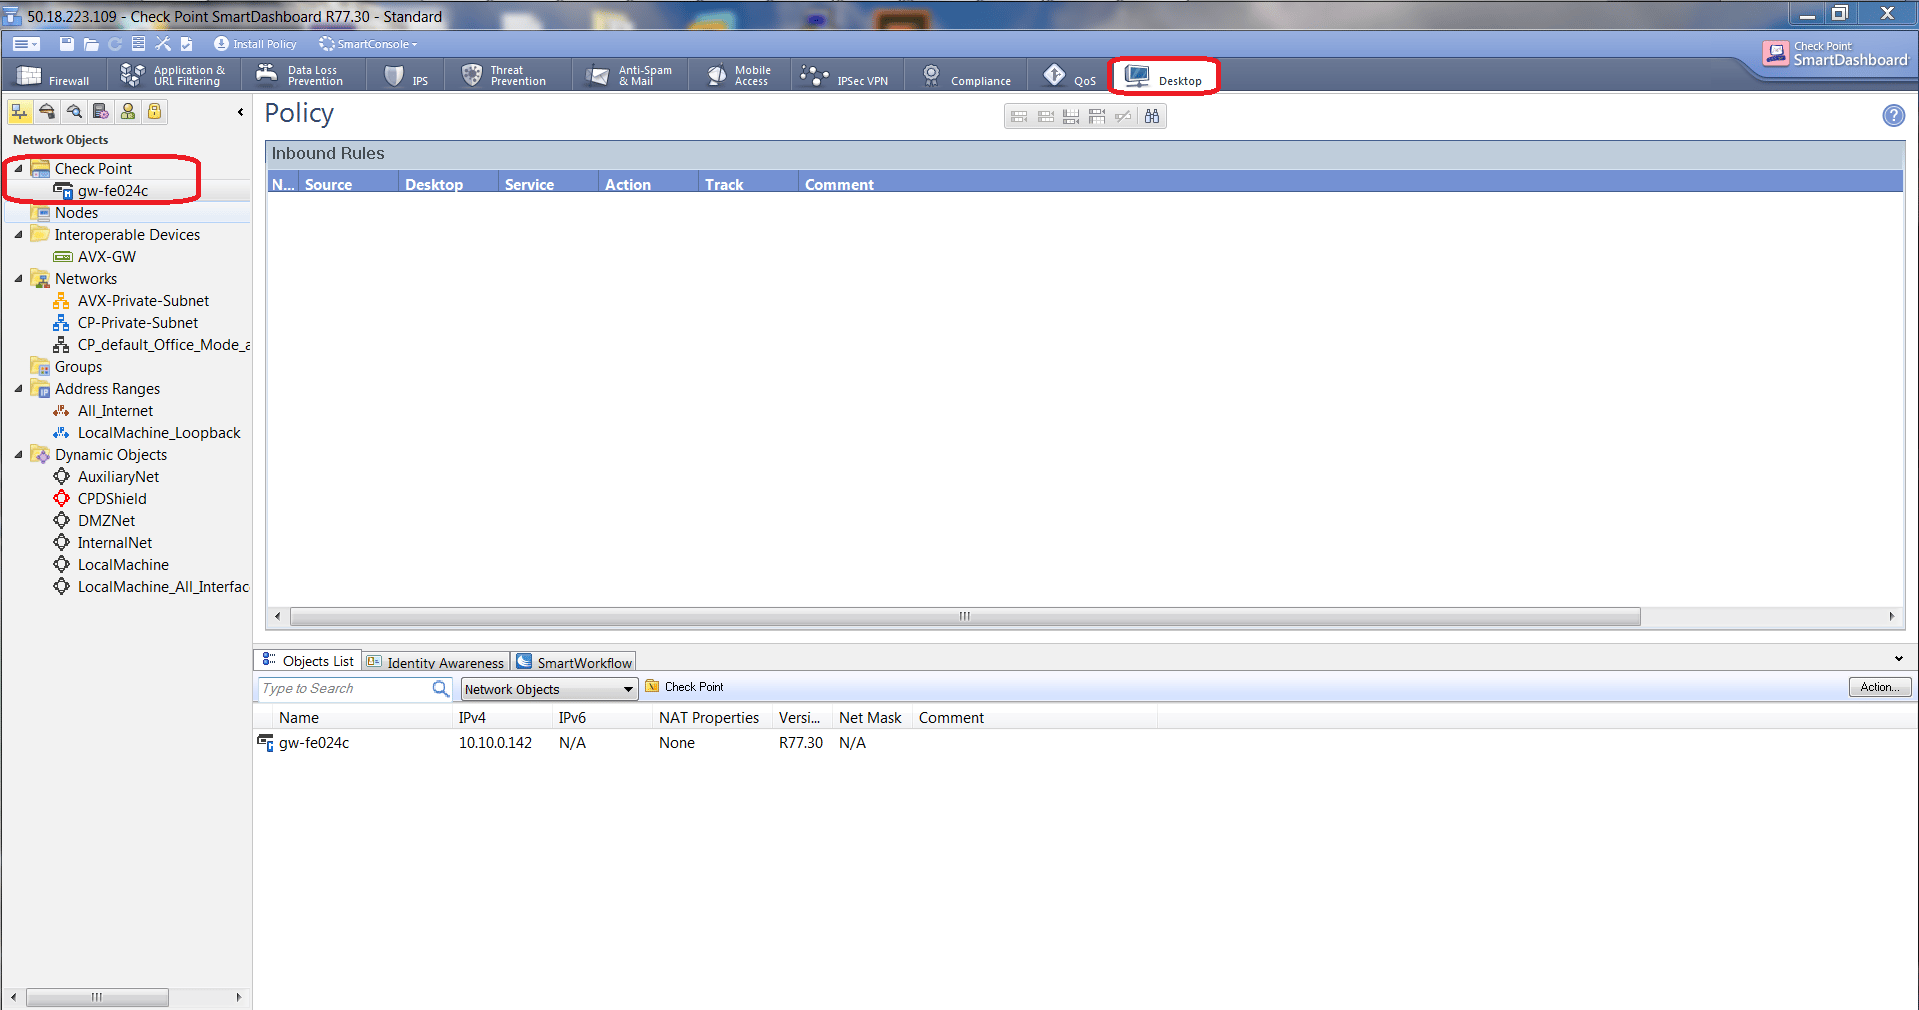
- Right-click the gateway name and select Edit from the menu.
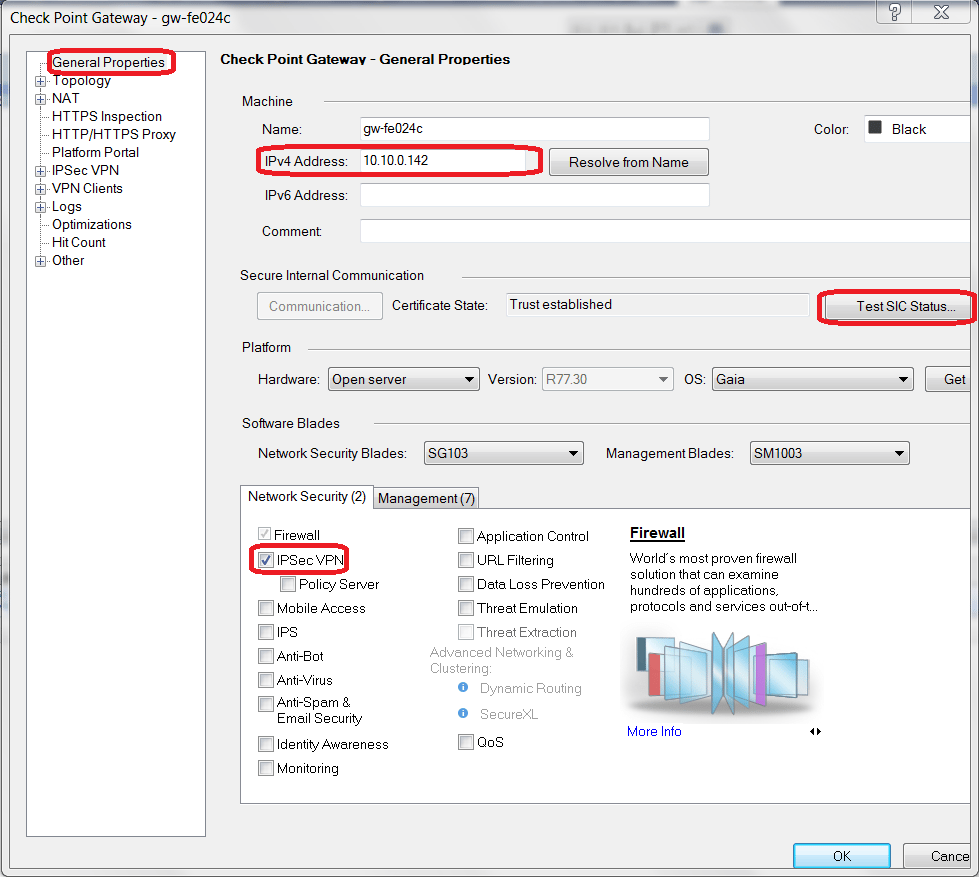
- At the Check Point Gateway > General Properties window:
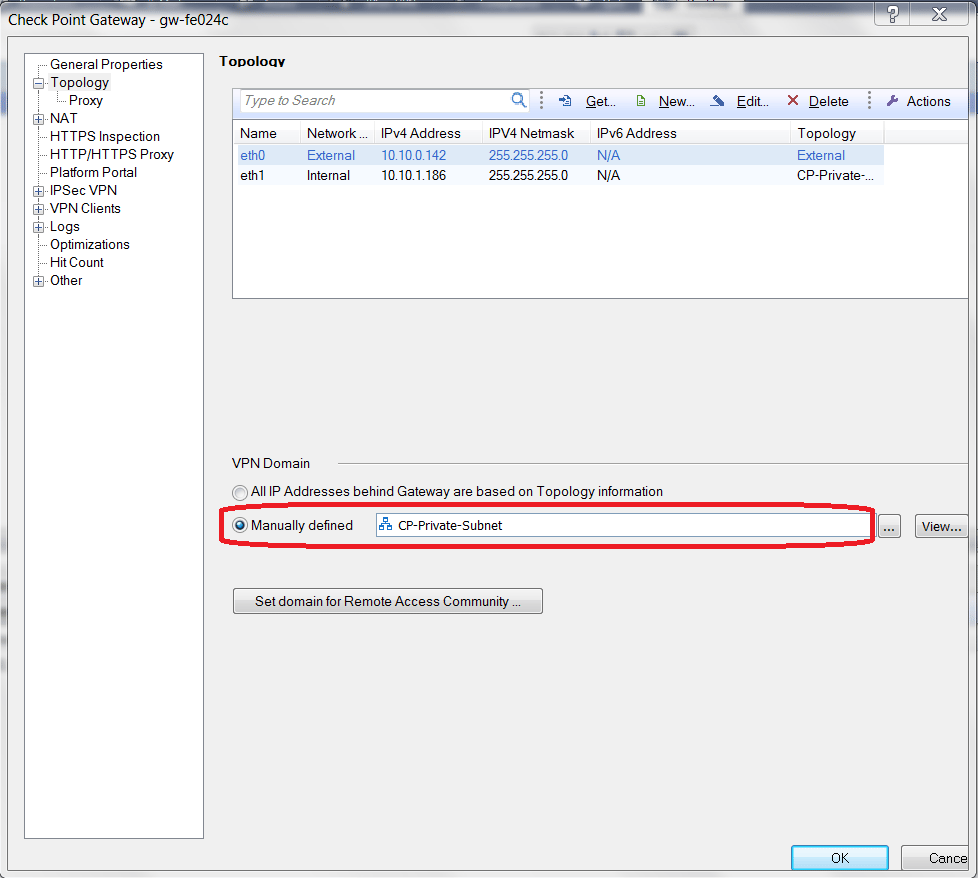
- At Check Point Gateway - Topology window, select Manually defined for VPN Domain. Select the network created when you created a network for private subnet of VPC2 (Check Point VPC).
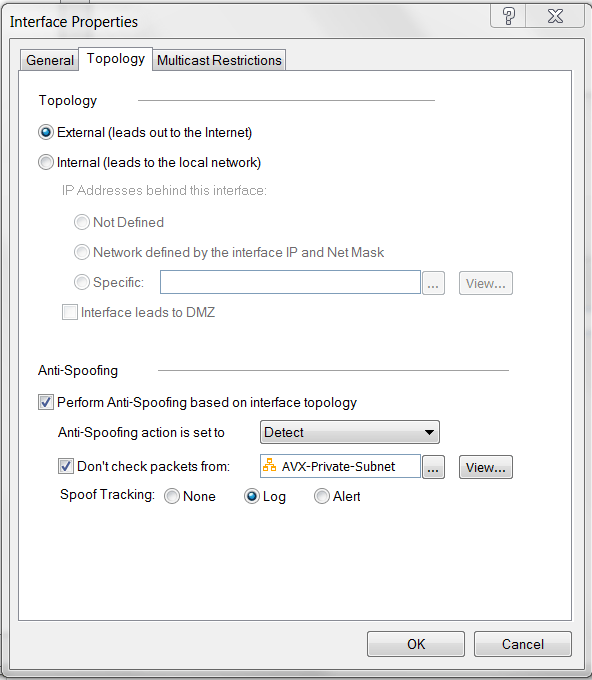
- At Check Point Gateway - Topology window, double-click “eth0” (Check Point WAN port). Select External (leads out to the Internet).
- At Check Point Gateway - Topology window, double click “eth1” (Check Point LAN port). Select Internal (leads to the local network).
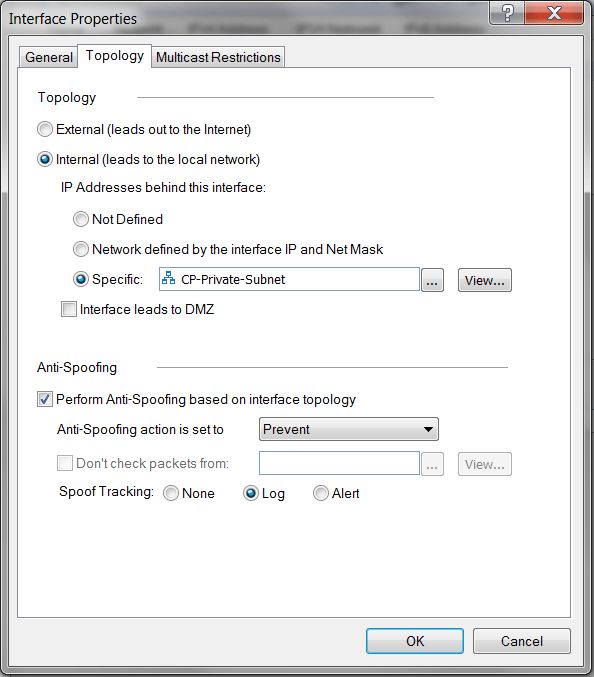
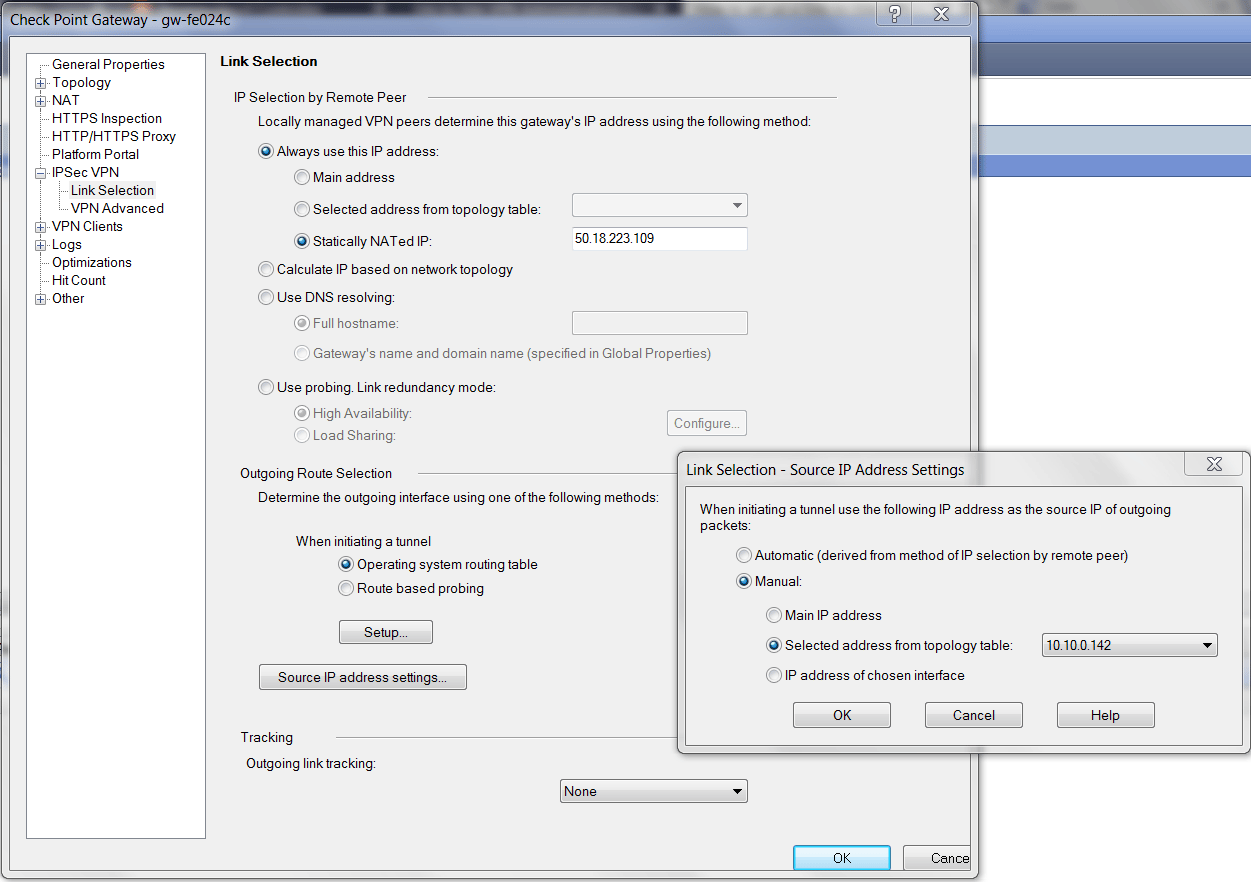
- At the Check Point Gateway - IPsec VPN - Link Selection window, configure the parameters as follows:
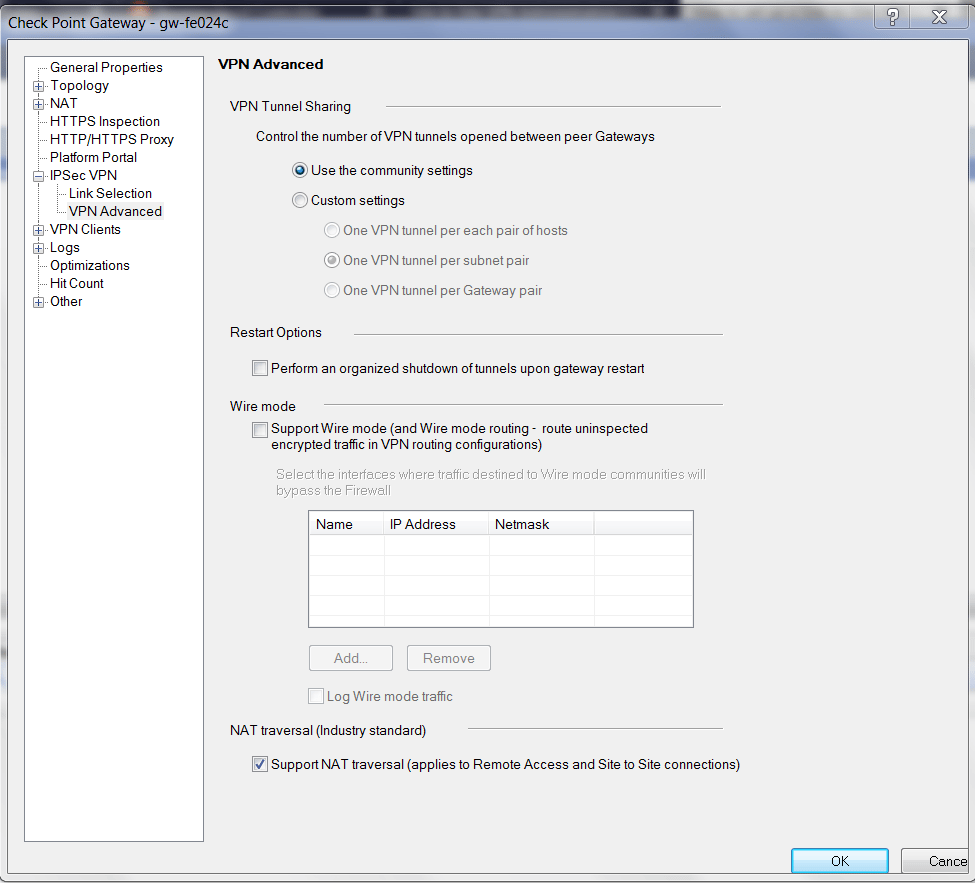
- At the Check Point Gateway - IPsec VPN - VPN Advanced window, configure the parameters as follows:
Configuring an Interoperable Device to Represent Aviatrix Gateway
- At Check Point SmartDashboard window, select the Desktop tab. Right-click the Networks folder at the left navigation bar to create a new interoperable device.
- At the Interoperable Device - General Properties window:
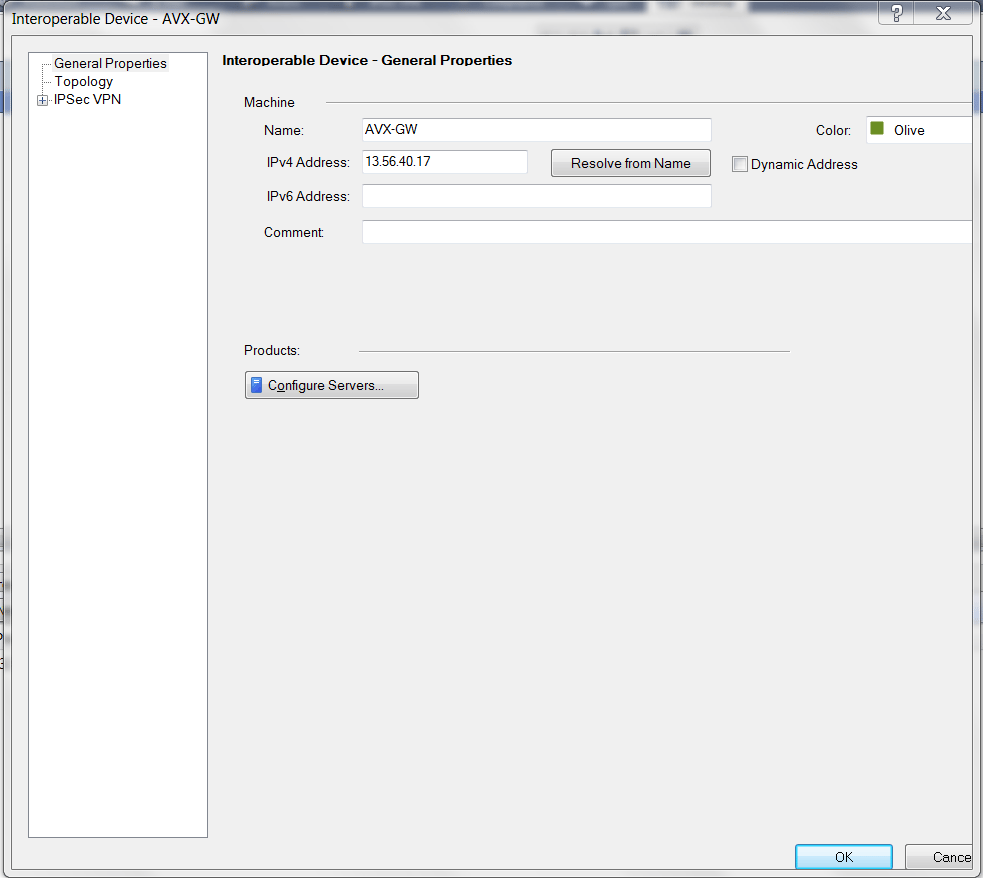
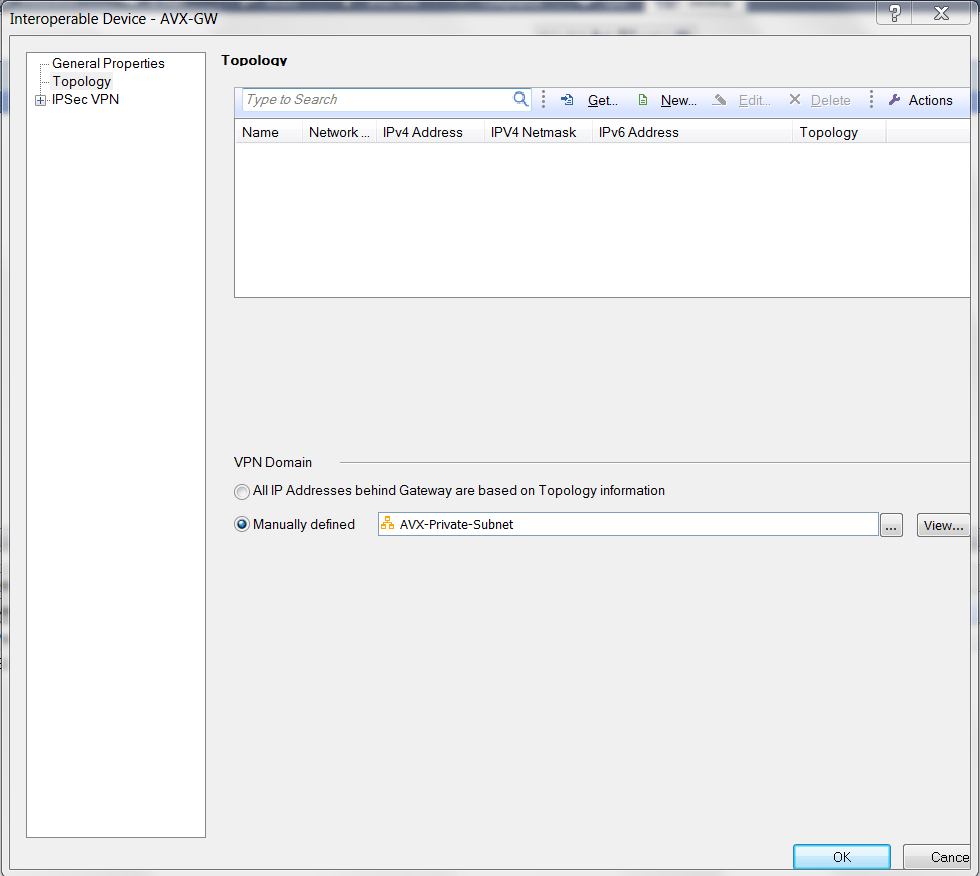
- At the Interopable Device - Topology window, select Manually defined for VPN Domain. Select the network private subnet of VPC1 (Aviatrix Gateway VPC) you created above.
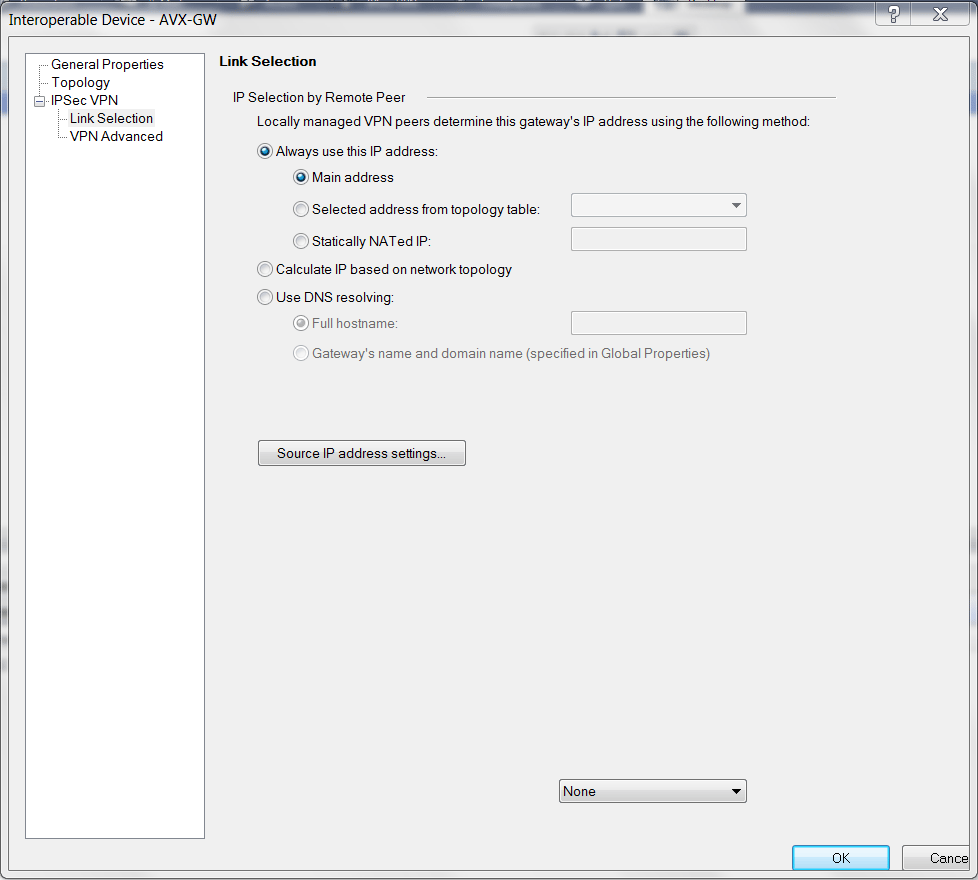
- At the Interopable Device - IPsec VPN - Link Selection window, select Always use this IP address > Main Address.
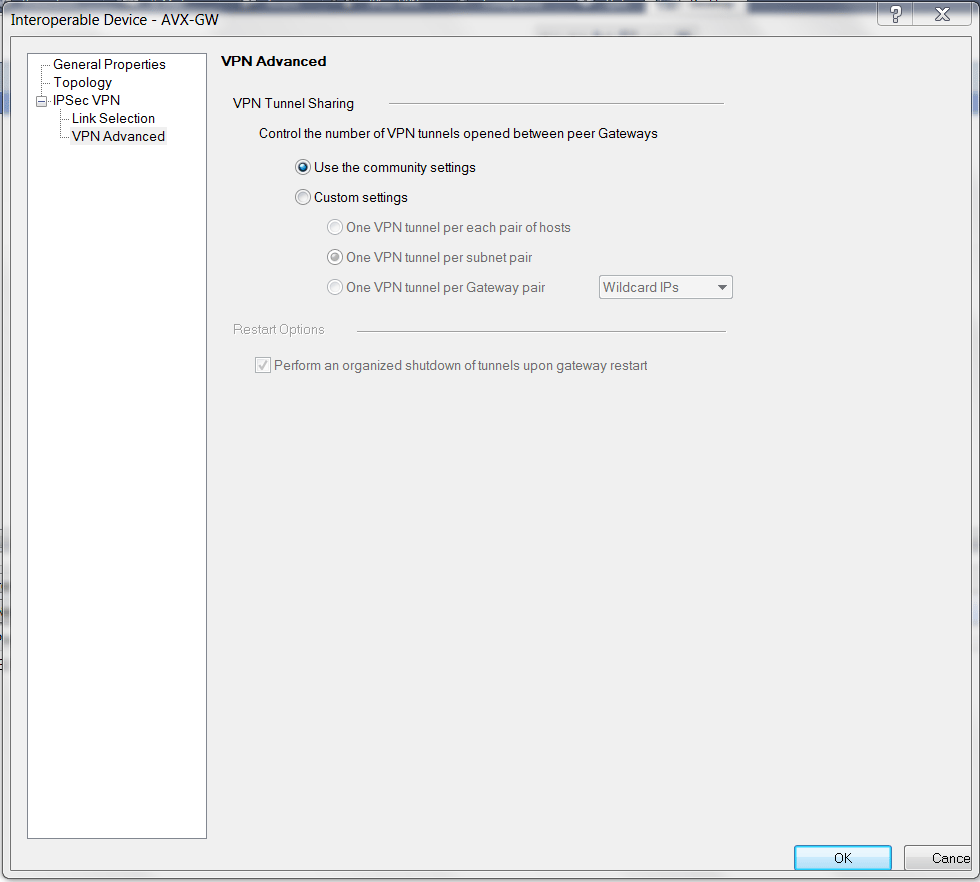
- At the Interopable Device - IPsec VPN - VPN Advanced window, select Use the community settings.
Creating a VPN Community
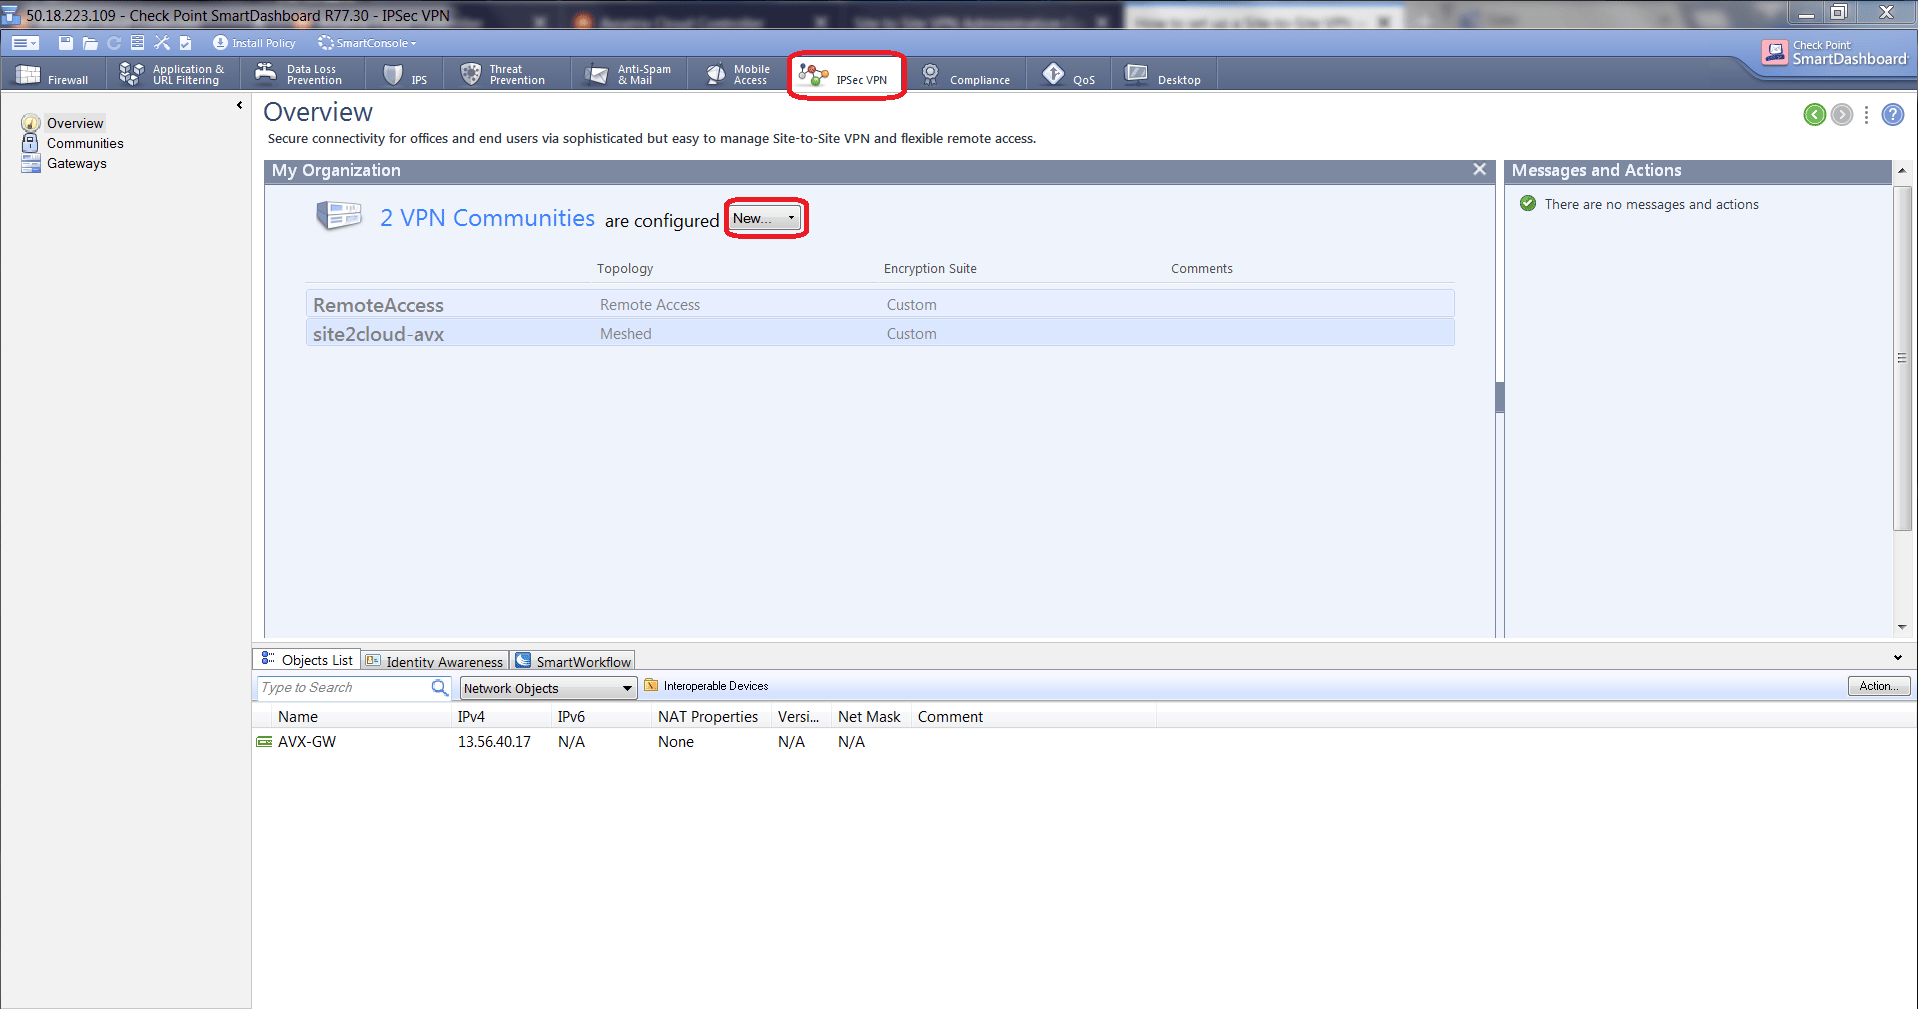
- At SmartDashboard IPsec VPN tab, select Overview from left navigation bar. Click New to create a Meshed Community.
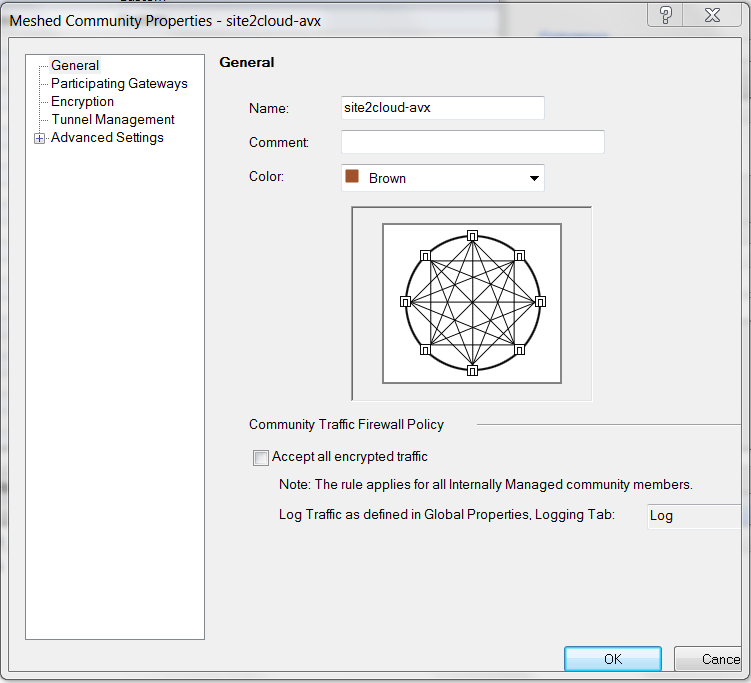
- At Meshed Community Properties - General window, create one community with a name (e.g. Site2Cloud-avx).
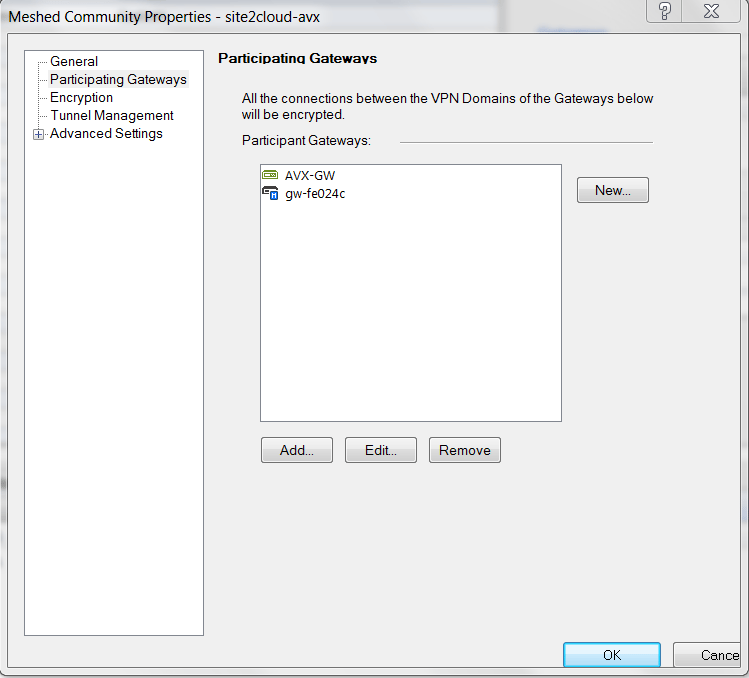
- At Meshed Community Properties - Participating Gateways window, add both Check Point Security Gateway (e.g. gw-fe024c) and the interopable device created when you configured an interoperable device to represent the Aviatrix Gateway (e.g. AVX-GW) to this community.
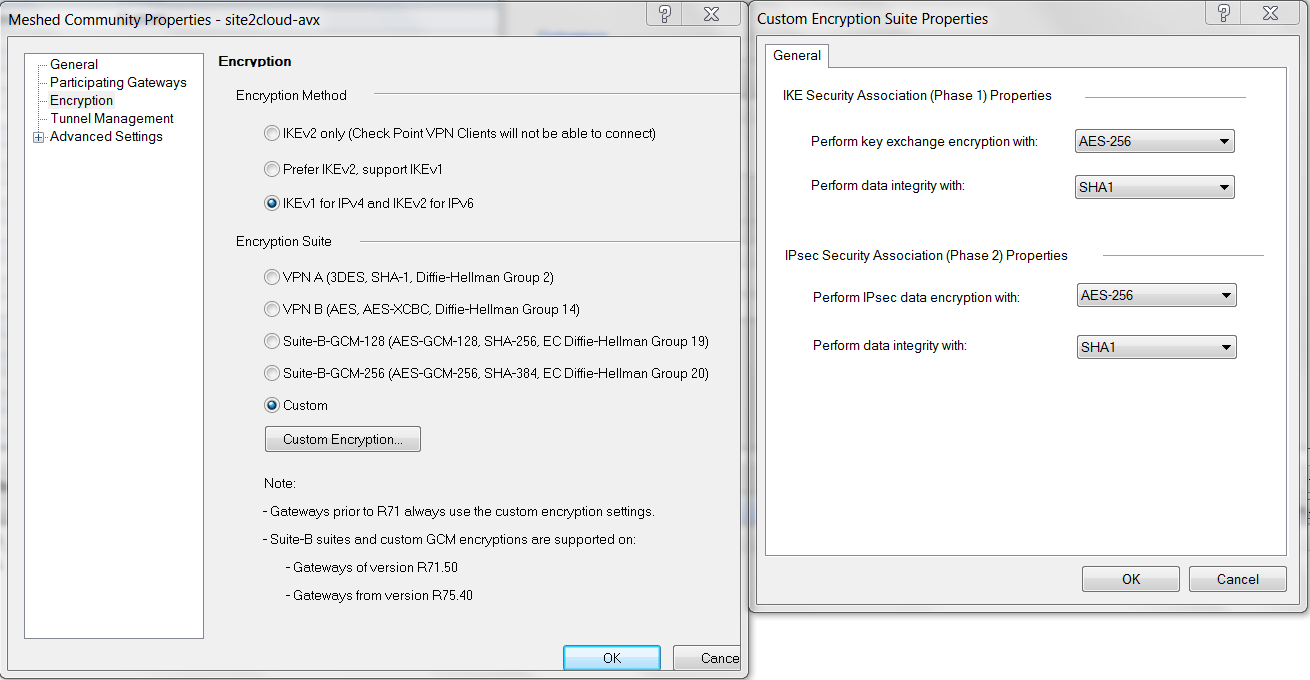
- At Meshed Community Properties - Encryption window, select the options according to the Site2Cloud configuration for configuring CheckPoint-VM you saved and downloaded above.
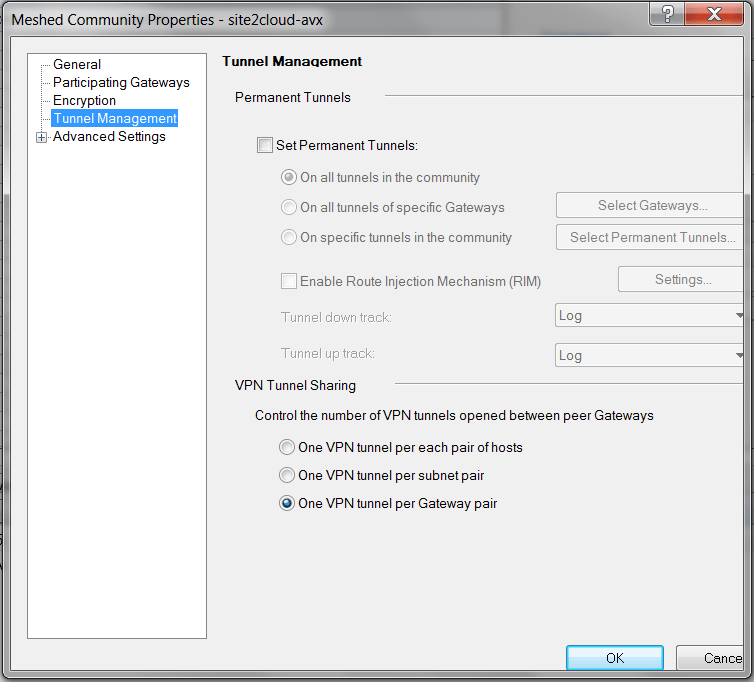
- At Meshed Community Properties - Tunnel Management window, select One VPN tunnel per Gateway pair for VPN Tunnel Sharing.
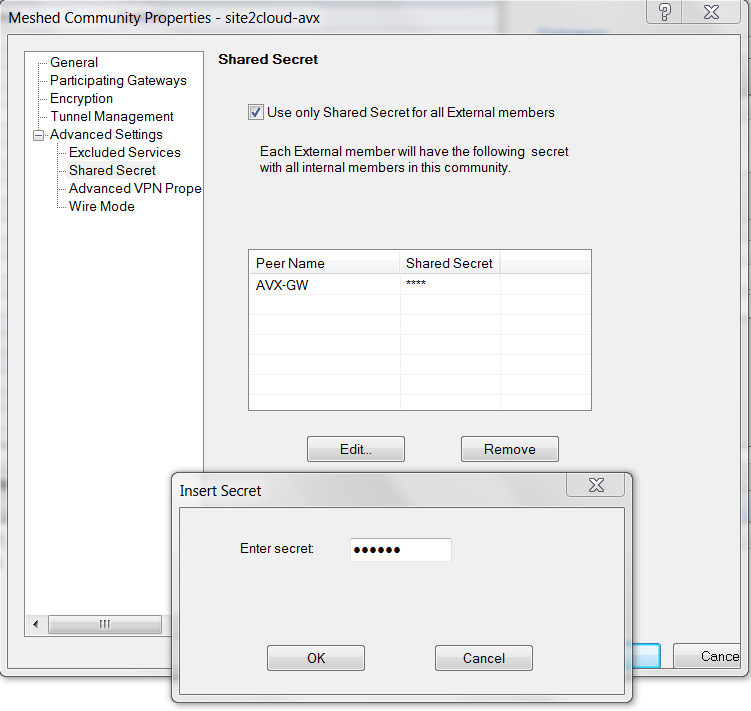
- At the Meshed Community Properties - Advanced Settings - Shared Secret window, enter Shared Secret by copying the Pre-Shared Key from the Site2Cloud configuration downloaded above.
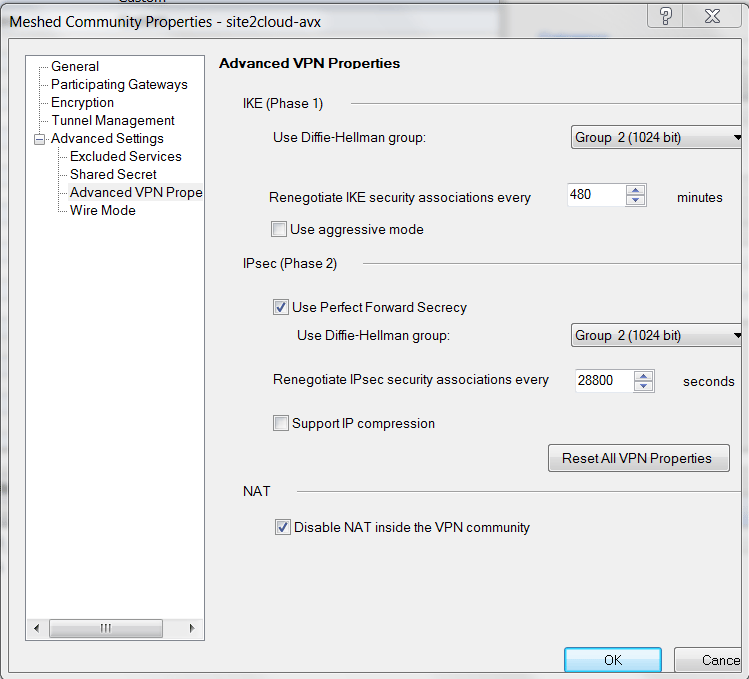
- At the Meshed Community Properties - Advanced Settings - Advanced VPN Properties window, enter the Phase1 and Phase2 parameters according to the Site2Cloud configuration downloaded above.
Creating Firewall Rule for VPN Traffic
- At SmartDashboard window, select the Firewall tab.
- Select Policy to add a new rule.
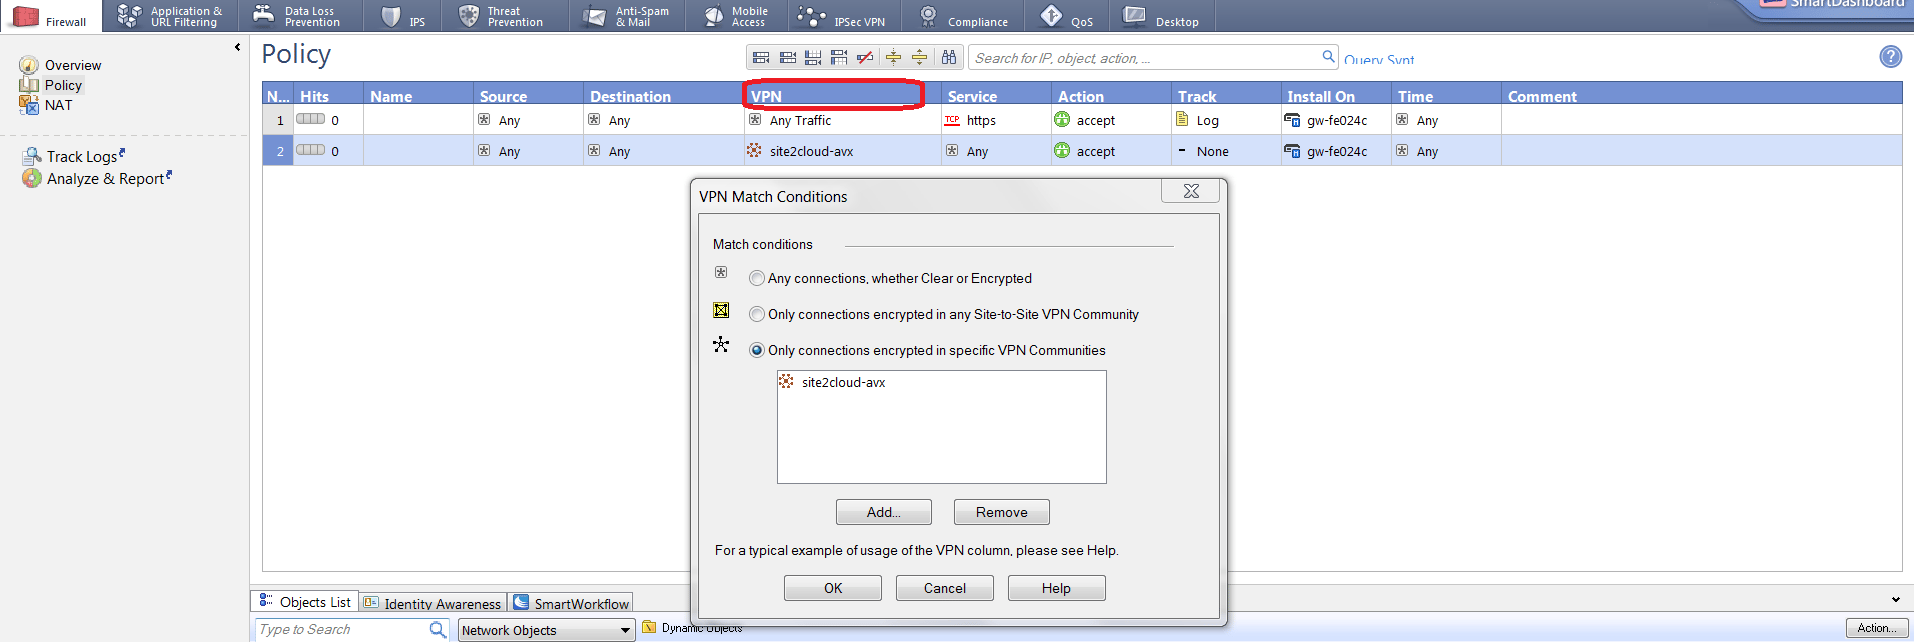
- Click Install Policy to push the firewall policy to the Check Point Security Gateway.

Troubleshooting and Verifying at Check Point Security Gateway
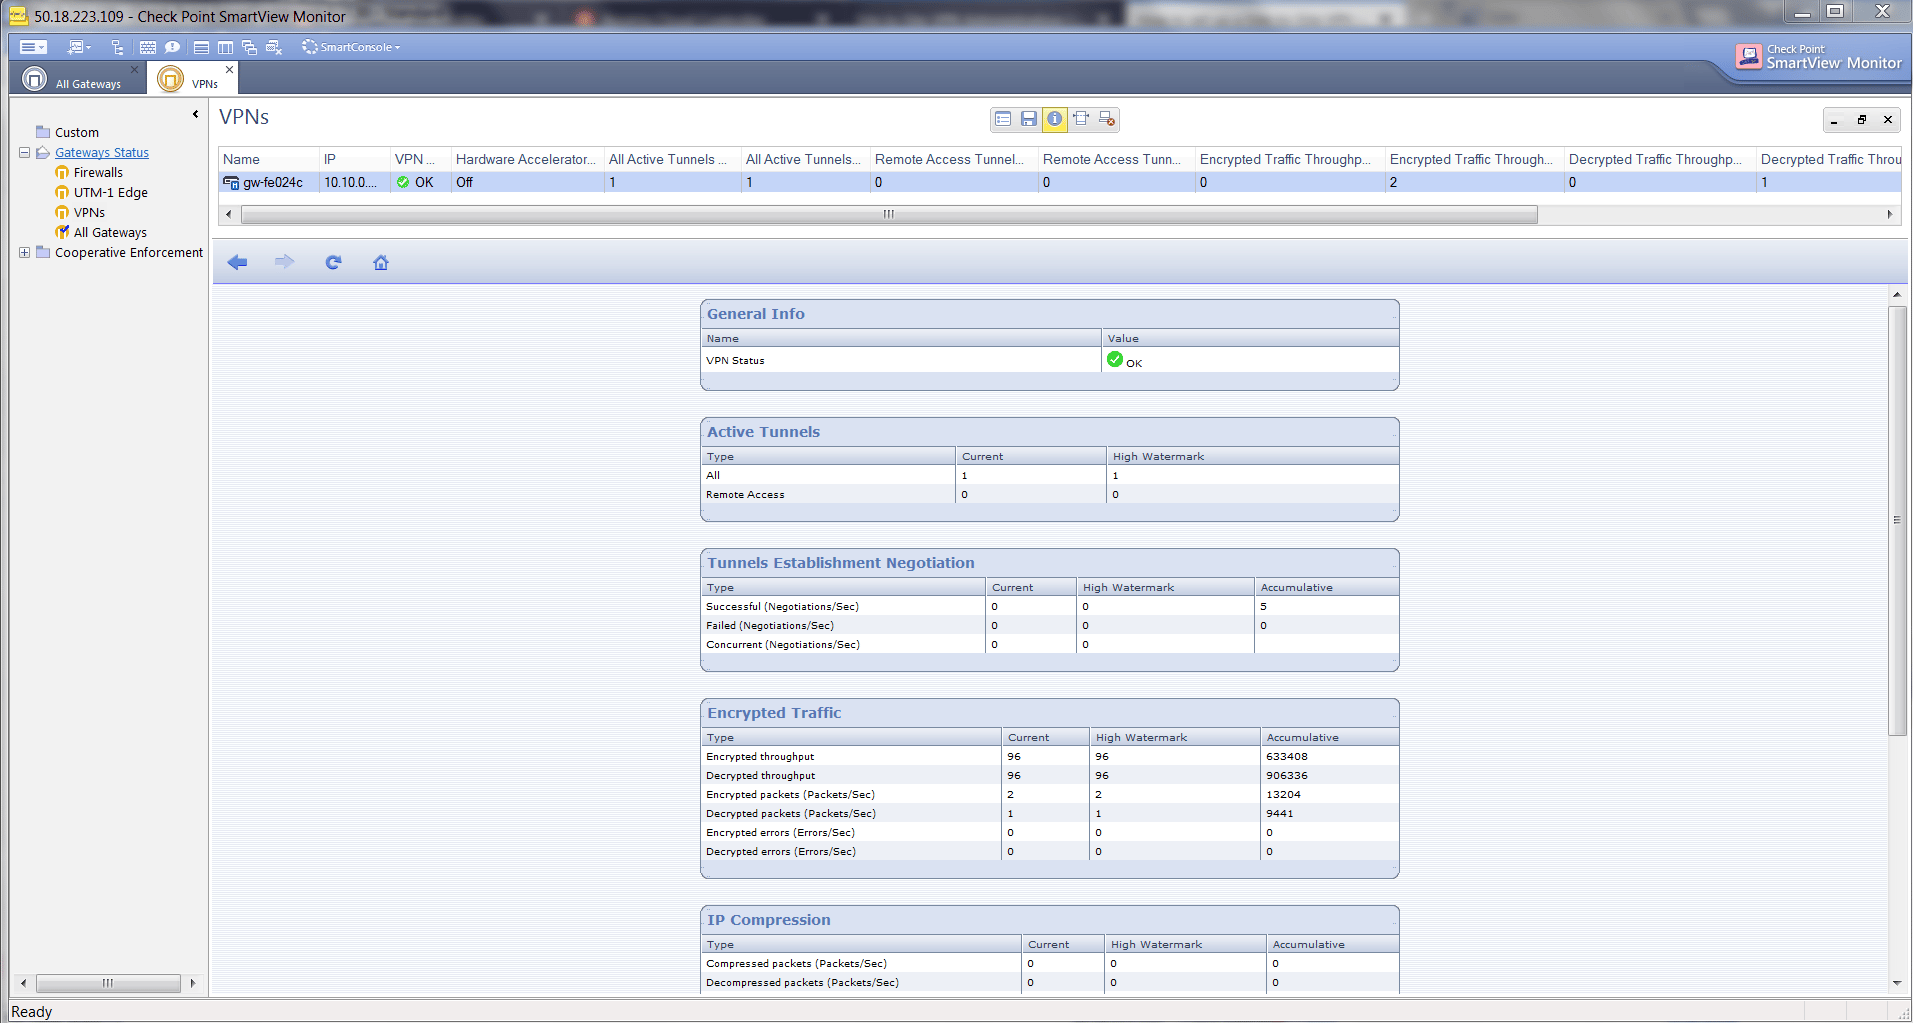
- At SmartDashboard window, from SmartConsole dropdown list, select SmartView Monitor.
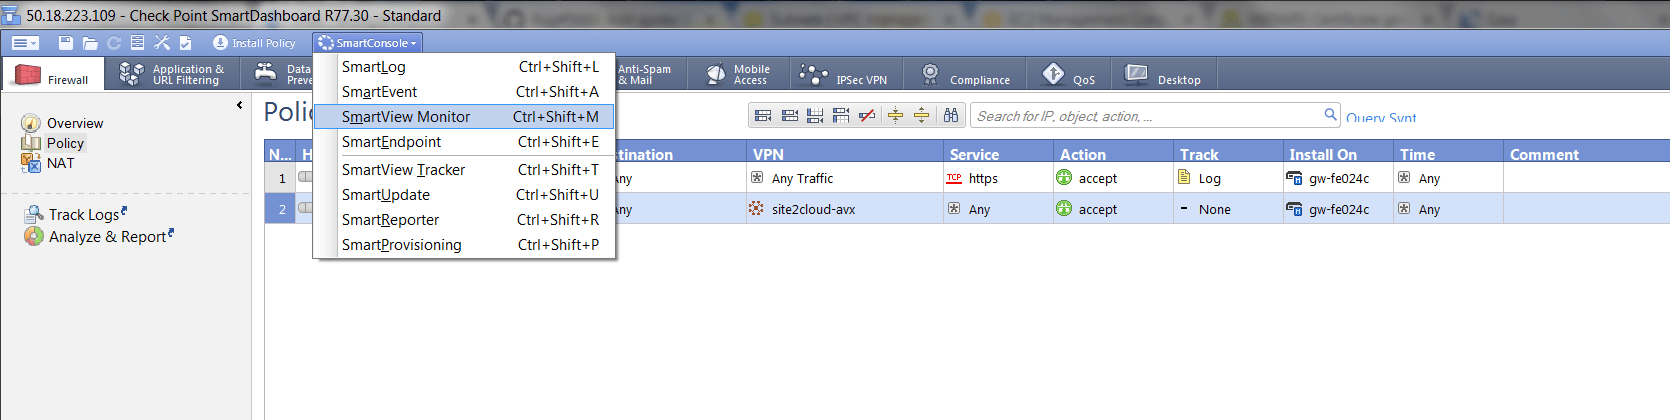
- At the SmartView Monitor window, select VPNs from Gateway Status and verify Encrypted Traffic.