> ## Documentation Index
> Fetch the complete documentation index at: https://docs.aviatrix.com/llms.txt
> Use this file to discover all available pages before exploring further.
# Aviatrix VPN Client User Guide
> 2. Run the installer and follow the onscreen instructions to install the application.
## Installing and Launching the Application
### Windows
1. Download the Aviatrix VPN Client installer
[here](https://s3-us-west-2.amazonaws.com/aviatrix-download/AviatrixVPNClient/AVPNC_win_x64.exe).
2. Run the installer and follow the onscreen instructions to install the
application.
If you have installed UserVPN previously, TUN TAP drivers would have been
installed. If they are not installed , you can install the same from
[this link](https://s3-us-west-2.amazonaws.com/aviatrix-download/AviatrixVPNClient/tap-windows-9.21.2.exe).
3. Save the VPN configuration file (with the extension .ovpn) that was sent to
you by your Admin, on to your machine.
4. Open the Aviatrix VPN Client application by going to Start Menu > Aviatrix
VPN Client > Aviatrix VPN Client.
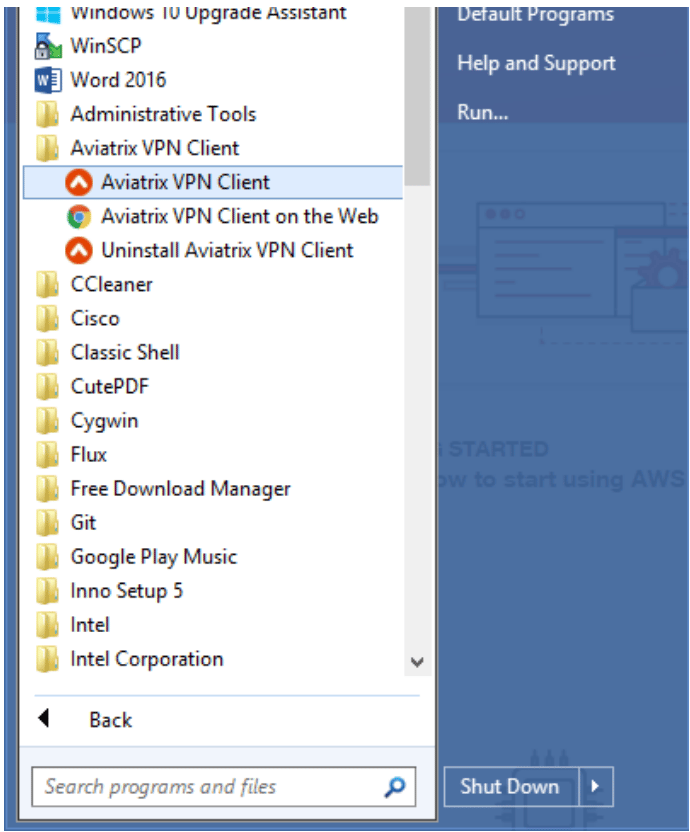 5. A UAC window opens. Allow administrator access so that the application can
modify the routing tables. The Aviatrix VPN Client window should open.
6. Skip to the [Using the Application](#using-the-application) section if you do
not need to install it on a Mac or Linux.
### Mac
1. Download the Aviatrix VPN Client installer from
[this link](https://s3-us-west-2.amazonaws.com/aviatrix-download/AviatrixVPNClient/AVPNC_mac.pkg).
Follow the on-screen instructions to install the application.
2. Save the OpenVPN configuration file (with the extension .ovpn) that was sent
to you by your Admin, on to your machine.
3. Start the Aviatrix VPN Client application by going to LaunchPad and clicking
on "Aviatrix VPN Client".
4. A popup requests sudo privileges to modify routing tables.
5. A UAC window opens. Allow administrator access so that the application can
modify the routing tables. The Aviatrix VPN Client window should open.
6. Skip to the [Using the Application](#using-the-application) section if you do
not need to install it on a Mac or Linux.
### Mac
1. Download the Aviatrix VPN Client installer from
[this link](https://s3-us-west-2.amazonaws.com/aviatrix-download/AviatrixVPNClient/AVPNC_mac.pkg).
Follow the on-screen instructions to install the application.
2. Save the OpenVPN configuration file (with the extension .ovpn) that was sent
to you by your Admin, on to your machine.
3. Start the Aviatrix VPN Client application by going to LaunchPad and clicking
on "Aviatrix VPN Client".
4. A popup requests sudo privileges to modify routing tables.
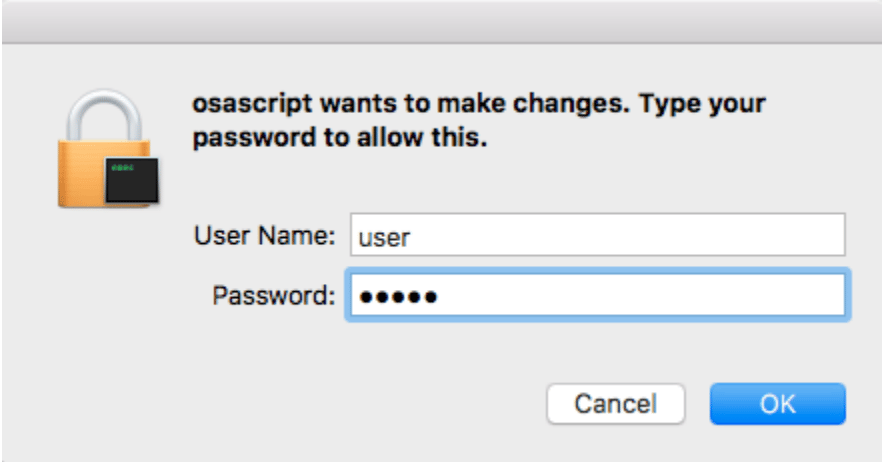 5. This opens the application window.
6. Skip to the [Using the Application](#using-the-application) section if you do
not need to install it on Linux.
### Linux |lux|
1. Download the Aviatrix VPN Client installer from
[this link](https://s3-us-west-2.amazonaws.com/aviatrix-download/AviatrixVPNClient/AVPNC_linux.tar.gz).
2. To install the application run the following commands:
```bash theme={null}
tar -xvzf AVPC_linux.tar.gz
sudo ./install.sh
```
3. Save the VPN configuration file (with the extension .ovpn) that was sent to
you by your Admin, on to your machine.
4. To open the "Aviatrix VPN Client" launch a new terminal and type AVPNC.
This has been tested only on Ubuntu 16/14. Theoretically, it should also work
with other flavours of linux as long as openvpn is installed separately.
## Using the Application
### Mac
5. This opens the application window.
6. Skip to the [Using the Application](#using-the-application) section if you do
not need to install it on Linux.
### Linux |lux|
1. Download the Aviatrix VPN Client installer from
[this link](https://s3-us-west-2.amazonaws.com/aviatrix-download/AviatrixVPNClient/AVPNC_linux.tar.gz).
2. To install the application run the following commands:
```bash theme={null}
tar -xvzf AVPC_linux.tar.gz
sudo ./install.sh
```
3. Save the VPN configuration file (with the extension .ovpn) that was sent to
you by your Admin, on to your machine.
4. To open the "Aviatrix VPN Client" launch a new terminal and type AVPNC.
This has been tested only on Ubuntu 16/14. Theoretically, it should also work
with other flavours of linux as long as openvpn is installed separately.
## Using the Application
### Mac
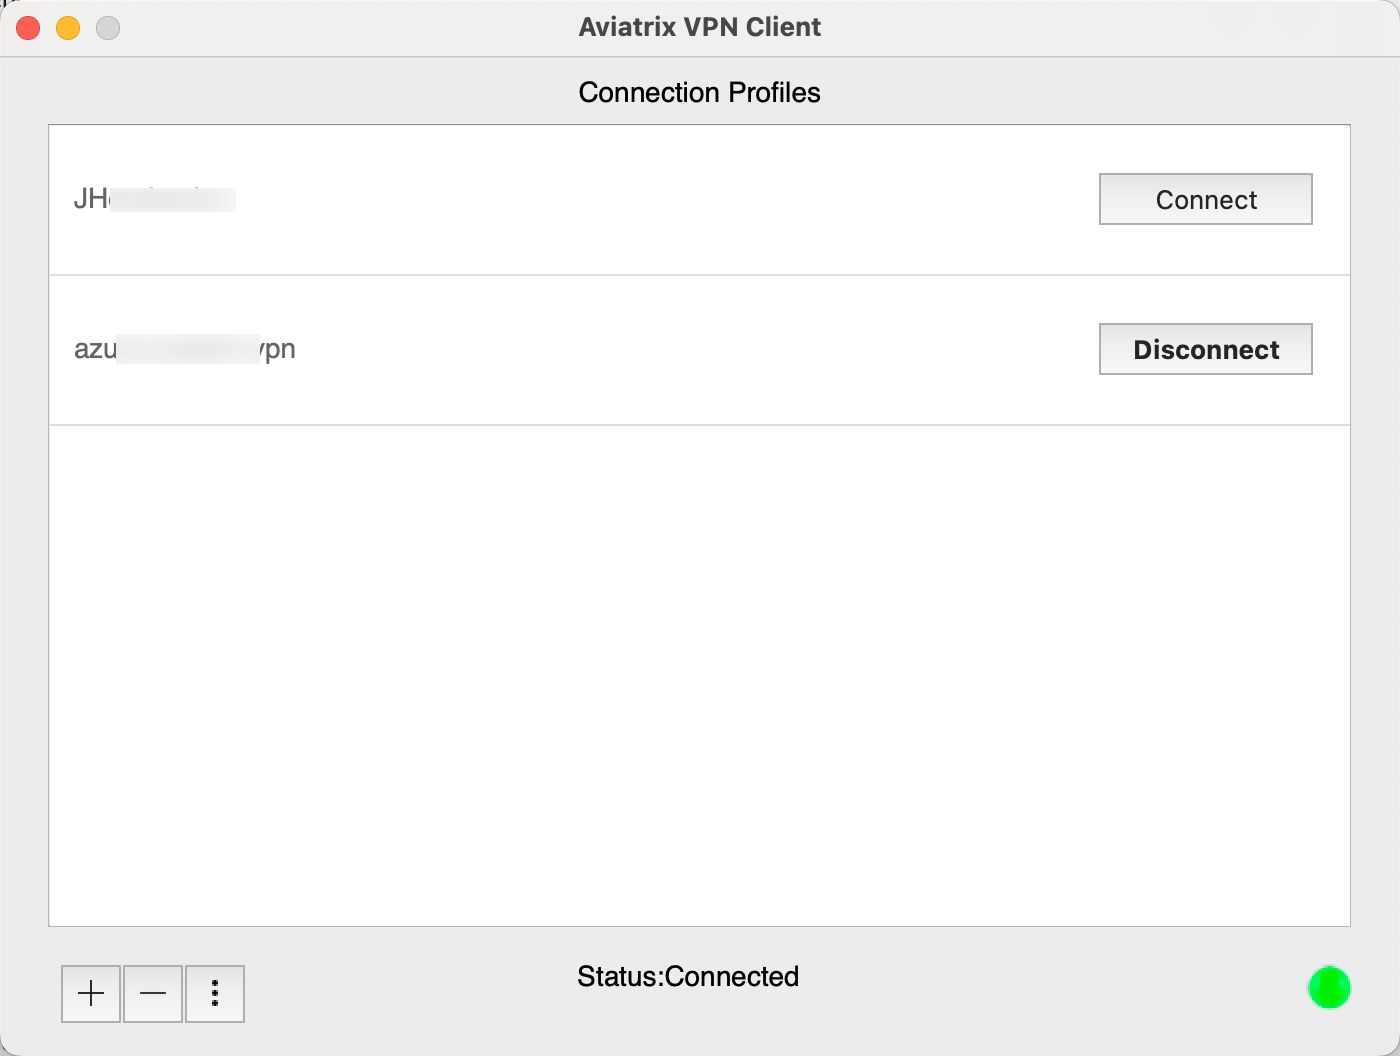 * Use the **+** (plus) button to select an .opvn file.
* Use the **-** (minus) button to delete a profile shown on Connection Profiles.
* Use
* Use the **+** (plus) button to select an .opvn file.
* Use the **-** (minus) button to delete a profile shown on Connection Profiles.
* Use  to open the
submenu, which includes settings for Edit, Sort, Connection Log, and Settings.
Closing the application window hides it in the system tray.
#### Settings
When you click on the
main Aviatrix VPN Client window, the Settings dialog opens.
to open the
submenu, which includes settings for Edit, Sort, Connection Log, and Settings.
Closing the application window hides it in the system tray.
#### Settings
When you click on the
main Aviatrix VPN Client window, the Settings dialog opens.
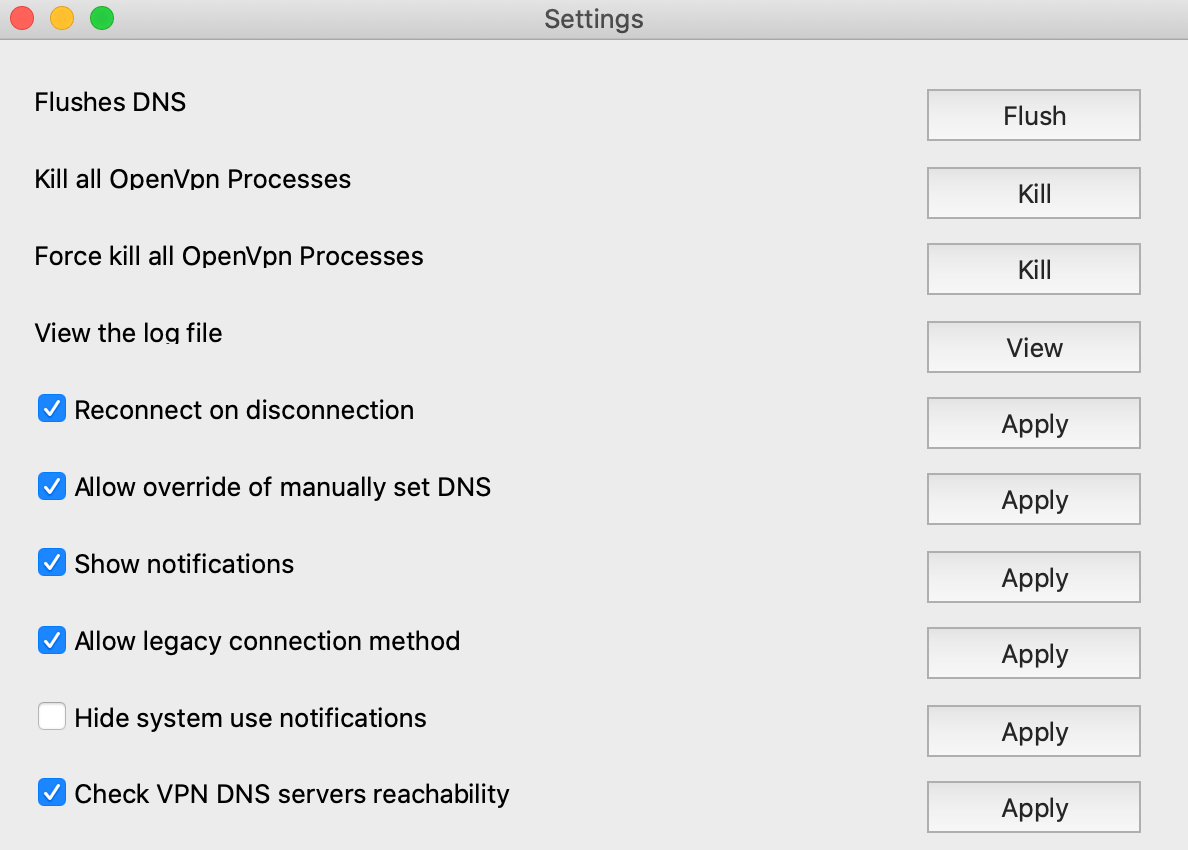 Here you can perform special operations if Troubleshooting is required.
* **Flushes DNS**: Flushes the DNS configuration if there are internet issues
after full tunnel VPN disconnection. Also turning the Wi-fi/ethernet adapter
on/off can fix some internet issues.
* **Kill all OpenVPN Processes**: Sends a soft kill to all running OpenVPN
processes
* **Force kill all OpenVPN Processes**: Terminates other OpenVPN processes that
are running abruptly
* **View the log file**: View the log files for every connection
* **Reconnect on disconnection**:
* **Allow override of manually set DNS**
* **Show notifications**
* **Allow legacy connection method**
* **Hide system use notifications**
* **Check VPN DNS server reachability**: If this option is checked, it will
apply the VPC DNS servers in the macOS system. If it is disabled, it will use
the local DNS servers or other local DNS mechanism (e.g. CISCO Umbrella)
Closing the application window hides it to the system tray. You click the icon
in the tray to show the menu.
### Windows
Here you can perform special operations if Troubleshooting is required.
* **Flushes DNS**: Flushes the DNS configuration if there are internet issues
after full tunnel VPN disconnection. Also turning the Wi-fi/ethernet adapter
on/off can fix some internet issues.
* **Kill all OpenVPN Processes**: Sends a soft kill to all running OpenVPN
processes
* **Force kill all OpenVPN Processes**: Terminates other OpenVPN processes that
are running abruptly
* **View the log file**: View the log files for every connection
* **Reconnect on disconnection**:
* **Allow override of manually set DNS**
* **Show notifications**
* **Allow legacy connection method**
* **Hide system use notifications**
* **Check VPN DNS server reachability**: If this option is checked, it will
apply the VPC DNS servers in the macOS system. If it is disabled, it will use
the local DNS servers or other local DNS mechanism (e.g. CISCO Umbrella)
Closing the application window hides it to the system tray. You click the icon
in the tray to show the menu.
### Windows
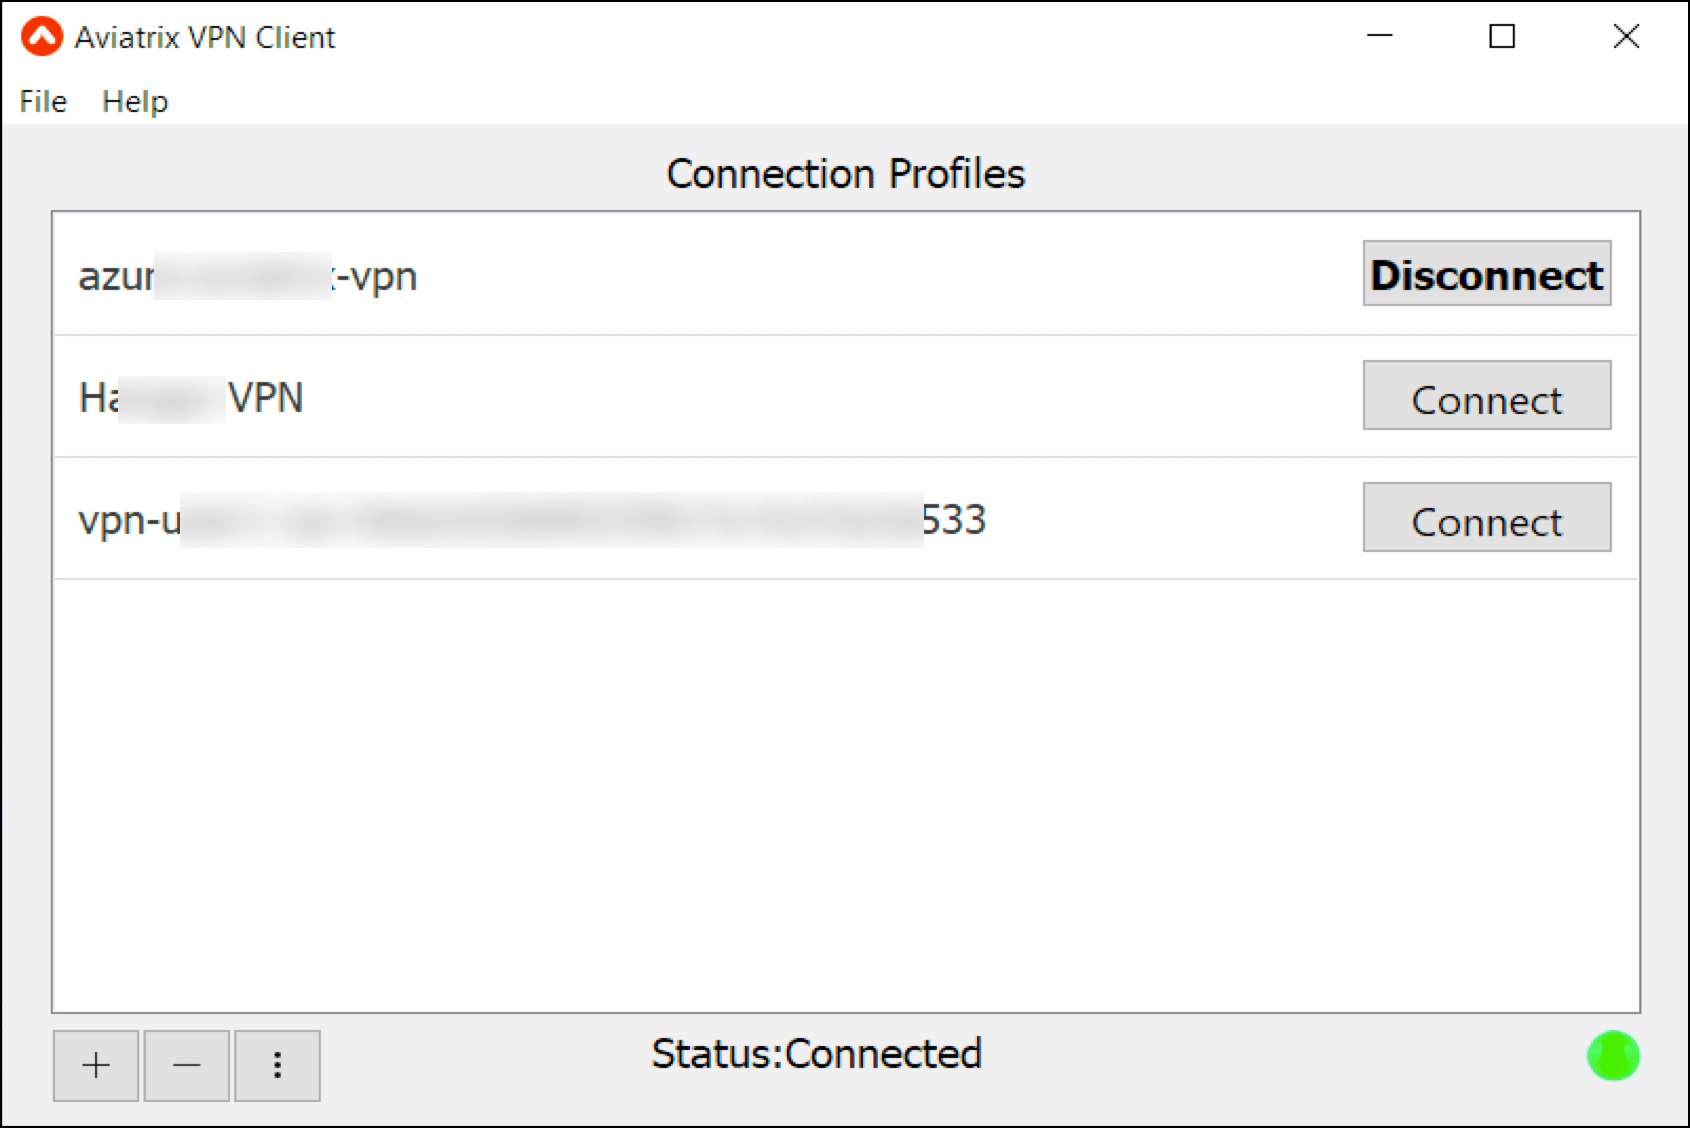 * Use the **+** (plus) button to select an .opvn file.
* Use the **-** (minus) button to delete a profile shown on Connection Profiles.
* Use to open the
submenu, which includes settings for Edit, Sort, Connection Log, and Settings.
* Use the File menu to quit the App.
* The Help > About menu shows the App information.
Closing the application window hides it in the system tray.
#### Settings
* Force kill all OpenVPN Processes
* View the log file
* Reconnect on disconnection
* Disconnect behaviour
* Show notifications
* Allow legacy connection method
* Hide system use notifications
### Connecting to a SAML Gateway
Enter your IDP Credentials to login.
Check OpenVPN® with SAML
Authentication for details.
#### Connecting to a Gateway without any Authentication
Load the VPN configuration (.ovpn) file on to the VPN Client and click
**Connect**.
LDAP: Enter username and password stored on LDAP server. Check LDAP Configuration for
Authenticating VPN Users for details.
* Use the **+** (plus) button to select an .opvn file.
* Use the **-** (minus) button to delete a profile shown on Connection Profiles.
* Use to open the
submenu, which includes settings for Edit, Sort, Connection Log, and Settings.
* Use the File menu to quit the App.
* The Help > About menu shows the App information.
Closing the application window hides it in the system tray.
#### Settings
* Force kill all OpenVPN Processes
* View the log file
* Reconnect on disconnection
* Disconnect behaviour
* Show notifications
* Allow legacy connection method
* Hide system use notifications
### Connecting to a SAML Gateway
Enter your IDP Credentials to login.
Check OpenVPN® with SAML
Authentication for details.
#### Connecting to a Gateway without any Authentication
Load the VPN configuration (.ovpn) file on to the VPN Client and click
**Connect**.
LDAP: Enter username and password stored on LDAP server. Check LDAP Configuration for
Authenticating VPN Users for details.
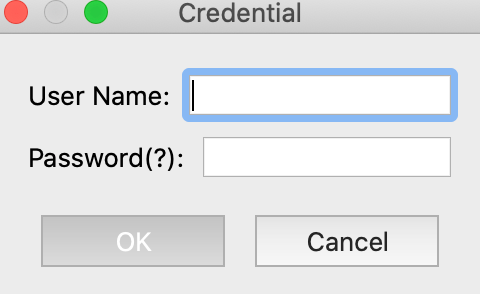 Google 2-step verification: Use your email address as the username. The password
should be appended with the 6-digit code generated by Google authenticator app
on your phone. For example, if your email is "[joe@examplecompany.com](mailto:joe@examplecompany.com)", the
following username password combination of "[joe@examplecompany.com](mailto:joe@examplecompany.com)" and
"password123456" should be used where "password" is your account password and
"123456" is the 6 digit-code.
Duo Security Two-Factor Authentication (Mac and Windows users): An automatic
approval request will be pushed to your registered cellphone. Select "Approve"
to connect to VPN gateway.
LDAP + Duo Security Two-Factor Authentication: Enter username and password for
the LDAP server and an automatic approval request will be pushed to your
registered cellphone. Select "Approve" to connect to VPN gateway. The username
and password window appears.
Google 2-step verification: Use your email address as the username. The password
should be appended with the 6-digit code generated by Google authenticator app
on your phone. For example, if your email is "[joe@examplecompany.com](mailto:joe@examplecompany.com)", the
following username password combination of "[joe@examplecompany.com](mailto:joe@examplecompany.com)" and
"password123456" should be used where "password" is your account password and
"123456" is the 6 digit-code.
Duo Security Two-Factor Authentication (Mac and Windows users): An automatic
approval request will be pushed to your registered cellphone. Select "Approve"
to connect to VPN gateway.
LDAP + Duo Security Two-Factor Authentication: Enter username and password for
the LDAP server and an automatic approval request will be pushed to your
registered cellphone. Select "Approve" to connect to VPN gateway. The username
and password window appears.