> ## Documentation Index
> Fetch the complete documentation index at: https://docs.aviatrix.com/llms.txt
> Use this file to discover all available pages before exploring further.
# Deploying Check Point CloudGuard
> Ensure that you have completed all Transit FireNet steps up to but not including the launch of the Check Point firewall instance.
* Ensure that you have completed all Transit FireNet steps up to but not including the launch of the Check Point firewall instance.
* Current Aviatrix requirements mean that a Management Server needs to be configured along with the Gateway Server.
- You have access to a Windows client so you can run the SmartConsole,
which is provided by Check Point and is specific per version of
CloudGuard being installed. You can use this link:
[https://supportcenter.checkpoint.com/supportcenter/portal?eventSubmit\_doGoviewsolutiondetails=\&solutionid=sk119612\[R80.10](https://supportcenter.checkpoint.com/supportcenter/portal?eventSubmit_doGoviewsolutiondetails=\&solutionid=sk119612\[R80.10)].
## Recommendations and Caveats
* Check Point versions R77.30 and R80.10 support standalone deployments. For more information see [https://supportcenter.checkpoint.com/supportcenter/portal/user/anon/page/default.psml/media-type/html?action=portlets.DCFileAction\&eventSubmit\_doGetdcdetails=\&fileid=24831\[Download](https://supportcenter.checkpoint.com/supportcenter/portal/user/anon/page/default.psml/media-type/html?action=portlets.DCFileAction\&eventSubmit_doGetdcdetails=\&fileid=24831\[Download) Details: R77 Versions Installation and Upgrade Guide for Gaia Platforms].
* For more information on the differences across the available
models/versions see
[https://supportcenter.checkpoint.com/supportcenter/portal?eventSubmit\_doGoviewsolutiondetails=\&solutionid=sk95746\[Check](https://supportcenter.checkpoint.com/supportcenter/portal?eventSubmit_doGoviewsolutiondetails=\&solutionid=sk95746\[Check) Point Default Version and Release Terminology].
Check Point has recommended the upgrade to R80 as part of their roadmap.
For more information regarding such advisories, check the
[https://supportcenter.checkpoint.com/supportcenter/portal?eventSubmit\_doGoviewsolutiondetails=\&solutionid=sk110980\[Check](https://supportcenter.checkpoint.com/supportcenter/portal?eventSubmit_doGoviewsolutiondetails=\&solutionid=sk110980\[Check) Point R80 image updates FAQ].
* For the purpose of this installation guide, we are going to consider
only version R80.10 in standalone mode using the latest CloudFormation
template available at the time this document was written.
* Currently we do not have a full integration between the Aviatrix
dashboard and the CloudGuard, which means that you will not be able to
update the firewall routing table via API, as it is currently possible
with the Palo Alto VM-Series.
## Check Point CloudGuard Prerequisites
Ensure that you have completed all Transit FireNet steps up to but not including
the launch of the Check Point firewall instance.
Current Aviatrix requirements mean that a Management Server needs to be
configured along with the Gateway Server.
You have access to a Windows client so you can run the SmartConsole, which is
provided by Check Point and is specific per version of CloudGuard being
installed. You can use this link:
[R80.10](https://supportcenter.checkpoint.com).
### Recommendations and Caveats
Check Point versions R77.30 and R80.10 support standalone deployments. For more
information see
[Download Details: R77 Versions Installation and Upgrade Guide for Gaia Platforms](https://supportcenter.checkpoint.com).
For more information on the differences across the available models/versions see
[Check Point Default Version and Release Terminology](https://supportcenter.checkpoint.com/supportcenter/portal?eventSubmit_doGoviewsolutiondetails=\&solutionid=sk104859).
Check Point has recommended the upgrade to R80 as part of their roadmap. For
more information regarding such advisories, check the
[Check Point R80 image updates FAQ](https://supportcenter.checkpoint.com/supportcenter/portal?eventSubmit_doGoviewsolutiondetails=\&solutionid=sk116585).
For the purpose of this installation guide, we are going to consider only
version R80.10 in standalone mode using the latest CloudFormation template
available at the time this document was written.
Currently we do not have a full integration between the Aviatrix dashboard and
the CloudGuard, which means that you will not be able to update the firewall
routing table via API, as it is currently possible with the Palo Alto VM-Series.
## Setup Firewall Network (FireNet)
After you have prepared your FireNet VPCs and
[added the necessary Transit FireNet gateways](https://legacy.docs.aviatrix.com/documentation/latest/security/transit-firenet-create-aws.html),
you can prepare your Check Point firewall as follows.
## Deploying Check Point Instance From AWS Marketplace
Go to aws.amazon.com/marketplace and search for the chosen instance
model/version in AWS Marketplace. Click **Continue to Subscribe**.
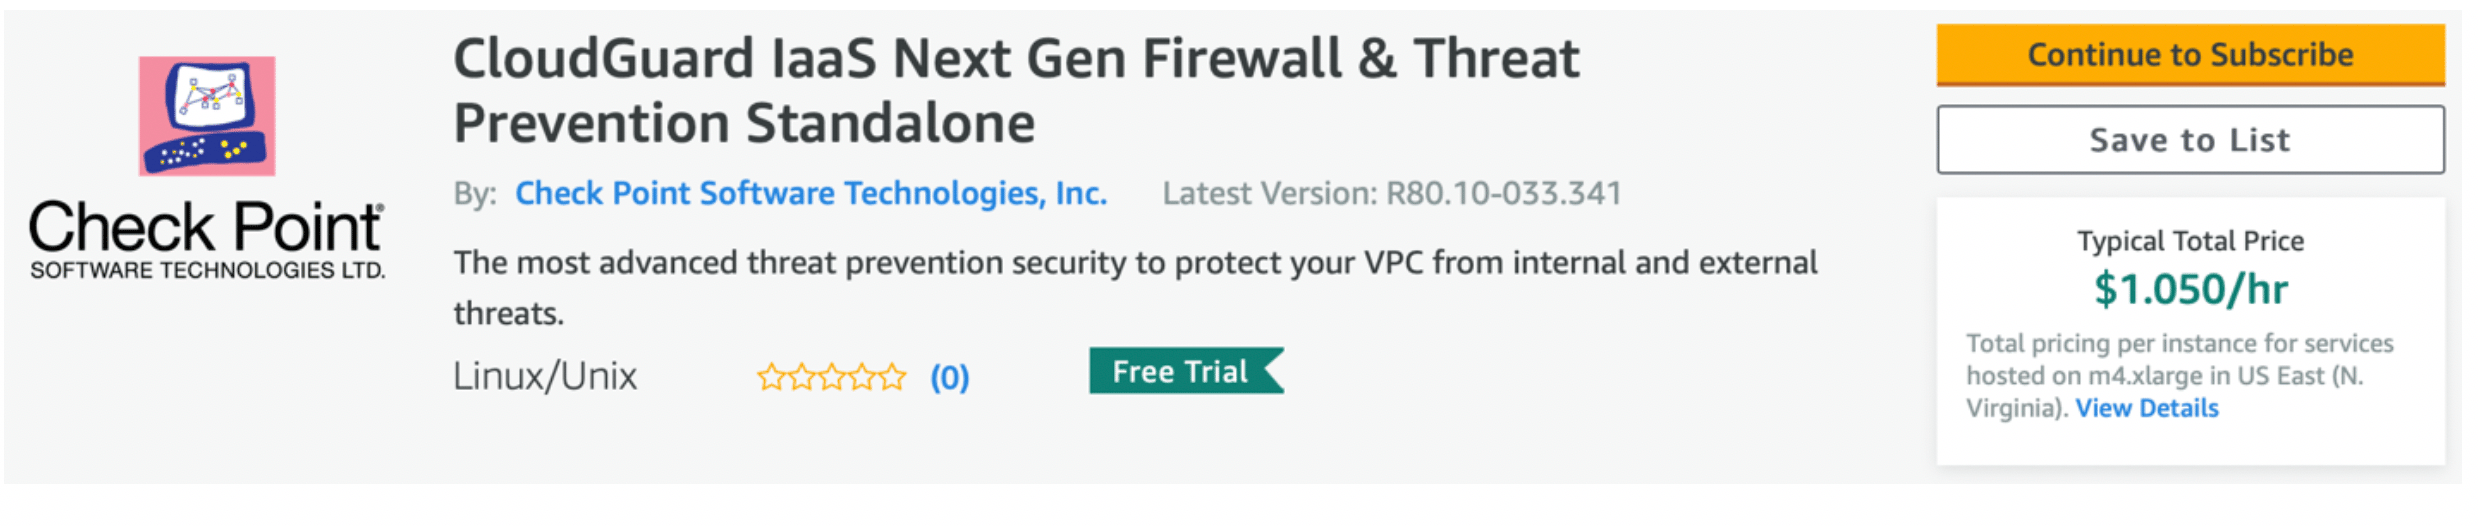 On the next screen, accept the terms and you should be able to continue. If you
have chosen any of the R80 versions, you should be able to launch it using one
of the CloudFormation templates.
On the next screen, accept the terms and you should be able to continue. If you
have chosen any of the R80 versions, you should be able to launch it using one
of the CloudFormation templates.
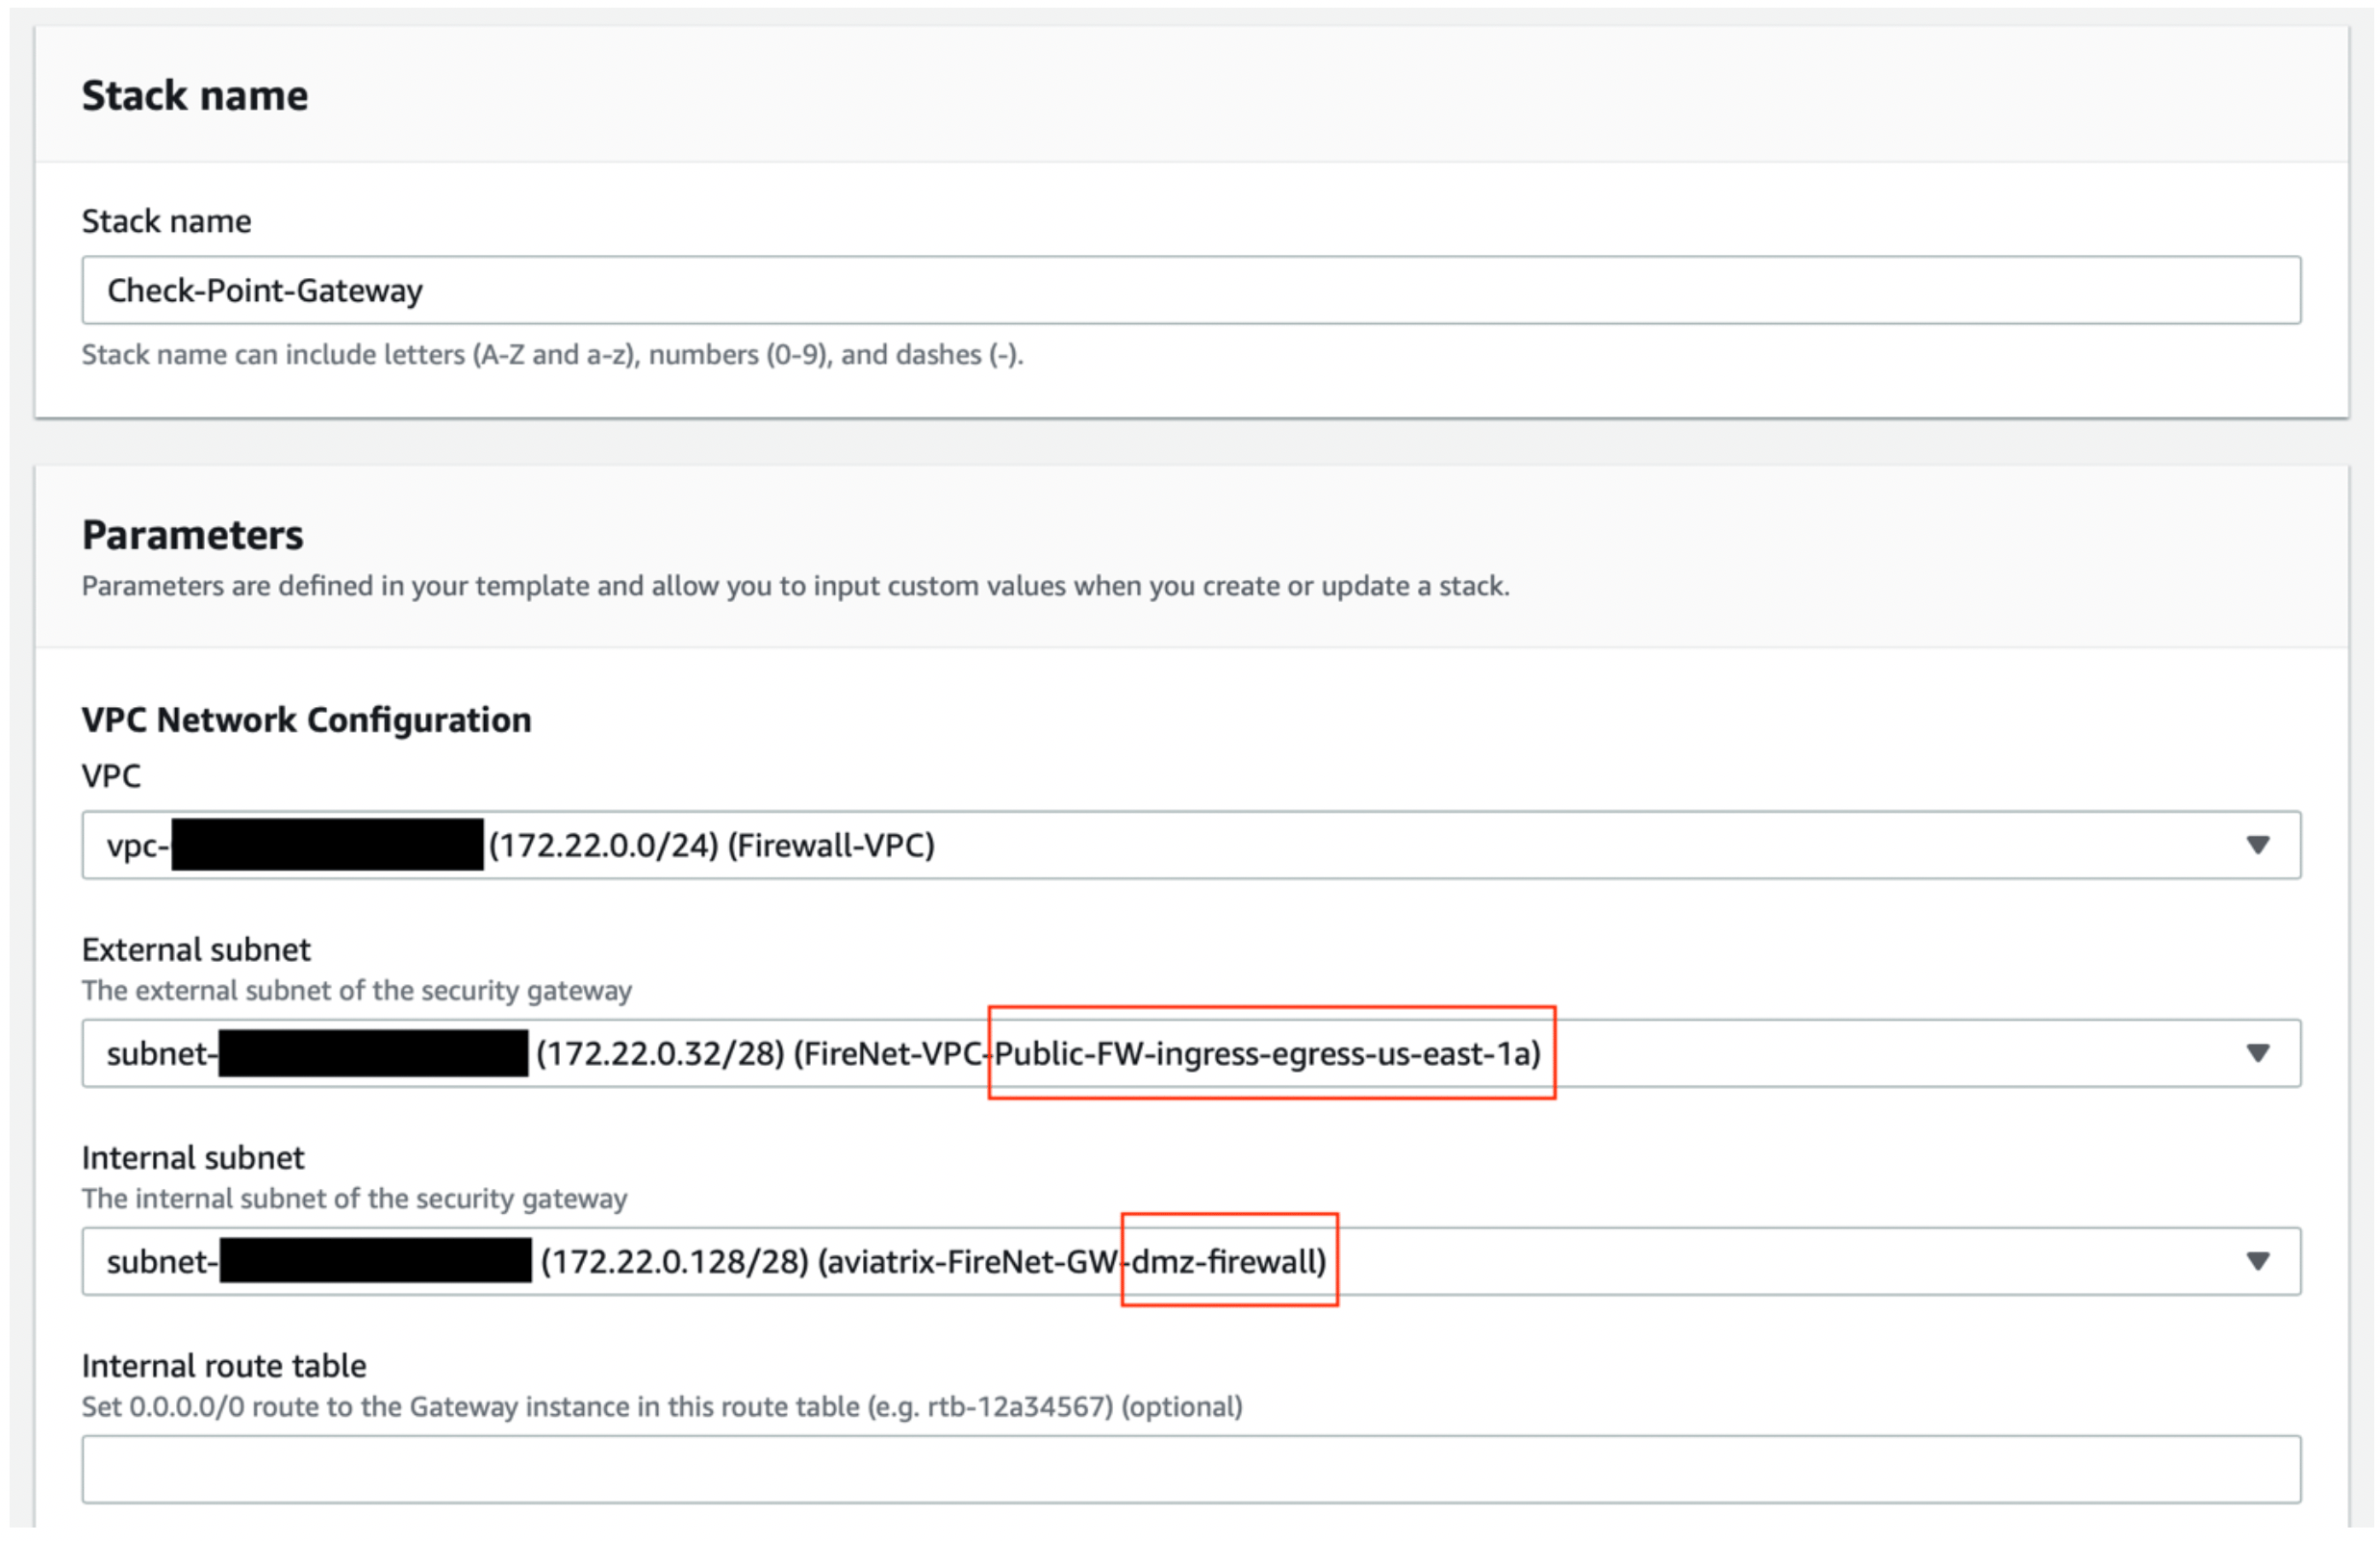 For the purpose of this guide, we are going to use template 15 (standalone into
existing VPC). If you have a Management Server deployed already you should use
template 2 instead.
This template will configure the first interface (eth0) as "external" and the
second (eth1) as "internal". For consistency purposes we suggest keeping eth0 as
egress and management and eth1 for LAN.
The template should look like this (if you have selected an existing VPC). Make
sure your interfaces are in the same AZ.
For the purpose of this guide, we are going to use template 15 (standalone into
existing VPC). If you have a Management Server deployed already you should use
template 2 instead.
This template will configure the first interface (eth0) as "external" and the
second (eth1) as "internal". For consistency purposes we suggest keeping eth0 as
egress and management and eth1 for LAN.
The template should look like this (if you have selected an existing VPC). Make
sure your interfaces are in the same AZ.
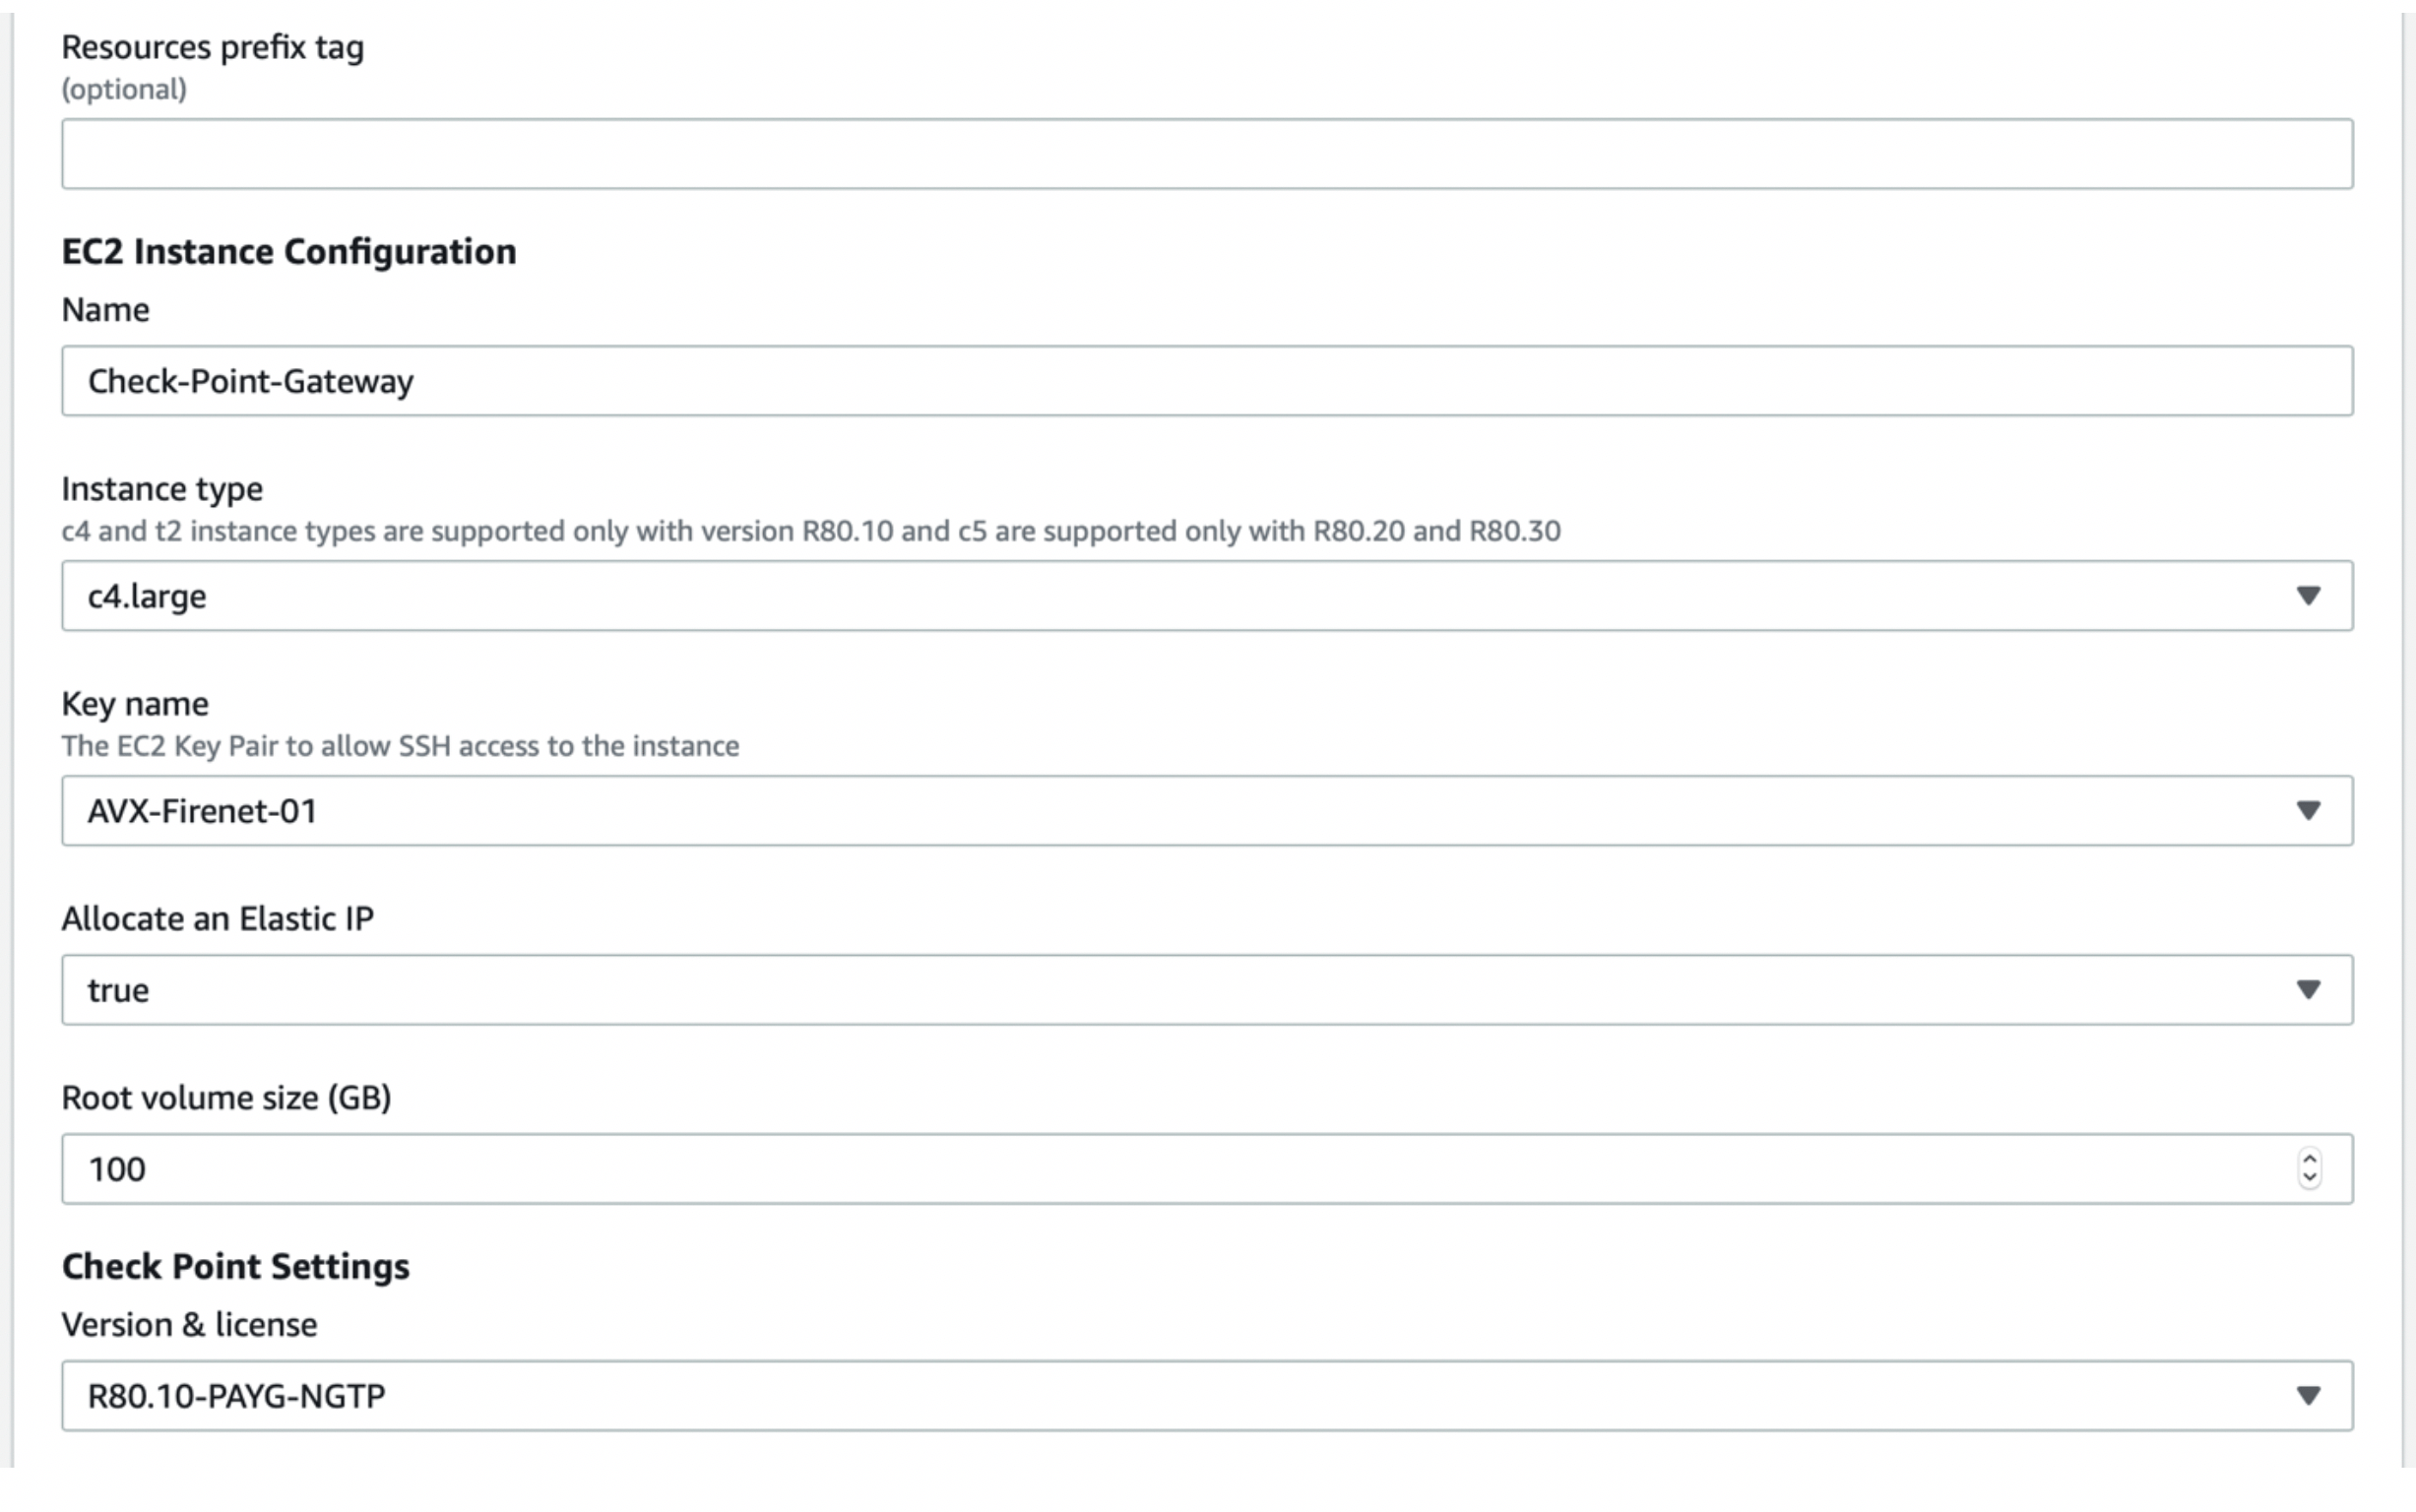 For the next part of the template, make sure you have created/downloaded your
pem key, as well as selected the proper instance size. For information on the
networking features of each instance type, go [here](https://aws.amazon.com).
For the next part of the template, make sure you have created/downloaded your
pem key, as well as selected the proper instance size. For information on the
networking features of each instance type, go [here](https://aws.amazon.com).
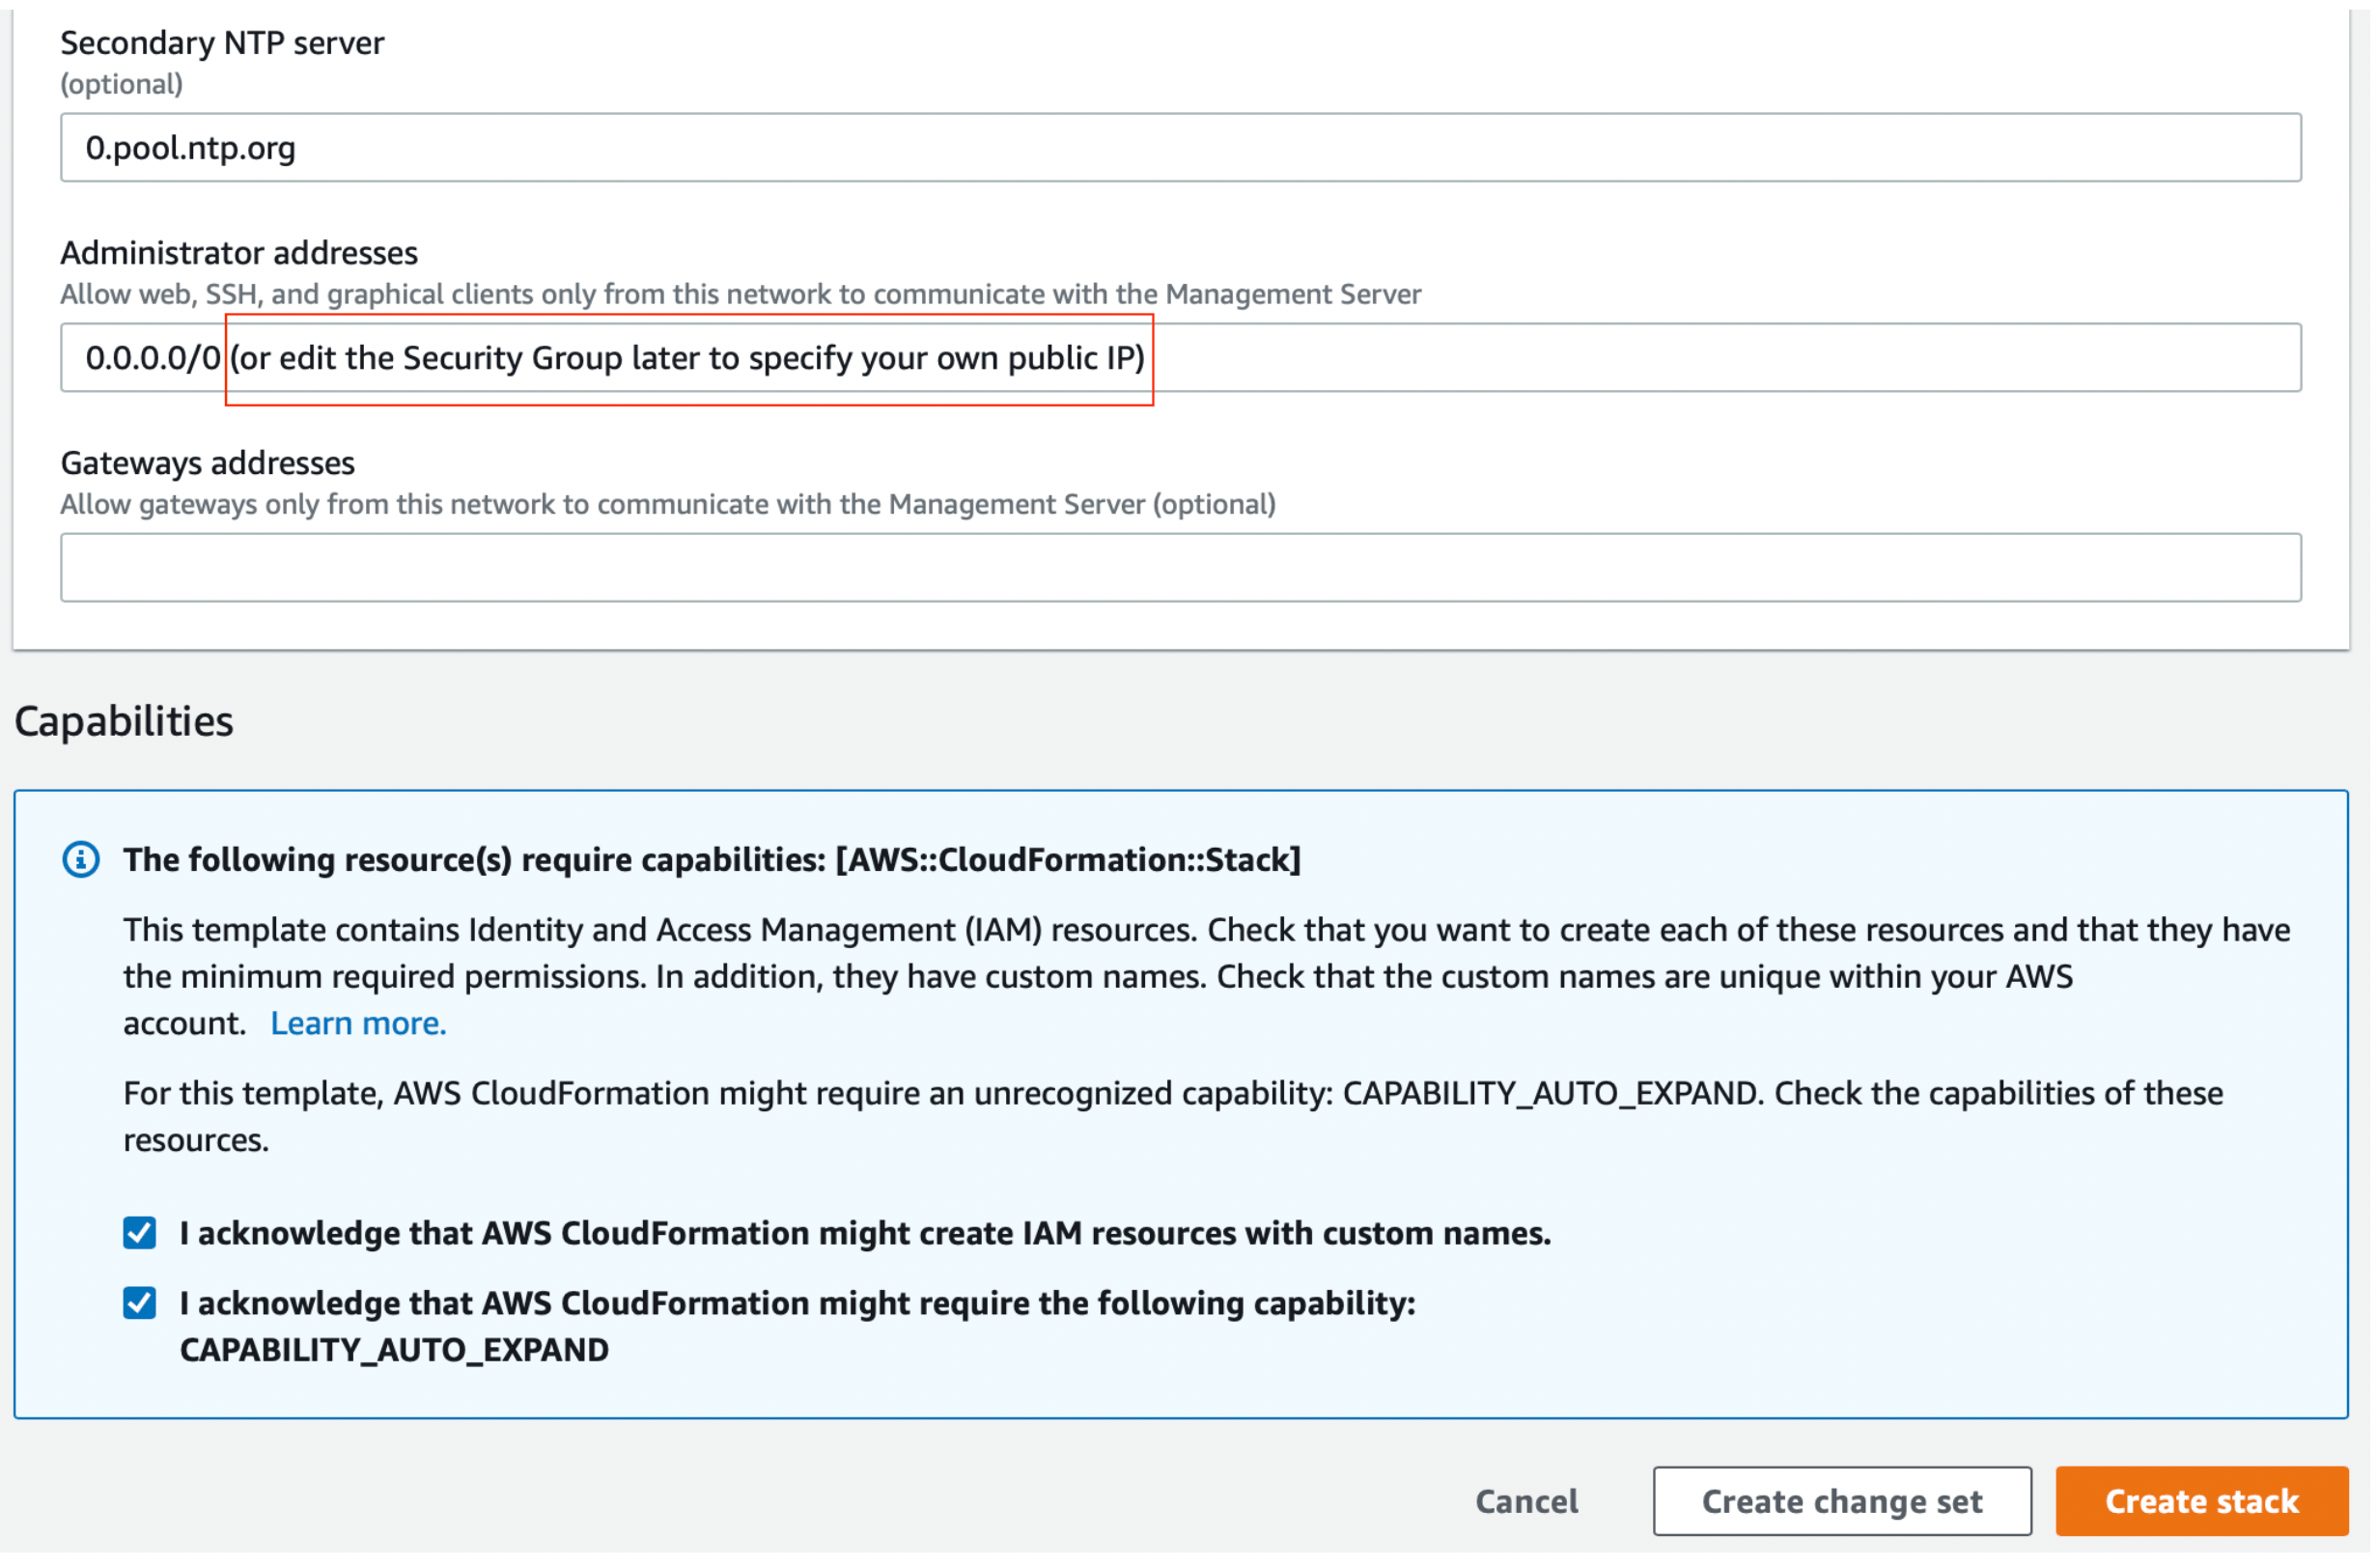
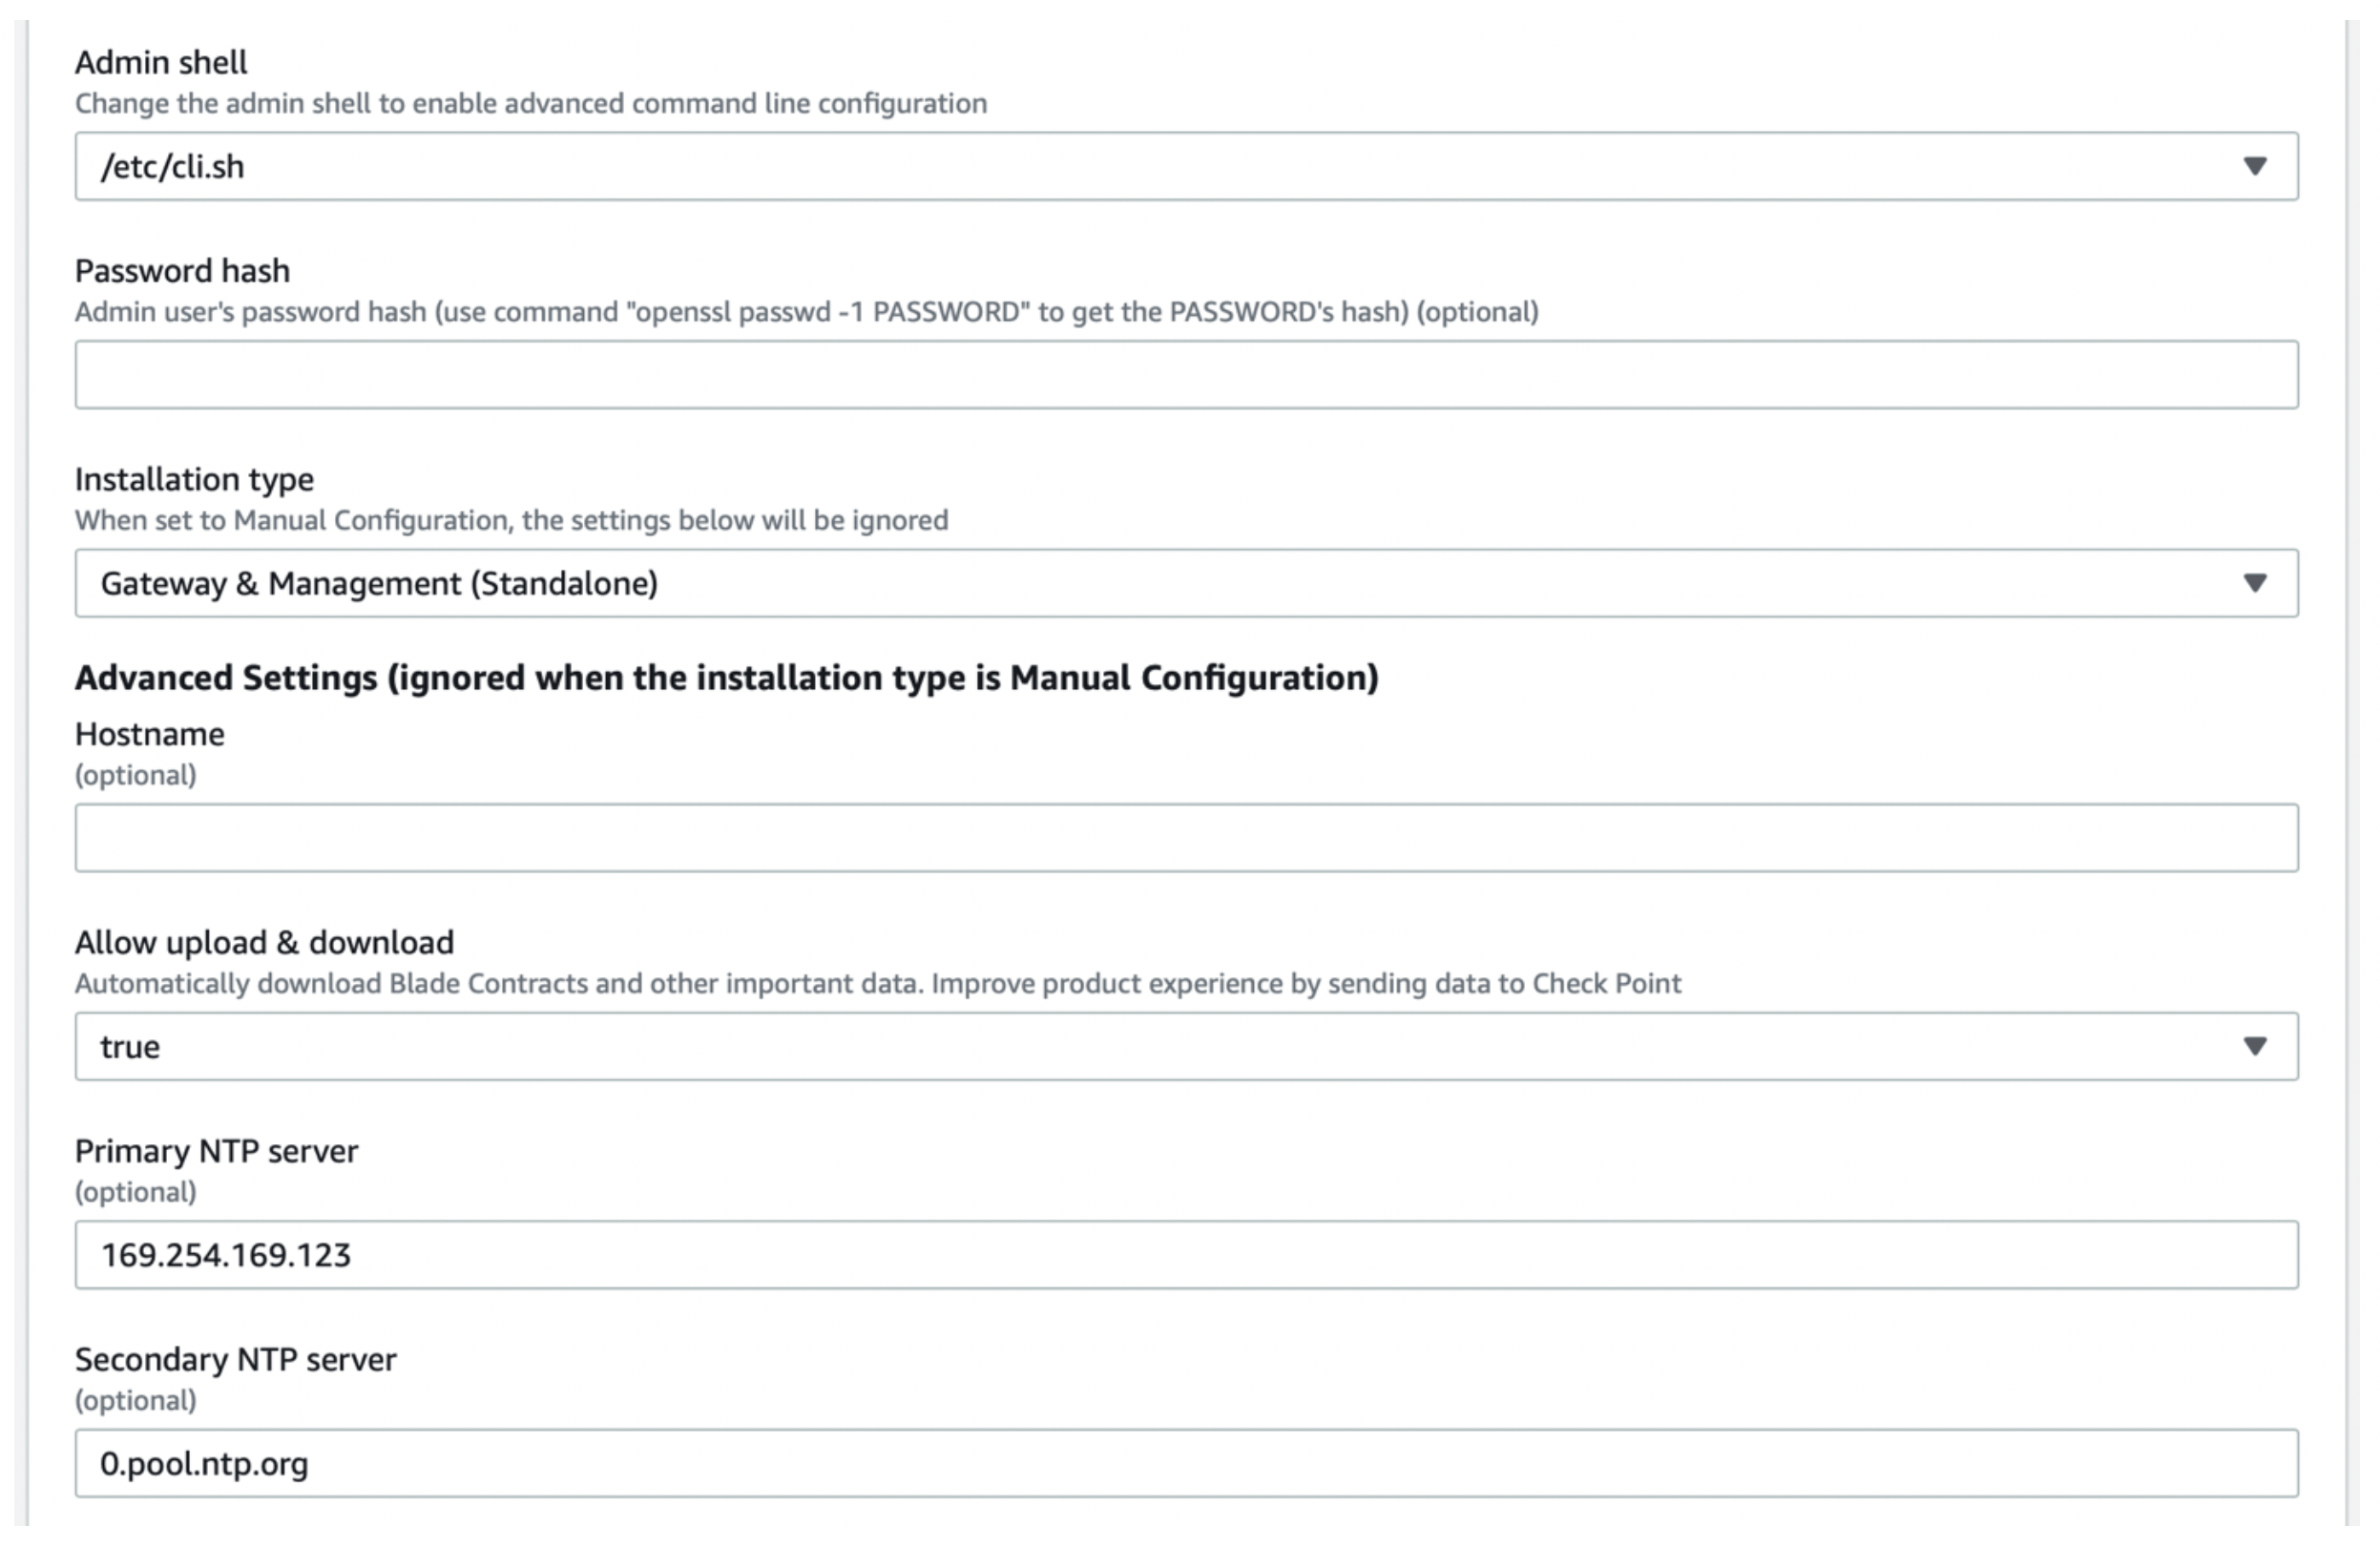 After you click on **Create stack** you can navigate to CloudFormation to
monitor the stack creation. The status after creation should be CREATE COMPLETE.
You can troubleshoot any warnings by checking the details in the "Outputs" tab.
After you click on **Create stack** you can navigate to CloudFormation to
monitor the stack creation. The status after creation should be CREATE COMPLETE.
You can troubleshoot any warnings by checking the details in the "Outputs" tab.
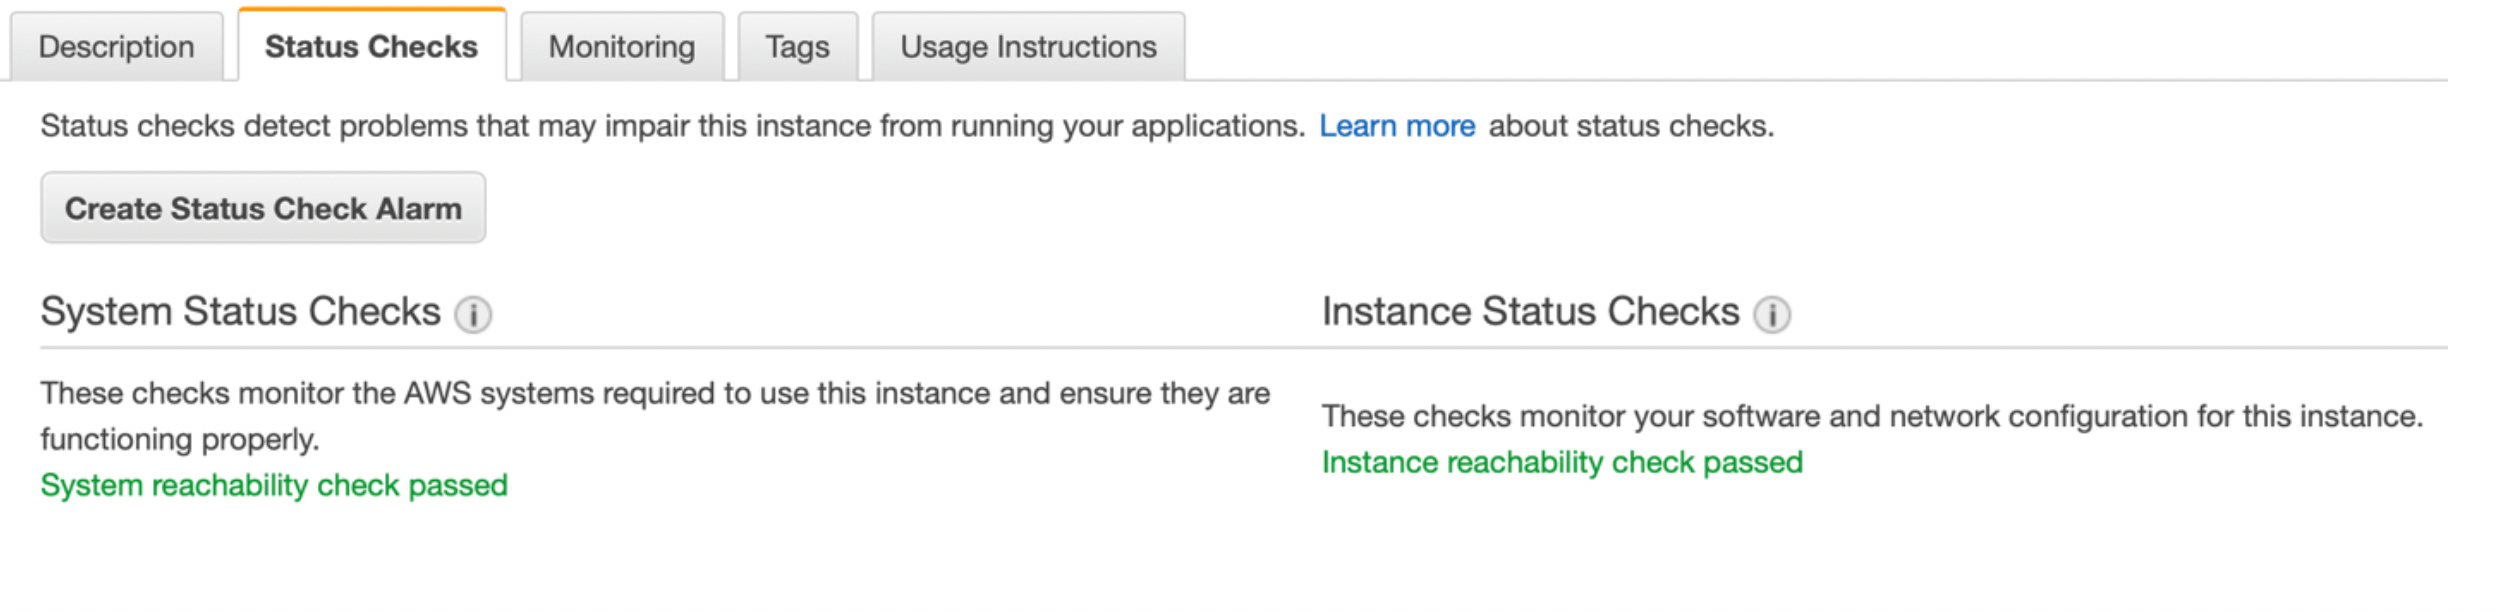
 Now go to the EC2 instances to monitor the status check – once they are done,
you should be able to SSH into the instance.
Now go to the EC2 instances to monitor the status check – once they are done,
you should be able to SSH into the instance.
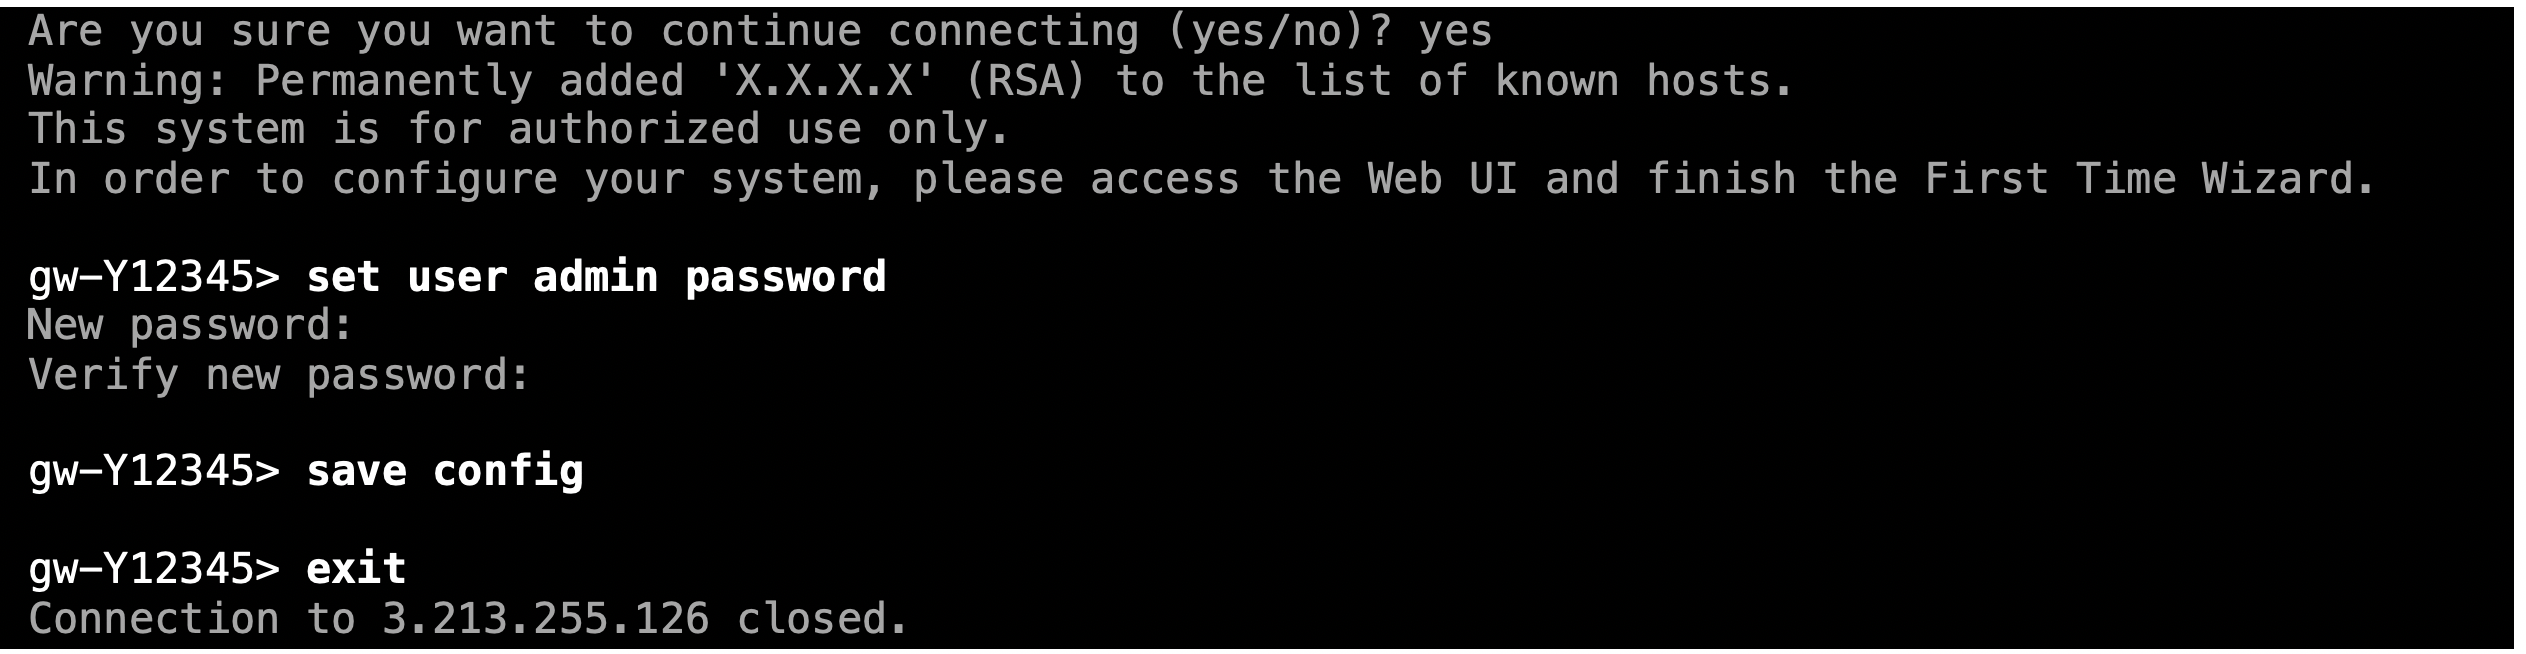
 Now that the instance is up – open your preferred terminal and SSH into the
instance using the proper keys and the user "admin". It takes only two commands
to set a new password.
Now that the instance is up – open your preferred terminal and SSH into the
instance using the proper keys and the user "admin". It takes only two commands
to set a new password.
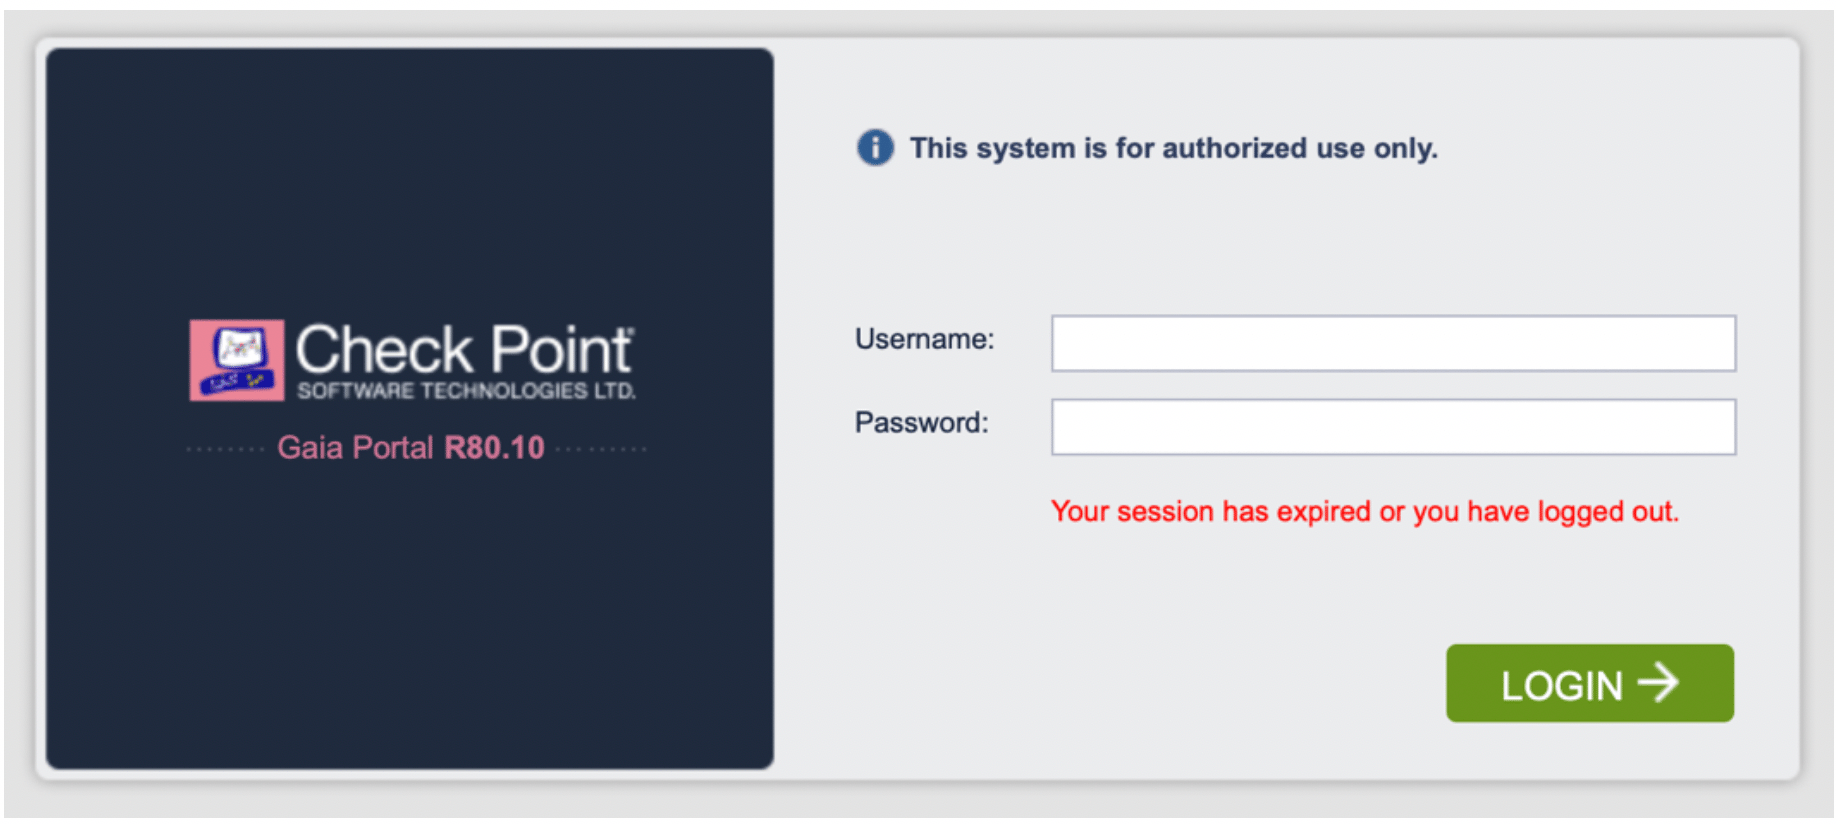
 ### Logging into the Gaia Portal
Open a browser and go to [https://management\_eip/](https://management_eip/) to
log into the Gaia Portal. You should be prompted with a screen like the one
below. Enter the user name as admin and the password you configured in the
previous step.
### Logging into the Gaia Portal
Open a browser and go to [https://management\_eip/](https://management_eip/) to
log into the Gaia Portal. You should be prompted with a screen like the one
below. Enter the user name as admin and the password you configured in the
previous step.
 Go to Network Management > Network Interfaces. You should simply double-check
whether all interfaces are active with a valid IP address.
Go to Network Management > Network Interfaces. You should simply double-check
whether all interfaces are active with a valid IP address.
 ### Updating the Route Table
The next step is to update the route table. In this example, you add three
return routes, each for a RFC 1918 address pointing back to the VPC router of
the subnet aviatrix*dmz-firewall (or aviatrix*hagw-dmz-firewall if you are
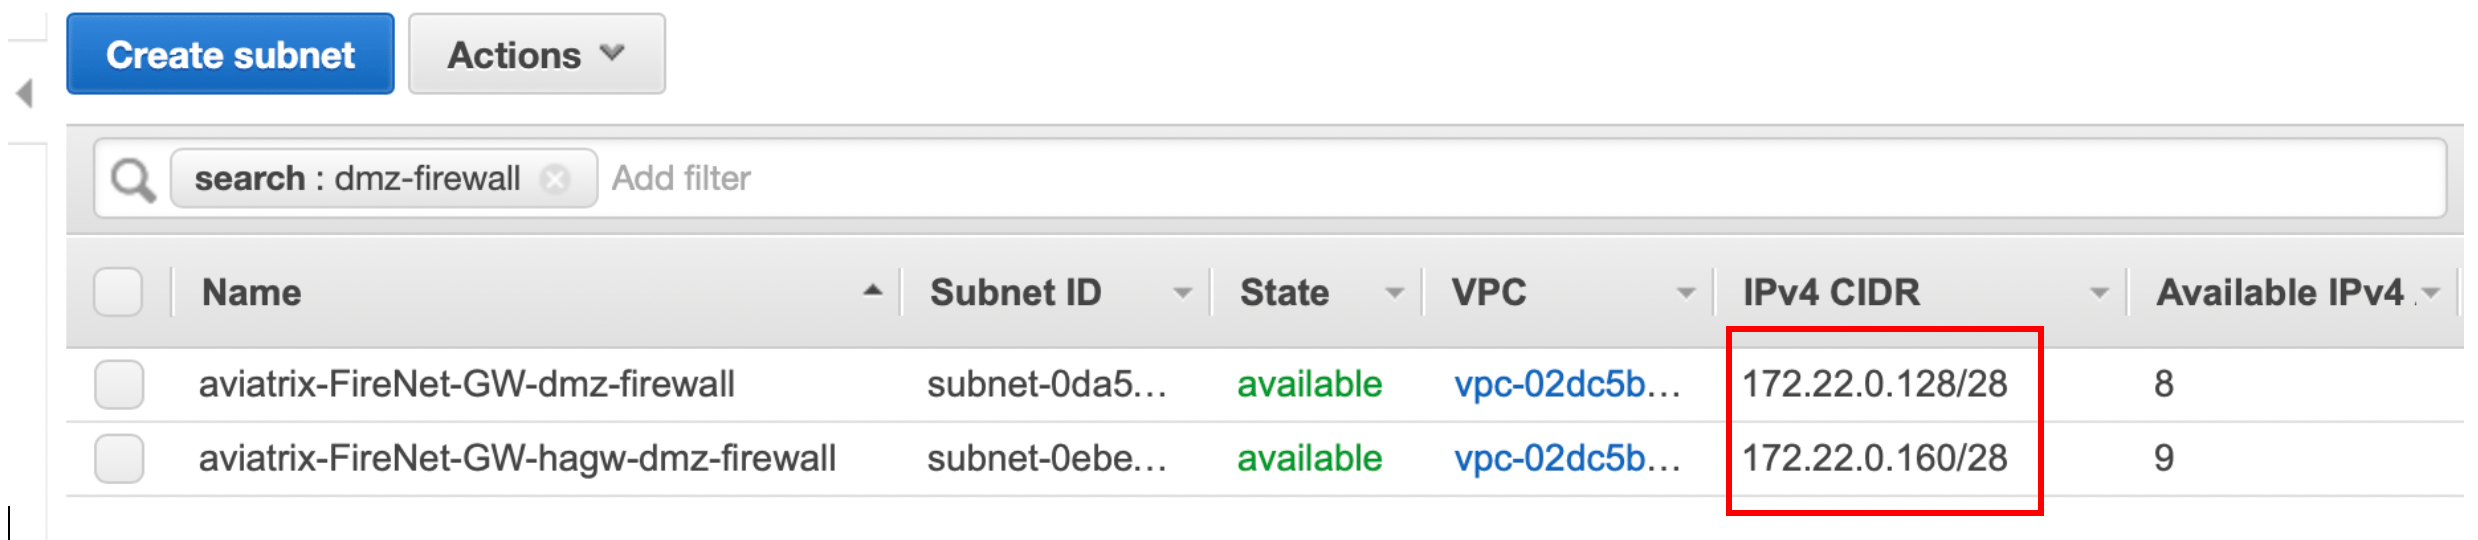
attaching the instance to the backup gateway instead). Go to the AWS console >
VPC > Subnets and filter by "dmz-firewall" – that will allow you to determine
the VPC router IP, which is the first host of each subnet.
### Updating the Route Table
The next step is to update the route table. In this example, you add three
return routes, each for a RFC 1918 address pointing back to the VPC router of
the subnet aviatrix*dmz-firewall (or aviatrix*hagw-dmz-firewall if you are
attaching the instance to the backup gateway instead). Go to the AWS console >
VPC > Subnets and filter by "dmz-firewall" – that will allow you to determine
the VPC router IP, which is the first host of each subnet.
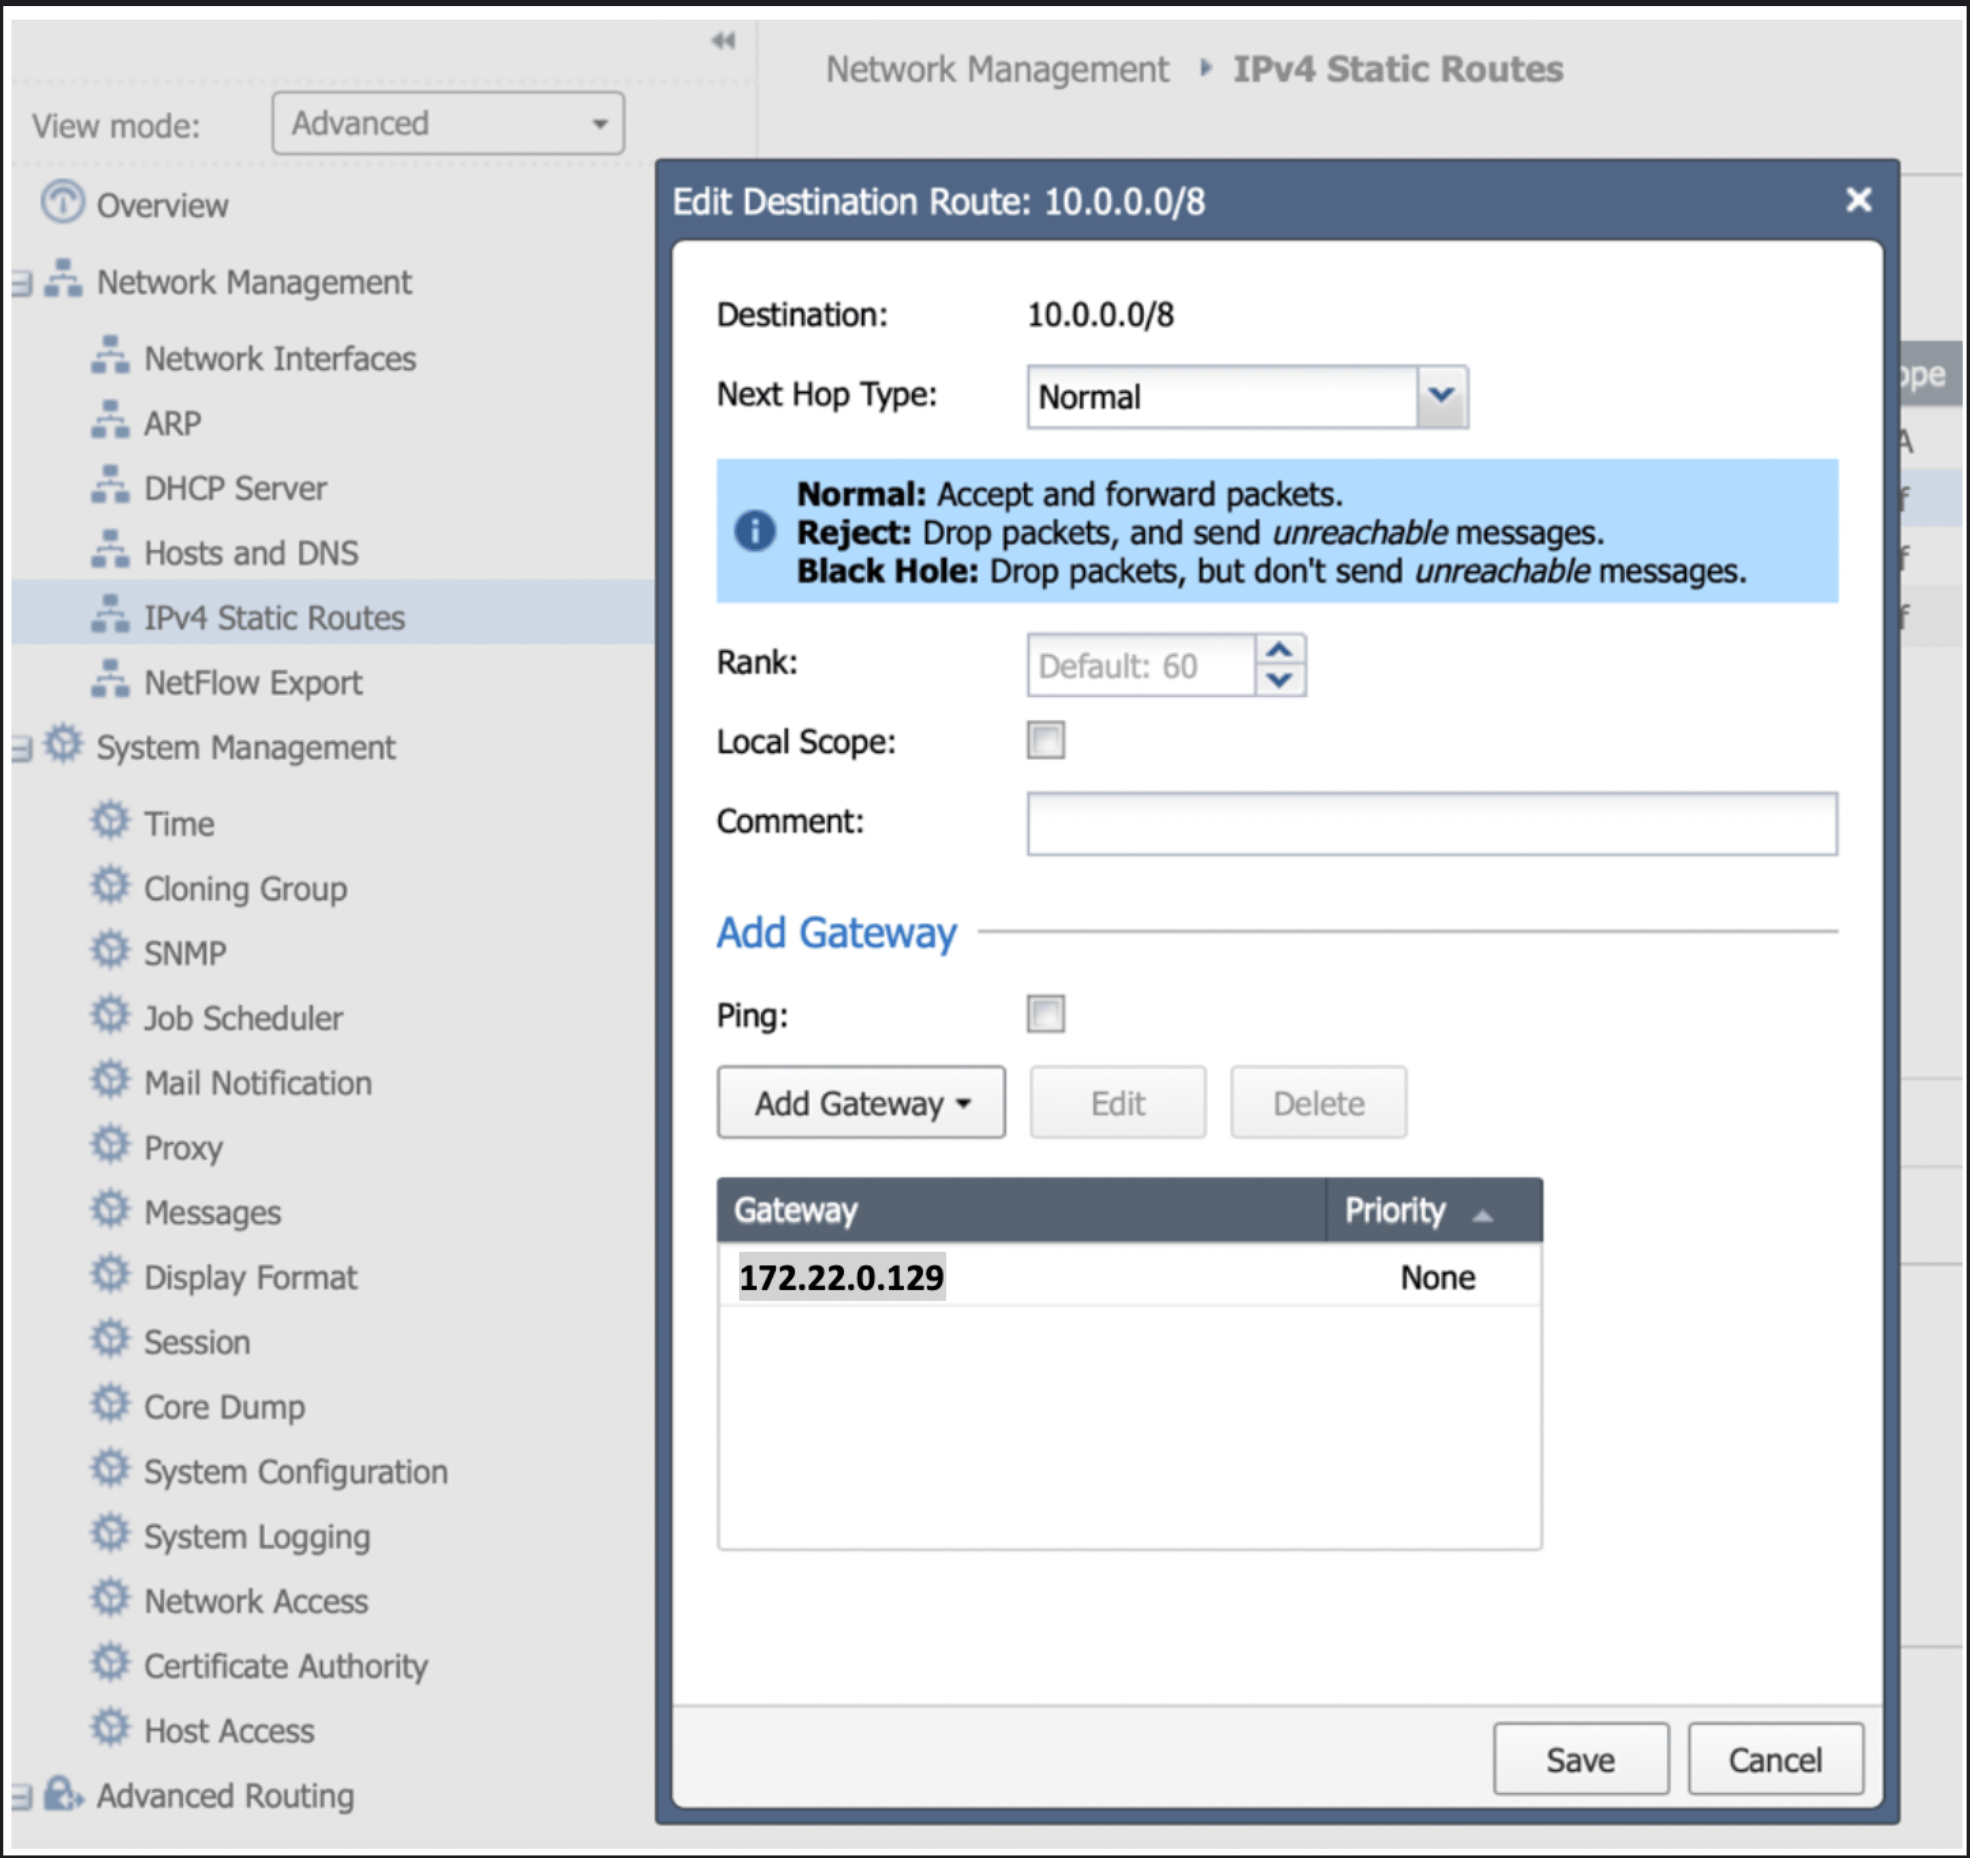
 Once you have determined the IP of the next hop, just go to IPv4 Static Routes
and click on "Add". Repeat this step for all three RFC 1918 subnets.
Once you have determined the IP of the next hop, just go to IPv4 Static Routes
and click on "Add". Repeat this step for all three RFC 1918 subnets.
 ### Downloading and Installing the SmartConsole
Download and install the SmartConsole (if you have not done so already) using
this link: [R80.10](https://supportcenter.checkpoint.com).
On SmartConsole you need to define a security policy that will allow the traffic
to be inspected/logged and update the topology.
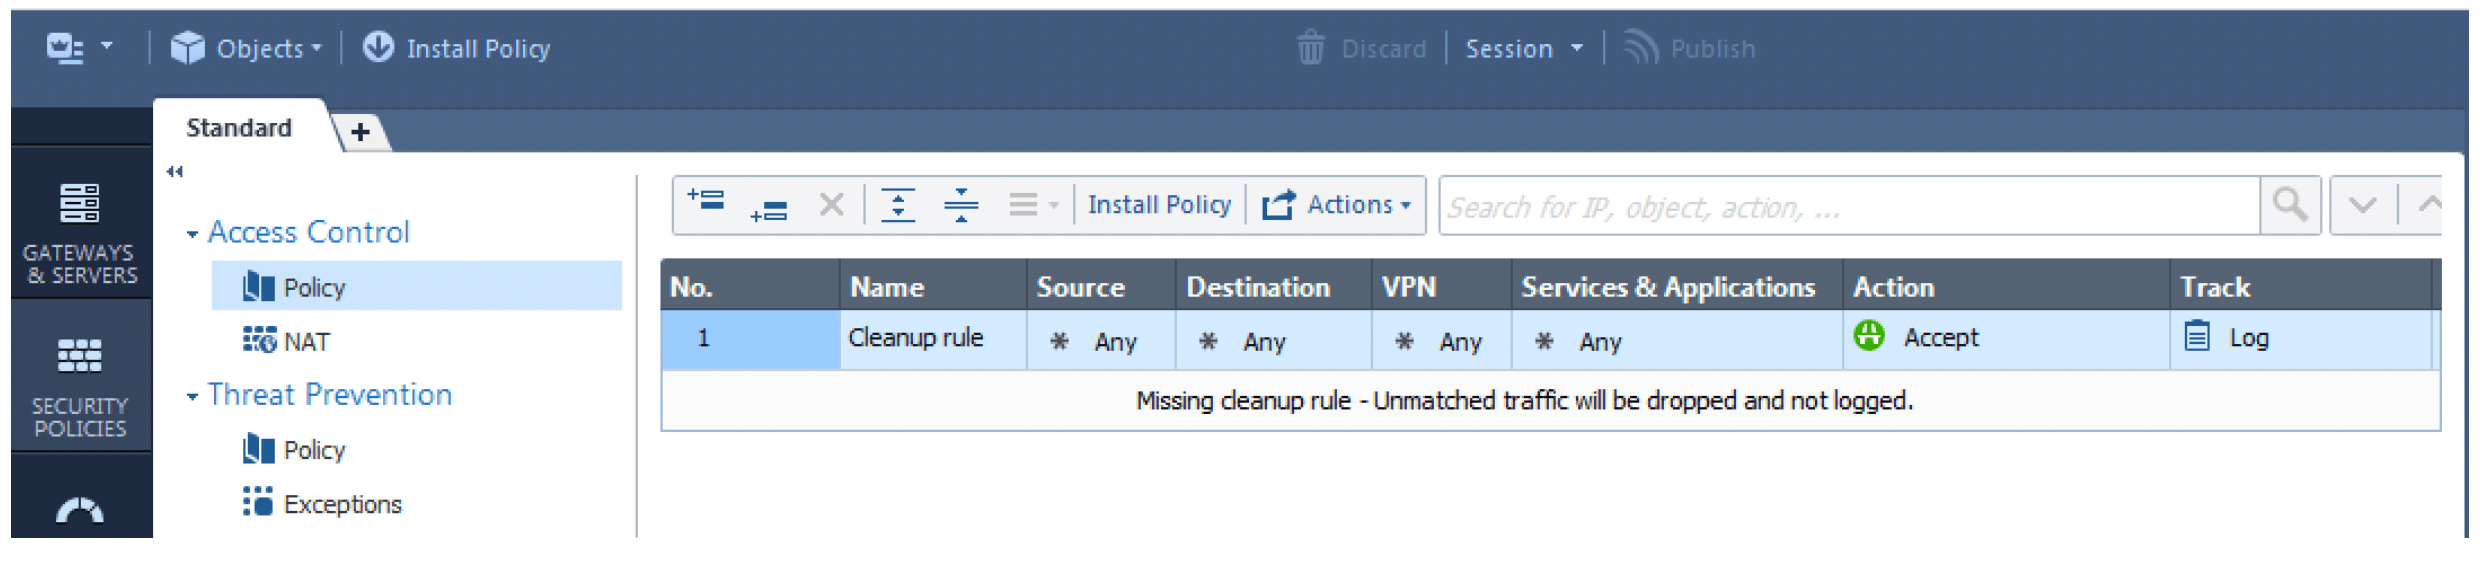
In the SmartConsole go to via Security Policies and then Policy and change the
default policy to accept and log traffic. This should be customized to comply
with your project requirements.
Install the policy on the gateway(s) in question.
Your basic policy should look like this:
### Downloading and Installing the SmartConsole
Download and install the SmartConsole (if you have not done so already) using
this link: [R80.10](https://supportcenter.checkpoint.com).
On SmartConsole you need to define a security policy that will allow the traffic
to be inspected/logged and update the topology.
In the SmartConsole go to via Security Policies and then Policy and change the
default policy to accept and log traffic. This should be customized to comply
with your project requirements.
Install the policy on the gateway(s) in question.
Your basic policy should look like this:
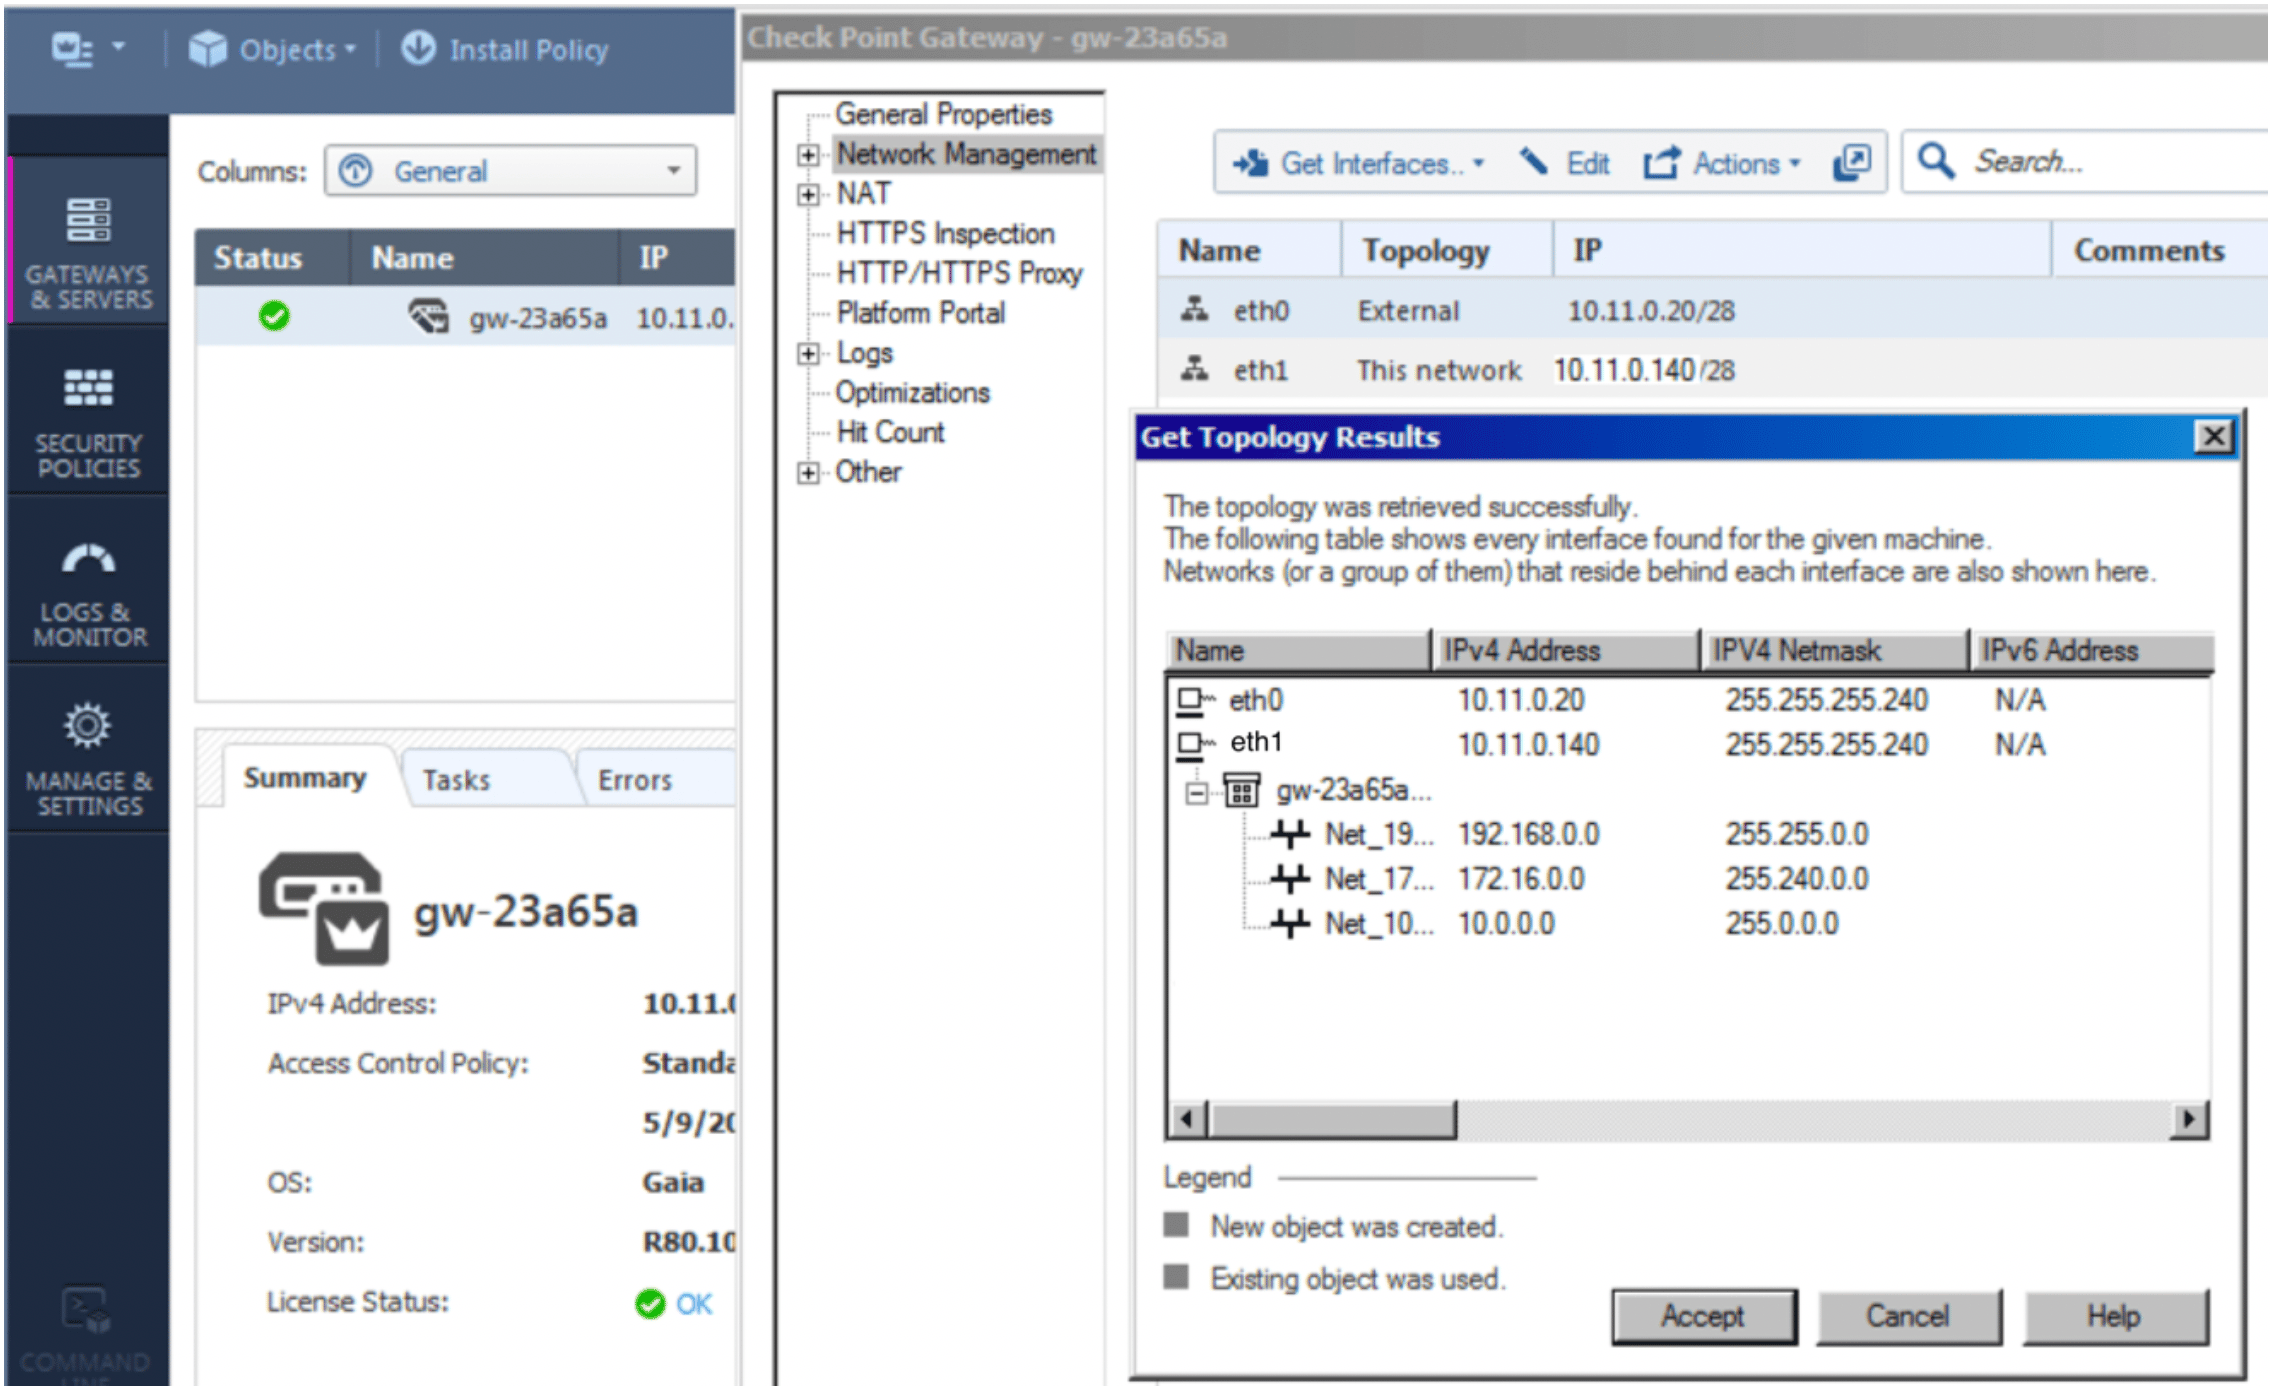
 As per the topology page, it can be reached via Gateways & Servers by
double-clicking on the gateway. Then click on Network Management > Get
Interfaces.
As per the topology page, it can be reached via Gateways & Servers by
double-clicking on the gateway. Then click on Network Management > Get
Interfaces.
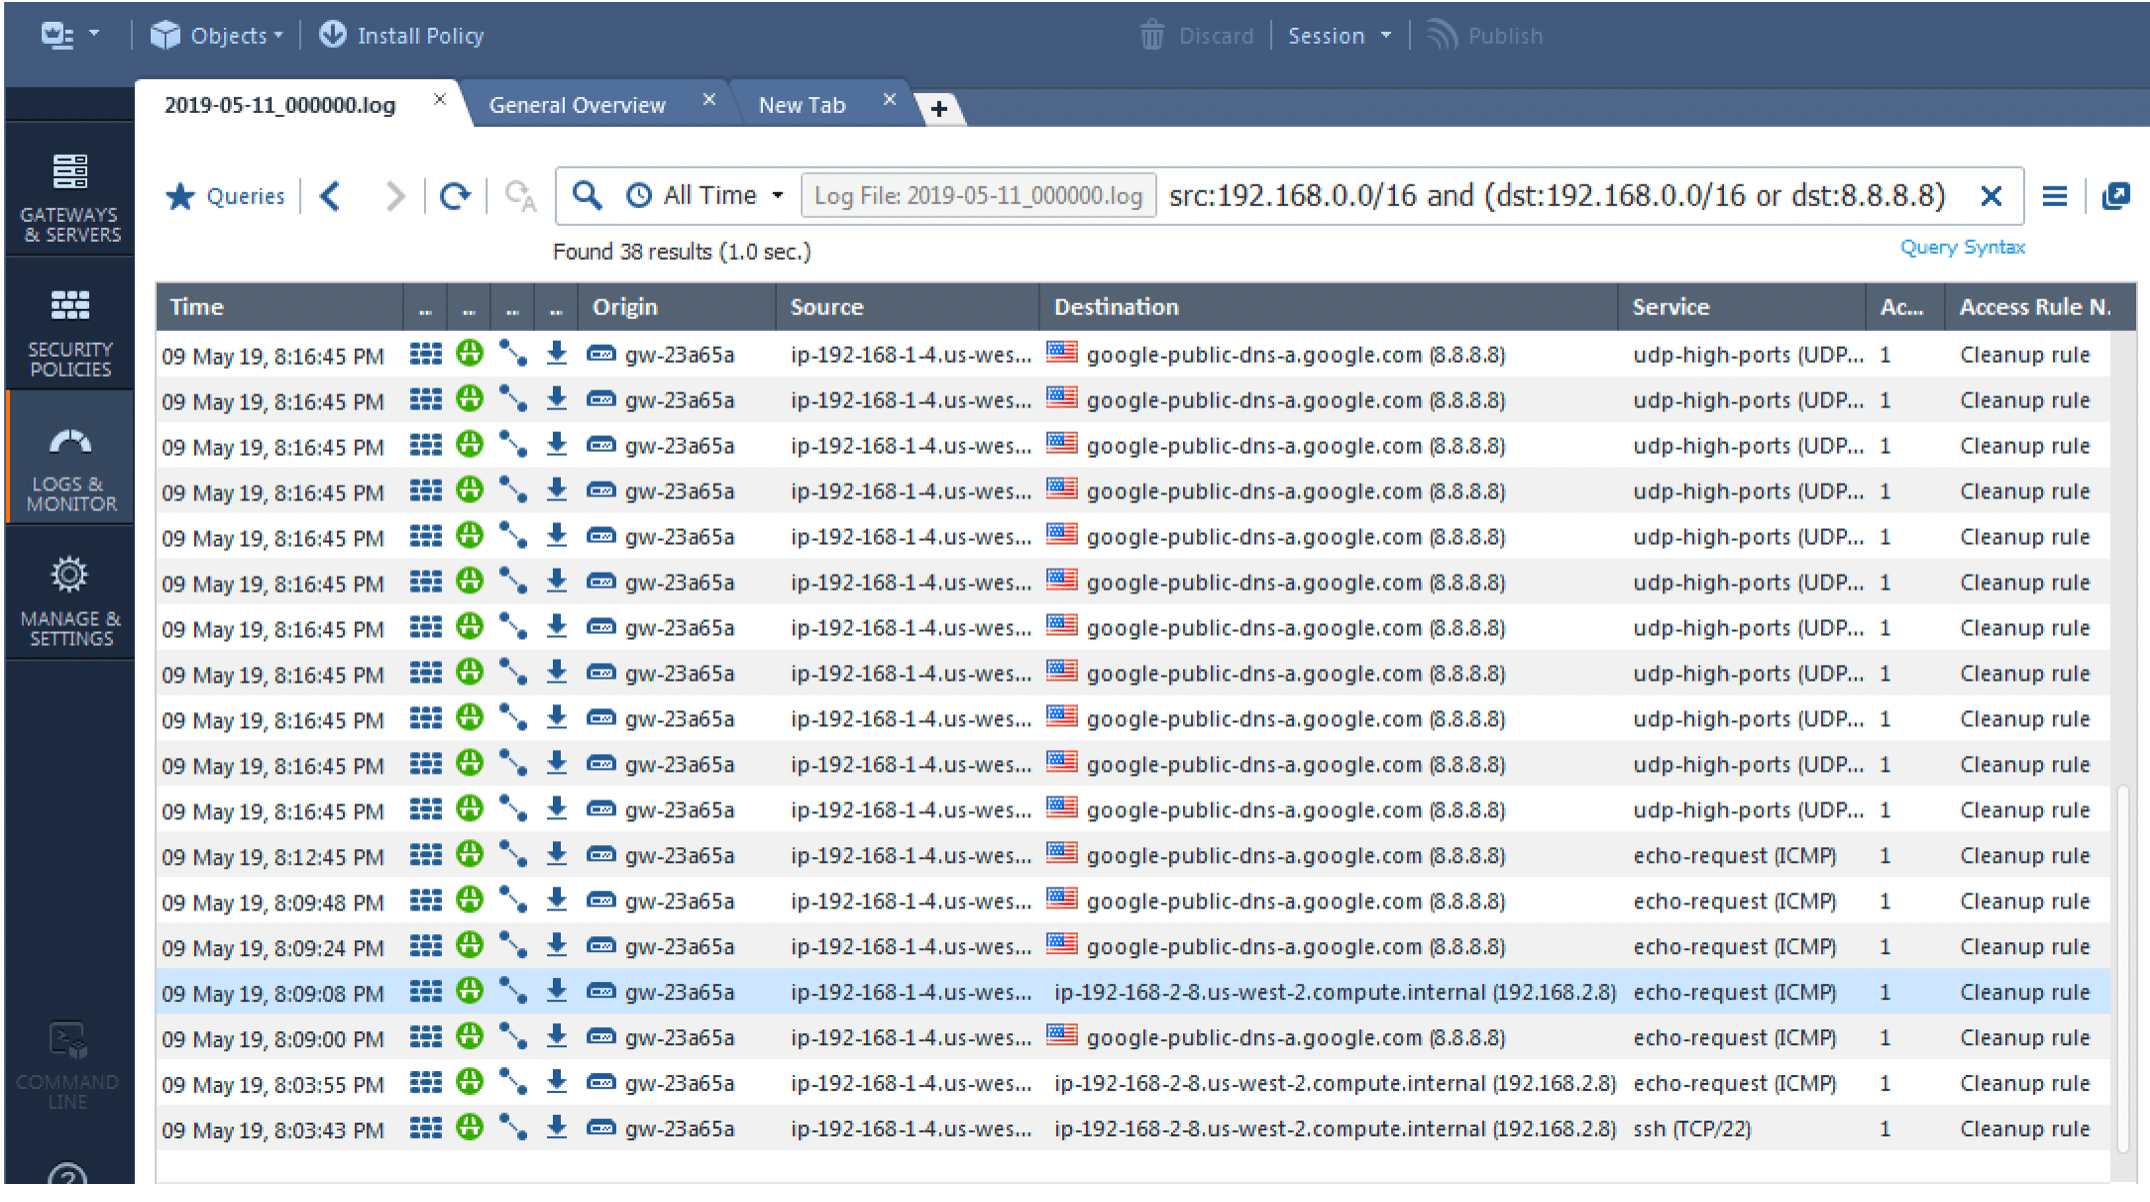
 The final step is to monitor your traffic to confirm that the inspection is
being performed as configured. Go to Logs & Monitor.
The final step is to monitor your traffic to confirm that the inspection is
being performed as configured. Go to Logs & Monitor.
 You can repeat this process to attach another CloudGuard instance to the backup
Aviatrix gateway. For backup Aviatrix gateways, the subnets should be in a
different AZ.
You can repeat this process to attach another CloudGuard instance to the backup
Aviatrix gateway. For backup Aviatrix gateways, the subnets should be in a
different AZ.