> ## Documentation Index
> Fetch the complete documentation index at: https://docs.aviatrix.com/llms.txt
> Use this file to discover all available pages before exploring further.
# Initial Setup of CoPilot
> Perform initial setup of CoPilot after you have launched the instance/virtual machine in the cloud provider environment.
## Prerequisites for Initial CoPilot Setup
Perform initial setup of CoPilot after you have launched the instance/virtual
machine in the cloud provider environment.
For initial setup of CoPilot, have the following information available:
* The static public IP address of your recently deployed CoPilot software
instance/virtual machine (obtained from the cloud provider portal).
* The static IP address for your Aviatrix Controller.
* The login credentials of your Aviatrix Controller user account.
* The login credentials for the user account to be used as the CoPilot service
account.
This procedure assumes your Aviatrix Controller is up and running and the
controller instance's inbound rules have port 443 open to the public static IP
address of the CoPilot instance (so that CoPilot can reach your Controller).
If you launched your CoPilot instance from the Aviatrix Controller user
interface, the Controller instance's inbound rules will have port 443 open to
the public static IP address of the CoPilot instance. This procedure also
assumes your CoPilot software instance/virtual machine is up and running.
## Initial Setup of CoPilot
To perform an initial setup of CoPilot:
1. (For marketplace deployment only), go to your Controller instance in your
cloud service provider. Add your CoPilot IP address into your Controller
security group with TCP protocol and port 443 on the cloud service provider
so that CoPilot server can communicate with Controller API.
2. Launch CoPilot in your web browser:
`https:///`
where \ is the static public IP
address of your newly deployed CoPilot instance/virtual machine.
If you are deploying a Load Balancer in front of CoPilot, ensure that the
Load Balancer timeout value is at least ten minutes (as described in
Configuring the Timeout Value for Load Balancer
).
Alternatively, you can launch CoPilot in your web browser directly from
Aviatrix Controller as described in the next step.
3. (Optional) To launch CoPilot in your web browser directly from Aviatrix
Controller: a. In Aviatrix Controller, under Settings, select CoPilot. b. For
the CoPilot Association, set the status to **Enabled**. c. In the **IP
Address/Hostname field**, enter the static IP address for your running
CoPilot instance/virtual machine. This can be the private or public IP
address of your CoPilot instance/virtual machine. The IP address specified
here is used for connectivity between the controller and CoPilot for
intra-platform communication (such as API message exchanges). If CoPilot is
located in the same VPC/VNet as your controller, specifying a private IP can
increase operational bandwidth and potentially save on cost. If you enter the
private IP address here, then go to the next step to specify the public IP
address. d. If you specified the private IP address of your CoPilot instance
in "IP Address/Hostname", enter the public IP address of your CoPilot
instance in the **Public IP (Optional)** field. This enables you to open
CoPilot in your web browser directly from your Controller. e. In the action
bar of your Controller homepage, click on the application icon, and then
select **CoPilot**.
4. When prompted, enter the username and password of a valid Aviatrix Controller
user account and click Login. Enter the static IP address of your controller
and click Login.
5. (Customer ID Required) If you are prompted for a **Customer ID**, then you
likely deployed Controller without setting the ID. In this case, enter the
Customer ID you received when you subscribed to the marketplace license. If
you did not receive a Customer ID, please contact
[Aviatrix Support](https://support.aviatrix.com).
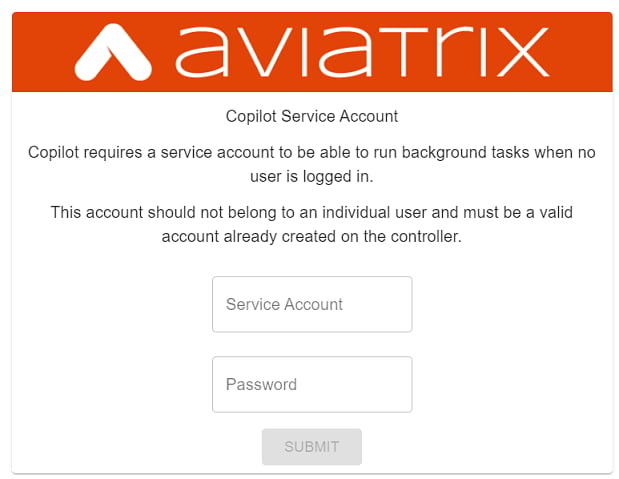
6. When prompted for a **CoPilot Service Account**, enter the login credentials
for a valid user account in Aviatrix Controller to be used as the CoPilot
service account.
See
CoPilot User Account Administration
.
 7. If a Data Disk Setup dialog does not appear, skip to step 8 to verify
connectivity with your Controller.
Do not toggle or move your mouse during the Data Disk Setup.
8. In Data Disk Setup, select the disk/volume you created for CoPilot storage
and click START. When the process is complete, click FINISH.
Note that when you launch CoPilot at first your version number will be based
on the version of the image release. Within an hour, the CoPilot version will
be updated to the latest software release.
9. Verify the CoPilot Deployment and the Connectivity with Controller
.
The expected page load time in the CoPilot UI is less than 10 seconds. If you
see significantly slower behavior, contact Support for assistance.
7. If a Data Disk Setup dialog does not appear, skip to step 8 to verify
connectivity with your Controller.
Do not toggle or move your mouse during the Data Disk Setup.
8. In Data Disk Setup, select the disk/volume you created for CoPilot storage
and click START. When the process is complete, click FINISH.
Note that when you launch CoPilot at first your version number will be based
on the version of the image release. Within an hour, the CoPilot version will
be updated to the latest software release.
9. Verify the CoPilot Deployment and the Connectivity with Controller
.
The expected page load time in the CoPilot UI is less than 10 seconds. If you
see significantly slower behavior, contact Support for assistance.