> ## Documentation Index
> Fetch the complete documentation index at: https://docs.aviatrix.com/llms.txt
> Use this file to discover all available pages before exploring further.
# Configuring an AWS Load Balancer with SSL in Front of Aviatrix Controller
> The Aviatrix Controller supports adding an SSL certificate. However, sometimes you may prefer to put an AWS Load Balancer (ALB) in front of the Controller.
The Aviatrix Controller supports adding an SSL certificate. However, sometimes
you may prefer to put an AWS Load Balancer (ALB) in front of the Controller.
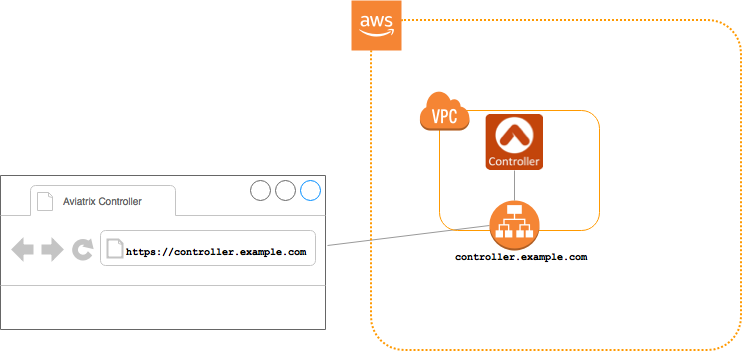 Follow these steps to place the Aviatrix Controller behind an AWS ALB:
1. Log into your AWS console.
2. Go to EC2 > Load Balancers in the region where your Aviatrix Controller is
running.
3. Click **Create load balancer**.
4. Click **Create** under Application Load Balancer.
Follow these steps to place the Aviatrix Controller behind an AWS ALB:
1. Log into your AWS console.
2. Go to EC2 > Load Balancers in the region where your Aviatrix Controller is
running.
3. Click **Create load balancer**.
4. Click **Create** under Application Load Balancer.
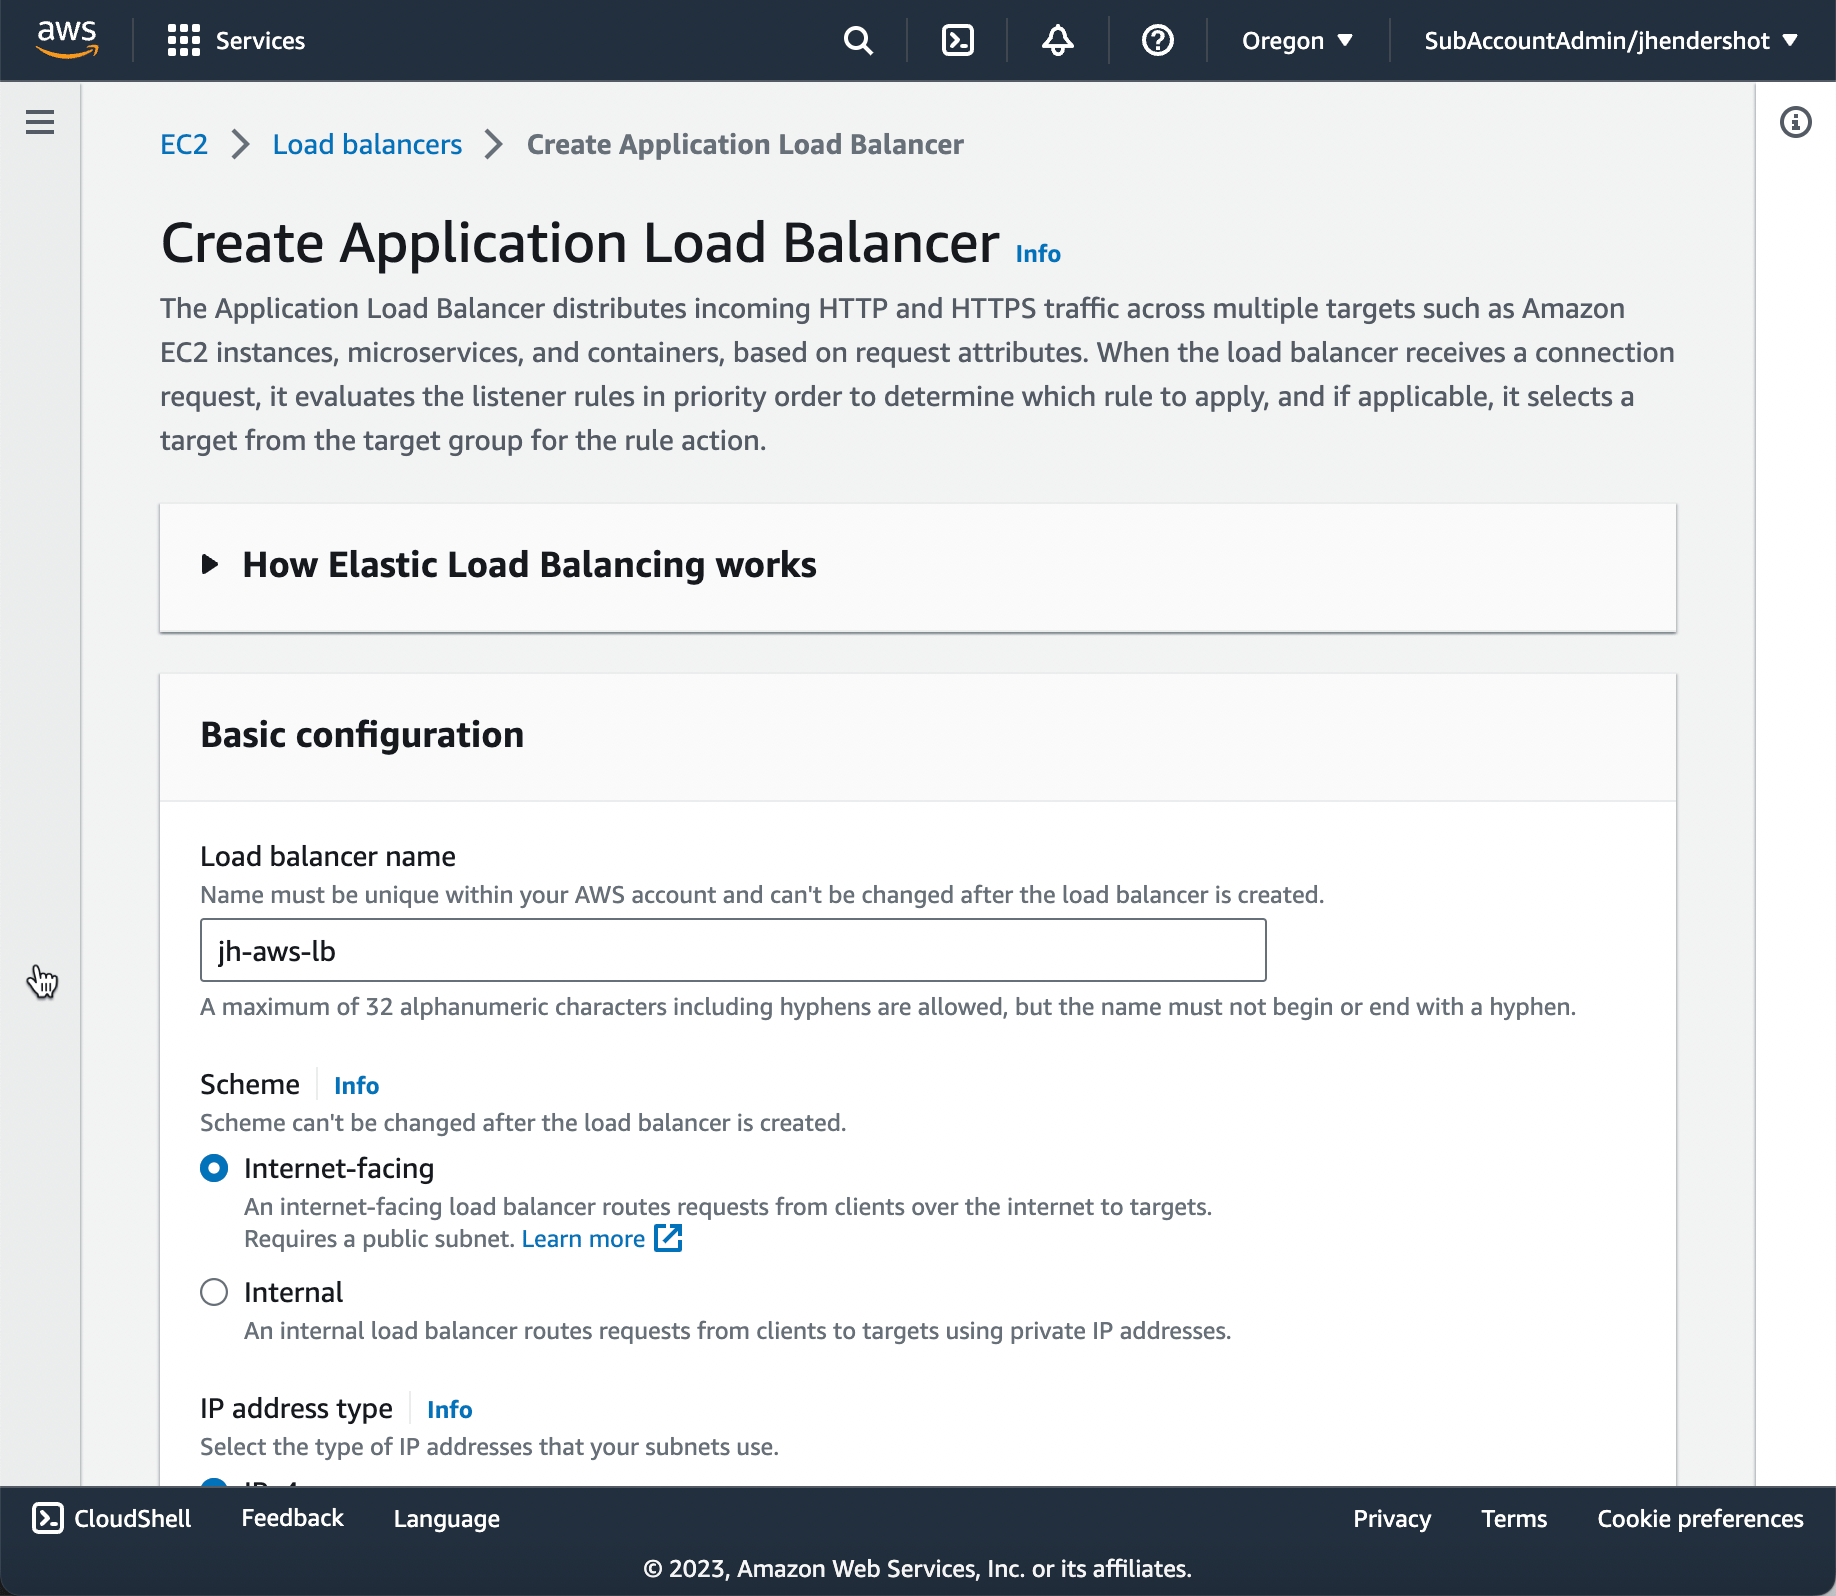 5. On the Create Application Load Balancer page, under Basic configuration,
enter a name for the load balancer.
6. Also under Basic Configuration, select **Internet-Facing** for the Scheme.
5. On the Create Application Load Balancer page, under Basic configuration,
enter a name for the load balancer.
6. Also under Basic Configuration, select **Internet-Facing** for the Scheme.
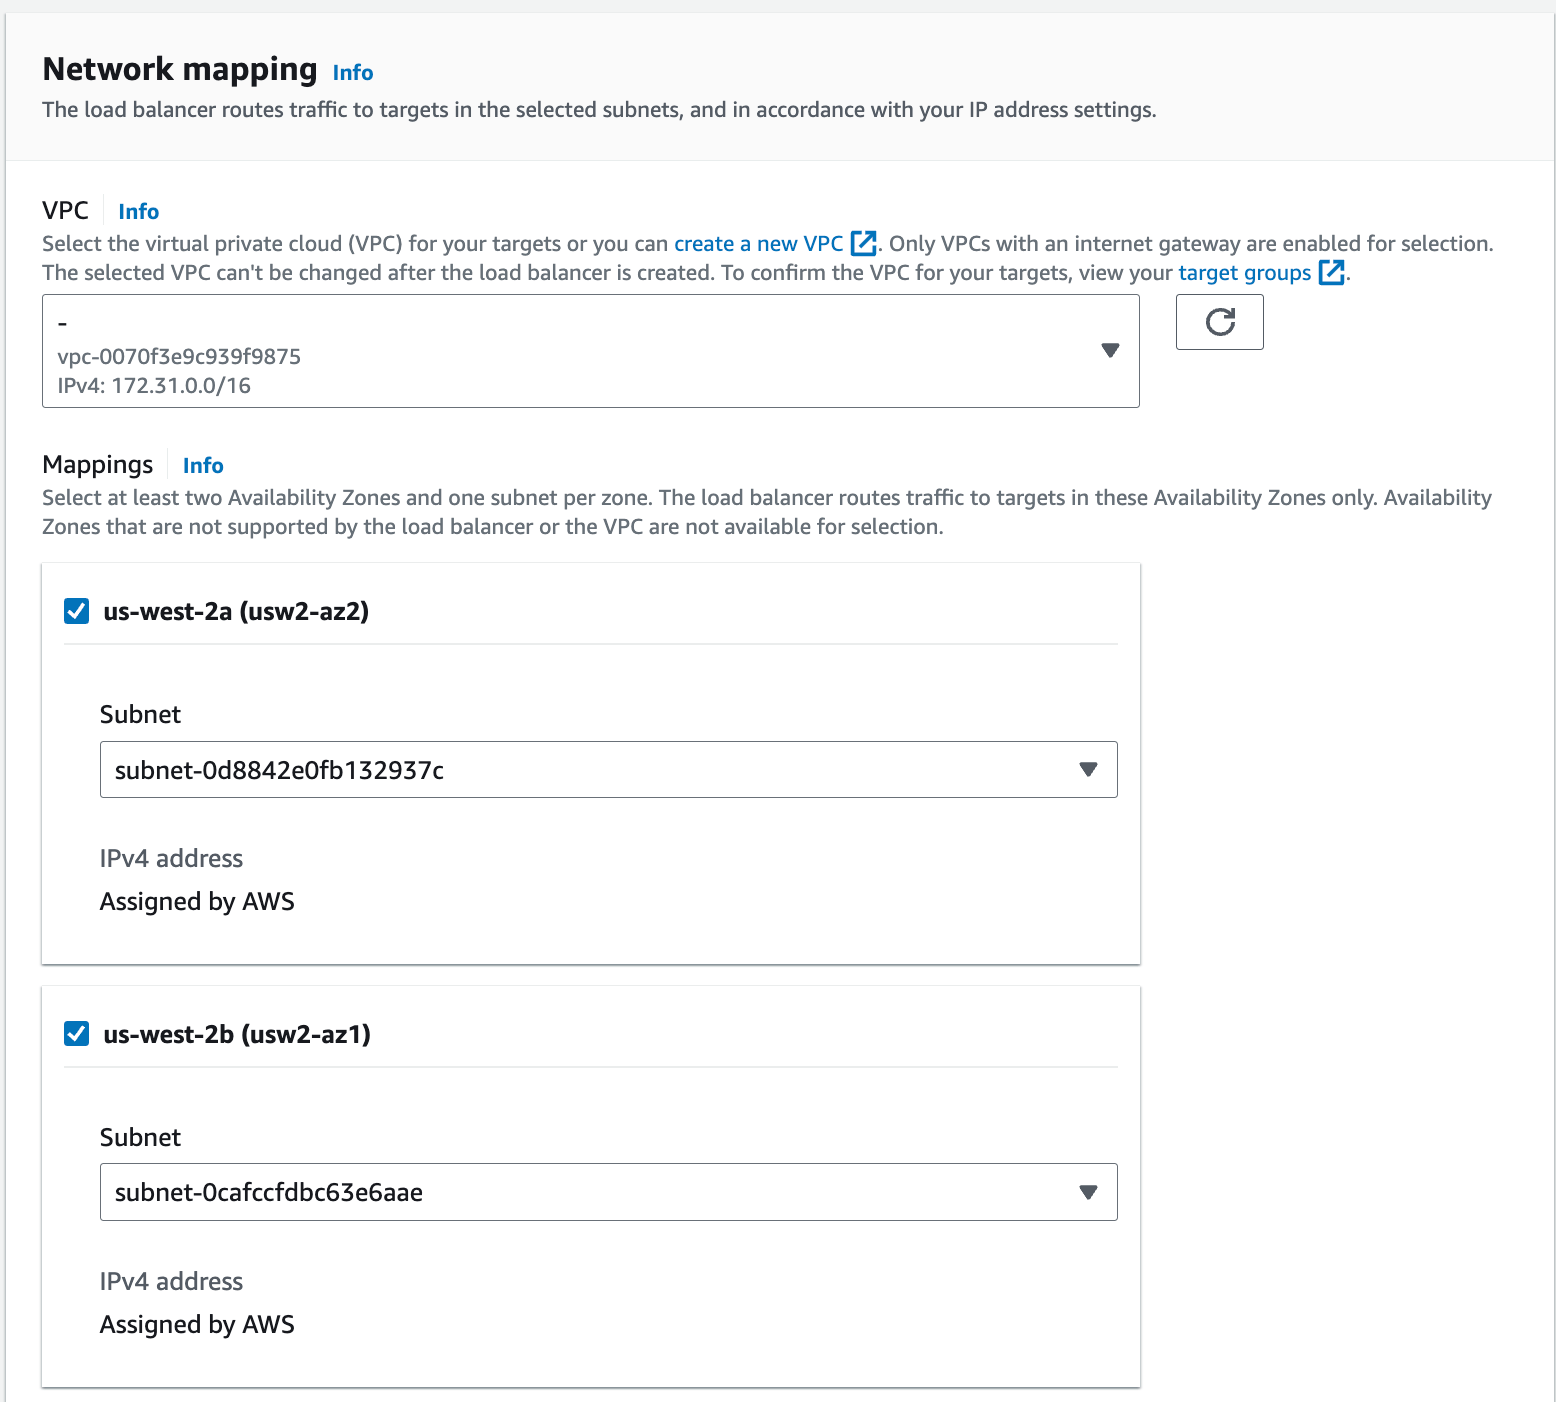 7. Under Network mapping, select at least two Availability Zones and one subnet
per zone.
8. Under Security groups, select the appropriate security group from the
Security groups drop-down. This security group should allow traffic on port
443 from your desired source network(s). A default security group may already
be selected.
7. Under Network mapping, select at least two Availability Zones and one subnet
per zone.
8. Under Security groups, select the appropriate security group from the
Security groups drop-down. This security group should allow traffic on port
443 from your desired source network(s). A default security group may already
be selected.
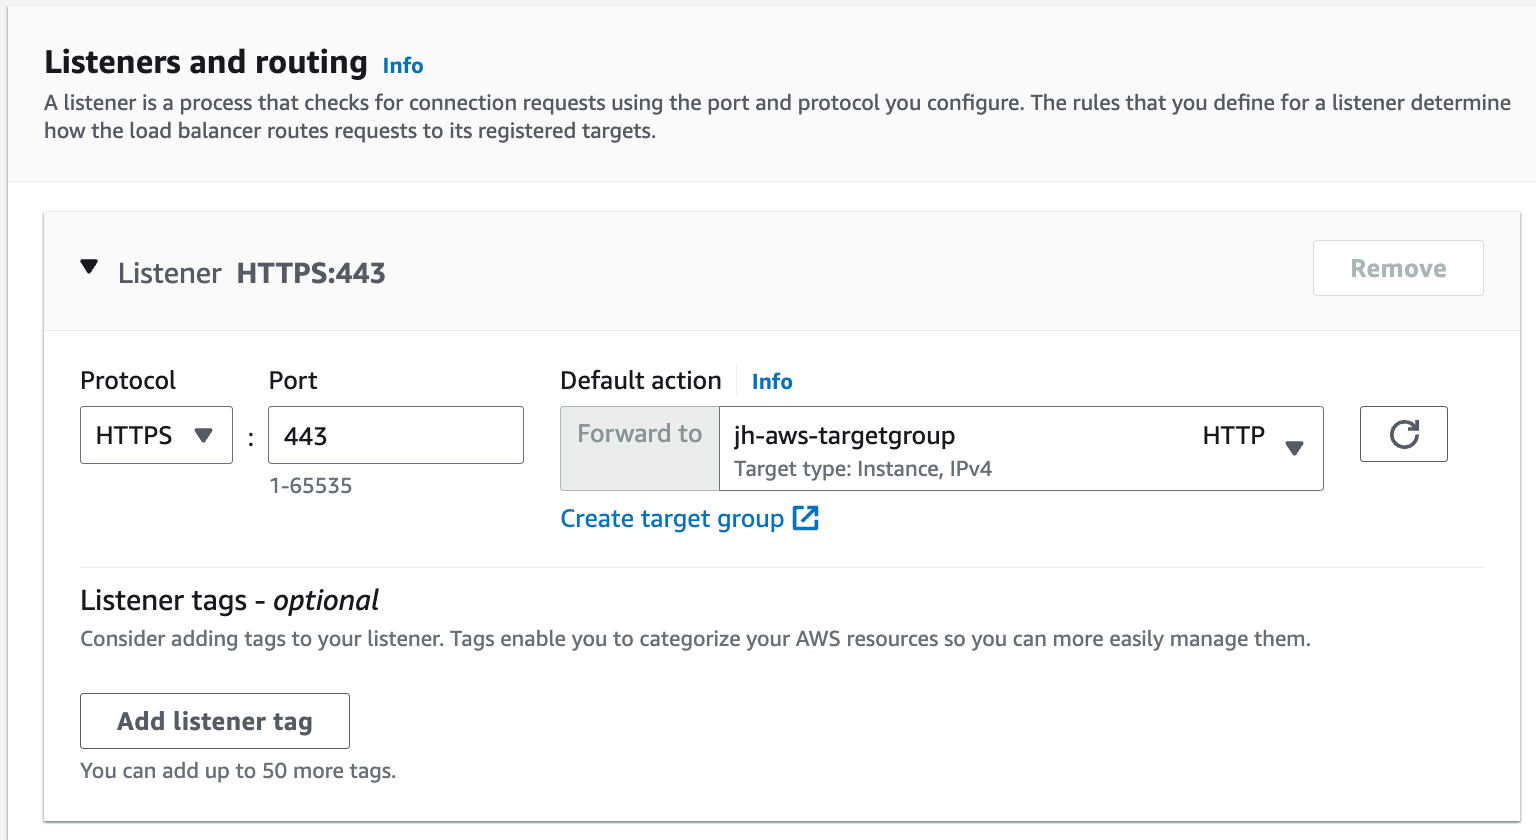 9. Under Listeners and routing, select **HTTPS** from the Protocol list.
10. Select a target group from the Default action field.
11. (optional) If needed, click **Create target group** under the **Default
action** field. This opens the EC2 > Target groups > Create target group
Console page in a new web browser tab.
9. Under Listeners and routing, select **HTTPS** from the Protocol list.
10. Select a target group from the Default action field.
11. (optional) If needed, click **Create target group** under the **Default
action** field. This opens the EC2 > Target groups > Create target group
Console page in a new web browser tab.
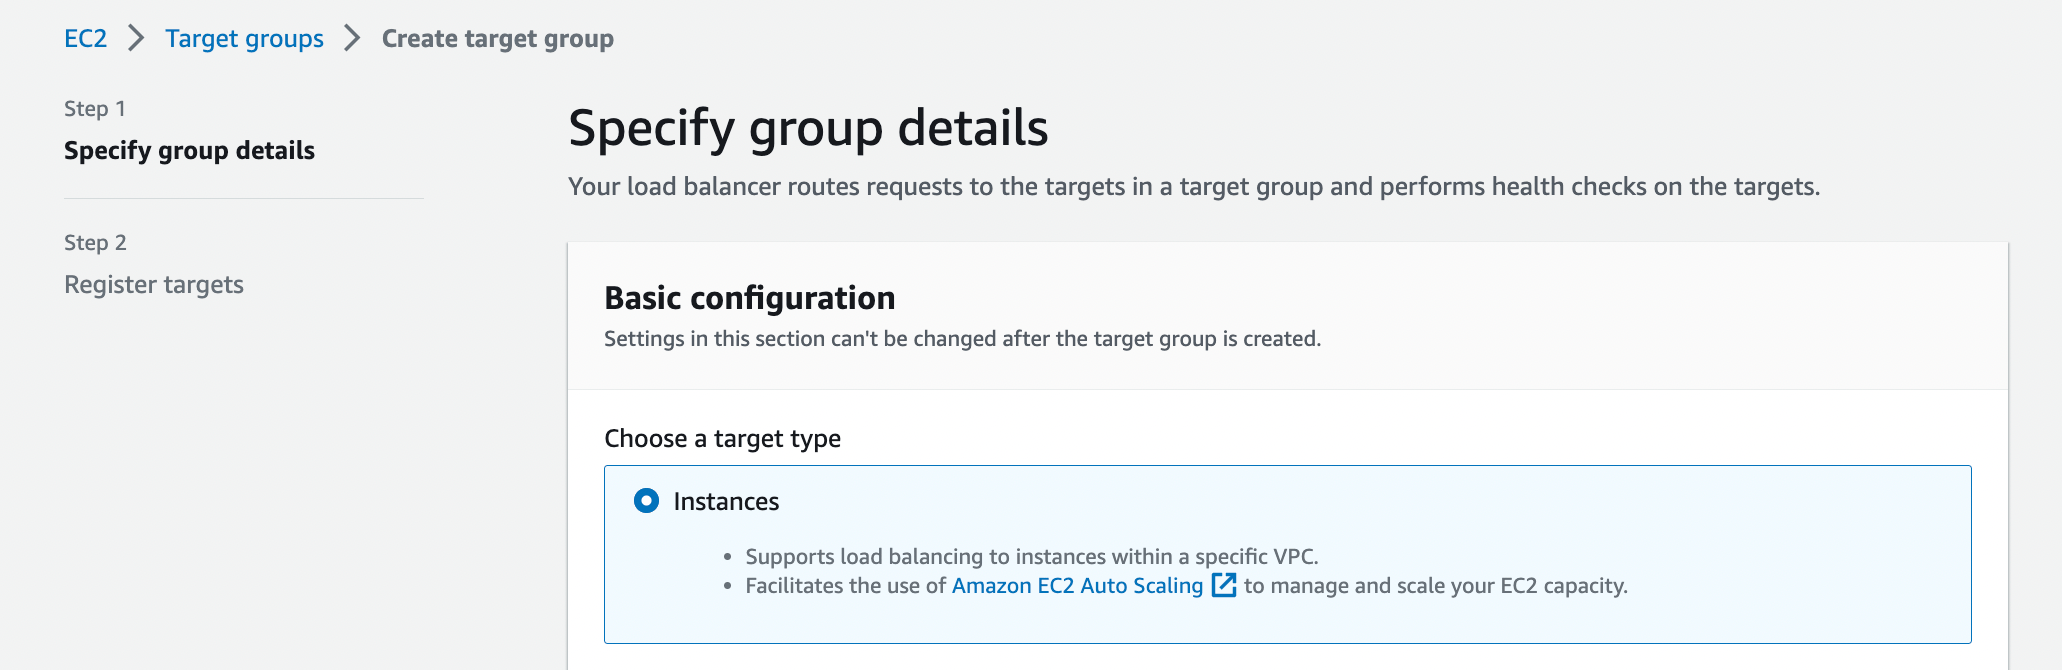 On the Specify group details page:
1. Select the **Instances** target type.
2. Enter a target group name.
3. Select the HTTPS Protocol and port 443.
4. Select the VPC where the Controller resides (normally named
aviatrix-mgt-vpc).
5. Under Health checks, select the HTTPS Protocol and the default Path of
'/'.
6. Click **Next** to register the target group.
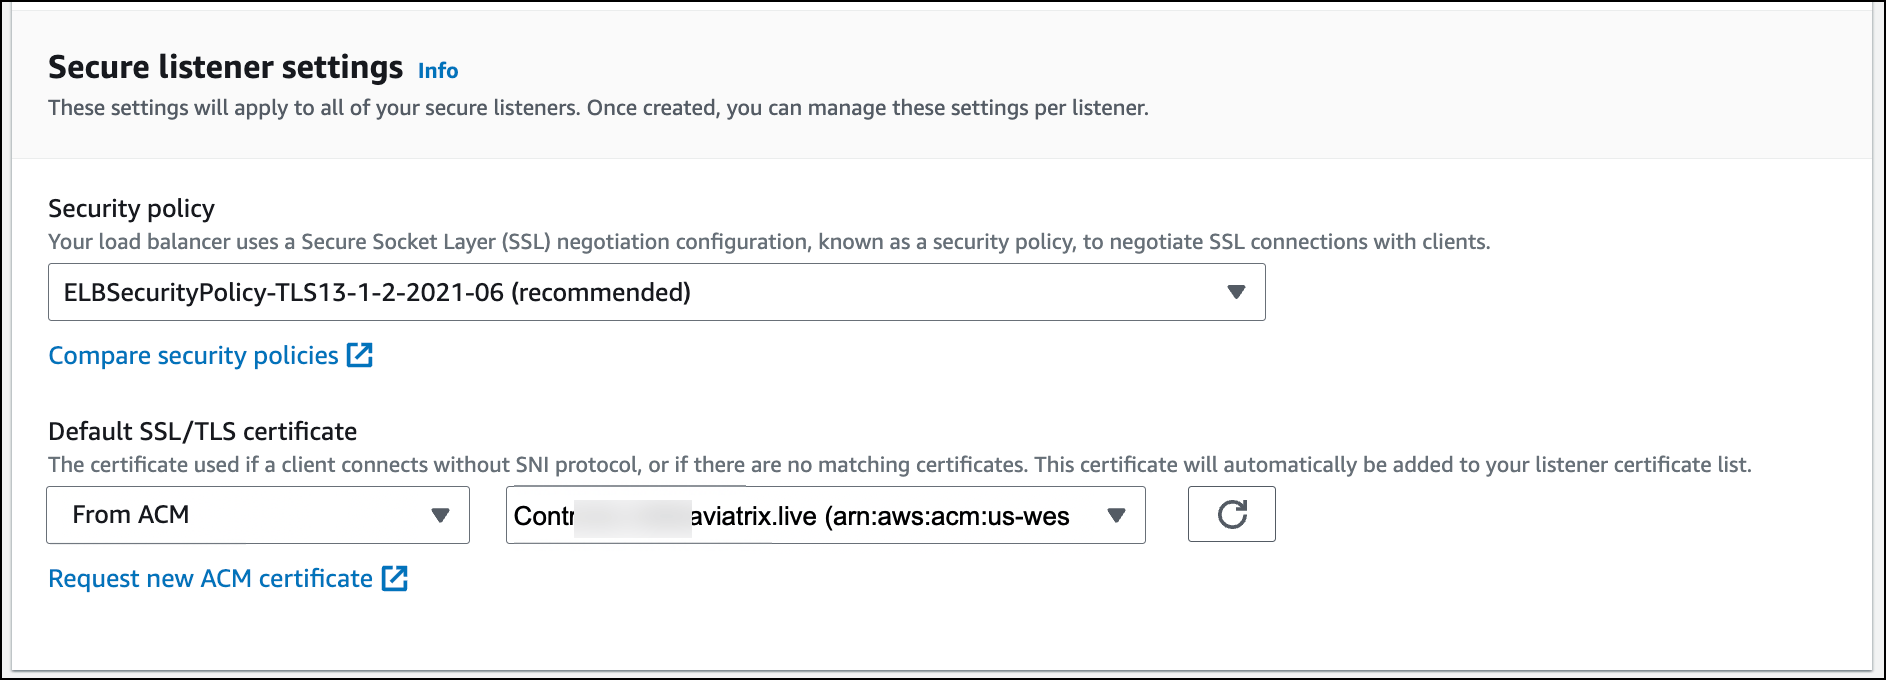
12. On the Create Application Load Balancer page, under Secure listener
settings, select **From ACM** from the Default SSL/TLS Certificate drop-down
and select your certificate. If necessary you can
[request a new certificate](https://docs.aws.amazon.com/acm/latest/userguide/gs-acm-request-public.html).
On the Specify group details page:
1. Select the **Instances** target type.
2. Enter a target group name.
3. Select the HTTPS Protocol and port 443.
4. Select the VPC where the Controller resides (normally named
aviatrix-mgt-vpc).
5. Under Health checks, select the HTTPS Protocol and the default Path of
'/'.
6. Click **Next** to register the target group.
12. On the Create Application Load Balancer page, under Secure listener
settings, select **From ACM** from the Default SSL/TLS Certificate drop-down
and select your certificate. If necessary you can
[request a new certificate](https://docs.aws.amazon.com/acm/latest/userguide/gs-acm-request-public.html).
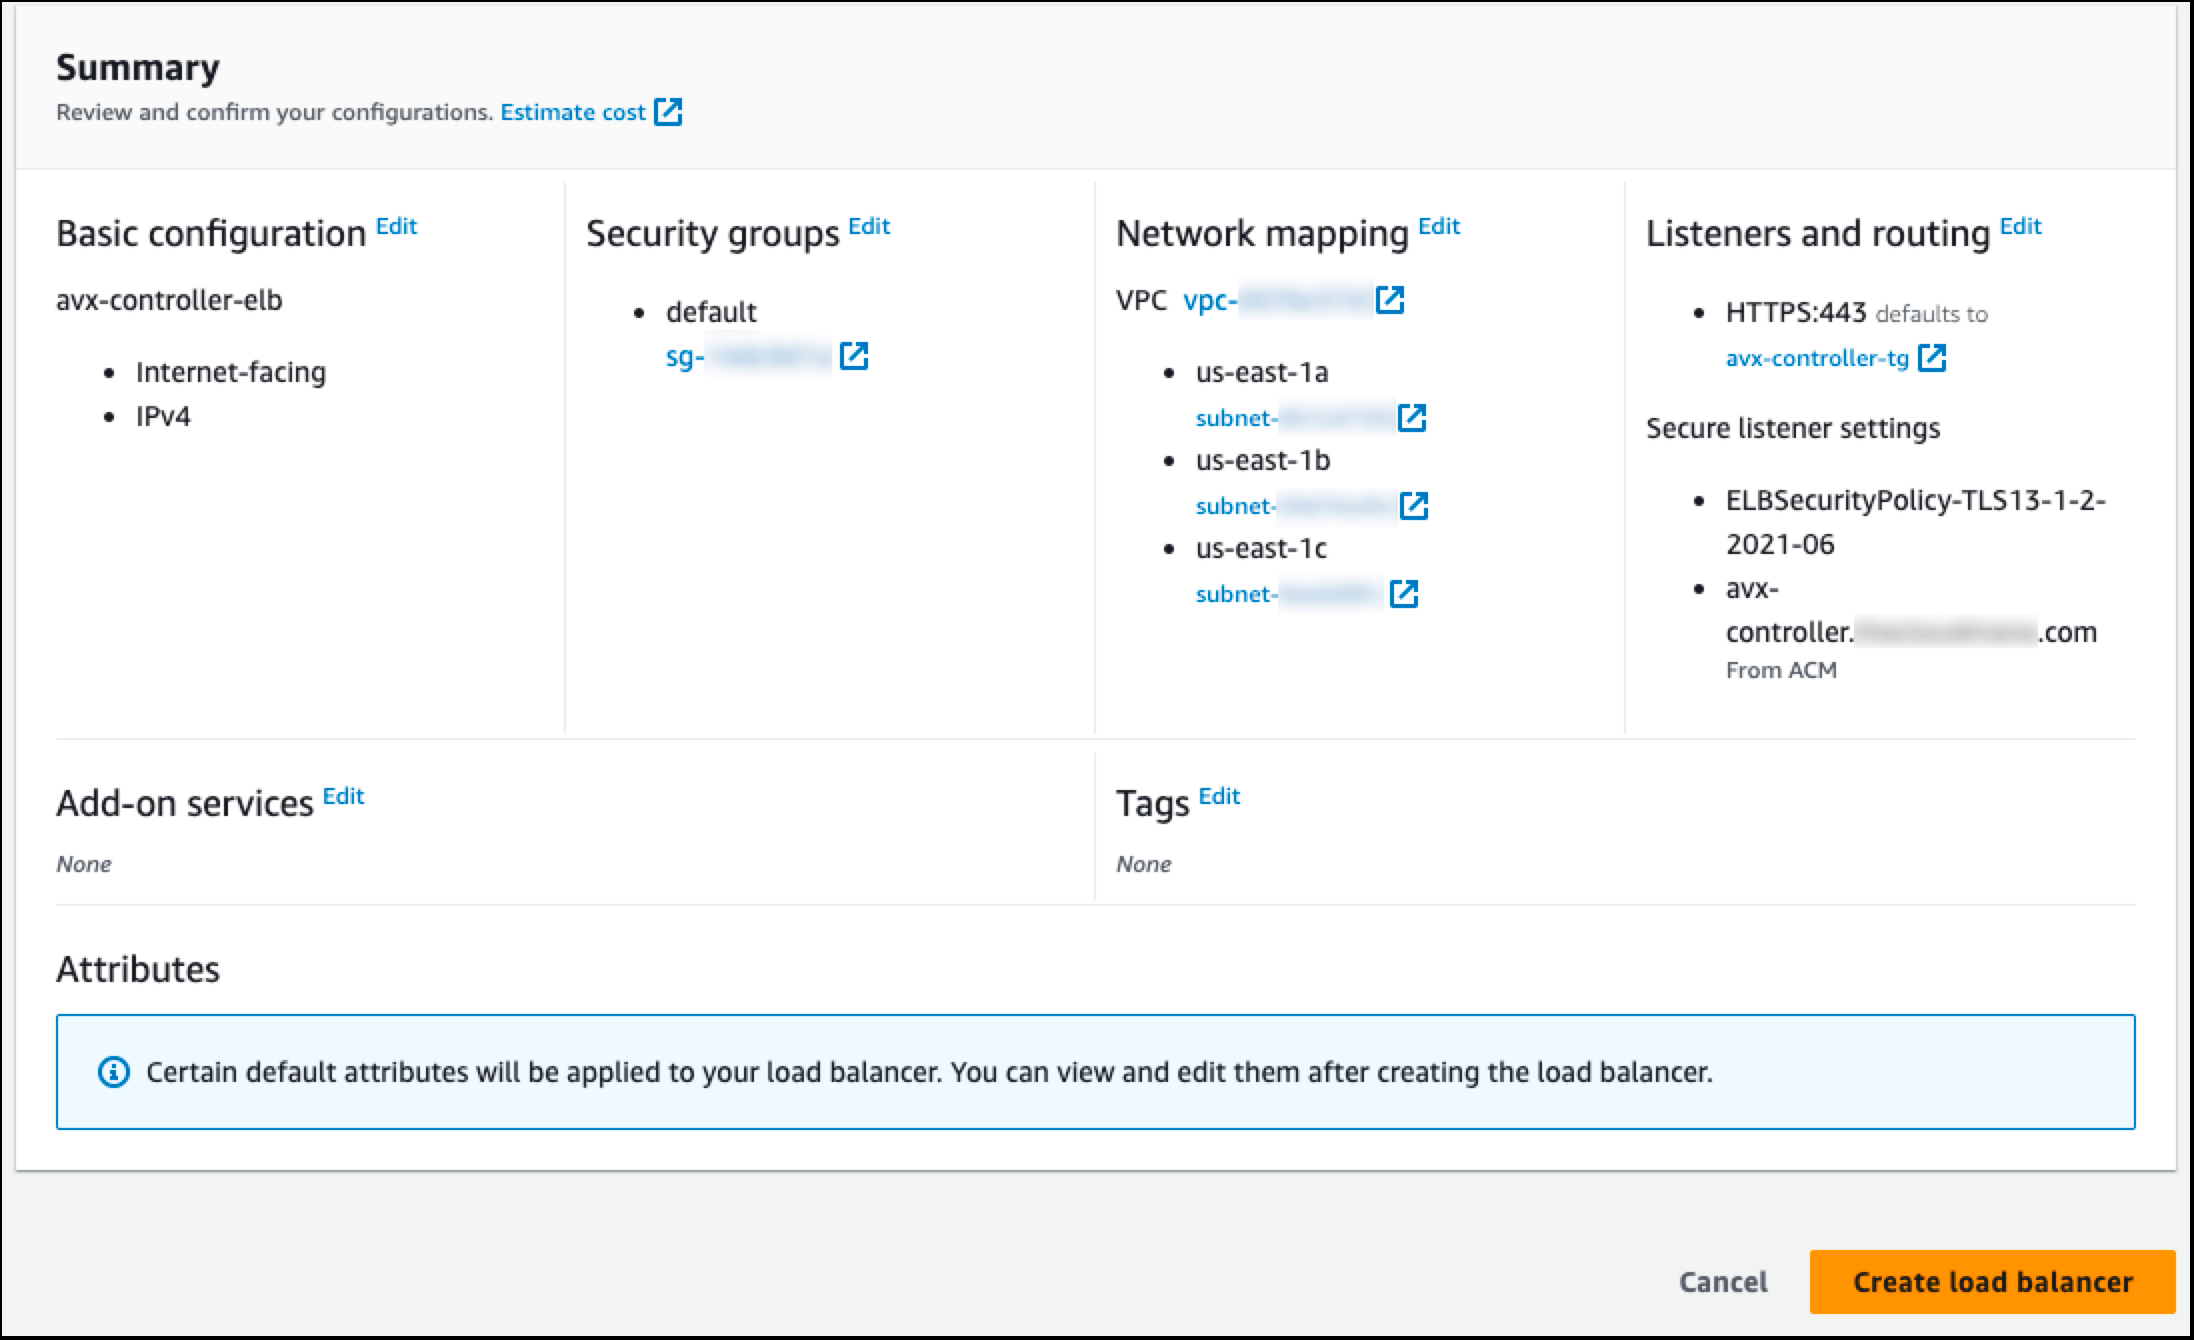
 13. Review and create the load balancer.
14. Collect the DNS name from the load balancer.
13. Review and create the load balancer.
14. Collect the DNS name from the load balancer.
 15. Create a DNS CNAME record that points your desired name to the load
balancer's DNS name.
The DNS CNAME record must match the name used in the SSL certificate or
you will receive a warning.
16. Ensure that your Controller security groups have an inbound allow policy for
port 443 for the VPC CIDR, so that the load balancer can talk to the
Controller.
If you have enabled HA for your Aviatrix Controller, you can point your auto
scaling group to the target group of your load balancer in the event of a
failover. The Max value should always be 1. Having more than one active
Controller for any given set of services is not supported if deployed behind a
load balancer.
15. Create a DNS CNAME record that points your desired name to the load
balancer's DNS name.
The DNS CNAME record must match the name used in the SSL certificate or
you will receive a warning.
16. Ensure that your Controller security groups have an inbound allow policy for
port 443 for the VPC CIDR, so that the load balancer can talk to the
Controller.
If you have enabled HA for your Aviatrix Controller, you can point your auto
scaling group to the target group of your load balancer in the event of a
failover. The Max value should always be 1. Having more than one active
Controller for any given set of services is not supported if deployed behind a
load balancer.